
A cable/wire railing is a great looking, inexpensive deck railing option that is actually VERY EASY to install yourself! To install a DIY wire/cable railing on your own, you will need to follow these 6 steps:
- Select the cable and hardware for your railing.
- Create a template for your railing post holes.
- Use the template to drill through your railing posts.
- Run the cable/wire through the deck railing posts.
- Install the wire railing hardware.
- And finally, cut the excess bolt length.
Each Step in the DIY Cable/Wire Railing Installation process is outlined in detail below. Additionally, feel free to check out my DIY cable railing tutorial video on Youtube if you are more of a visual learner:
Step 1: Select the cable and hardware for your railing
There are a TON of different types of cable and hardware that you can use for your DIY cable railing. However, the most important thing that you want to look for is rust resistance. I recommend that you look for Type 316 Stainless Steel (Marine Grade) hardware and cable due to its superior rust and corrosion resistance.
For my railing, I used the following tools and hardware:
- Type 316 Stainless Steel Cable (included cable cutter): https://amzn.to/3j1lJYD
- Muzata Cable Railing Kit Hardware: https://amzn.to/3wTEa5y
- Hydraulic Cable Crimping Tool (I will explain what this is used for in Step 5): https://amzn.to/2SXMz9p
Step 2: Create a template for your railing post holes
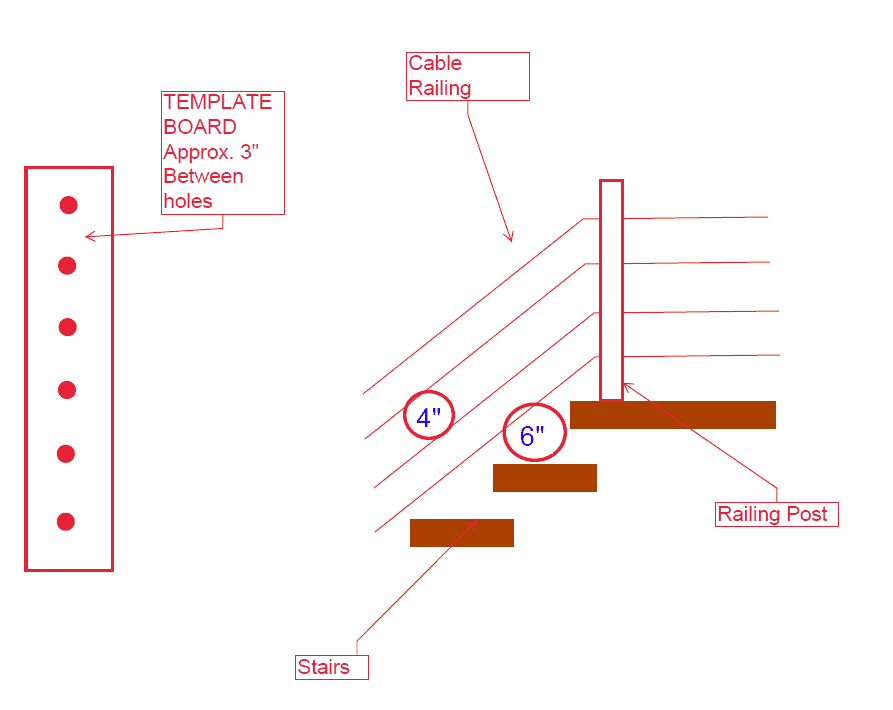
To ensure that your drill holes are exactly the same from post to post, I recommend that you create a template with a scrap 2”x4” board. Because I used 1/8” cable, I drilled 1/4” holes spaced every 3 inches (approximately) and located them directly in the center of the template board. Please check your local code requirements for cable railings.
You may find references to a “4-inch sphere rule” that specifies that a 4” sphere should not be able to pass through your wire railing. Additionally, you might also come across a “6 inch sphere rule” that specifies that a 6” sphere should not be able to fit under the stairs. Please refer to your own local building codes when creating your template. Refer to the reference image below to get an idea of what I am talking about:
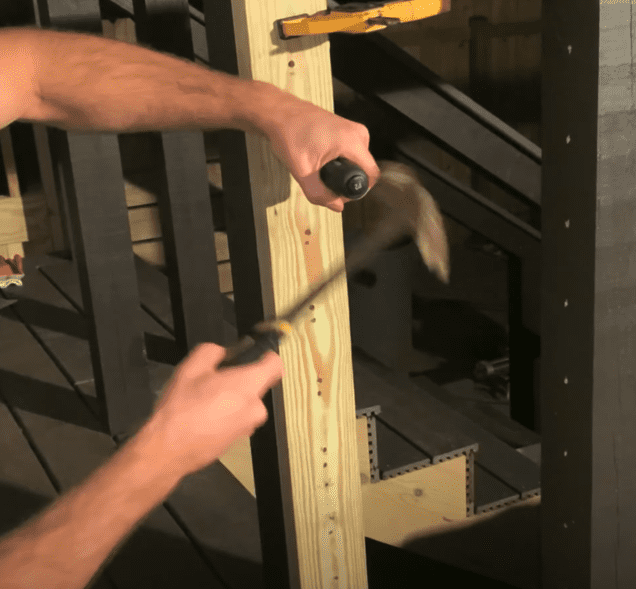
Step 3: Use the template to drill through your railing posts
At this point, use a drill bit that is slightly larger than the diameter of your cable and drill half way though the post in the exact spot where you marked it with your template.
Be sure to hold the drill level and make sure you are in the exact center of the post. Next, move to the other side of the post and drill in halfway, meeting the previously drilled hole in the center. By meeting in the center, you will avoid “wood break out” on the other side and also ensure that you don’t miss the mark. I found that the “meet in the middle” approach worked best. However, I also purchased one of these fancy drill guides off Amazon. Here is the one I bought:
However, I found that this wasn’t super helpful and just went with the “meet in the middle” approach.
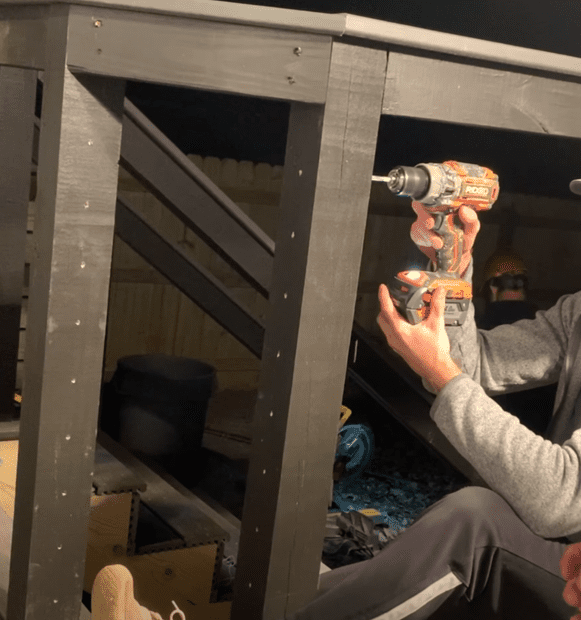
Step 4: Run the cable / wire through the deck railing posts
If you drilled your holes in the railing posts properly, this step should be a breeze! Simply run the wire/cable railing though the holes in the post and cut to length. Depending on the hardware, you choose, “cutting to length” may look different. For us, however, we simply cut the cable so that it was flush with the inside of both the first and last post in the railing run.
TIP: Pay attention to local code requirements and the cable / hardware manufacturer’s recommendations regarding the maximum run length for your cable.
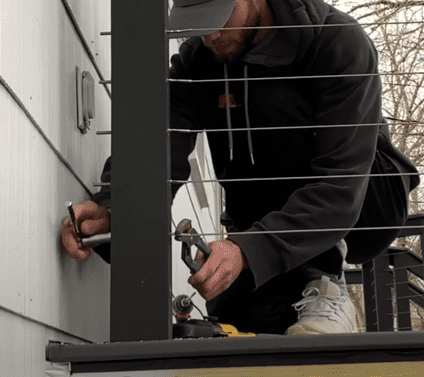
Step 5: Install the wire railing hardware
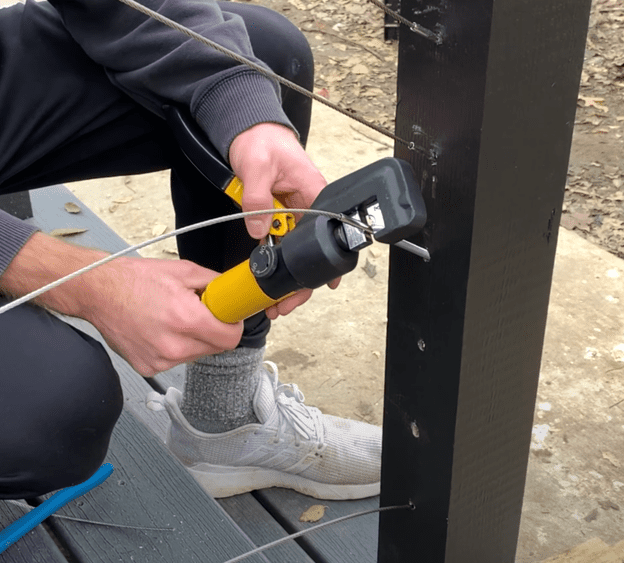
Once the cable is run through the railing, you will need to secure it to the posts at the beginning and end of the cable run with your hardware. To do this, insert the the hardware into the pre-drilled holes in the post. Next, insert you cable into the hardware and then crimp the hardware down on the cable in two locations for redundancy. This will keep the cable firmly secured within the hardware. Then, thread the washer and nut on the opposite side of the post and tighten the nut with a wrench as necessary to get your desired cable tension.
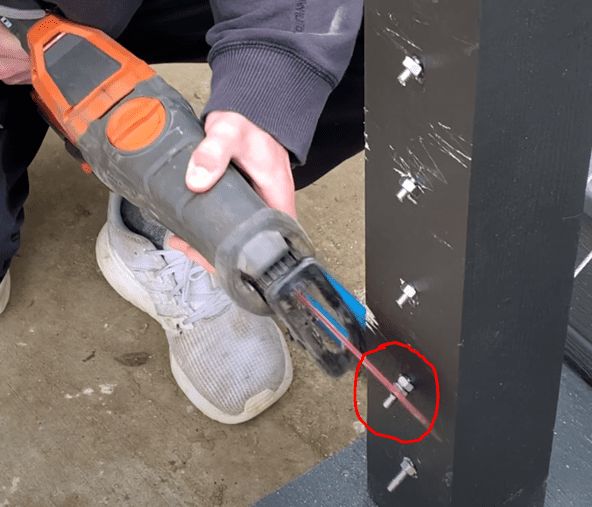
Step 6: Cut the excess bolt length.
Once the cable tension is to your liking, cut off the excess bolt length with either an angle grinder or a reciprocating saw. You will need a metal blade for this. You can check out the one I used on amazon here.
Once the excess bolt length has been cut off, thread on the decorative hardware end cap, and your DIY Wire Railing Installation is complete.
Cost + Additional Tips
All in all, the wire railing materials cost me $155 for the Stainless Steel Cable, Muzata Hardware, and hydraulic crimping tool.
Check out my tutorial video on Youtube to see how I executed the 6 steps for my DIY wire/cable railing:
Again, below are the links to the exact products and materials I used:
Hydraulic Cable Crimping Tool: https://amzn.to/2SXMz9p
316 Stainless Steel Cable (includes cutter): https://amzn.to/3j1lJYD
Muzata Cable Railing Kit Hardware: https://amzn.to/3wTEa5y
DISCLAIMER: This is a reference guide only – Consult local building codes. Links included in this article might be affiliate links. If you purchase a product or service with the links that I provide I may receive a small commission. There is no additional charge to you! Thank you for supporting ATimprovements so I can continue to provide you with free content each week!