
When building a shed, framing the walls is typically one of the most critical steps in the shed construction process. Although shed wall framing will be similar for many shed sizes and styles, this guide will focus on a 10’x10′ modern shed with a lean-to style roof.
To frame a modern shed, start with a solid shed base and durable plywood subfloor. Next, frame the Frame the shed walls based on 16″ O.C. framing. To frame the walls, pre-cut the studs, top plates, and bottom plates to length and assemble the walls horizontally. Attach all of the studs to the top and bottom plates with a nail gun. Include rough openings for windows and doors as needed. Lift all of the walls into place, position them as needed, and fasten them together with a nail gun. Install a double wall plate on the top of the walls for additional durability.
Framing a shed, although intimidating at first, is a relatively simple process. The following sections in this guide will show you exactly how to frame a 10’x10′ modern shed, step-by-step.
How to Frame a Shed
Tools and Materials Needed to Frame a Shed

To successfully frame a shed you will need the following tools and materials:
- Safety Equipment (Glasses, gloves, boots, etc.)
- Tape Measure
- Drill
- Exterior Screws
- Circular Saw OR Miter Saw
- Air Compressor
- Framing Nailer
- Exterior Framing Nails (for nail gun)
- Reciprocating Saw
- Pressure Treated 4″x4″x10′ lumber
- Pressure Treated 2″x4″x10″ lumber
- Pressure Treated 2″x6′ lumber
- Pressure Treated 4″x4″ lumber
With all necessary tools and materials on hand, you can now begin framing the shed.
How to Frame a Shed Base
The key to building shed that will last for decades is to start by constructing a solid shed floor base. Building a shed floor base is simple, but it needs to be done correctly in order to set the correct foundation for the rest of your shed framing. There are many different ways to build a shed floor base, but 4″x4″ pressure treated floor joist lumber will guarantee a durable shed floor base that will last for years.
Note – You will need a solid shed foundation in order to build/frame your shed upon. This article assumes that you already have your shed foundation (concrete slab, gravel pad, etc.) constructed. For more information on How to Build a Concrete Slab Base Foundation, check out my blog article linked here.
Determine the Size of your Shed Floor Base
Although this goes without saying, you need to determine the size your shed before you can construct the shed floor base for it. For the purposes of this article, we will be constructing a 10’x10′ shed floor base. If you are building a different size shed, you can modify these instructions slightly in order to accommodate your specific shed size.
After determining your shed floor base size, you can start to layout the shed base floor joist spacing.
Determine Your Shed Base Floor Joist Spacing
When determining your 4″x4″ floor joist spacing, you want to ensure that that edges of your plywood subfloor (to be installed in later steps) will rest directly in the center of the floor joists below. Typically, this will be 16″ O.C. (on center) spacing. Spend some time thinking about how you will need to space your shed base floor joists so that the plywood subfloor will be properly supported.
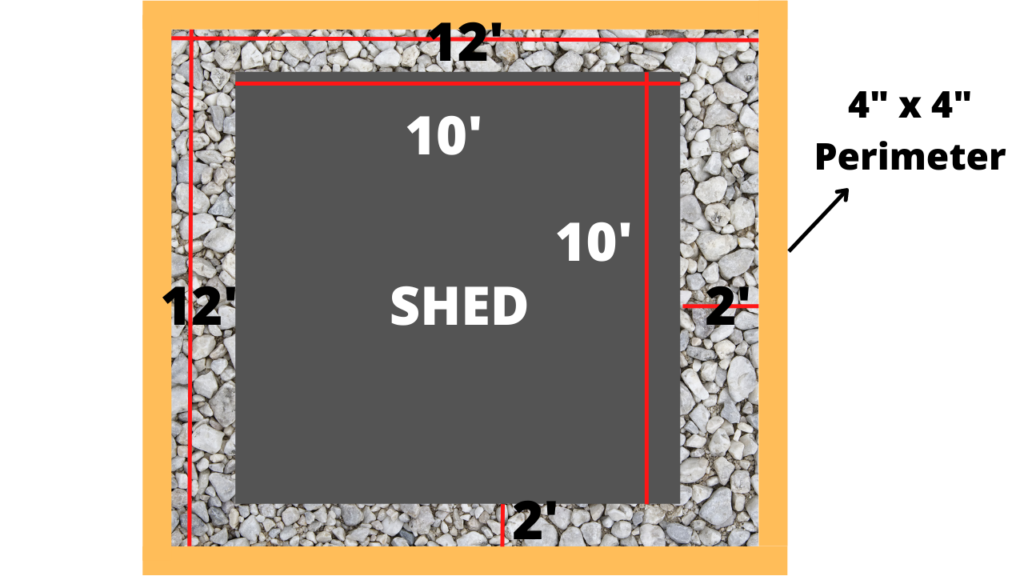
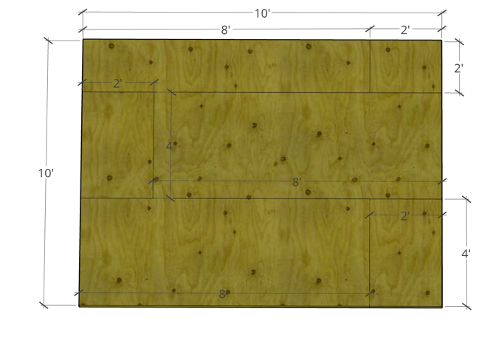
For a 10’x10′ shed, the following floor joist spacing will allow for the 4’x8′ plywood subfloor to land directly in the center of the joist – as indicated by the red “X’s” below.
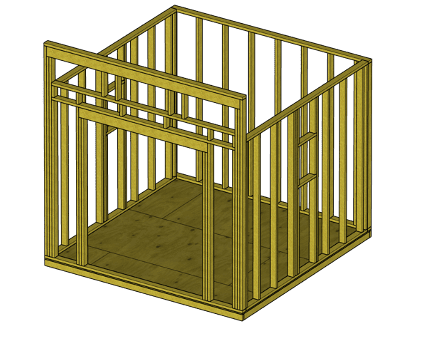
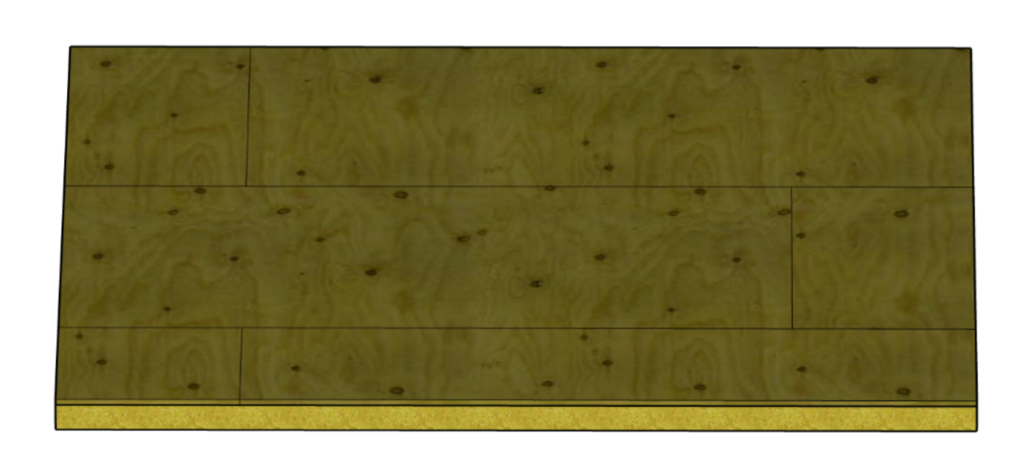
The figure below gives a preview of what the 10’x10′ shed floor base will look like once the plywood subfloor is installed.
Consider using graph paper or a 3D modeling software like Sketchup to model the shed base frame and the associated floor joist spacing. Again, the floor joists should be positioned such that the edges of plywood subfloor land directly in the center of the floor joists.
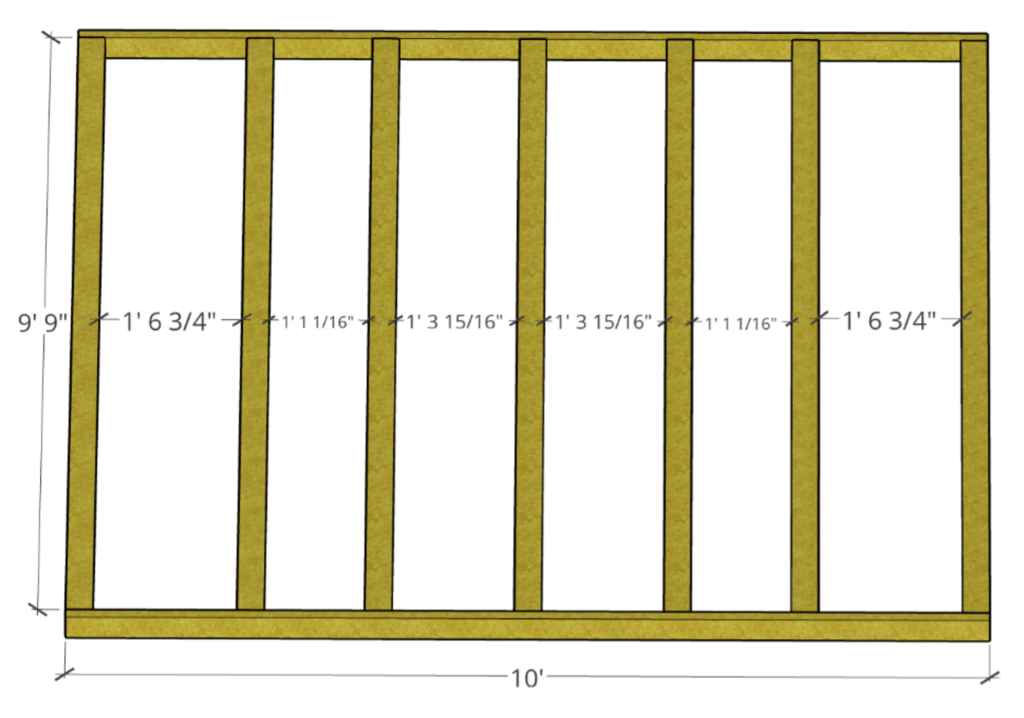
For a 10’x10′ shed base, seven (7) 4″x4″x10′ pressure treated floor joists are required in order to provide sufficient support for the plywood subfloor. Additionally, two pieces of 2″x4″x10′ pressure treated lumber will be needed for the end caps that run perpendicular to the floor joists. A sample 10’x10′ floor joist and end cap layout is shown below:

Layout The Shed Floor Base Frame
After determining the shed’s floor joist spacing, trim the 2″x4″x10′ end caps to the required length (10′, in this case). Next, mark the joist spacing on both end caps at the same time using a pencil.
By marking both end caps at the same time, you will easily be able to position your floor joists in the correct location.
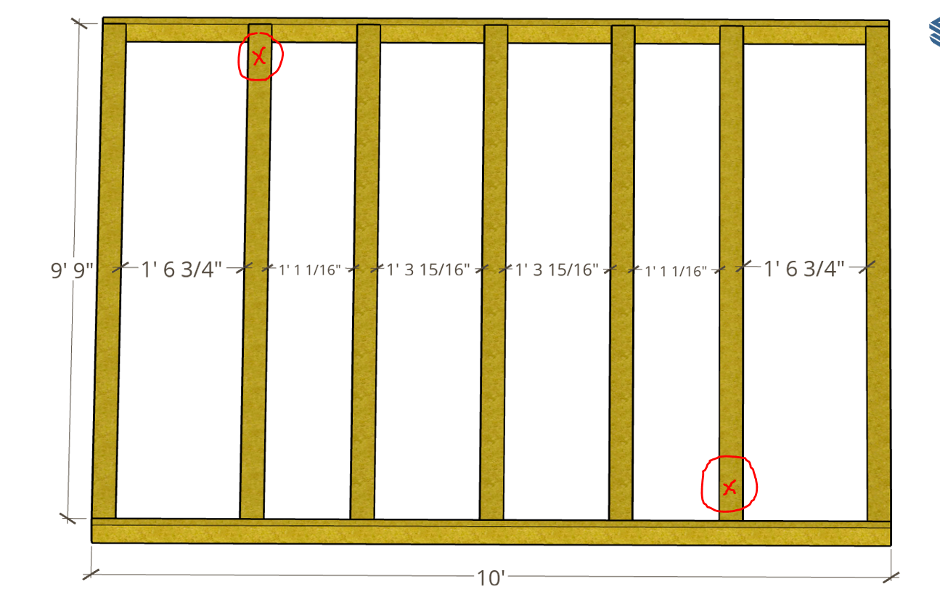
Mark each shed base floor joist location on the end caps as required to ensure that the edges of the plywood subfloor will land directly in the center of a floor joist. For a 10’x10′ shed floor base, consider marking the end caps with floor joist spacing as shown below:
Next, cut the 4″x4″ floor joists to length. For a 10’x10′ shed, cut the joists to a length of 9′-9″. Once you attach both end caps (1.5″ +1.5″), you will have a 10’x10′ square shed base.
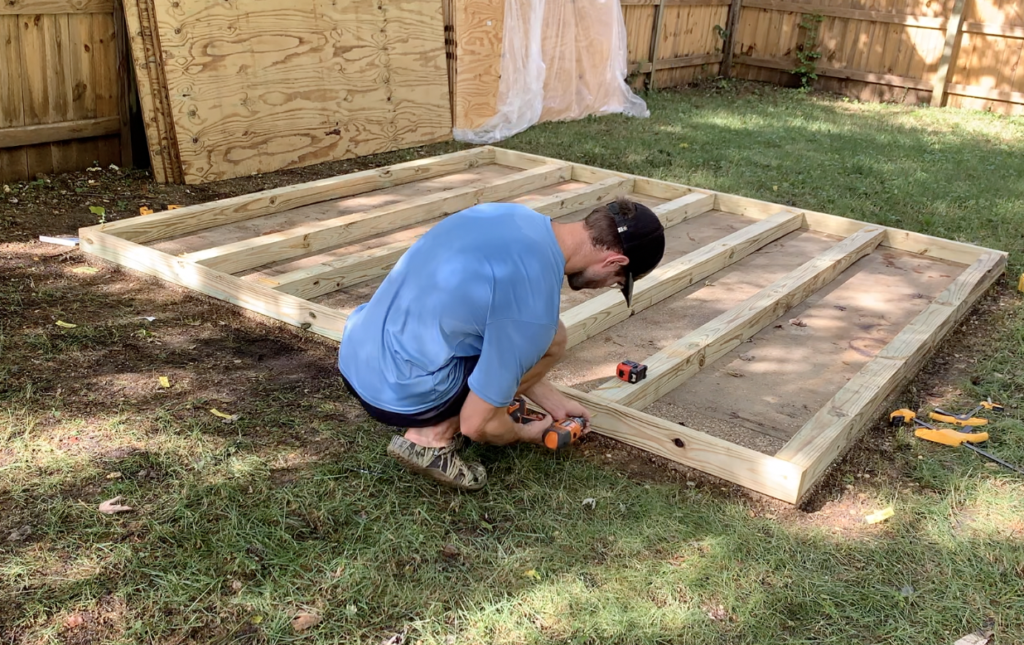
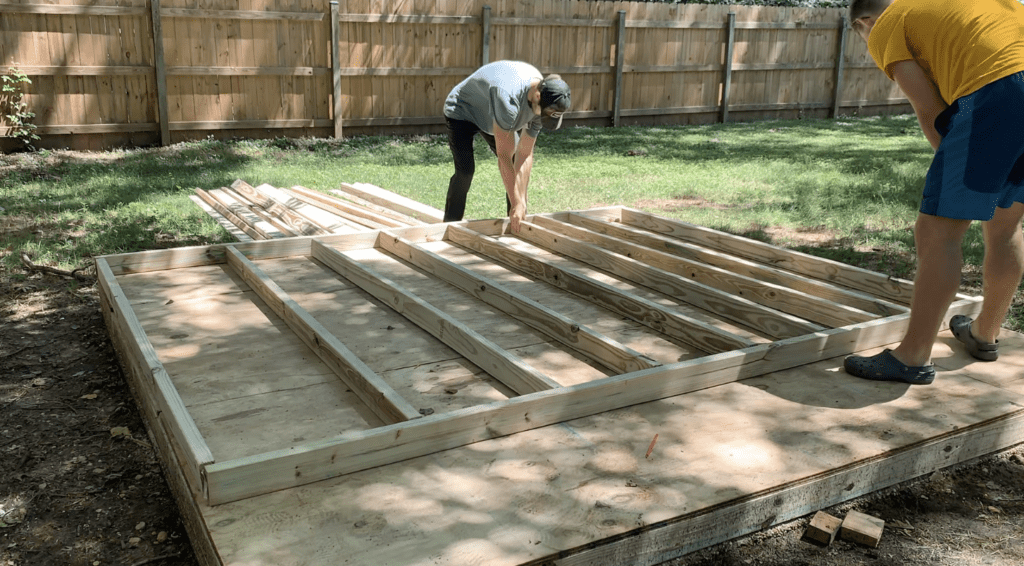
Position your end caps in place and begin positioning your 4″x4″ floor joists perpendicular to the end caps at the locations of the shed base floor joist markings made previously. Once you have positioned your end caps and floor joists in place, your shed floor base frame should look like this:
Attach the Shed Base Frame Together
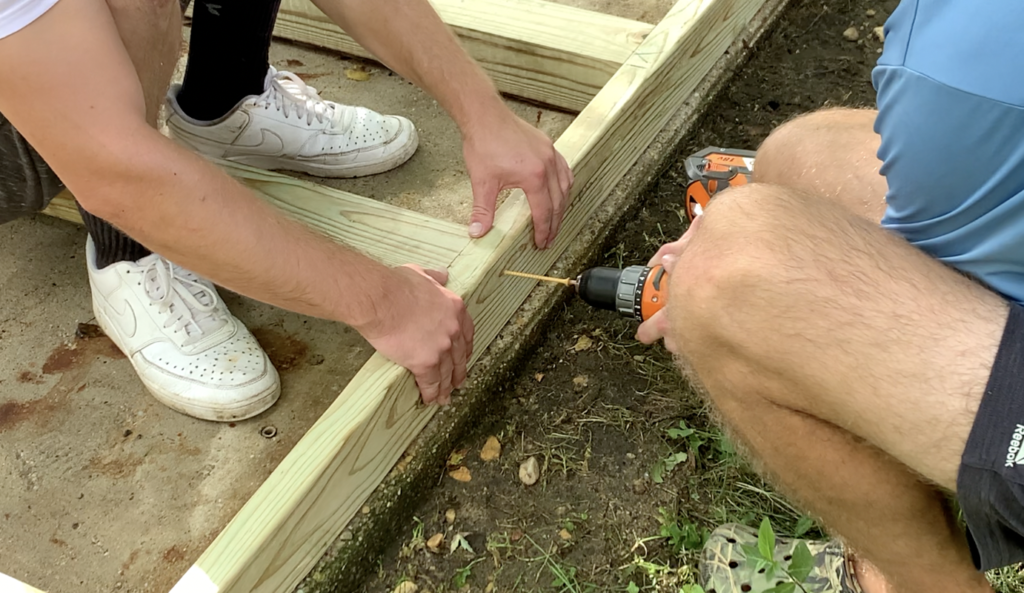
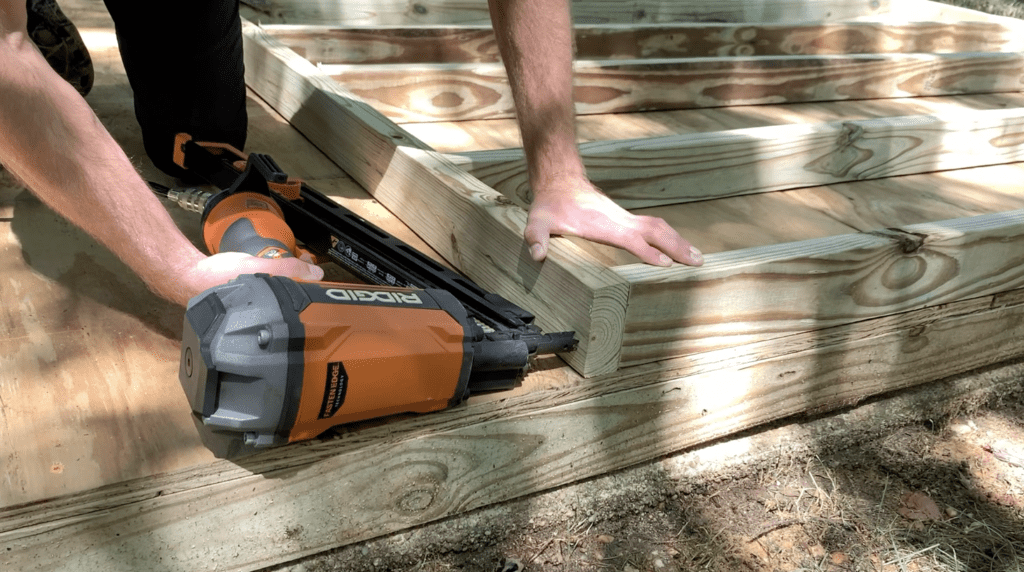
After laying out the shed base floor joists and end caps, attach the 4″x4″ floor joists to the 2″x4″ end caps using exterior rated screws or galvanized nails. Two screws (or nails) per connection is recommended.
PRO TIP: Attach the shed floor joists to the end caps by screwing through the end cap and into the floor joists. 3.5″ screws or nails are recommended. You may also attach the joists to the end cap by “toe-nailing” nails though the 4″x4″ floor joist and into the end cap.
After securing each shed floor joist to the end cap, you can proceed to the next step of the shed floor base construction process.
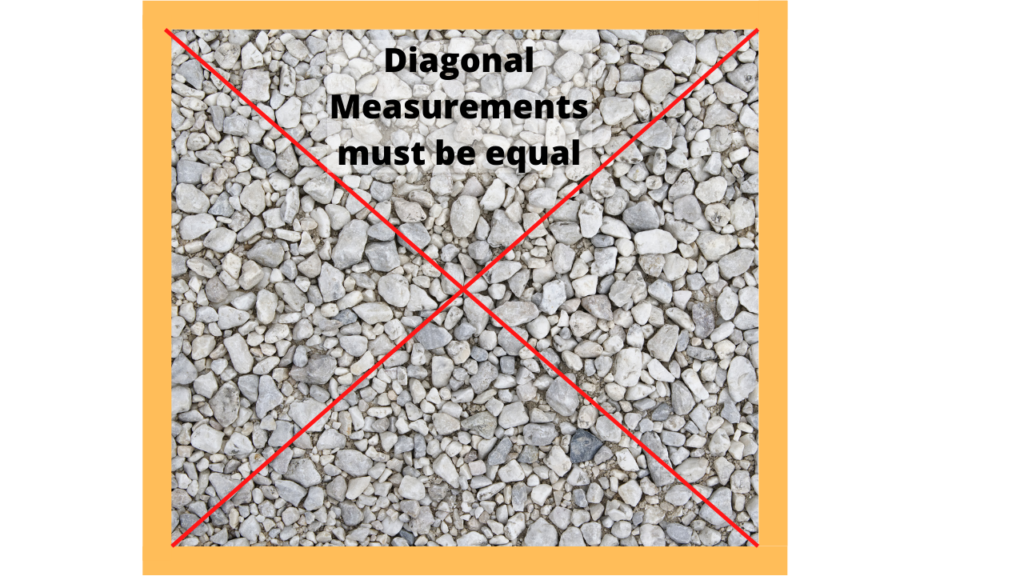
Square the Shed Floor Base Frame
After attaching the floor joists to the end caps, square the shed base frame to ensure that the plywood subfloor will fit appropriately. To square the shed, use a tape measure to compare the distance from each set of opposite corners. If the measurements are the same, the shed floor base frame is square. If the measurements differ, adjust the frame as needed until the measurements from each set of opposite corners is the same.
Anchor the Shed Floor Base to the Concrete Slab below (optional)
In high wind areas, it is often a code requirement to secure your shed to the concrete slab below. Consult with your local code requirements as needed.
For more information on how to anchor a shed base frame to a concrete slab, check out my “How to build a shed base frame” article linked here.
Attach the Plywood Subfloor to the Shed Base Frame
After confirming that the Shed floor Base frame is perfectly square, you can begin installing your plywood subfloor.
For most shed bases, pressure treated plywood makes for the best shed subfloor material. Because your shed floor joists will inevitably get wet, it is best practice to use a pressure treated subfloor in order to maximize the lifetime of your shed. Although standard plywood is also acceptable, it is not nearly as durable as pressure treated plywood in this application.
PRO TIP – Avoid using OSB for your shed subfloor. OSB swells and degrades when exposed to moisture – making it the worst subfloor option for you shed floor base.
If you planned out your joist spacing carefully, installing the shed subfloor should be a very straightforward process.
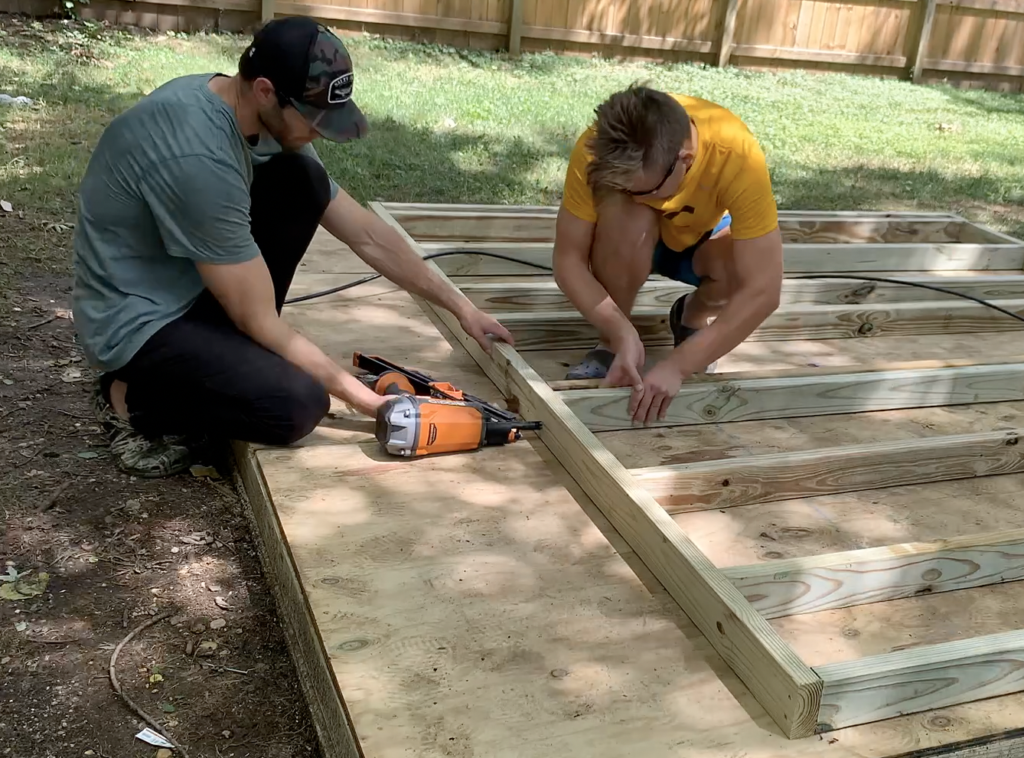
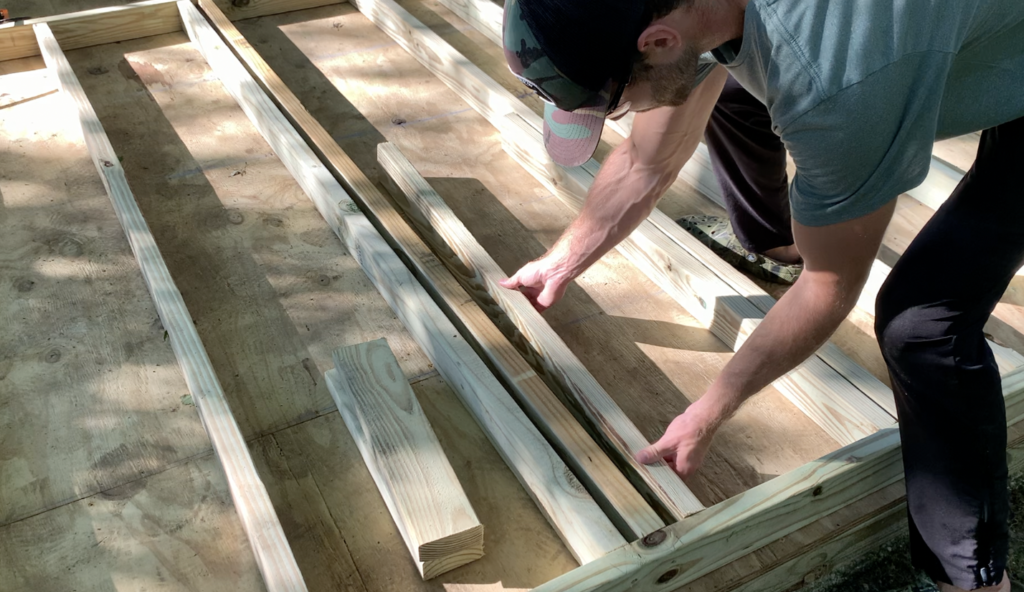
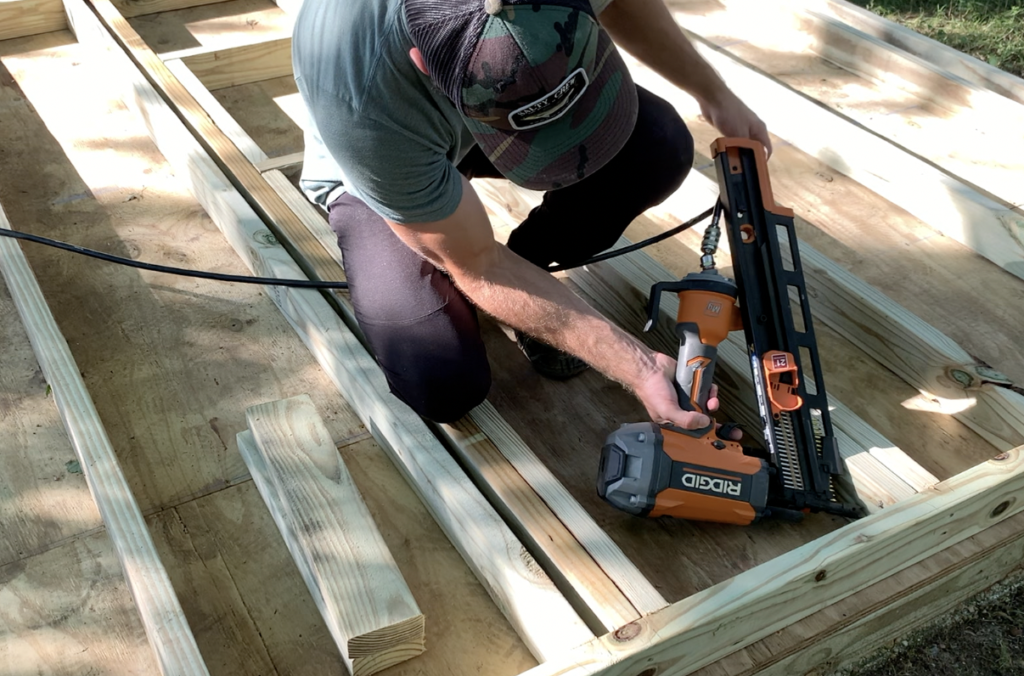
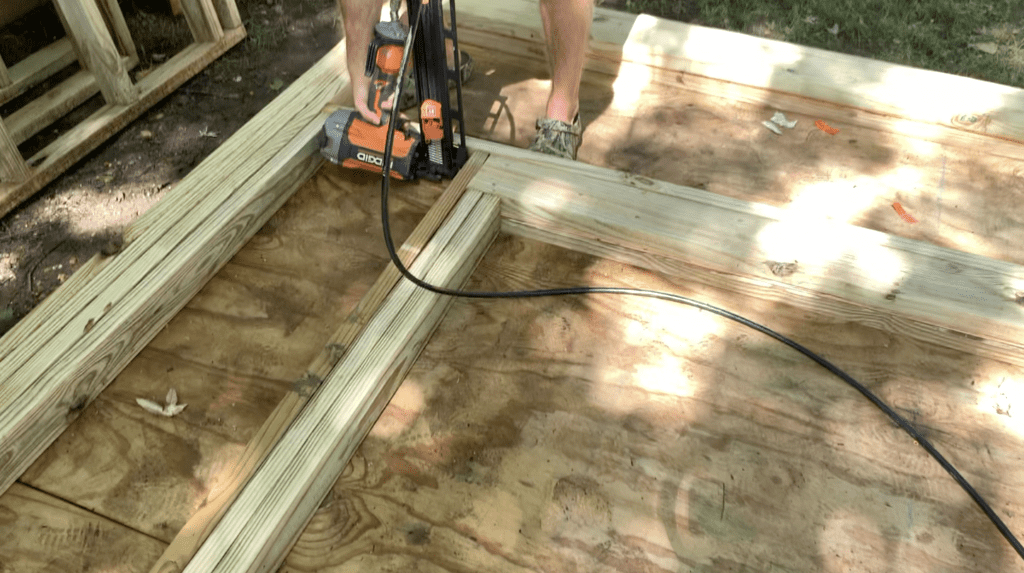
Use full sheets of 4’x8′ pressure treated plywood and position the plywood in place upon the shed base frame. The edge of each piece of plywood should land in the center of the floor joists. Position the first sheet of plywood so that it is flush with the shed base frame and also in the center of a floor joist. Next, attach the plywood to the joists and end cap using exterior rated screws or galvanized nails every 12″ O.C.
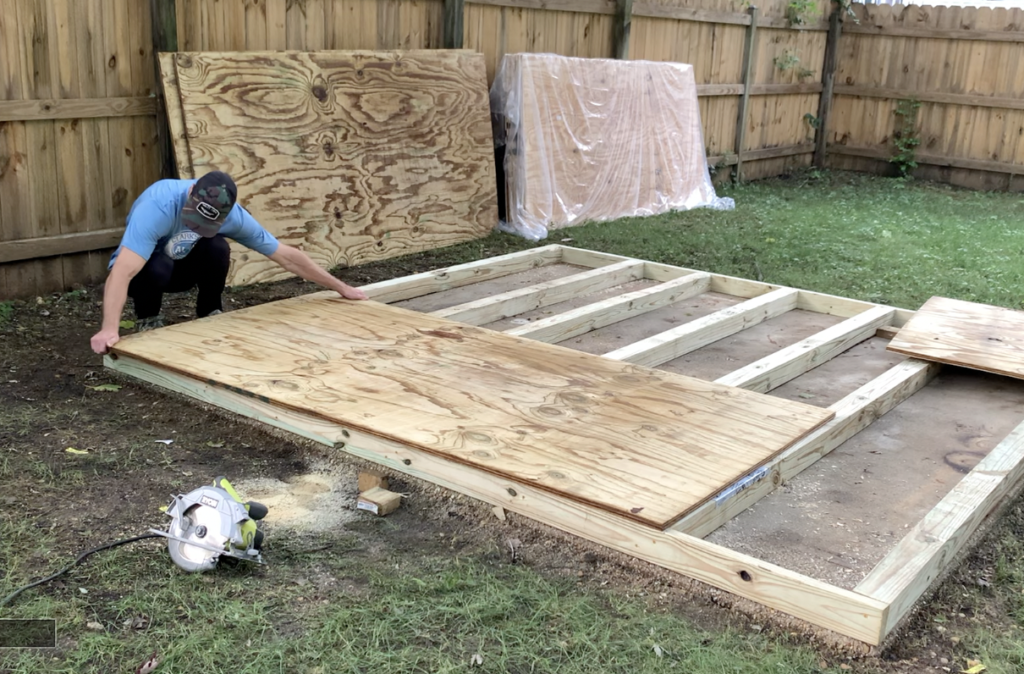
Continue to position plywood in place on top of the shed base frame until the entire frame is covered by the plywood subfloor.
PRO TIP – Consider marking the floor joist locations on each end cap and then using a chalk line to establish the joist location on the plywood subfloor. This may make it easier to identify the exact joist location when attaching the plywood subfloor the the shed base frame below.
It is generally good practice to leave a slight expansion gap (1/8″) between each sheet of the shed’s plywood subfloor. However, pressure treated lumber typically shrinks once it dries out. Therefore, it is also common for pressure treated plywood to be butted up right next to the adjacent sheet (with the expectation that the plywood sheet will shrink over time).
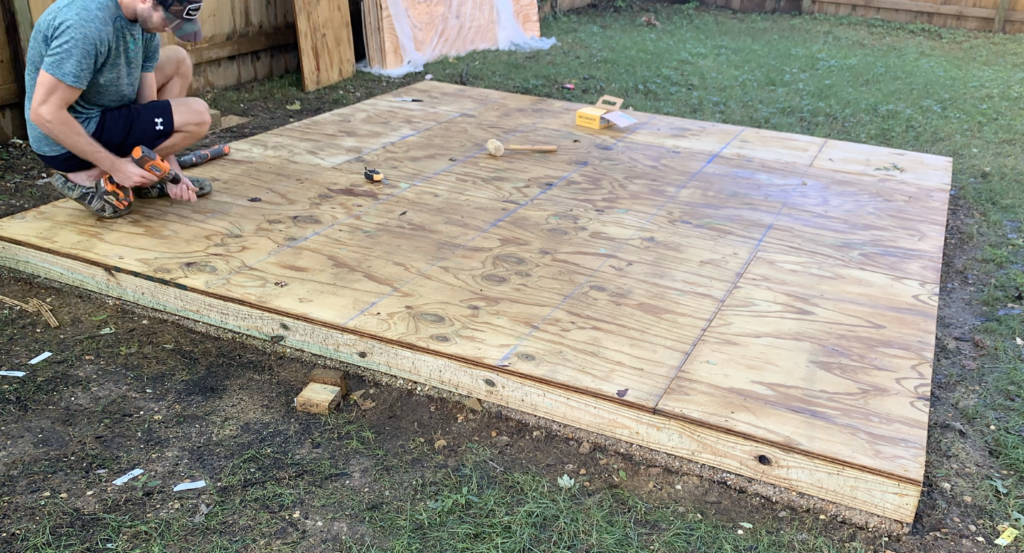
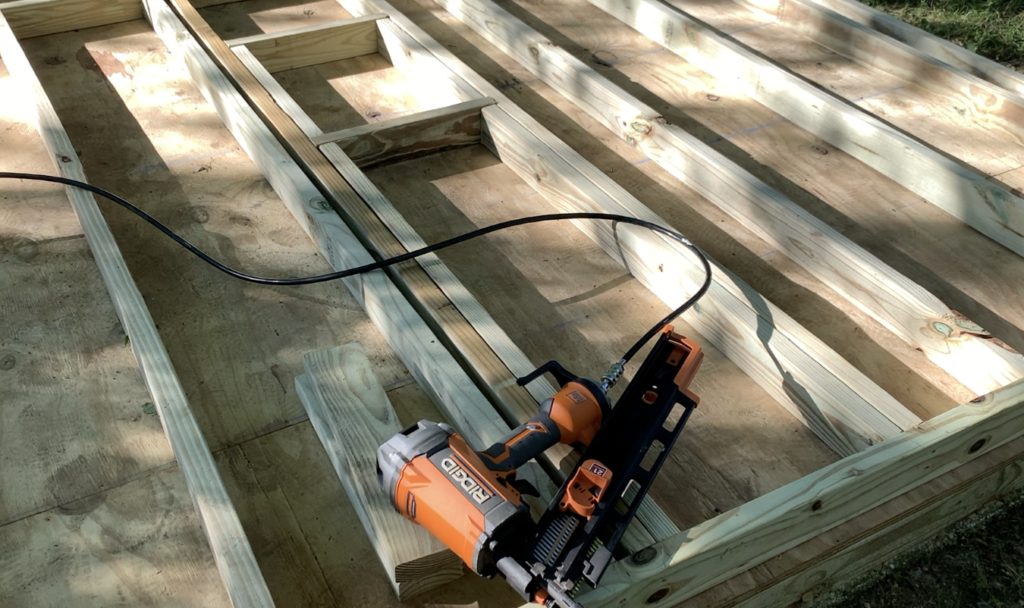
Continue to install plywood until the entire shed base frame has been covered by the subfloor. For a 10’x10′ shed, you will have a plywood subfloor arrangement similar to what is shown below:
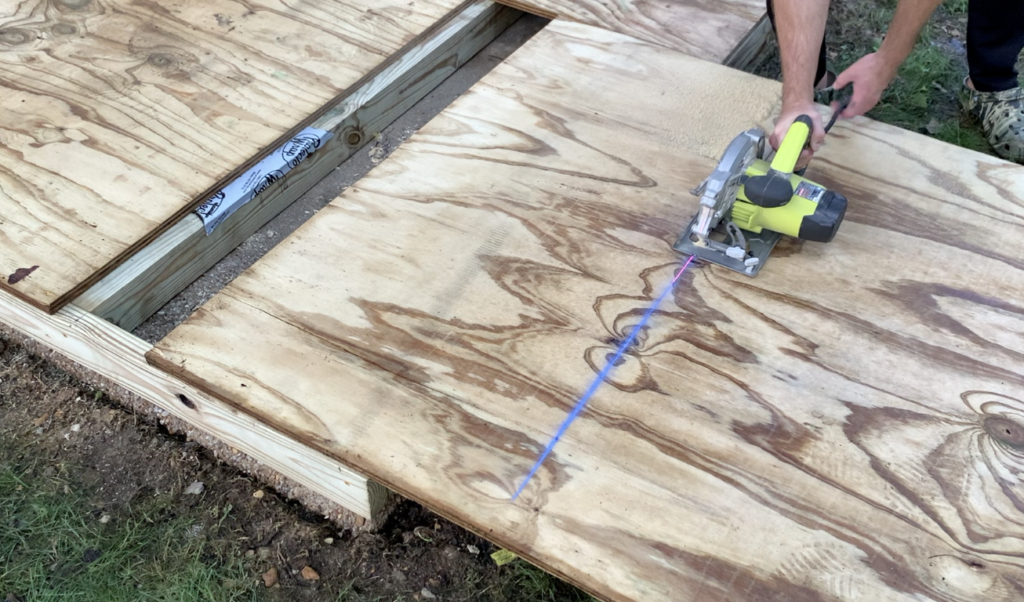
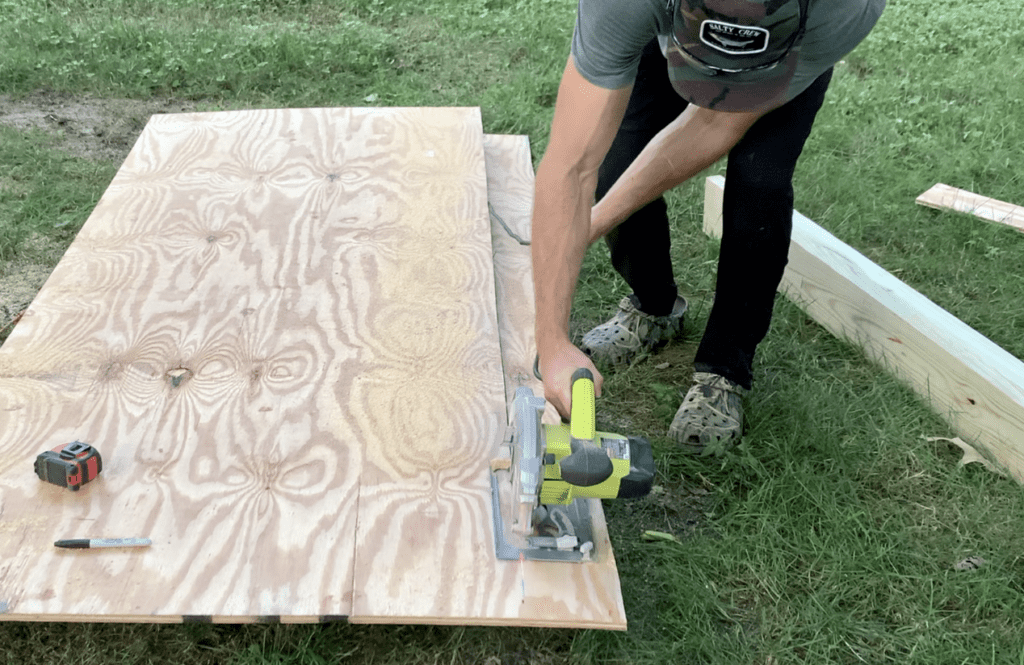
For the smaller sections of plywood subfloor, use a chalk line to establish the cut line and then trim the plywood subfloor to size using a circular saw.
After securing your plywood subfloor to the the shed base frame below, your shed base frame is complete. We can now move on to framing the Shed Walls.
How to Frame Shed Walls
Most sheds (including the 10’x10′ modern shed we are constructing in this article) are comprised of one (1) back wall, two (2) identical side walls, and one (1) front wall.
It is recommended that you begin framing the shed’s back wall – since it is the easiest.
Framing the Back Wall of the Shed
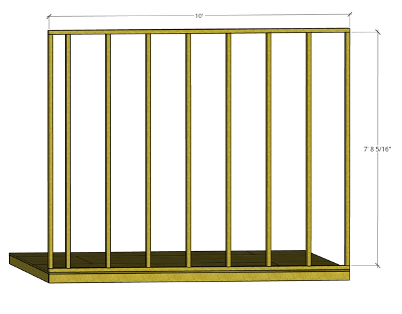
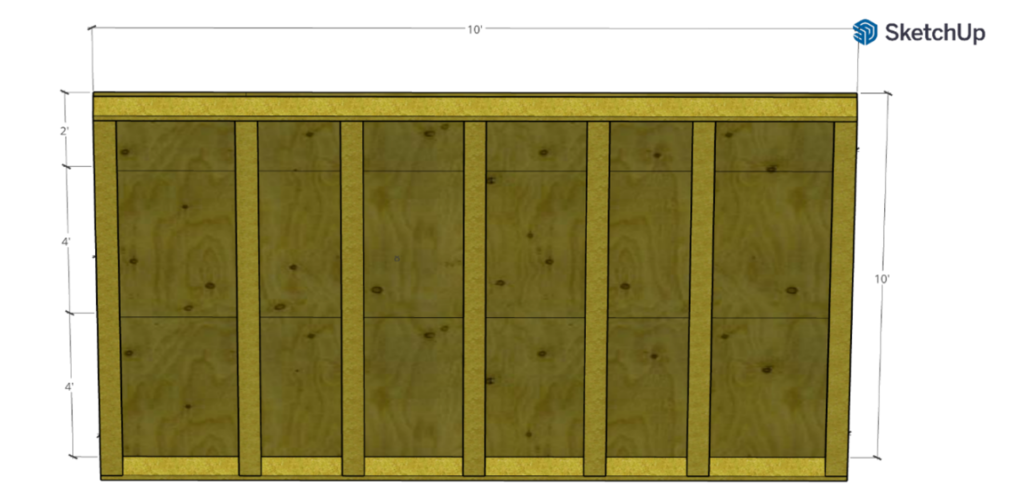
To frame the back wall of the 10’x10′ shed shown above, start with two (2), 2”x4”x10’s for the top and bottom plate. Ensure that your 2”x4”x10’s are exactly 10 feet long (sometimes, this will require minor trimming).
Next, cut the wall studs to the desired height (usually around 8′)
Once the 2”x4” top plate, bottom plate, and studs are cut to length, it’s time to assemble the back wall. I recommend that you assemble the back wall horizontally by placing it on the previously constructed plywood subfloor shed base – as shown below.
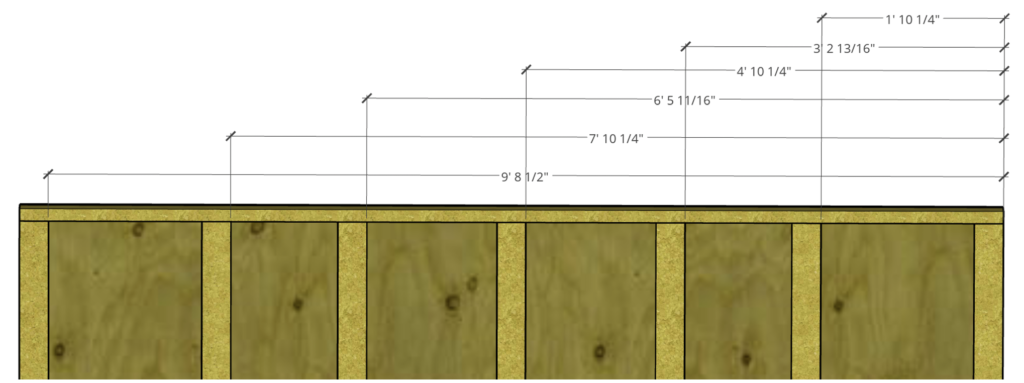
For stud spacing, we will be using 16” OC (on center) spacing with minor adjustments to ensure that the siding will land on stud.
PRO TIP – Plan your wall stud spacing so that the sheathing/siding (typically 4’x8′ plwood. TI-11, or SmartSide Panels) will land directly in the center of a stud.
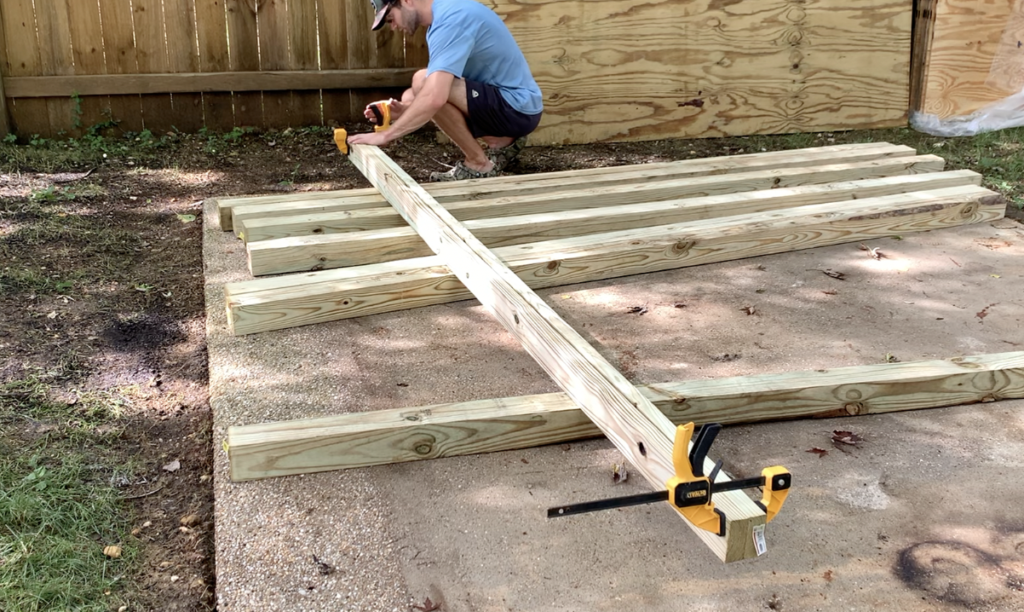
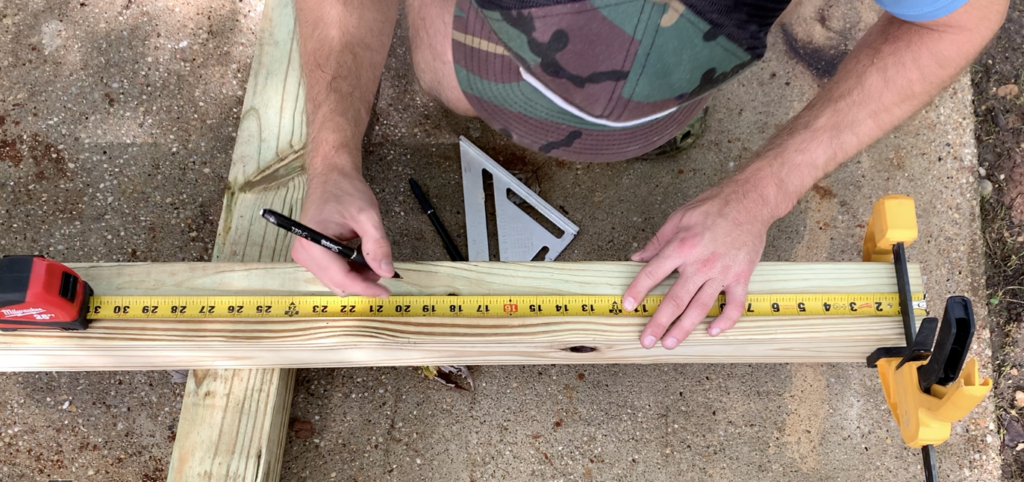
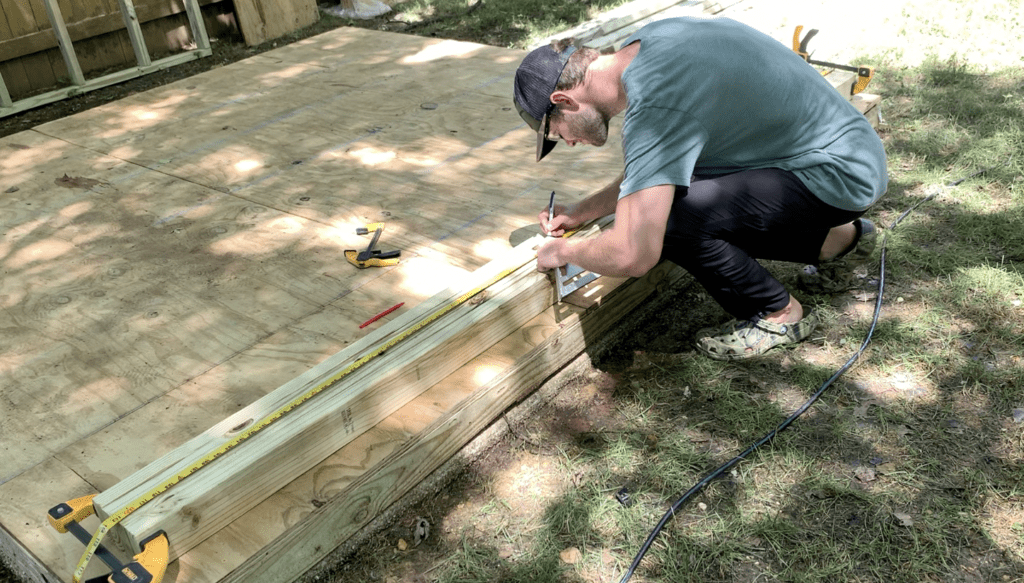
In order to easily mark your stud spacing, I recommend that you clamp the 2”x4”x10’ top and bottom plates together. Next, I recommend that you mark both 2”x4”x10’s at the same time by running your tape measure as shown on the Figure below.

After marking the stud locations on the top and bottom plate, attach the studs to the top and bottom plate with exterior rated nails or screws as shown.
Once you have framed your shed’s back wall, move it out of the way so that you can frame your other walls.
Framing the Side Walls of the Shed
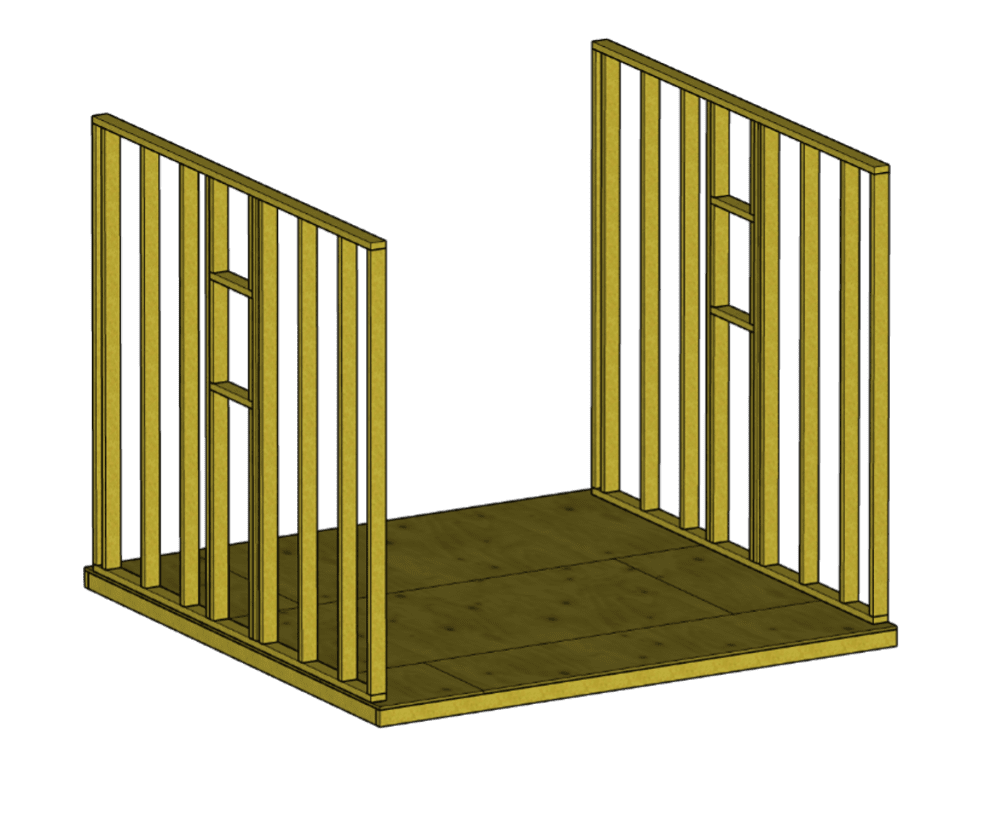
Typically, both shed side walls will be 100% identical – So you will need to repeat the steps listed below for the second side wall. The side walls are typically more complex than the back wall, since they will (often times) include a window rough opening.
For a 10’x10′ shed it is recommended that you cut two (2), 2”x4”x10’s to 9’-5” each. These 9’-5” pieces of 2”x4” lumber will serve as the top and bottom plate for the side wall. Next, to cut ten (10), 2”x4”x8’s to to you desired wall stud length – typically 8′ (be sure to match your back wall stud length)
Configure the Side Wall Stud Spacing as Shown in the Sample Wall Framing Figure Below (or as desired):
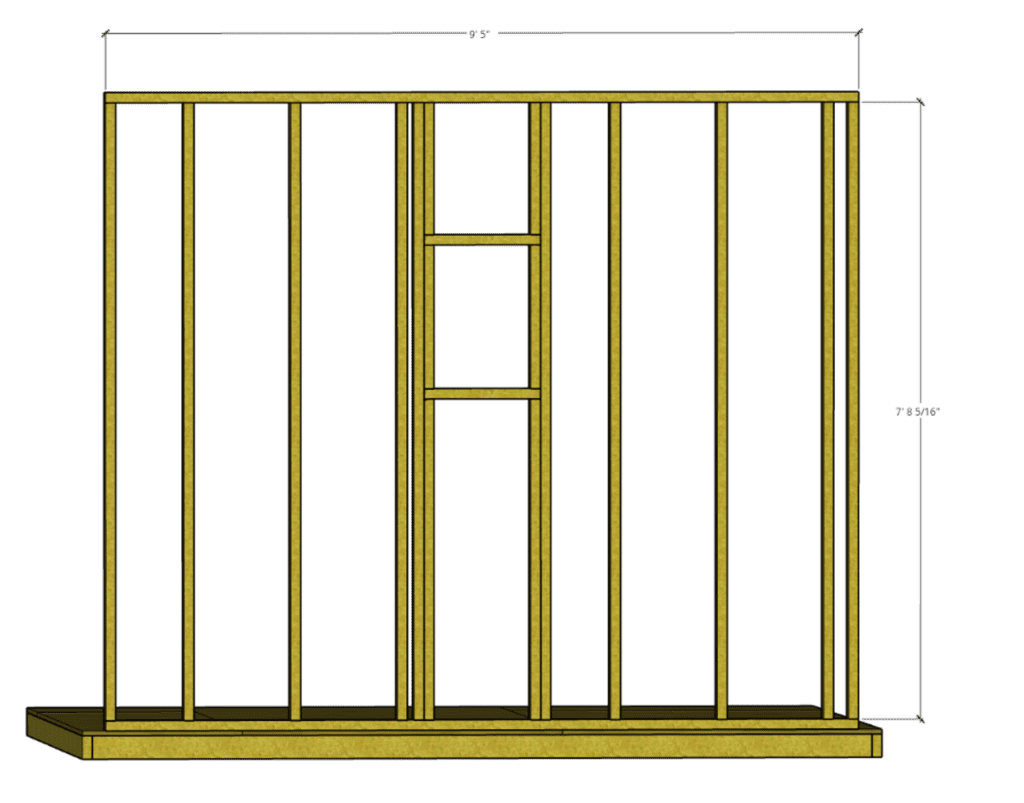
Similarly to the back wall, it is recommended that you mark the stud spacing on both the top and bottom plate at the same time. Since both side walls will be identical, both bottom plates and both top plates can be marked at the same time (for efficiency).
After marking the stud locations on the top and bottom plates, layout the side wall similar to how it was done for the back wall. Once all of the studs are positioned appropriately, fasten each stud to the top and bottom plate using a nail gun and galvanized screws. Two nails per connection location are recommended.
Framing the Rough Opening for the Shed Side Wall Window
Most shed sids walls will include a window – so you will need to frame the rough opening for the window when planning out your side wall framing layout. However, before you can frame the window’s rough opening, you need to decide what size shed window you are going to use.
Select the Shed Window Size

There are many different styles and sizes of windows to choose from for your shed. Pick a shed window size that works for your specific shed installation.
For this guide, we will be installing 14″x21″ shed windows that were purchased from Amazon.
These windows include a window mounting flange (discussed later) that will be used to attach the window to the shed.
Frame the Shed Window
Once you have selected you window size, it’s time to frame the shed’s window. When framing a shed window, there is a bit of terminology to keep in mind. The different components of a shed window’s rough opening are listed below:
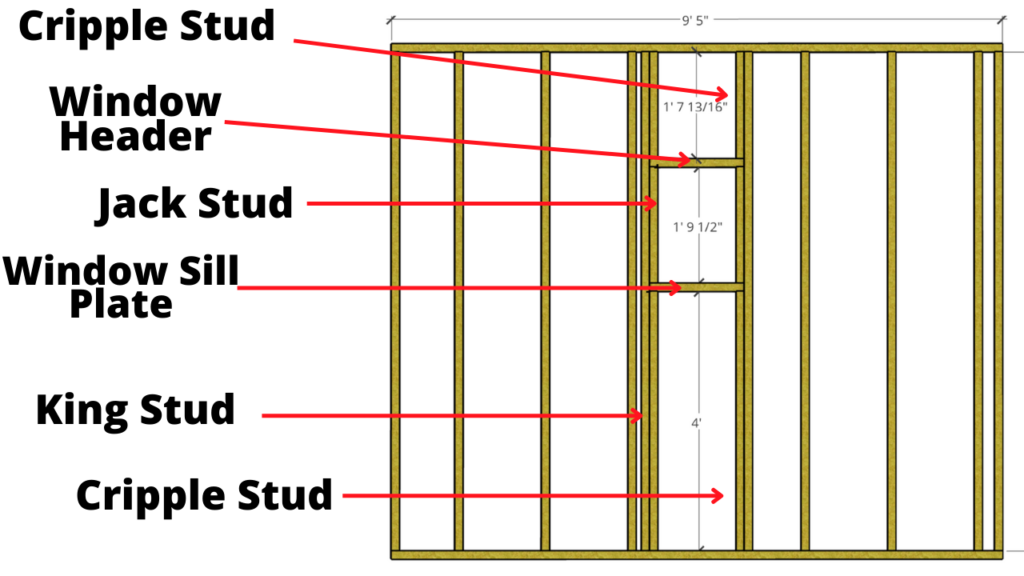
WIth the an understanding of the different components that make up a window’s rough opening, you can now begin framing the shed window.
When determining the actual size of a window’s rough opening, you will want to check the window manufacturer’s instructions. Typically, the window’s rough frame will be approximately 1/2″-1″ wider and taller than the actual window. This slightly larger opening will allow the window to fit in place while also allowing for minor adjustments to be made. Further, the slightly larger rough opening frame will allow for the window flanges to contact the sides of the shed while still allowing the window to fit securely within the window’s rough frame.
For this shed window, the rough frame was constructed 1/2″ taller and 1/2″ wider than the actual shed window. Therefore, for the 14″x21″ window, the window’s rough frame was determined to be 14 1/2″ – 21 1/2″. It is always a good idea to have your shed window on-site so that you can refer to it when determining the appropriate rough in opening.
At this stage, it is recommended that you install the king studs so that they are appropriately spaced. For our 14 1/2″ shed window rough opening width, the spacing between king studs was 17 1/2″ (to account for the jack studs – which are 1.5″ each). See below:

You can either frame the shed window before you stand up the shed walls (horizontally), or after the wall is lifted into place. The choice is yours.
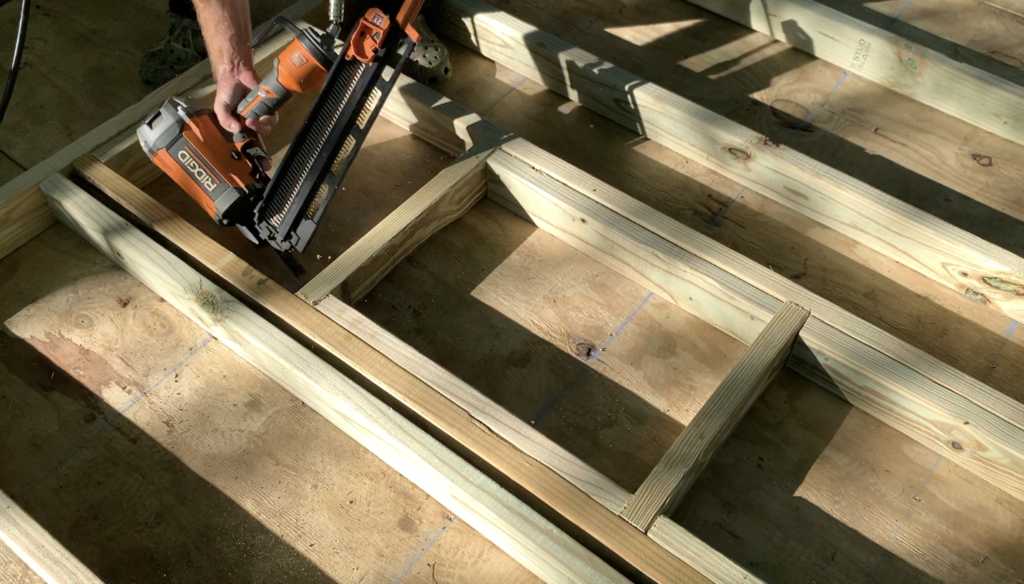
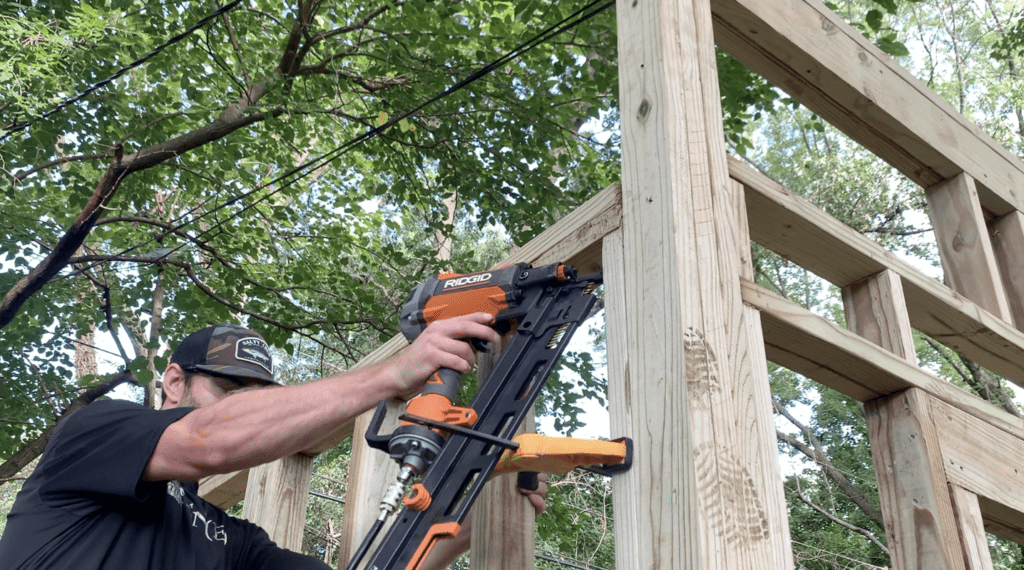
Use a framing nailer and galvanized (exterior) nails to fasten the window’s rough framing together.
After determining the shed window rough opening size, establish the Shed window height. For this application, I used 4′ high cripple studs to support the window’s sill plate (as shown below).
Attach the cripple studs (and all shed window rough opening framing) to the King Studs and Top/Bottom Plates of the walls with a framing nailer.
Continue to install the the rest of the shed window rough frame components as shown in the Figure above. Fasten the window’s rough frame to the king studs, cripple studs, etc. as you assemble.
Continue to fasten every component of the shed window’s rough frame with a framing nailer as shown:
After framing the entire shed window rough opening as shown above, perform a “dry-fit” of the shed window within the frame.
Dry Fit the Shed Window in the Rough Opening Frame
After framing the shed window rough frame, take some time to dry fit the shed window within the rough opening to confirm fit.
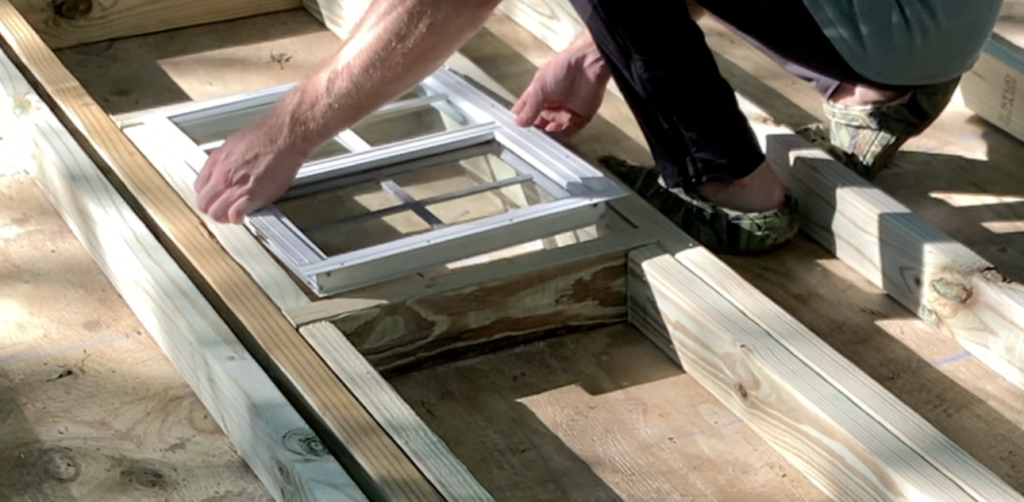
When performing a dry-fit of the shed window, check for the following:
- Ensure that the Shed Window will fit within the Rough Opening
- Confirm that the Shed window flanges will “catch” on the rough opening frame
- Confirm that window can be installed level and plumb
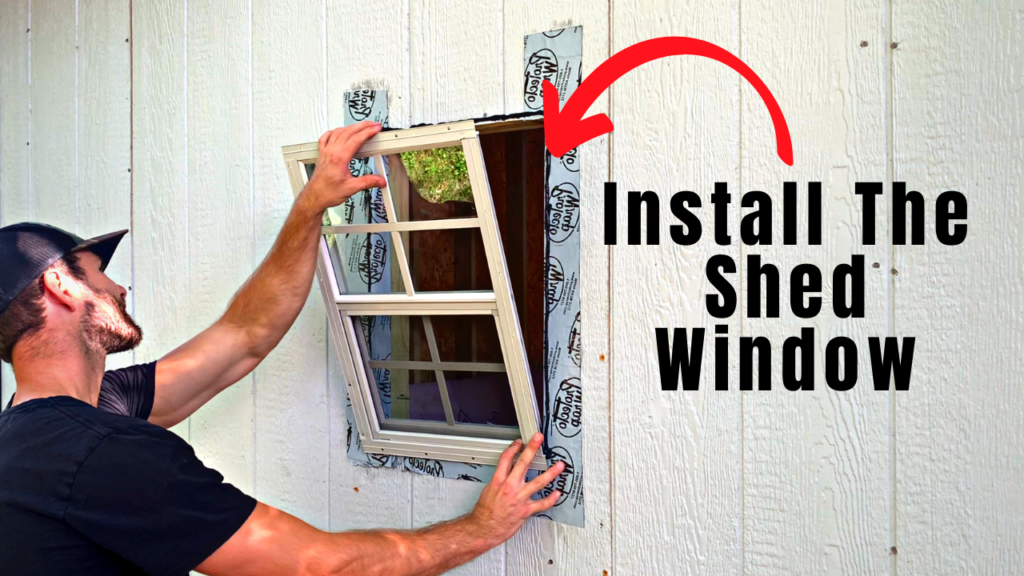
After you have completed the shed window dry-fit and you are satisfied with the fit, you can pause the shed window installation and finish framing your shed. Before you can proceed with the window installation, the shed’s sheathing and/or siding needs to the installed.
For a detailed tutorial on how to install a shed window from start to finish, check out my “How to Install a Shed Window” article.
Framing the front Wall
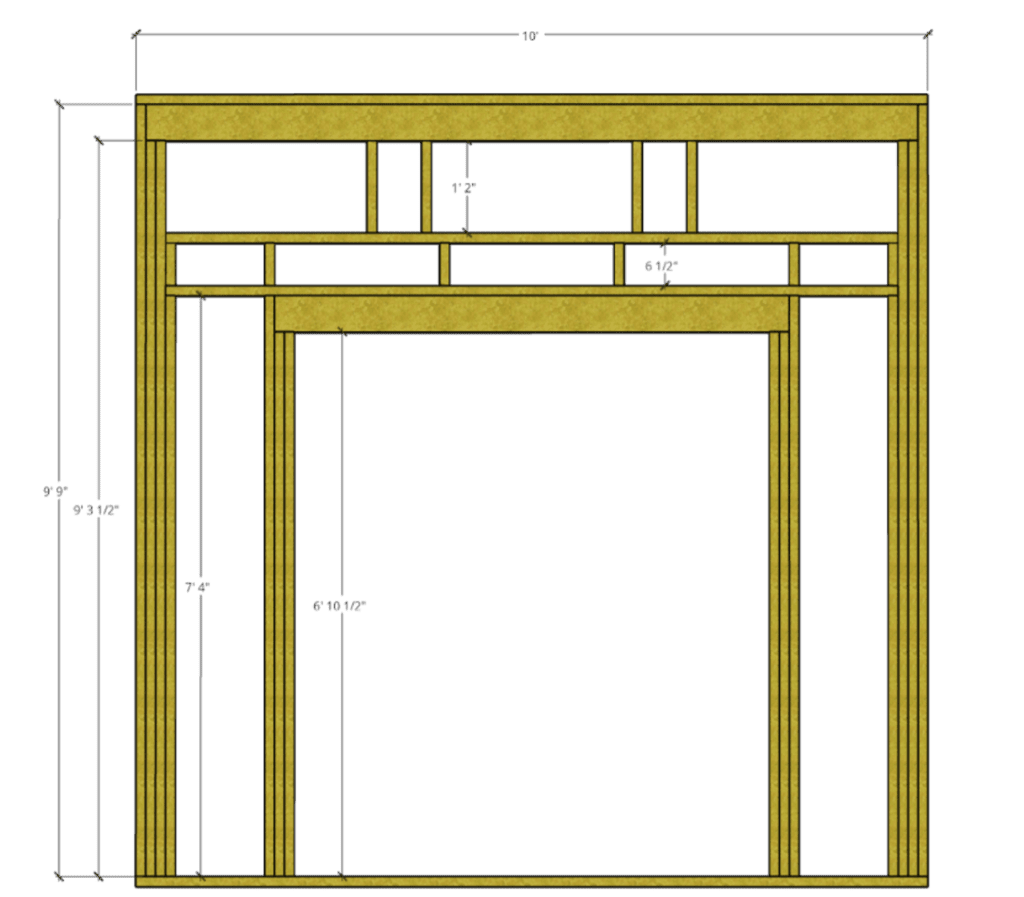
Framing the shed’s front wall is typically the most complex part of the shed framing process since it usually consists of the door’s rough opening, window rough openings, 2”x6” Lumber headers, etc.. To assemble the 10’x10′ front wall as included in this guide, you will need to make the following cuts. However, feel free to customize the shed framing plan as you see fit – this guide is for reference only. Note that this front wall framing is designed for a 6′ wide by 7′ tall roll-up door.
- Cut two (2), 2”x4”x10’s to exactly 10’ (sometimes, the factory boards require minor trimming).
- Cut two (2), 2”x4”x10’s to 9’- 9”.
- Cut four (4), 2”x4”x10’s to 9’- 3½”
- Cut four (4), 2”x4”x8’s to 7’- 4”
- Cut four (4), 2”x4”x8’s to 6’- 10½”
- Cut four (4), 2”x4”x8’s to 1’-2”
- Cut six (6), 2”x4”x8’s to 6½”
Refer to the Figure Below for the overall Shed Front Wall Layout.
You will also need to make the following cuts for the horizontal front wall headers:
- Cut two (2), 2”x6”x10’s to 9’-9”
- Cut two (2), 2”x6”x10’s to 6’-6”
- Cut two (2), 2”x4”x10’s to 9’-3”
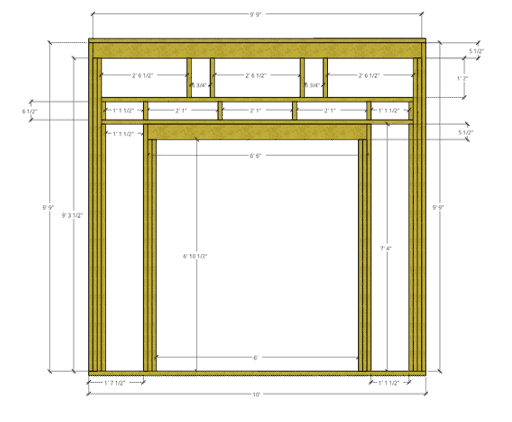
You can now assemble the front wall as shown:

An important Note about your 2”x6” Shed Wall Headers:
To assemble your 2”x6” headers (over the door rough opening), you will need to take your two pieces of 2”x6” lumber and attach them together. However, each 2”x6” is only 1.5” thick. Therefore, these will be approx. ½” thinner than the 3.5” wall depth. To make up the additional ½”, cut strips of your 1/2” plywood and sandwich it in between the two pieces of the 2”x6”.
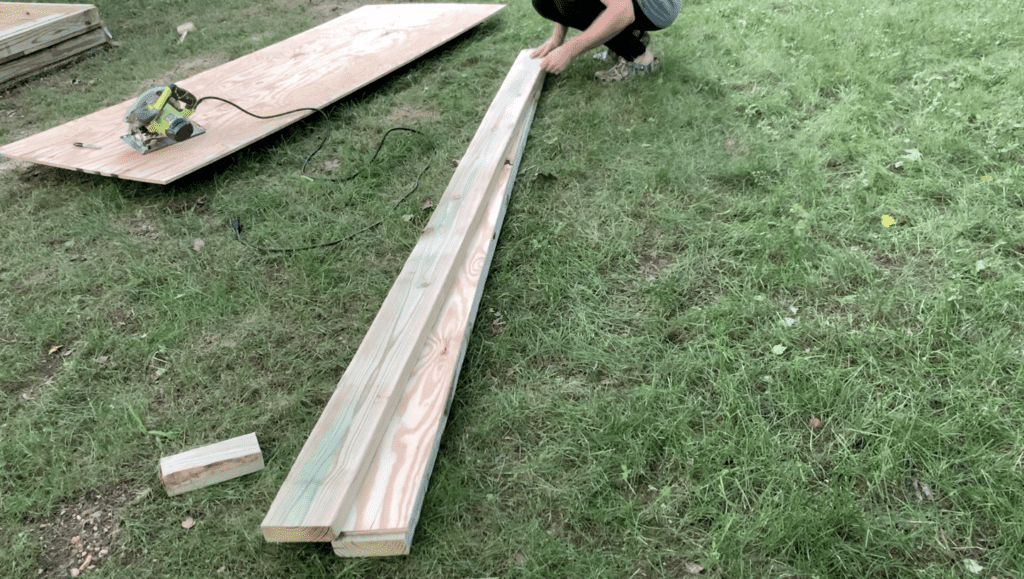
Because the plywood sheets we are using are only 8’ long, you will need to use two pieces of 1/2″ plywood for the 9’-9” header. Finally, nail the header together on both sides.
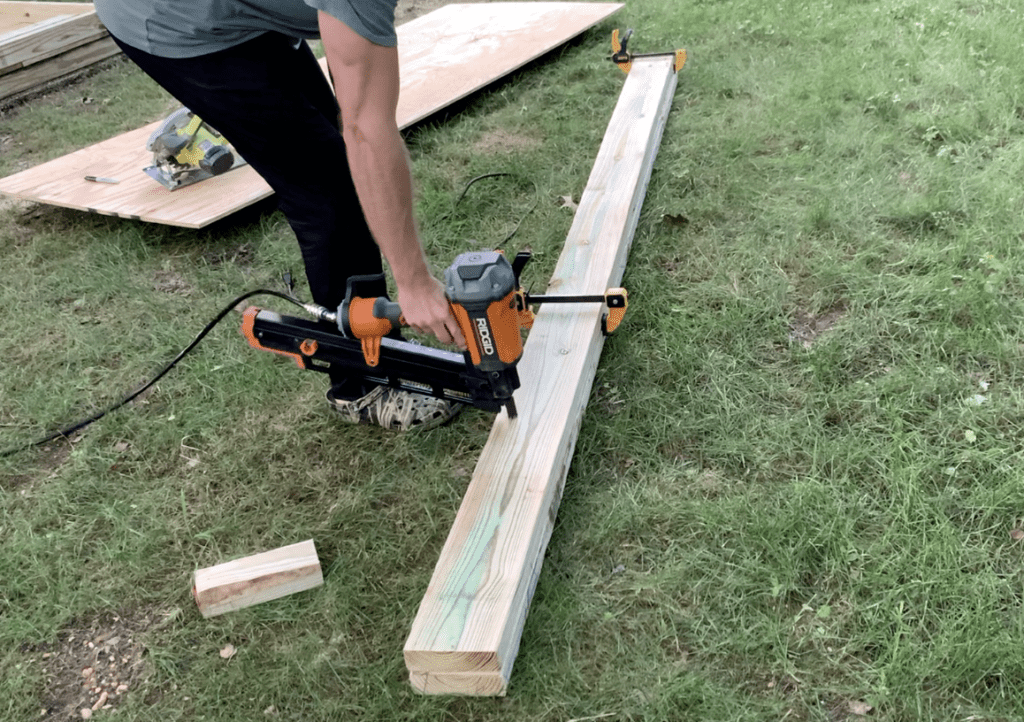
After cutting all of your Front wall lumber (and plywood strips) to size, fasten each stud to the top and bottom plate using a nail gun and/or galvanized screws. Two nails per connection location are recommended. Attach adjacent studs together with nails and toe-nail in additional fasteners as required. Attach 2”x6” headers and plywood together using nails from both directions.
At this stage, all of the Shed Walls have been framed and you can begin lifting the walls into place.
Attaching the Shed Walls Together
Once all of your shed walls are framed assembled, I recommend that you get some help to stand them up. The shed’s front wall, in particular, is quite heavy. I recommend that you start with the front wall (since it is the heaviest).
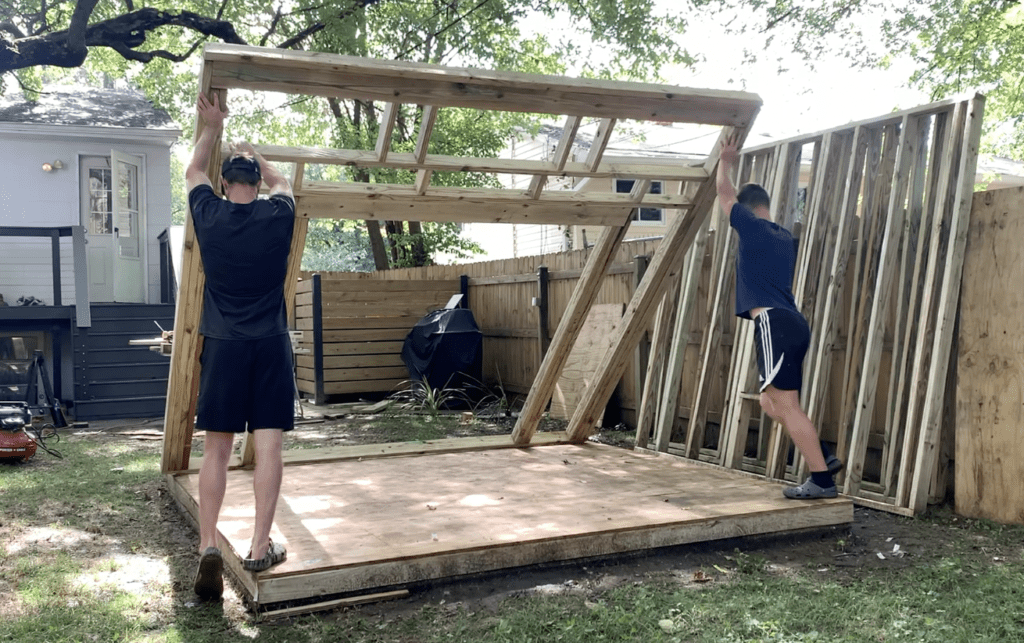
Lift the front wall into place and ensure that it is perfectly flush with the front and sides of shed base frame. Once the front wall is positioned correctly, tack it into place with nails. It is recommended that you install a temporarily brace to hold the walls in place until you have all of the shed walls in place.
Next, position your side walls, ensure that they are flush with the shed base and the adjacent front wall, and tack them in place with nails. You can also use bar clamps to temporarily hold the walls in place before you tack them into place with nails.
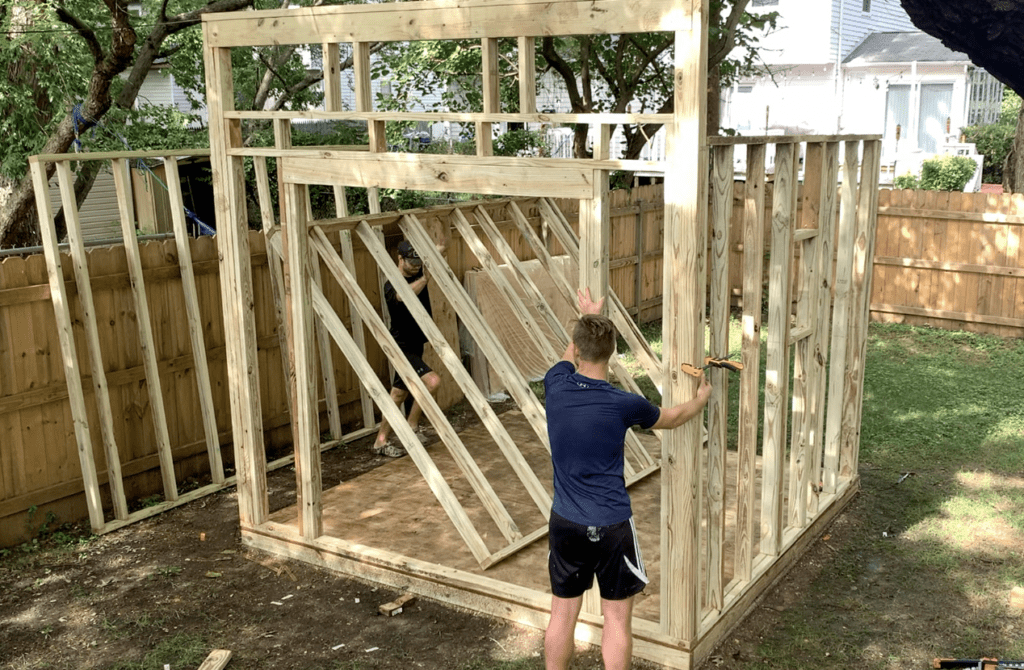
Finally position the back wall in place and tack it in place with nails.
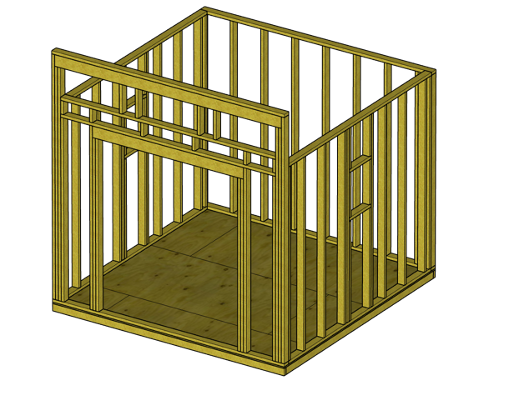
Once you have stood all of the shed walls up and secured them in place, your shed should look like this:
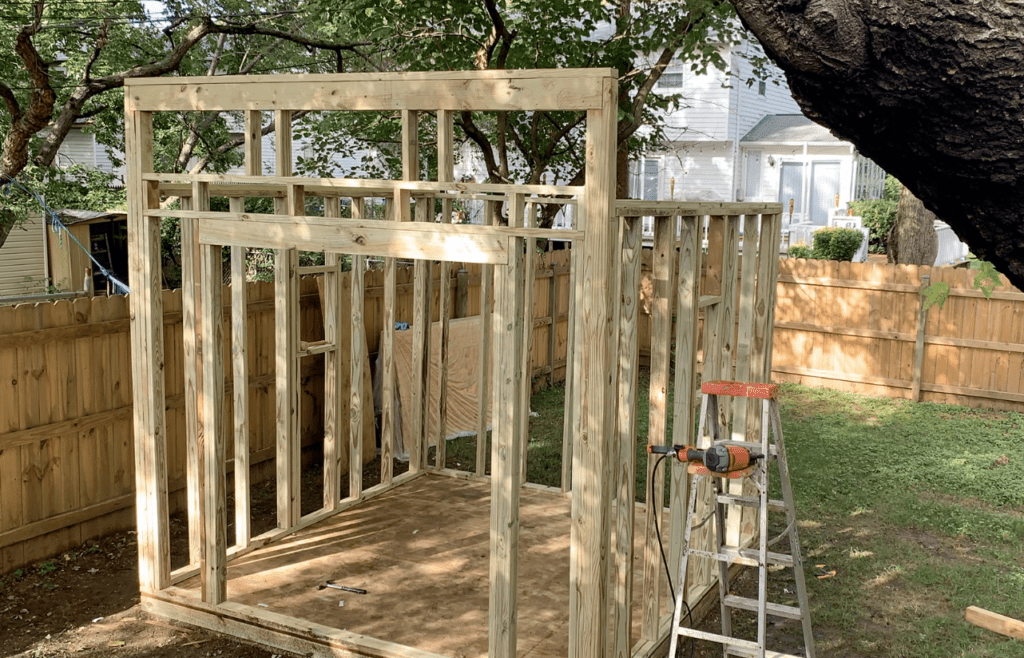
Be sure to attach all of the shed walls together with framing nail, screws, etc. Consider using a bar clamp to hold the shed walls as you fasten them together.
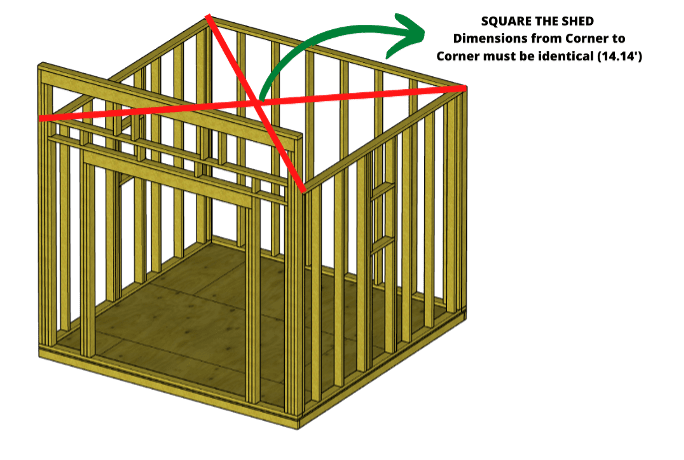
Before proceeding any further, Square the Shed to confirm that none of the walls are out of plumb. To do this, ensure that the measurement between opposite corners are the same.
At this stage, the shed framing is nearly complete.
Reinforcing the shed walls with a double top plate
Next, reinforce the shed wall top plates with additional pieces of 2”x4”x10’ top plates (known as a double top plate) as shown in the Figure Below:
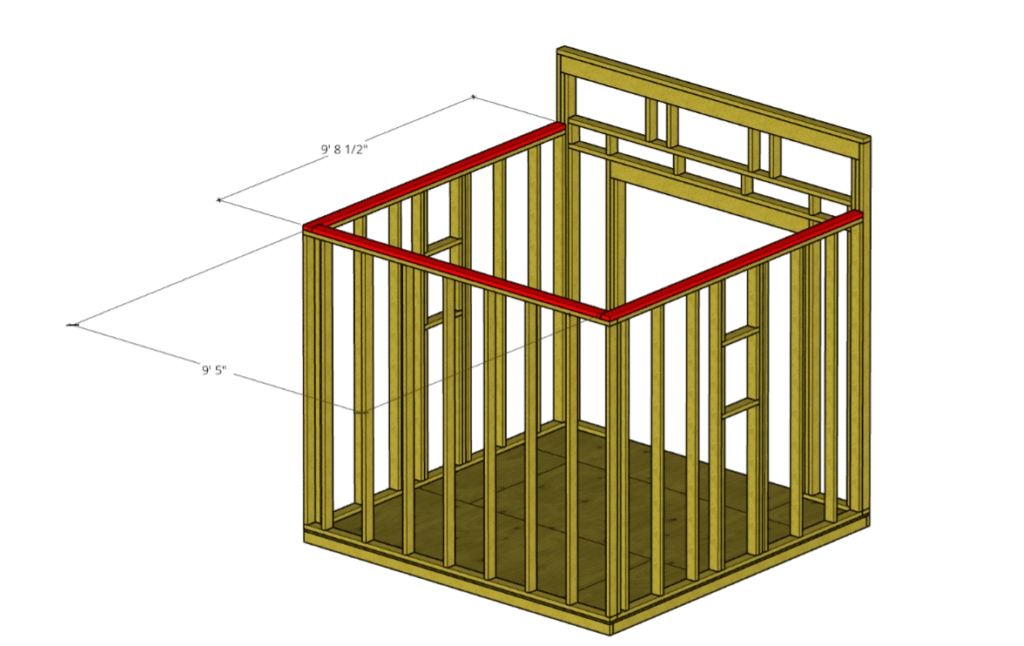
To accomplish this, you will need to make the following cuts (according to the 10’x10′ shed plan herein):
- Cut two (2), 2”x4”x10’s to 9’-8 1/2”
- Cut one (1), 2”x4”x10’ to 9’-5”
Next, simply tack the 2”x4”s in place with nails as shown below:
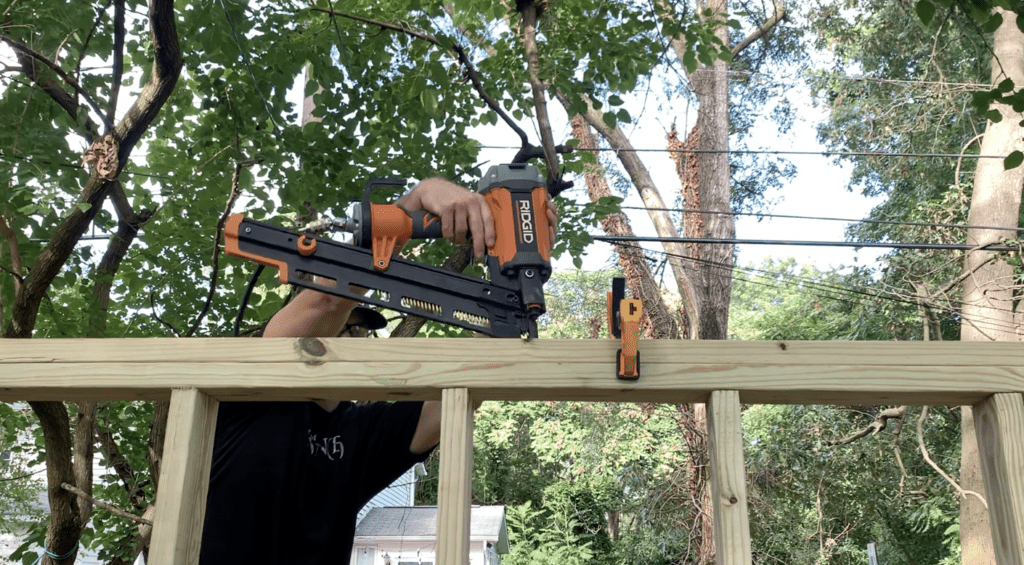
Double top plates will add additional strength and durability to the shed by anchoring the adjacent walls together at the top of the wall.
Take this time to ensure that you have adequate fasteners installed to attach the shed walls to each other and also to the shed base joists below.
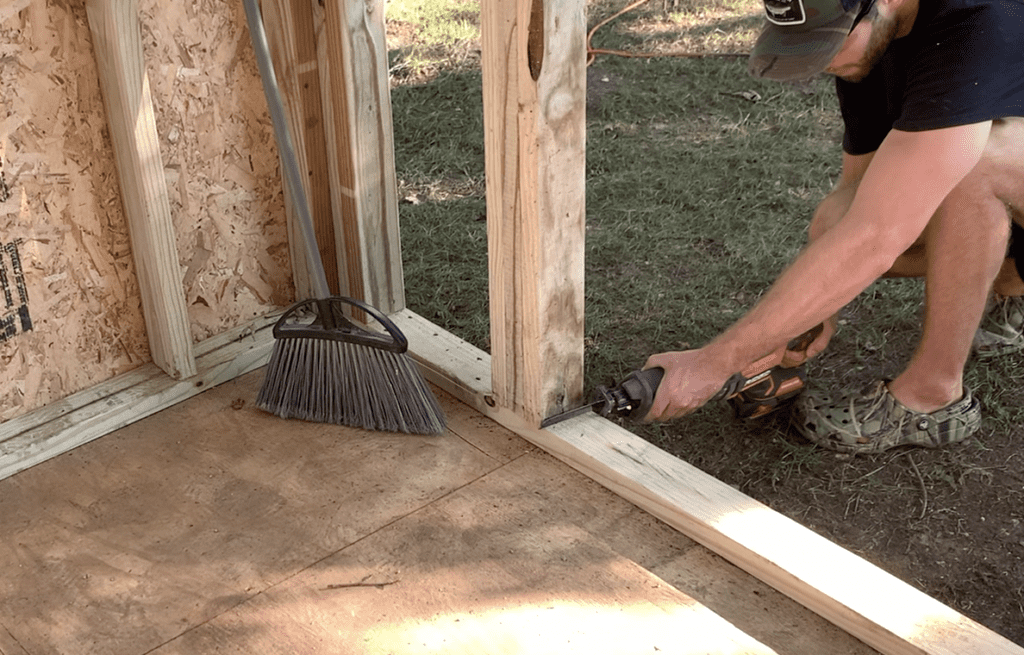
Removing the bottom plate from the Shed Door Opening
Lastly, cut out the portion of the 2”x4” bottom cap which is impeding the entrance to the Shed.

To cut this segment out, I recommend that you use a reciprocating saw.
At this point, your 10’x10′ shed walls have been fully framed. The next step in the shed build process is to install the roof rafters – which I will cover in a different article.
If you want to learn how to build the Modern Shed you see below, Check out my “How to Build a Modern Shed Course” Linked Here. This Course includes a detailed materials list, tools lists, lumber cut lists, and step-by-step video instructions for each step of the project!
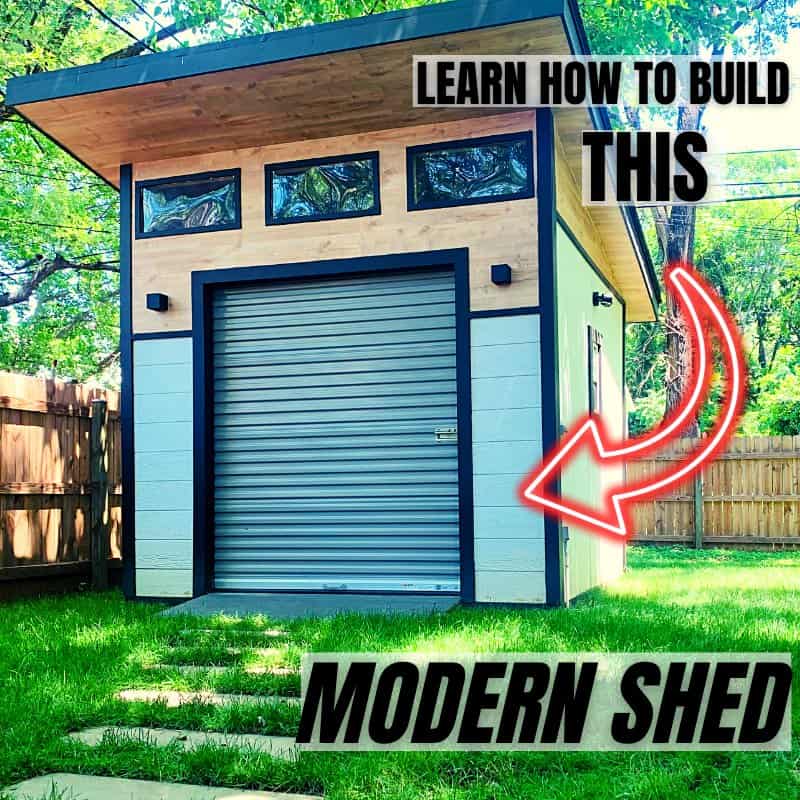
For more information on how to Build a 10’x10 Modern Shed from start to finish, check out ATimprovements.com or watch my step-by-step tutorial videos on Youtube. Thanks!
Thanks so much for checking out ATImprovements! If you learned something from this project, you might also like these other DIY Projects:
- How to Build a Concrete Slab Shed Foundation: https://atimprovements.com/how-to-build-a-shed-base-concrete-slab-step-by-step-diy-guide/
- How to Frame a 10’x10′ Shed Base: https://atimprovements.com/how-to-build-a-shed-floor-base-diy-step-by-step-guide/
- How in Install a Shed Window: https://atimprovements.com/shed-window-installation-how-to-install-a-window-in-a-shed-diy/
- How to Build a Fence: How to Build a Fence (DIY Guide) – AT Improvements
- How to Build a Fence Gate: How to Build a Fence Gate (7 Steps with Pictures & Video) – AT Improvements
- How to Install a DIY deck Wire Railing: DIY Cable Railing – How to Install Cable Railing Step-by-Step – (atimprovements.com)
- How to Build a Concrete Paver Patio: DIY PAVER PATIO – Easy DIY Paver Patio Ideas – (atimprovements.com)
Thanks!
DISCLAIMER: This is a reference guide only. Consult local code requirements. Links included in this article might be affiliate links. If you purchase a product or service with the links that I provide, I may receive a small commission. There is no additional charge to you! Thank you for supporting ATimprovements so I can continue to provide you with free content each week!