
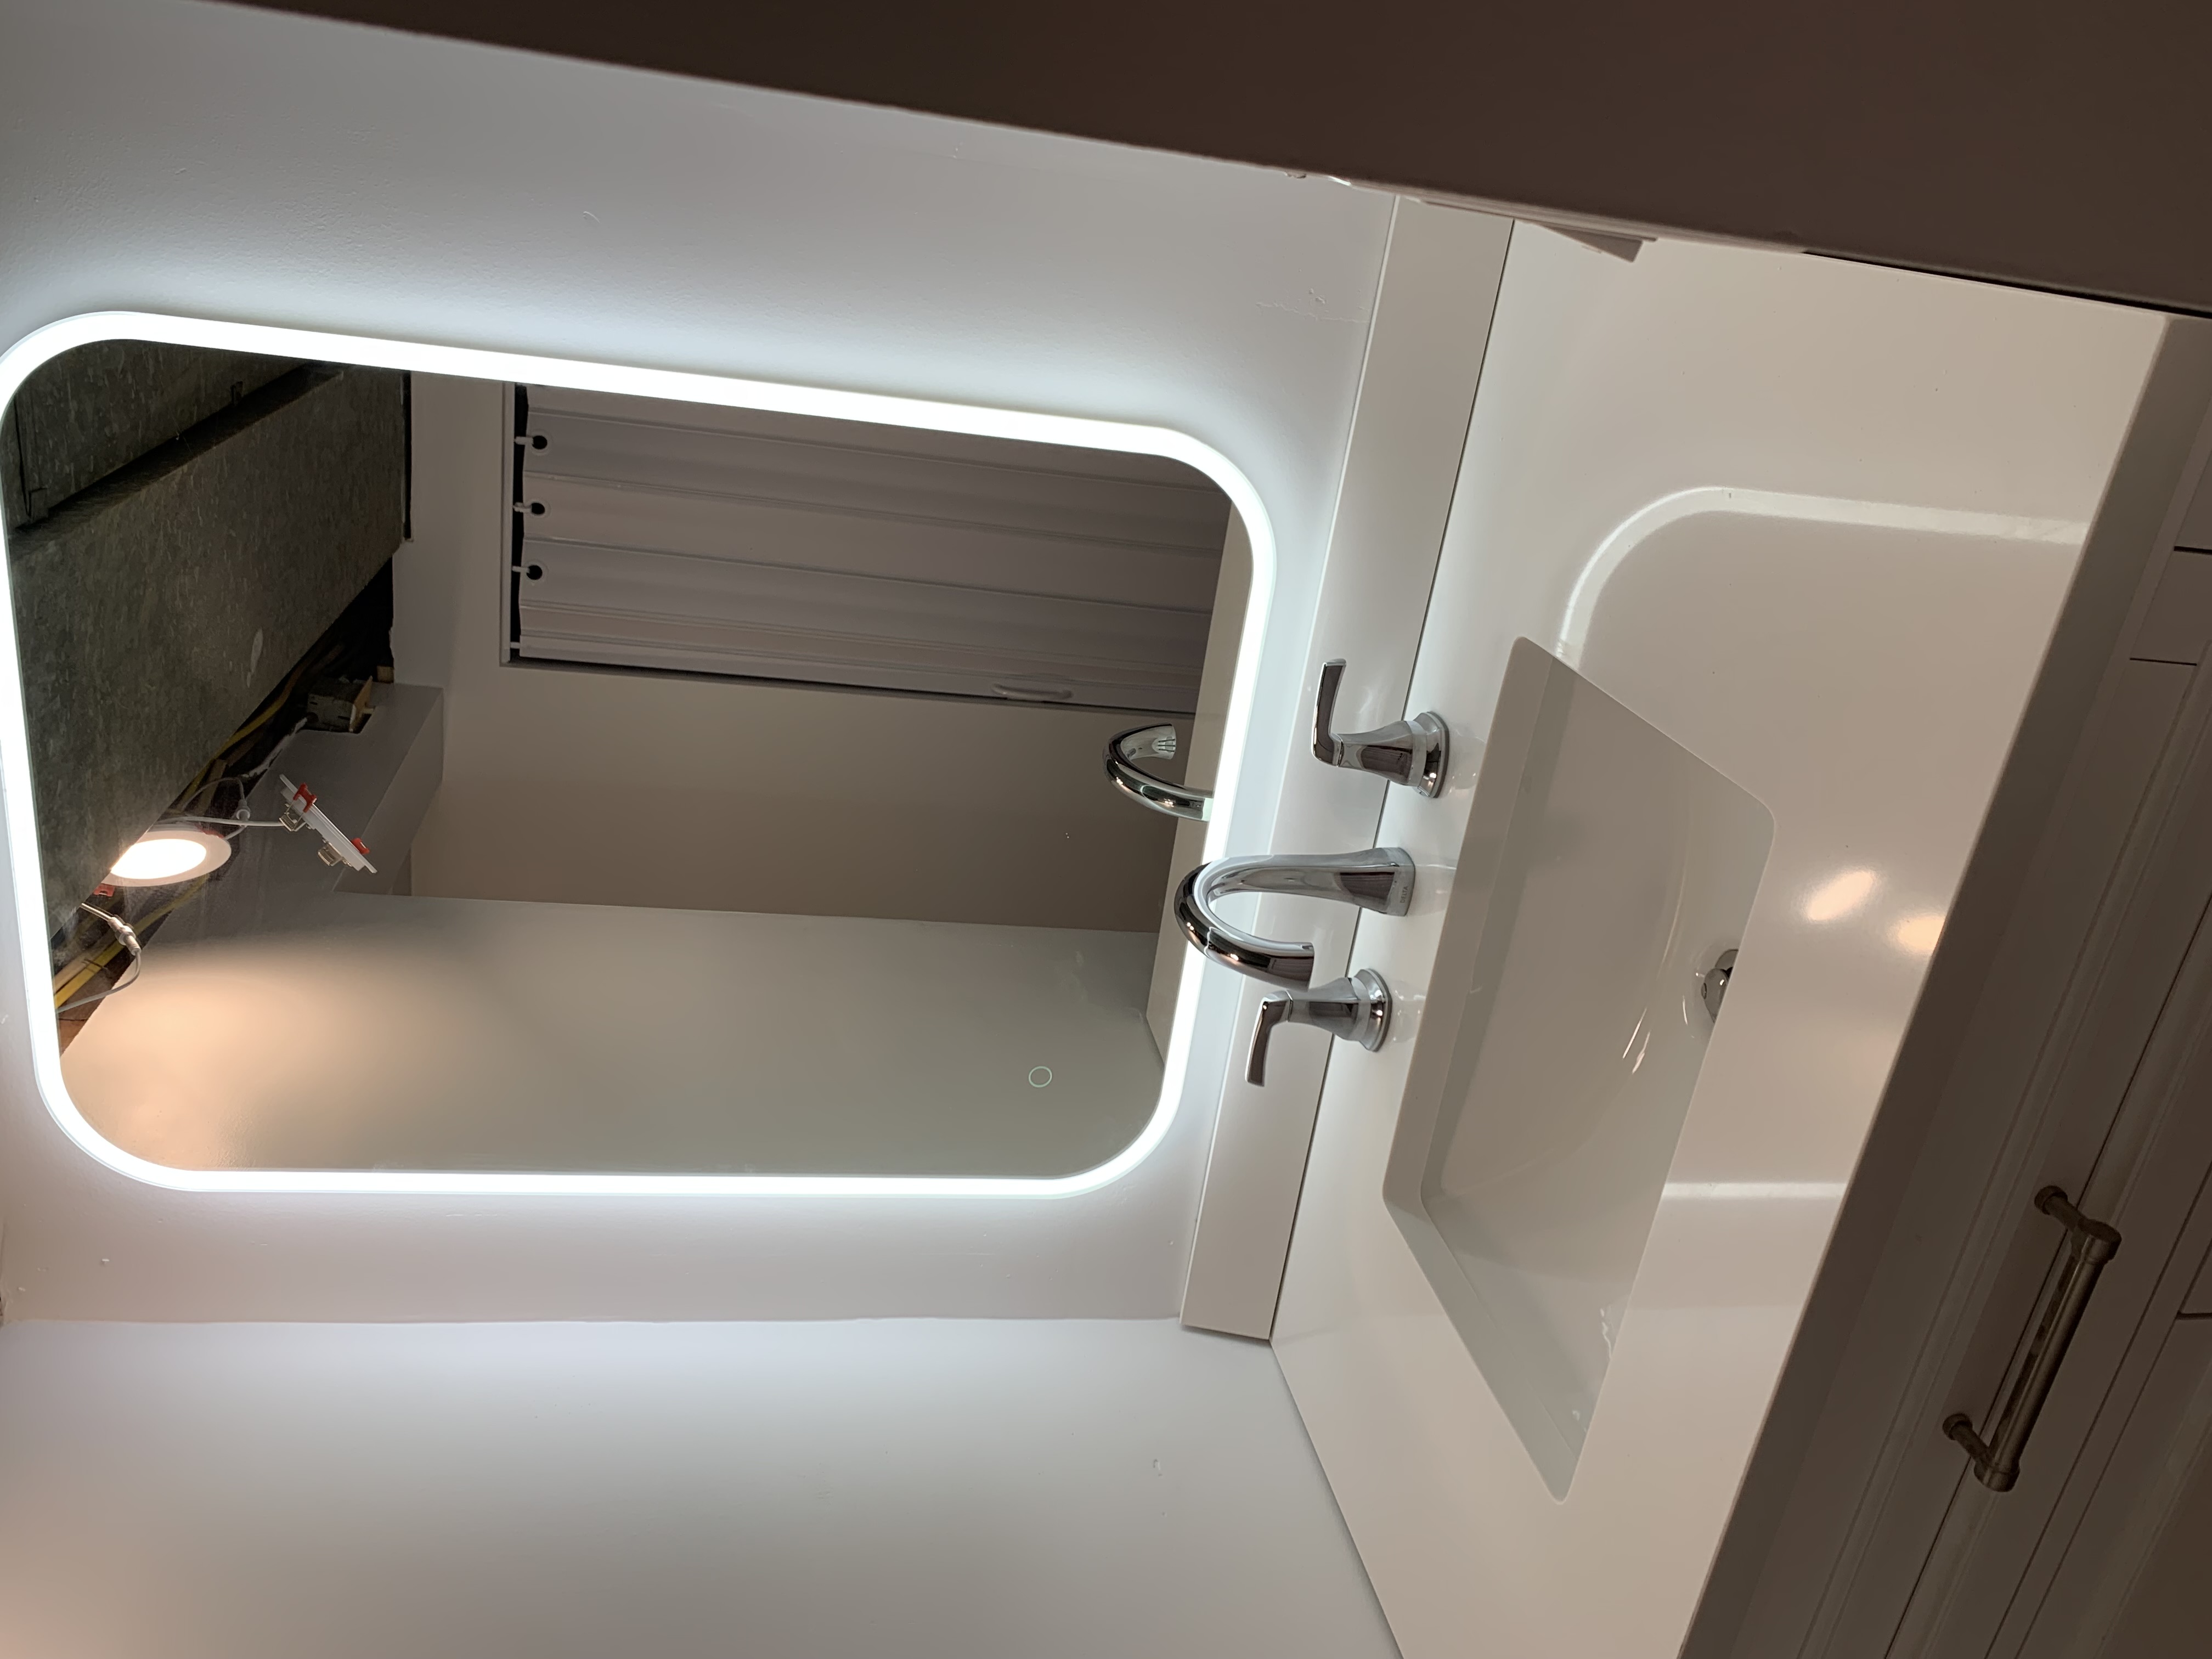
Installing an LED bathroom mirror is a great way to provide a unique and functional feature to your bathroom. In addition to providing exceptional lighting, LED mirrors look great and add a “high end” look to any bathroom – justifying the slightly higher cost.
To install an LED bathroom mirror, start by measuring the installation height and determining the best mounting location for the mirror. Next, screw the the LED mirror hanging bracket to the wall, ensuring that it is secured with drywall anchors or into the wall studs. Connect the LED mirror wiring to the incoming power supply with wire nuts and electrical tape. Finally, hang the LED mirror on the mounting bracket and test that the LED light is functioning properly.
This article will show you how to complete a LED Bathroom Mirror installation, step by step.
Suggested Tools and Materials

To successfully complete a LED bathroom mirror installation, you will need the following tools and materials:
LED bathroom Mirror: https://amzn.to/3CgVQLZ
Drill: https://amzn.to/3JICKkk
Tape Measure: https://amzn.to/3HaTWgE
Level: https://amzn.to/3HowUDn
Wire Strippers: https://amzn.to/3p4nK8I
Voltage Tester: https://amzn.to/3BF9LLD
Electrical Tape: https://amzn.to/3hE8HhF
Wire Nuts: https://amzn.to/3vW3mef
With the LED bathroom mirror and all necessary tools and materials on hand, you can now begin the installation process.
1. Prepare your LED Mirror Electrical Wiring
Although most LED bathroom mirrors will be powered by a nearby outlet (i.e. plugged in), some may require a hardwired connection. If your LED bathroom mirror comes with an outlet connection, simply ensure that you have a nearby GFCI outlet to plug your LED bathroom mirror into. If your LED bathroom mirror requires a hardwired connection, you will need to do a bit more preparation work.
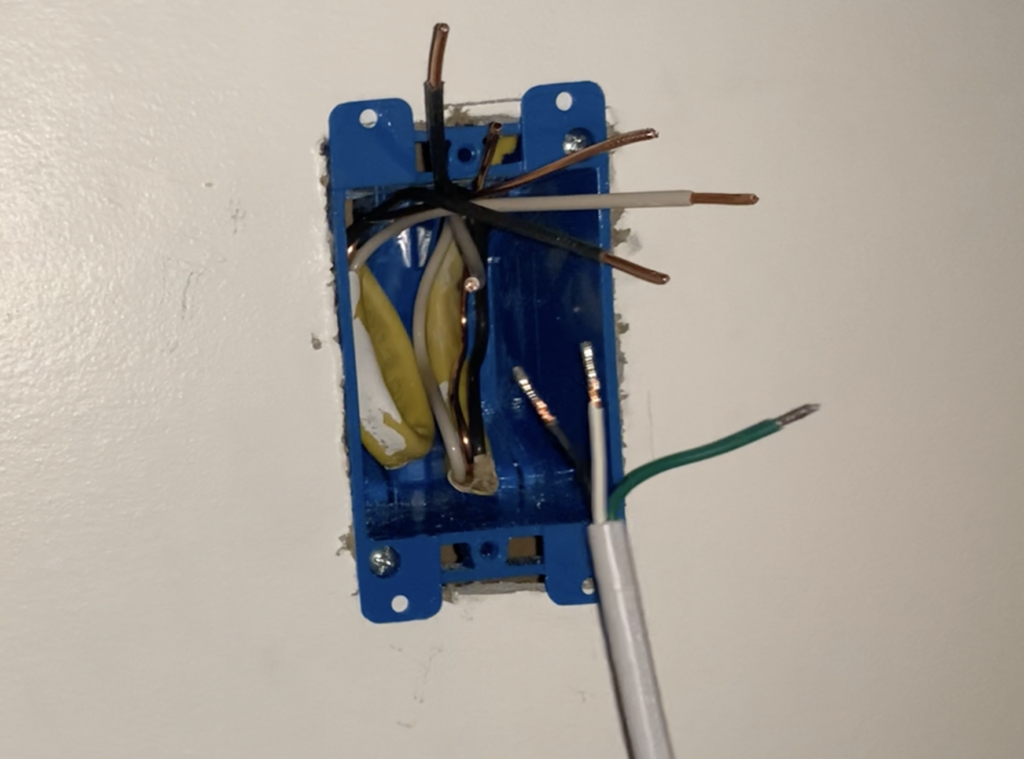
In order to run a hardwired electrical connection to your LED mirror, start by determining the approximate location of where your LED bathroom mirror will be installed. After determining the preliminary location for the LED mirror, install an electrical box in a location that will be completely covered by the mirror once it is hung in place.
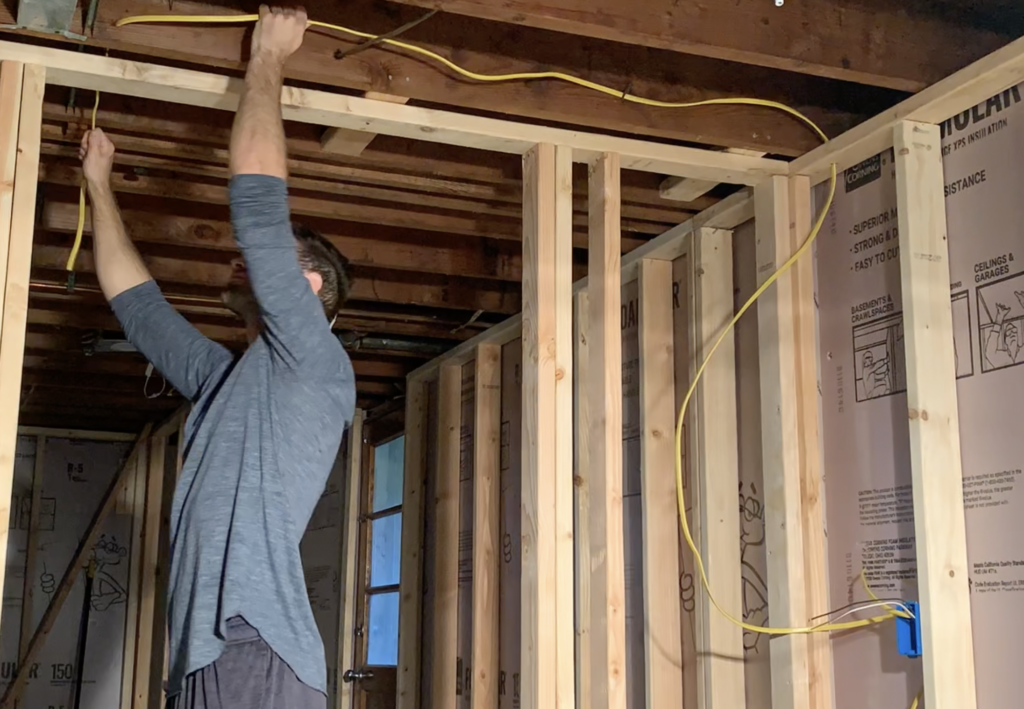
After installing an electrical box, you will need to run 14/2 or 12/2 (depending on your application) electrical wire from a power source to the LED bathroom mirror.
WARNING: Before performing any electrical work, ensure the the circuit breaker has been shut off. All electrical work should be performed by a licensed electrician.
Typically, the LED bathroom mirror power supply will be run from a nearby GFCI outlet. Spend some time thinking about how you will power your new LED Bathroom Mirror and consult with a qualified electrician as necessary.
2. Measure and Establish your LED Bathroom Mirror Mounting Location
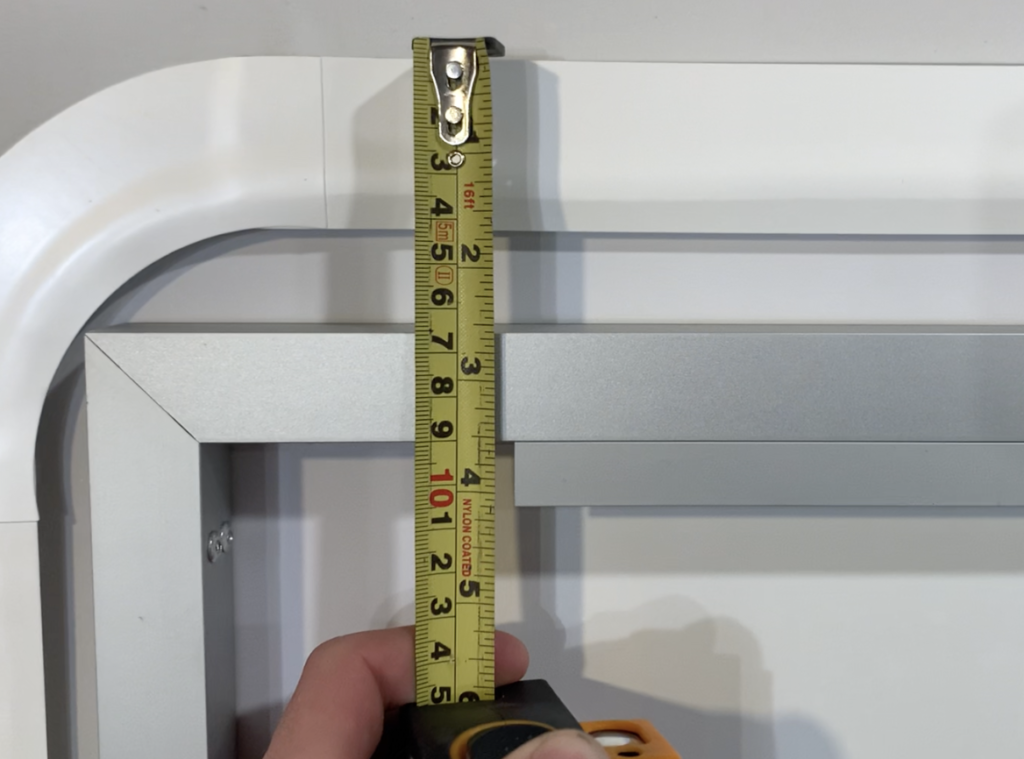
After coordinating your electrical wiring, you can determine the final mounting location of your LED bathroom Mirror. First, determine where you want the top of the LED bathroom mirror to be situated. Then, determine the offset between the top of the mirror and the mounting bracket location. In my case, the LED bathroom mirror mounting bracket was approximately 3.5″ lower than the top of the mirror. Therefore, I knew that I would need to install my LED bathroom mirror mounting bracket 3.5″ lower than my desired LED mirror height.
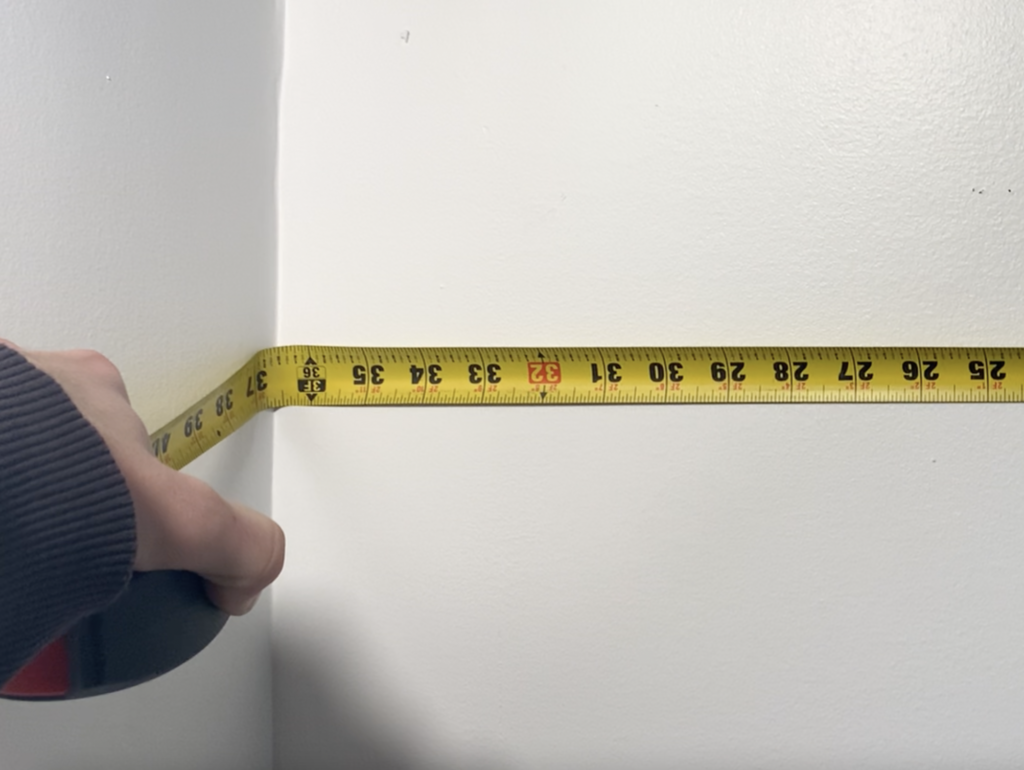
After determining your mounting bracket height, perform the necessary measurements to center the LED bathroom mirror on the wall. To do this, start by measuring the wall-to-wall distance for the wall where you plan on installing your LED mirror. In my case, the wall-to-wall distance was 36-3/4″.
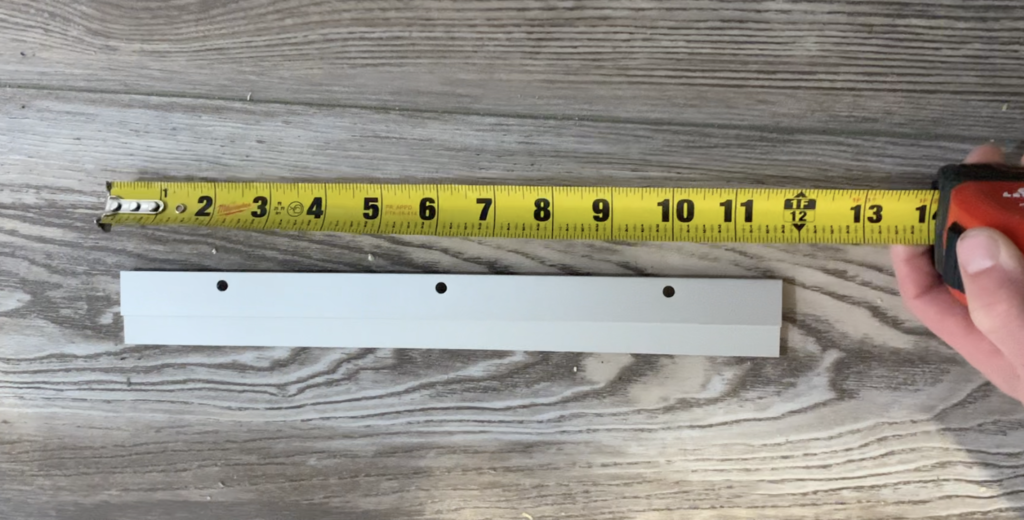
Next, measure the length of your LED bathroom mirror mounting bracket. In my case, the LED bathroom mounting bracket length was 11-3/4″.
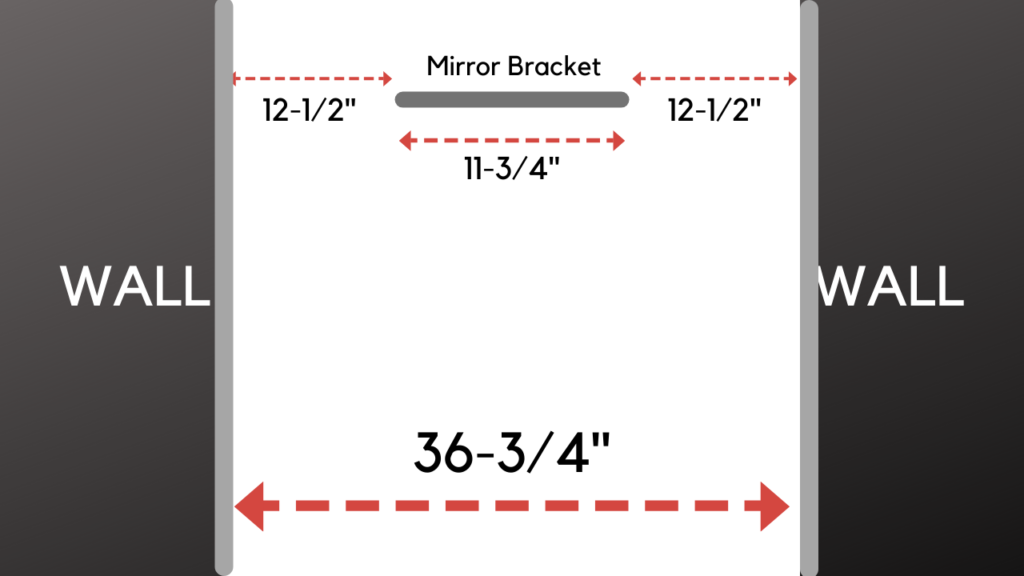
Finally, to determine the centered location for the LED mirror mounting bracket, subtract the bracket length from the overall wall-to-wall length and then divide by 2. This will give you the distance from the wall to the end of the mounting bracket. This dimension will be the same on both ends of the LED mirror mounting bracket. In my case, the calculation looked like this:
Distance from wall to the end of bracket = (36-3/4″ – 11-3/4″) / 2 = 12-1/2″.
Although your specific LED bathroom mirror configuration may be slightly different than what is presented above, use these steps as a guide to determine your LED bathroom mirror mounting height and position between walls.
3. Attach the LED Mirror Mounting Bracket to the Wall
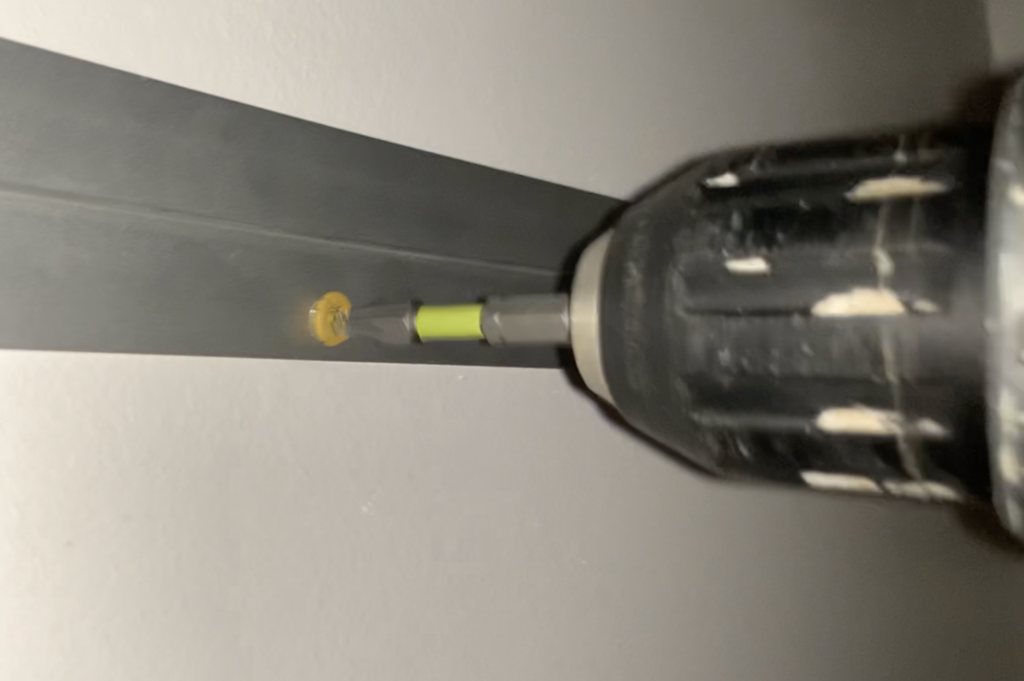
After establishing your LED bathroom mirror mounting bracket location, attach it to the wall. To do this, determine if you are able to attach the mounting bracket directly to your wall studs by using a stud finder. If so, simply screw your mounting bracket directly into the wall studs.
If you are unable to screw the mounting bracket directly to wall studs, you will need to use drywall anchors to ensure that you have a secure mounting bracket. Most LED bathroom mirror will include drywall anchors and the associated mounting hardware.
4. Make LED Bathroom Mirror Electrical Connections
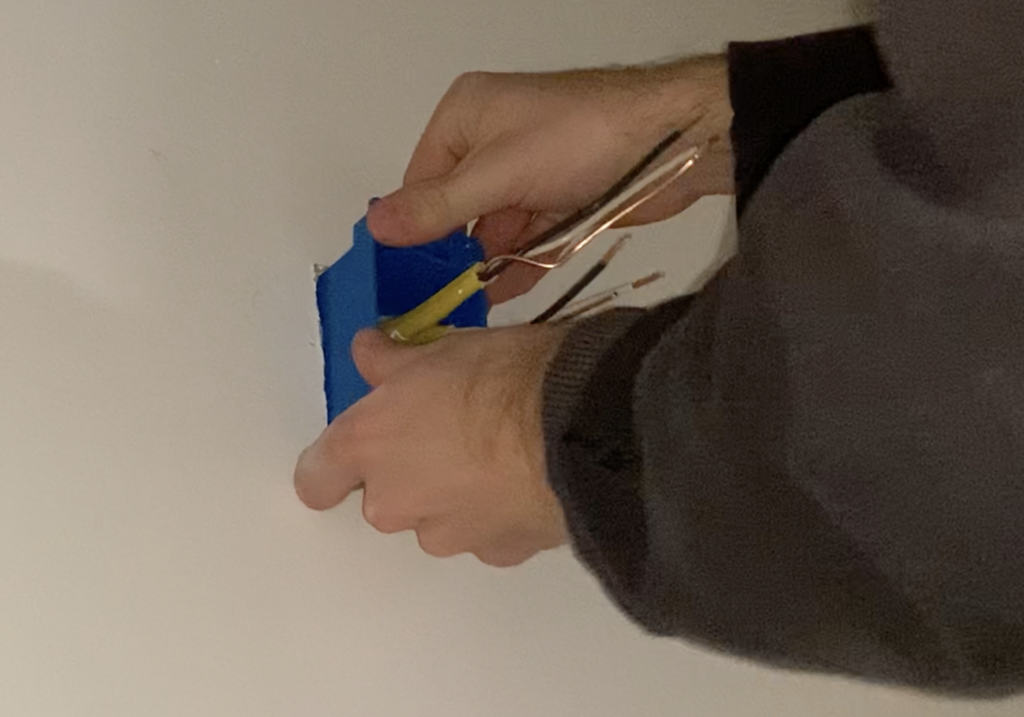
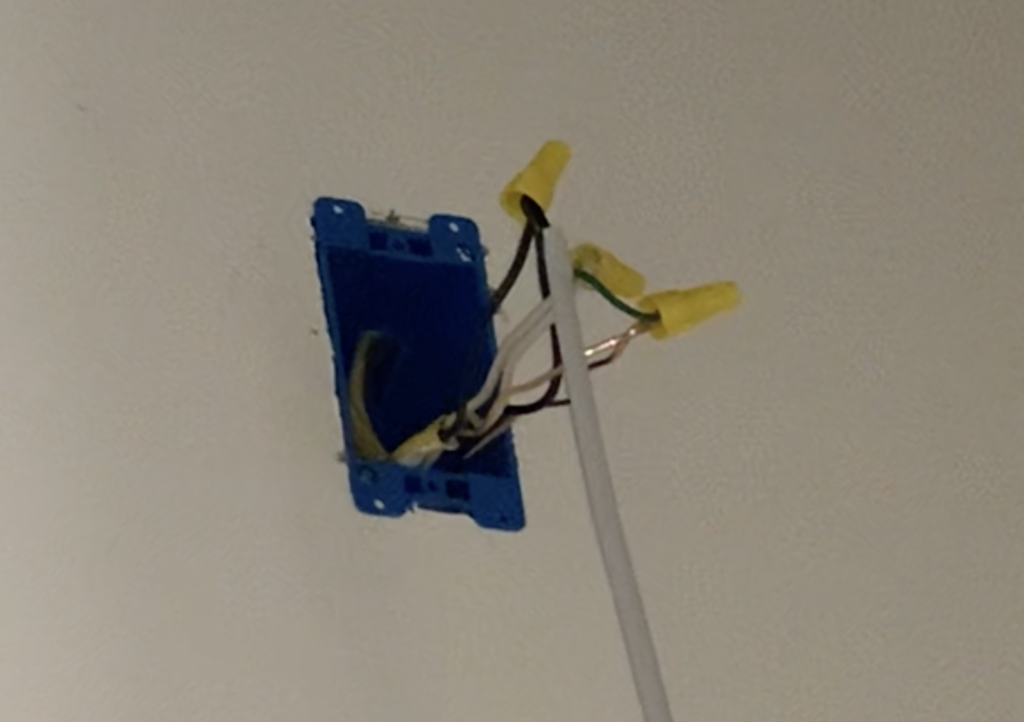
After attaching your LED bathroom mirror mounting bracket to the wall, make your electrical connections. To do this, a licensed electrician will need to connect the LED bathroom mirror wires to the incoming powering supply wire. Connect the hot, neutral, and ground wires together using wire nuts and electrical tape.
After successfully connecting all of the wires together with wire nuts and electrical tape, tuck all of the wires into the electrical box so that they are not in the way when you go to hang up the LED bathroom mirror.
5. Hang the LED Bathroom Mirror on the Mounting Bracket
Lift the LED bathroom mirror into place and slide it down the wall until the mirror catches on the mounting bracket. See below for how the LED bathroom mirror should “mate” with the Mounting bracket.
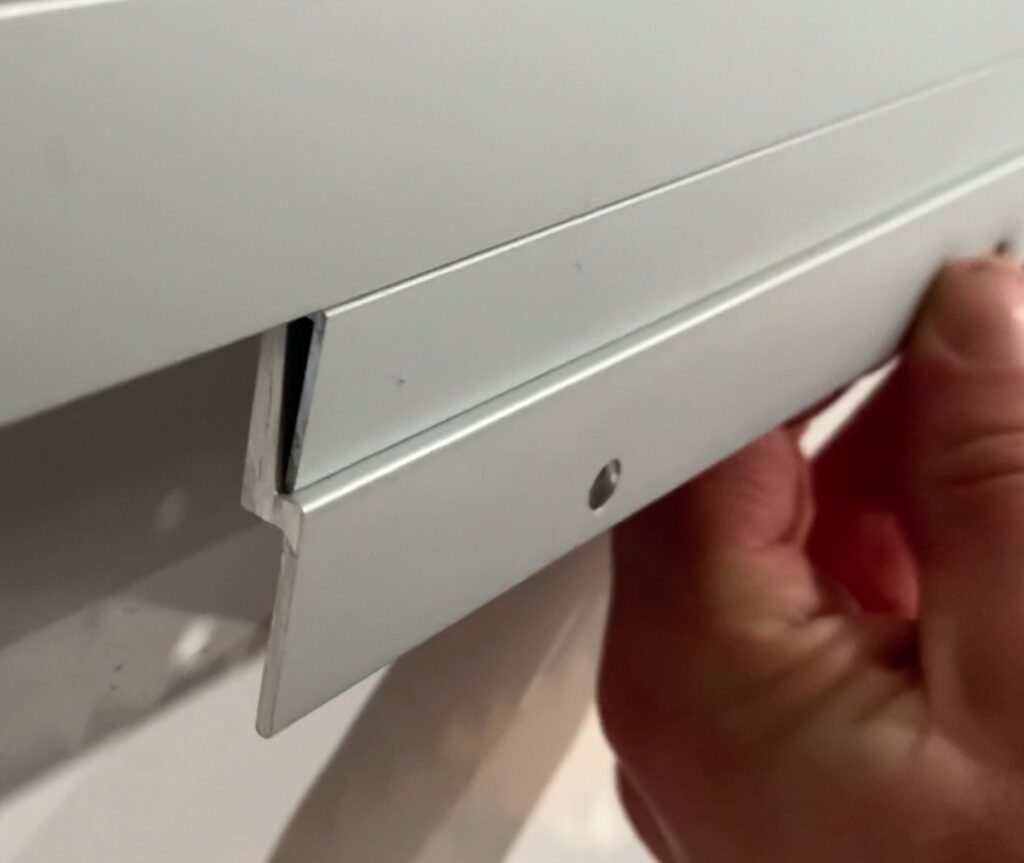
If done correctly, the LED bathroom mirror will hang securely on the wall. Confirm that the mirror is installed evenly by using a level.
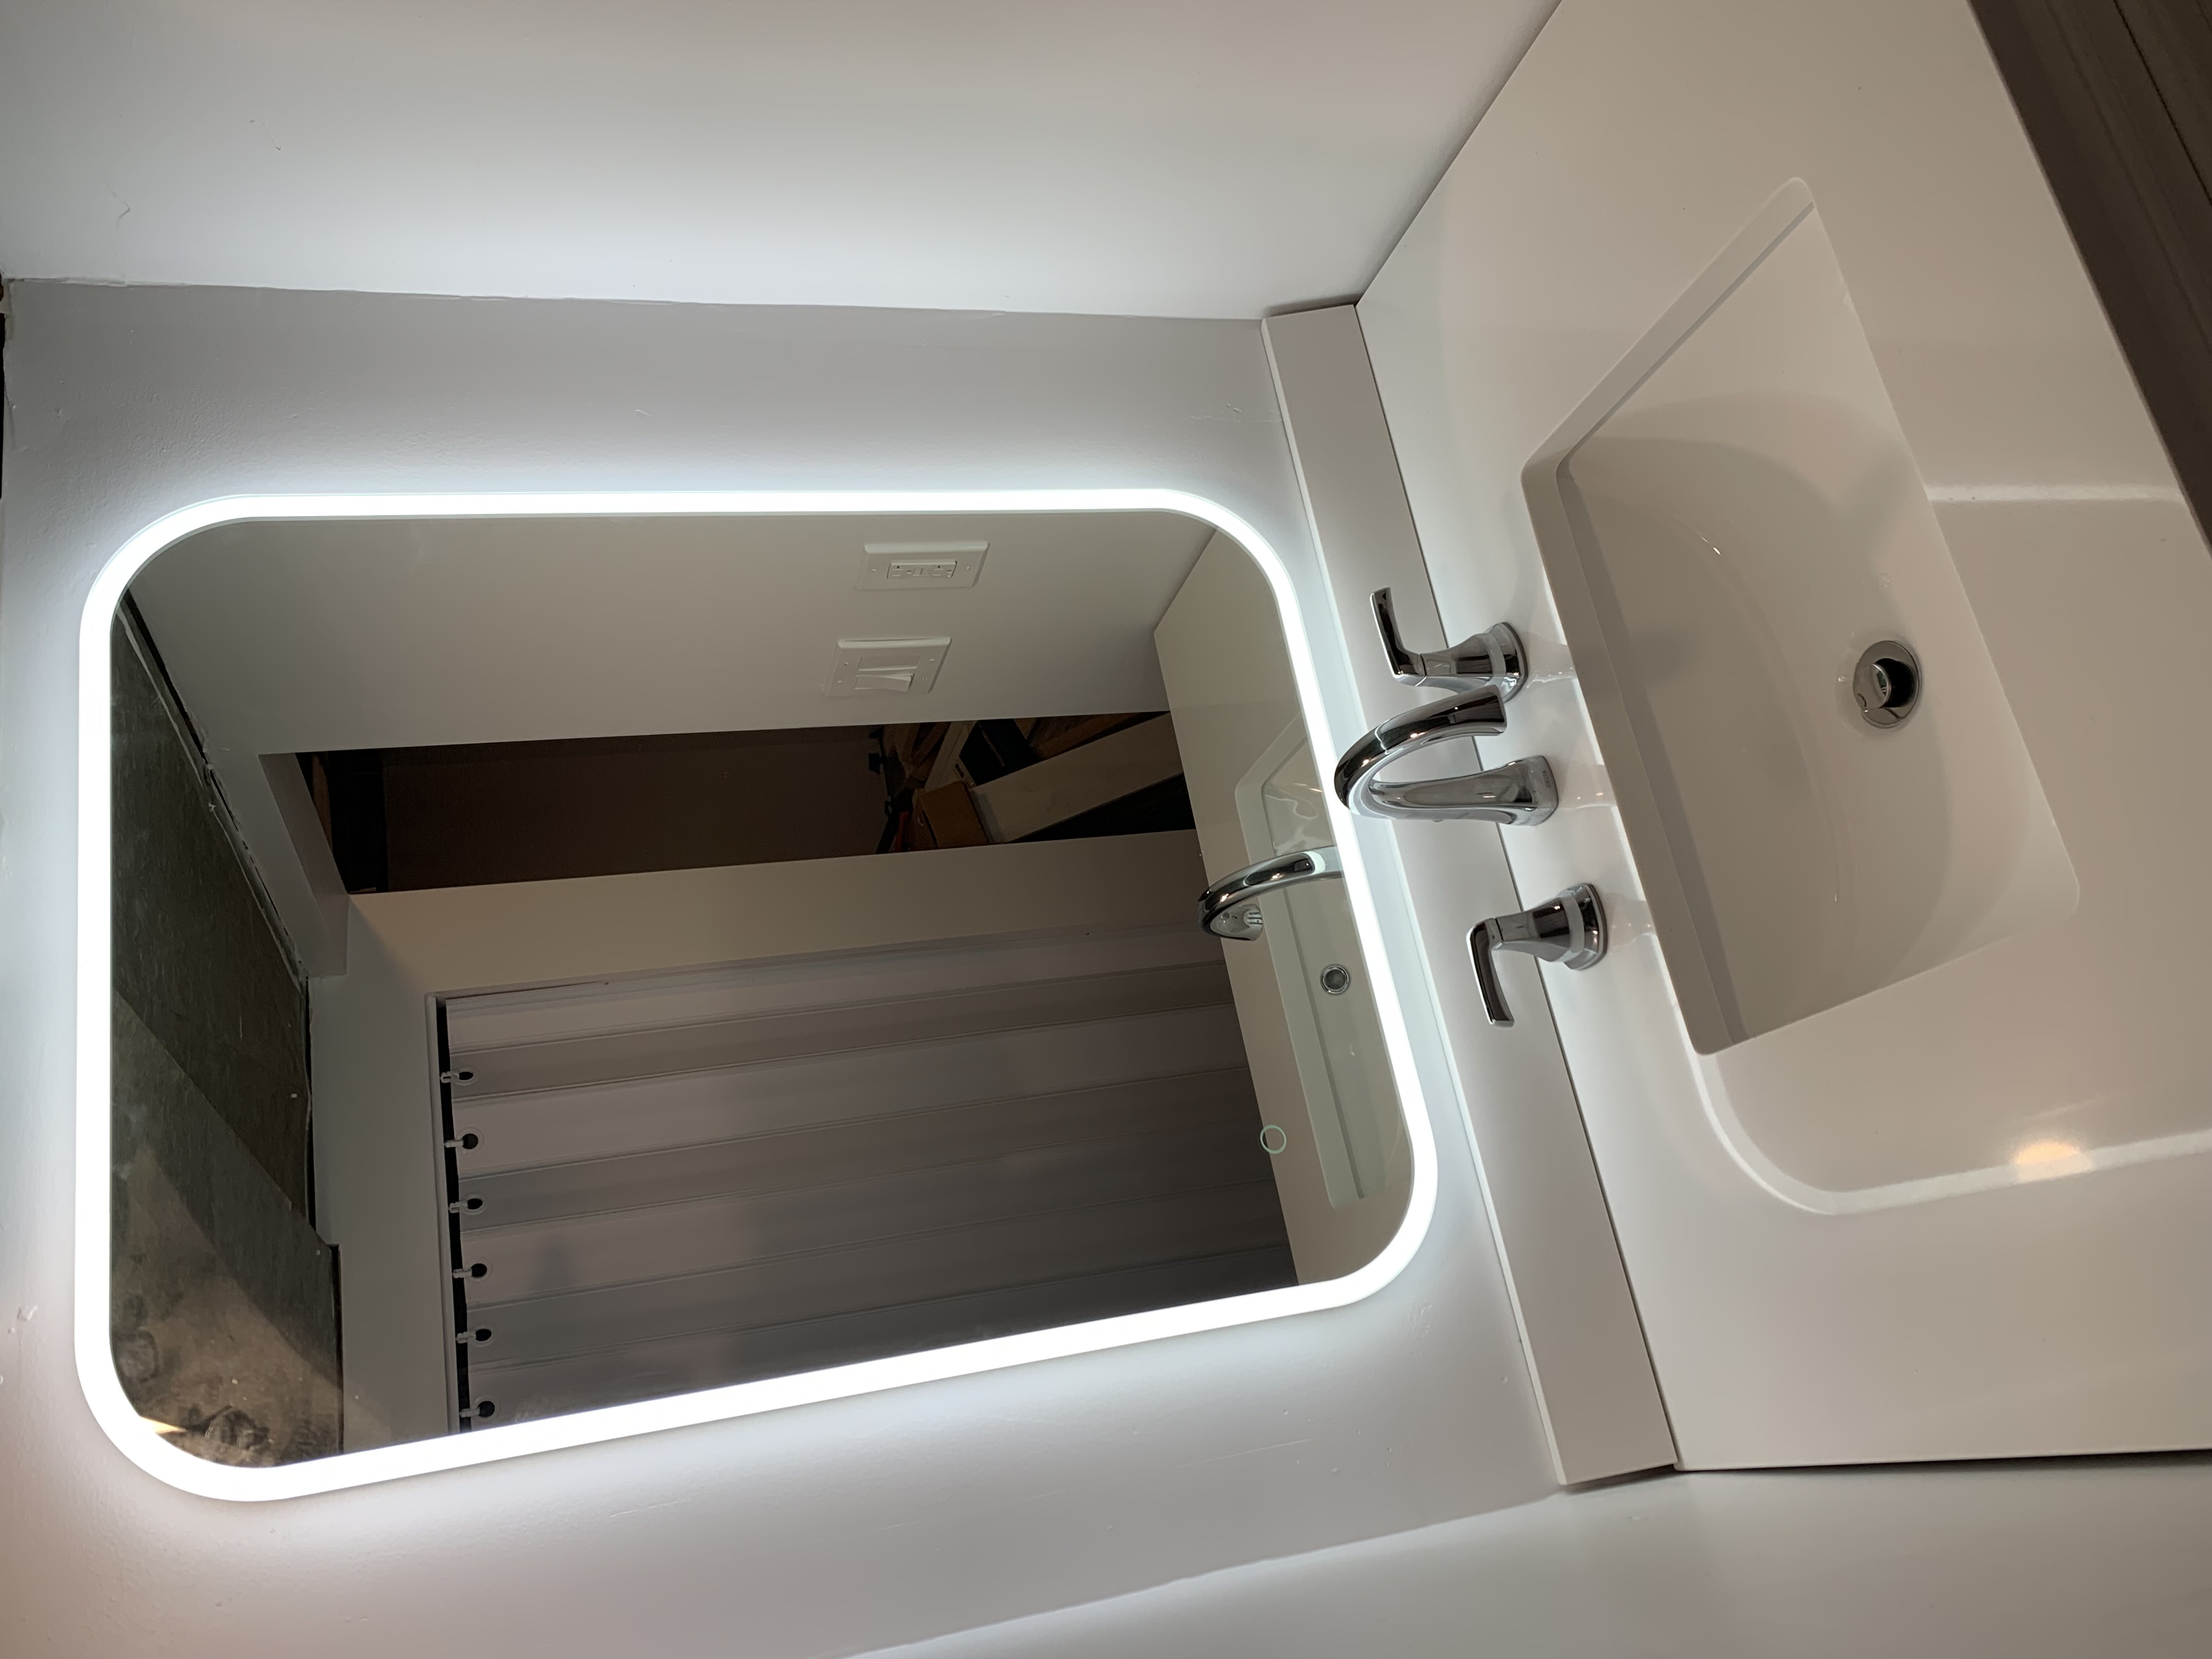
6. Test the LED Bathroom Mirror light to ensure a successful Installation
The last step in the LED bathroom mirror installation project is to turn back on the circuit breaker and test that the LED light is functioning properly. If so, you LED bathroom mirror installation is complete. If not, turn off the circuit breaker and ensure that all of the electrical connections are sound.
Thanks so much for checking out ATImprovements! If you learned something from this project, you might also like these other DIY Projects:
- How to Build a Fence: How to Build a Fence (DIY Guide) – AT Improvements
- How to Build a Fence Gate: How to Build a Fence Gate (7 Steps with Pictures & Video) – AT Improvements
- How to Install a DIY deck Wire Railing: DIY Cable Railing – How to Install Cable Railing Step-by-Step – (atimprovements.com)
- How to Build a Concrete Paver Patio: DIY PAVER PATIO – Easy DIY Paver Patio Ideas – (atimprovements.com)
Thanks!
DISCLAIMER: This is a reference guide only. Links included in this article might be affiliate links. If you purchase a product or service with the links that I provide, I may receive a small commission. There is no additional charge to you! Thank you for supporting ATimprovements so I can continue to provide you with free content each week!
Warning: Electrical work is dangerous and should only be performed by a licensed electrician.