
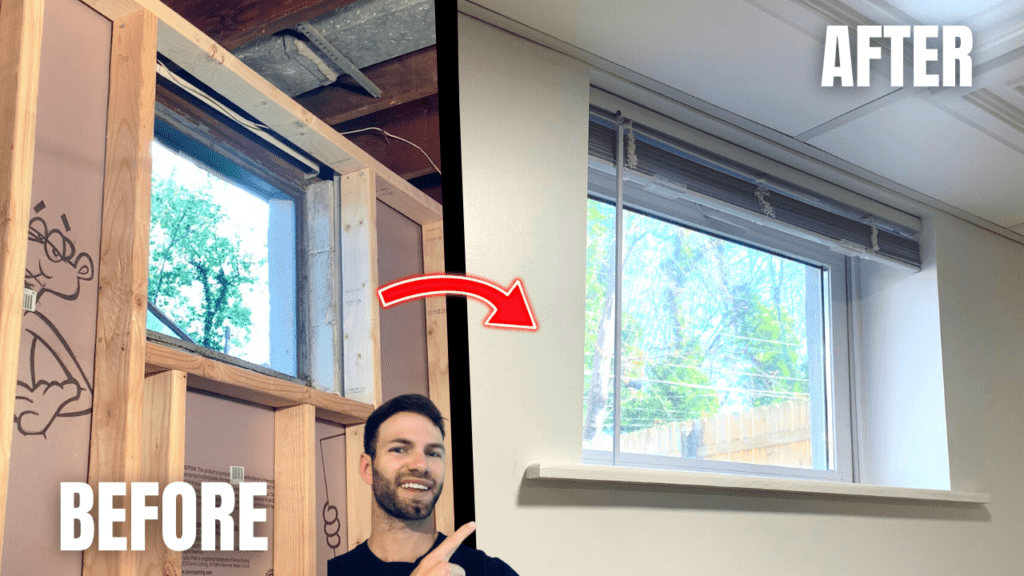
When finishing a basement, you will likely need to install drywall and trim around the basement windows. However, the drywall return method of finishing basement windows requires no trim. Although there are many ways to successfully “trim out” a basement window, using drywall is both a simple and inexpensive method for giving your basement windows a finished look. This article will also show you how to cut a window sill out of common lumber.
To install drywall a drywall return around a basement window, start by cutting drywall for the top and sides of the window. Cut they drywall such that it contacts the window’s frame on one side and so that it is flush with the wall drywall on the other side. Then, install corner bead and finish the drywall with joint compound. Caulk any joints between the drywall and window.
To cut your own window sill for a basement window, select a piece of lumber that is approximately 1.5″ wider than the depth of the basement window cavity. You may need to “rip” the lumber to a suitable width using a table or circular saw. Cut the off the sill so that it is 3″ longer than the window cavity on both sides. Next, use a router to give the window sill a rounded edge and use a jigsaw to cut the penetrations on both sides of the window sill – leaving a 3″ overhang on each side. Finally, caulk any gaps and paint the window sill (if desired)
Although the process of building your own drywall retune and window sill for a basement window is relatively straightforward, it helpful to see video of the process. As a result, I have linked my “How to Install Drywall Return and Window Sill on a Basement Window” YouTube video at the end of this article.
Prepare the Window for Drywall Return
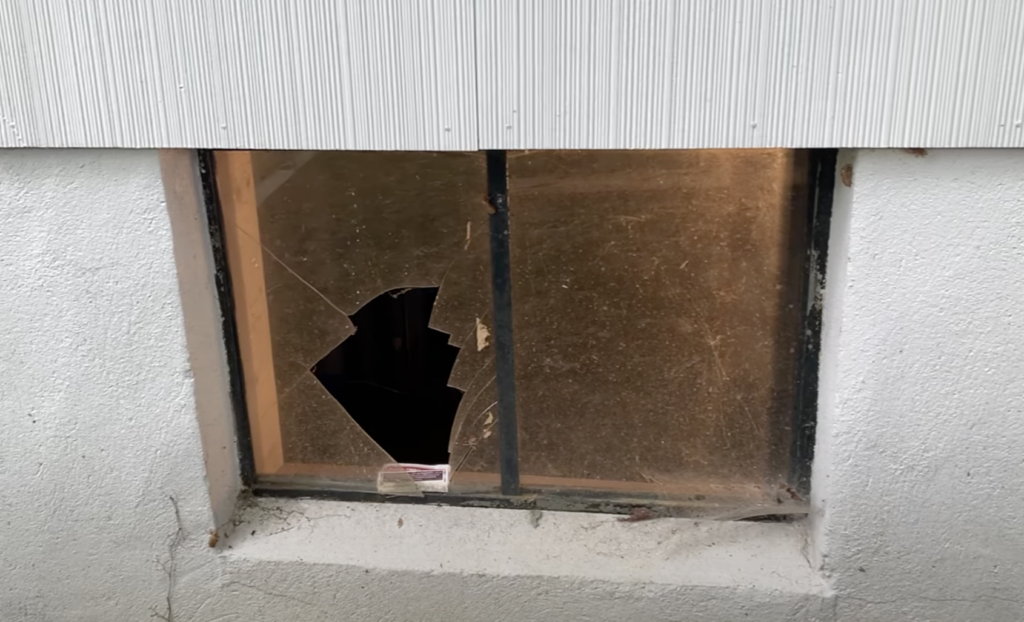
Before you install a drywall return around a basement window, I recommend that you inspect the existing window to make sure that it is relatively new and functional. If you have an old, metal/aluminum basement window, you may want to replace it with a new vinyl window before proceeding.
For more information on replacing an old basement window, check out my “How to Replace a Basement Window” Youtube Video below or my Blog Article linked here.
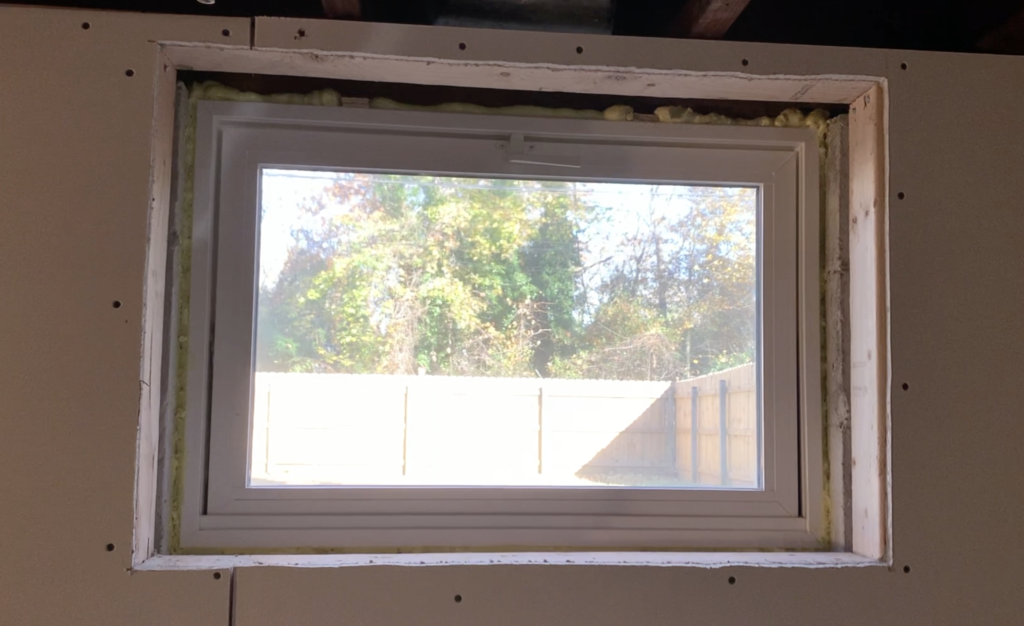
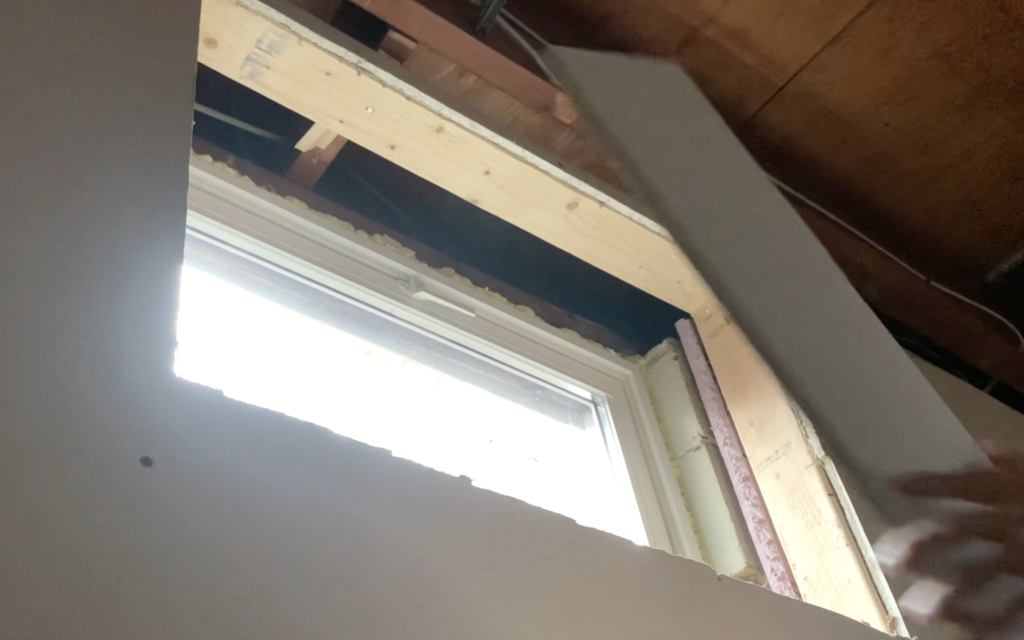
Additionally, the basement window framing needs to have been framed to facilitate the installation of of a No-trim drywall return. What this means is that the framing needs to be flush with the window cavity. See below:
For more information on Framing Basement walls, you can read my blog article linked here or watch my “How to frame basement Walls” Youtube Video linked here.
After ensuring that your window is new and after making any corrections to the basement wall framing (if required), you can begin to construct the basement window drywall return.
Cut the Drywall for the Basement Window Return to Length
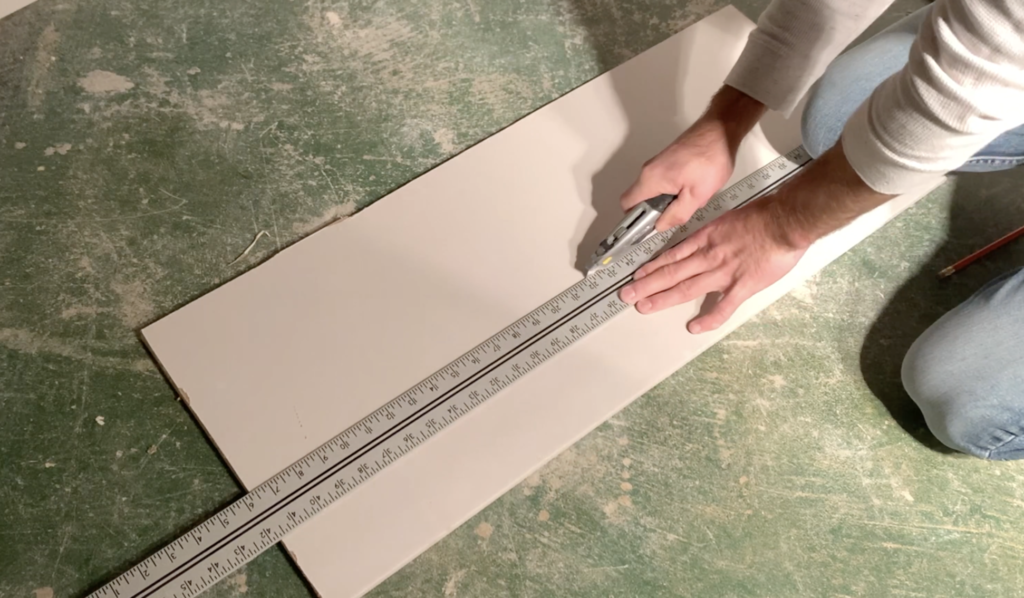
At this stage of the basement window drywall return construction process, use a utility knife and a straight edge to cut your drywall to appropriate size.
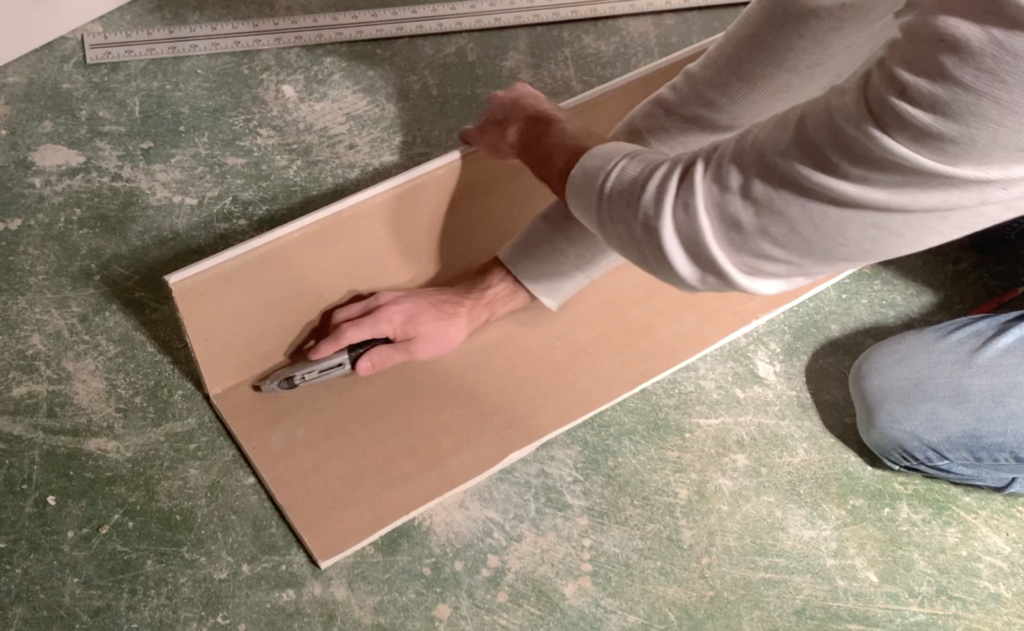
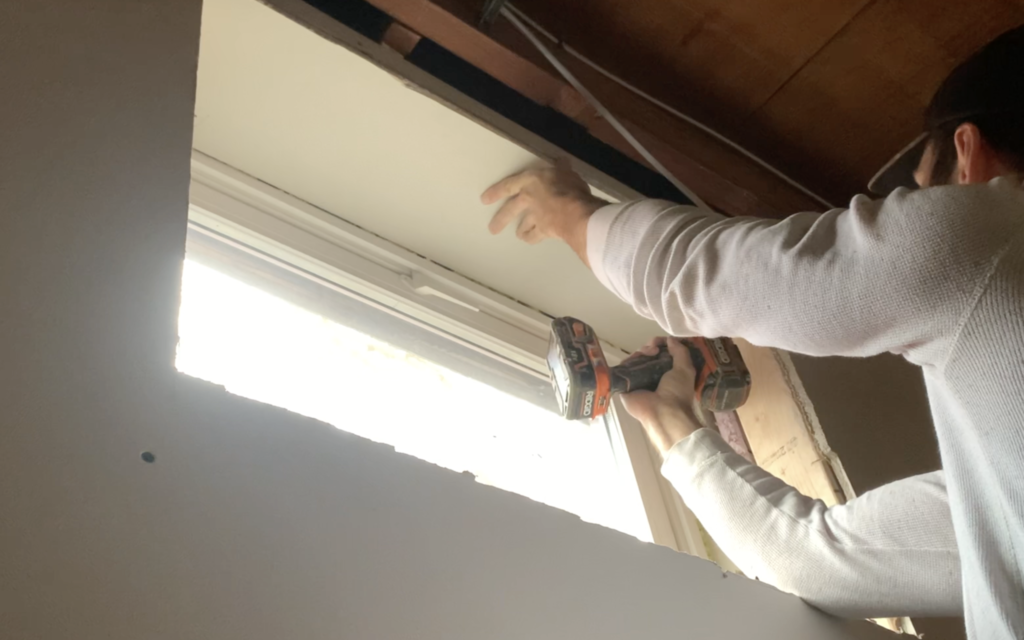
Typically, I recommend that you install the top piece of drywall first – cutting it so that the back of the drywall contacts the window’s frame and the front of the drywall is flush with the basement wall.
Make any adjustments as needed and then fasten the drywall to the basement wall framing above with a few drywall screws.
After installing the top piece of drywall, I recommend that you install the side pieces of drywall. To do this, cut the side pieces of drywall to the correct height (don’t worry about length at this point) and position them in place on the sides of the widow cavity.
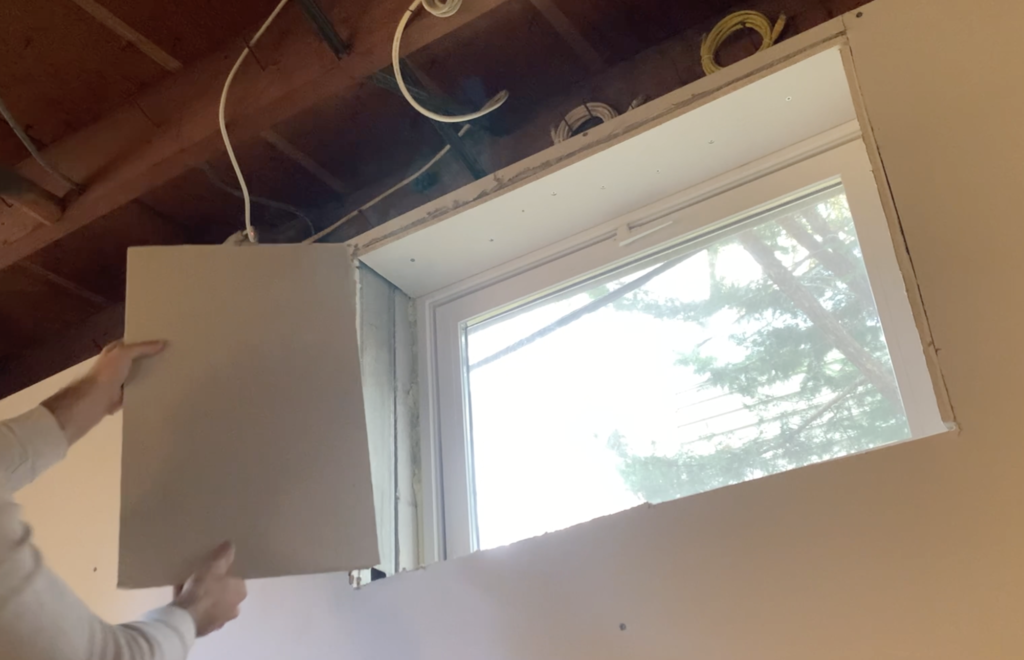
Ensure that the back of the drywall is contacting the window’s frame and then use a utility knife to cut the drywall so that it is flush with the basement wall. Refer to the image below.
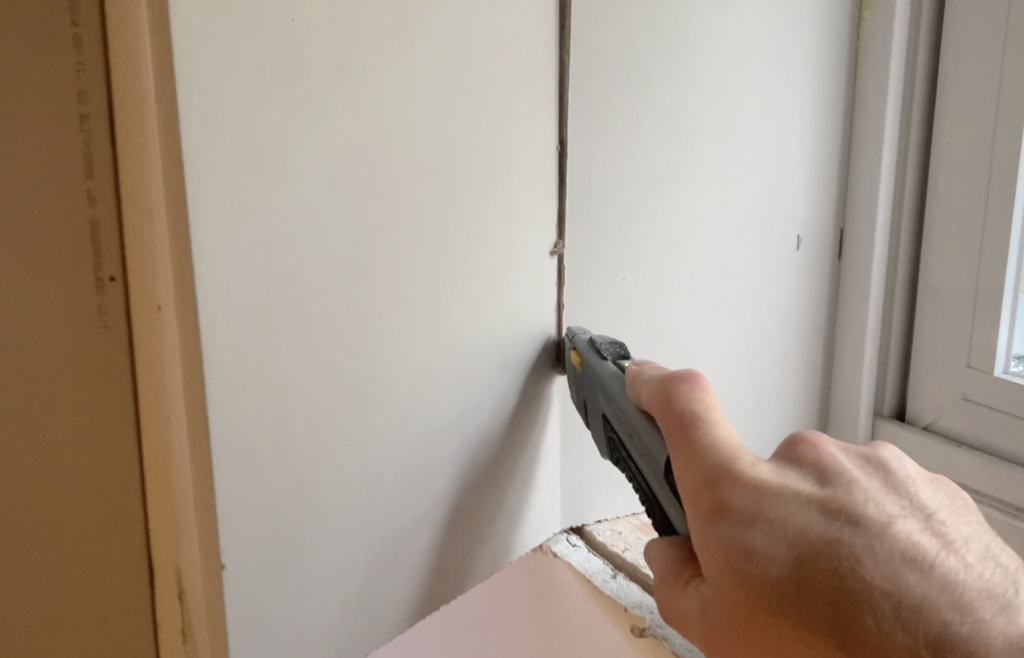
After cutting both sides of the window drywall to the correct length, secure the drywall to the basement framing with drywall screws.
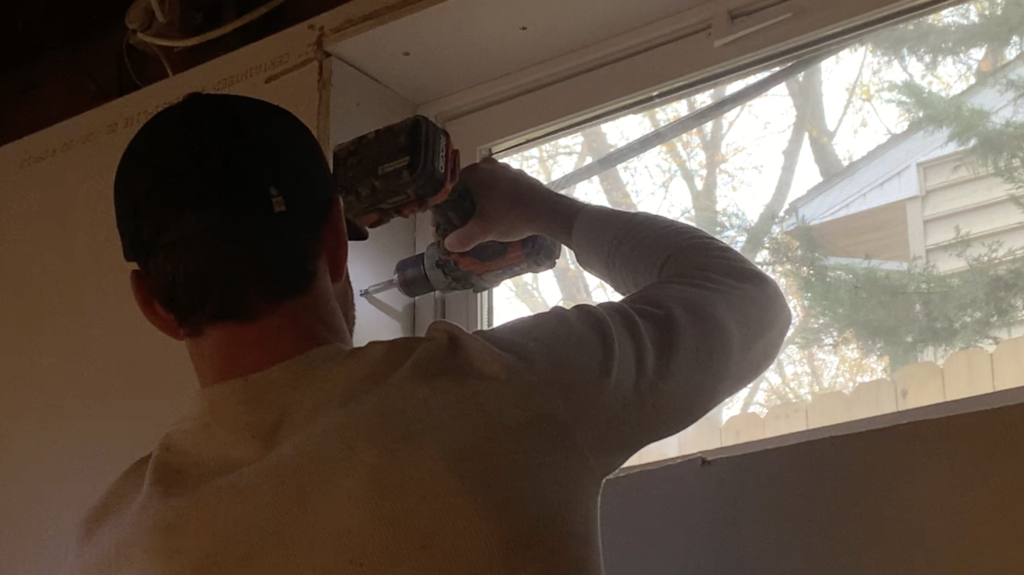
PRO TIP: If you want to secure the drywall to the concrete window cavity as well, use a carbide tipped masonry bit to pre-drill holes for the screws. Then use Tapcon screws to secure the drywall to the concrete or cinderblock basement window wall cavity.
Apply Drywall Corner Bead and Joint Compound to the Basement Window Corners
After cutting and installing the drywall around the top and sides of the basement window, it’s time to finish the drywall outside corners – just like you would for any other drywall project.
First, cut your corner bead to the appropriate length using tin snips. Next, apply drywall joint compound to the outside corners and push the corner bead into place. Use a drywall finishing knife to finish the corners of the window – similar to how you would finish outside corners of any drywall project. For more information on how to finish drywall in a basement, check out my “Basement Drywall Finishing Tips and Tricks” YouTube video linked here.
After finishing the outside corners, allow the drywall compound to dry and sand down any imperfections.
Cut the Window Sill to Size
After installing drywall on the tops and sides of the window cavity and finishing the outside corners with corner bead and joint compound, it’s time to measure and cut the window sill to length.
First, measure the distance from the window frame to the face of the basement wall.
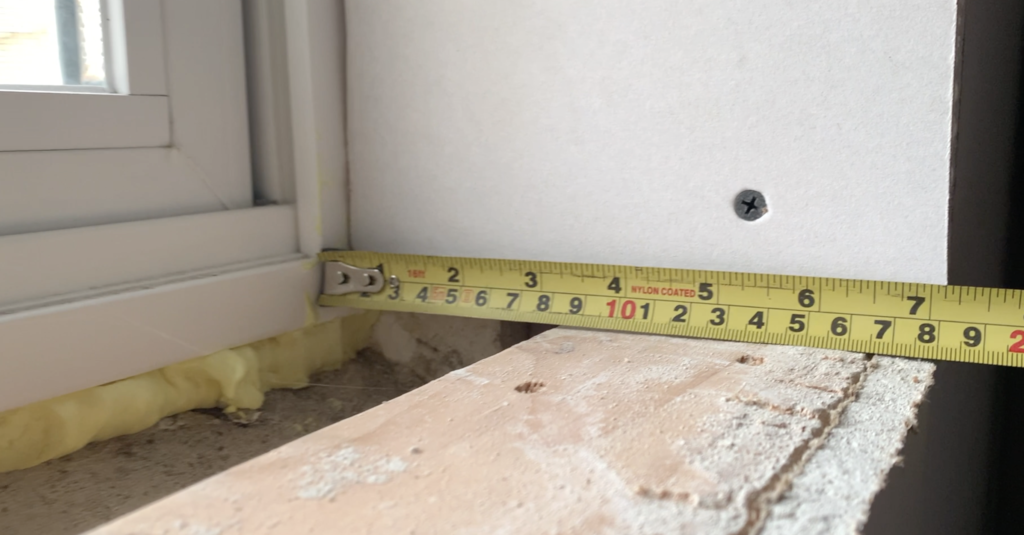
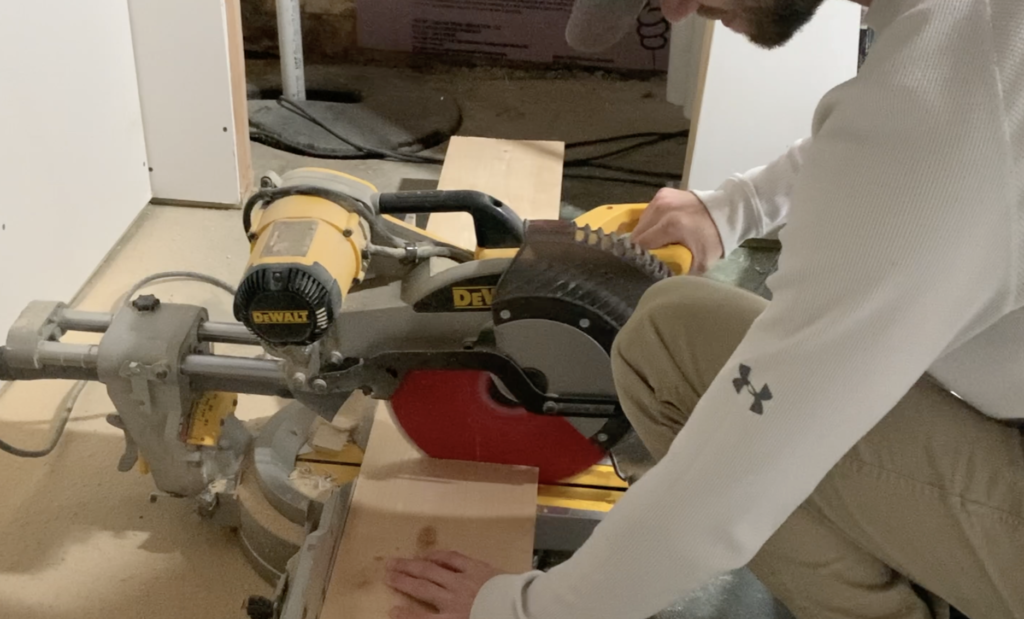
After getting that measurement, add approx. 1″ for the window sill overhang that will be on each side of the window. Select a piece of common lumber or hardwood lumber (depending on your budget) that is 1″ thick and as wide (or wider) than the measurement you made from the window frame to the face of the basement wall (+1″). Use a table saw or circular saw to “rip” the lumber (if needed) to the appropriate dimension.
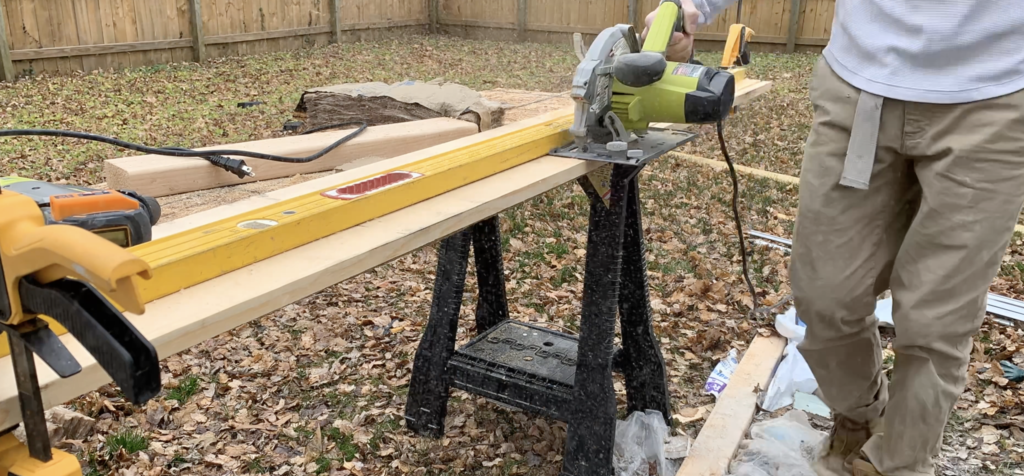
After ripping the window sill board to the correct width, measure the length of the window cavity.
I recommend that you add approximately 6″ to this length – 3″ for the overhang on one side of the window and 3″ for the overhang on the other side.
Next cut the window sill to the correct length.
Use a router to give the window sill a rounded edge
After cutting the window sill to the rough dimensions needed, use a router (I recommend a 3/4″ round over bit) to give the edges of the window sill a rounded edge.
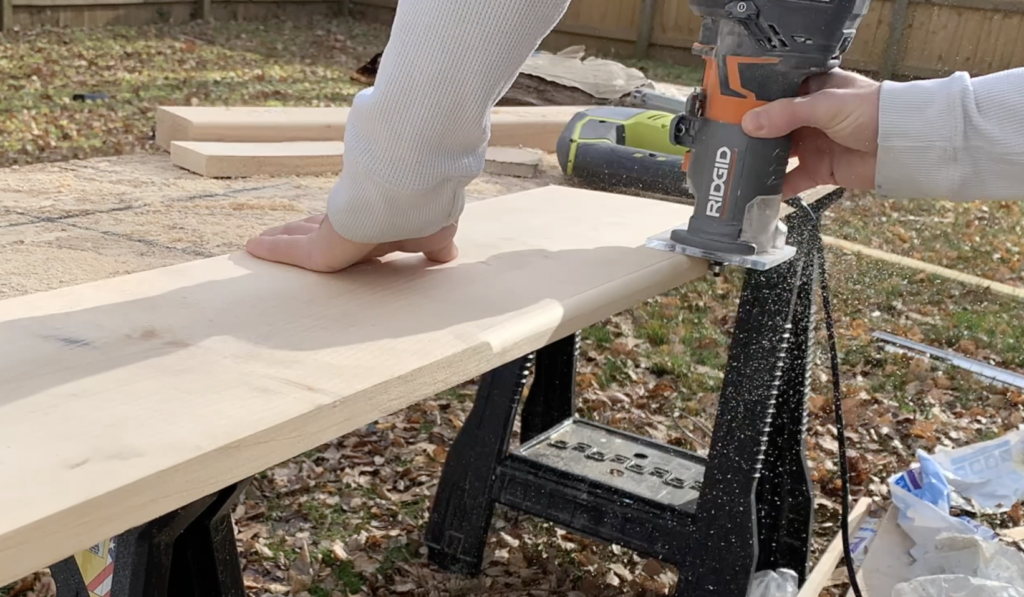
Although this step is not 100% necessary, I believe that it will help to give the window sill more of a professional, finished look
Cut the Penetration of the Window Sill Overhang
Finally, cut out the penetration on the window sill such that you can slide the window sill into the basement window cavity and so that there will be a 1″x3″ overhang on both sides of the window.
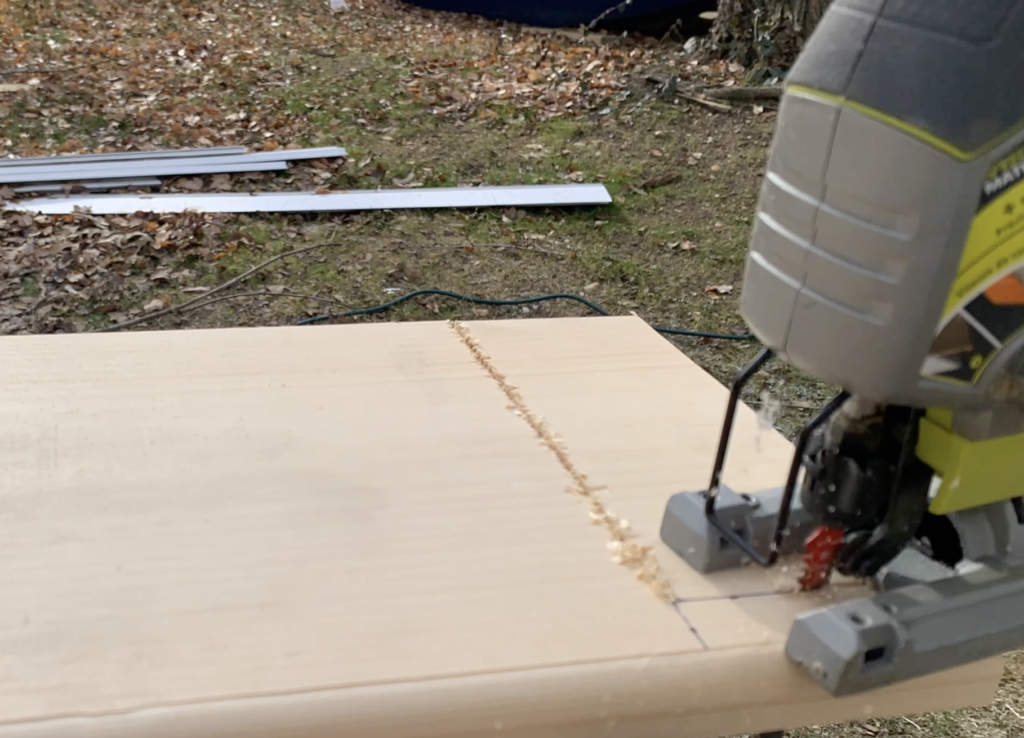
I recommend that you cut the penetration in the window sill with a jig saw.
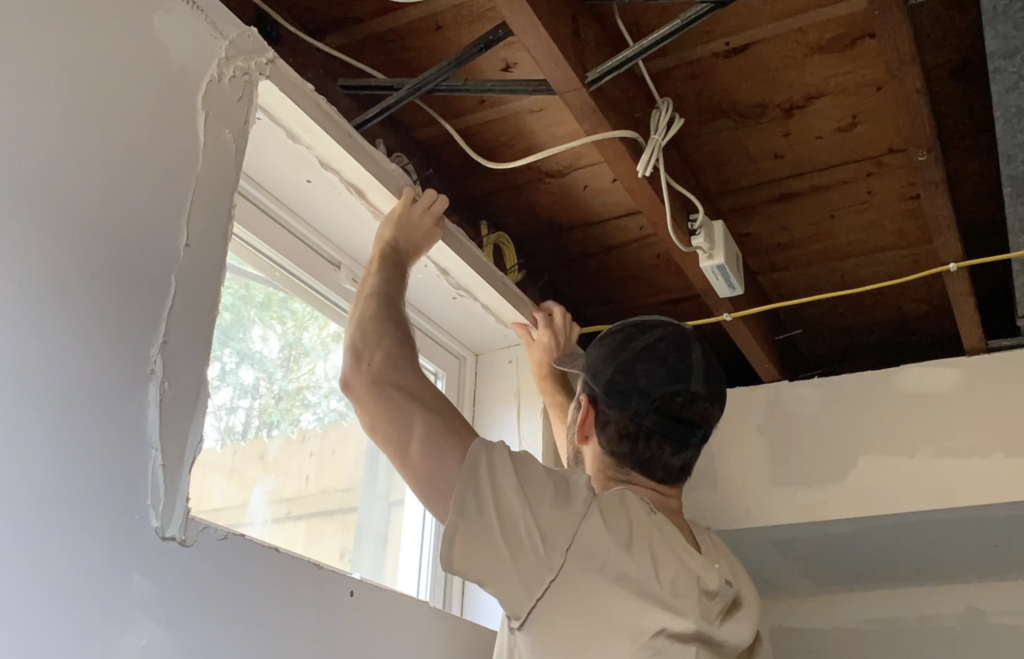
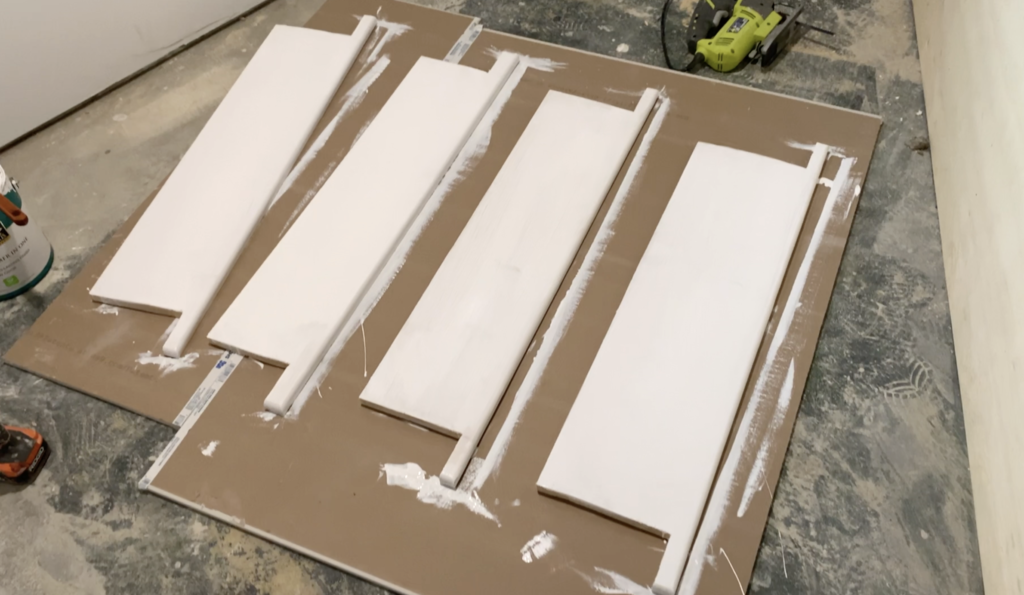
After making the window sill cuts for each of your basement windows, perform a dry fit to ensure that each of the window sills fit properly. Make any adjustment at this time (if needed)
Sand Down any Rough Edges on the Window Sill
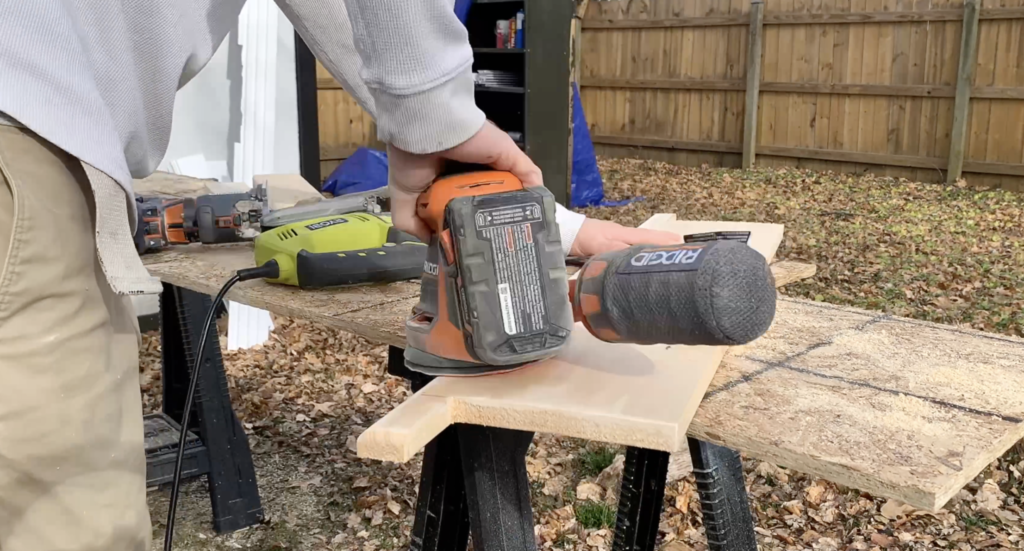
After cutting the window sill and rounding over the edges, use 120 grit sandpaper (and an orbital sander if you have one) to sand down the window sill.
Ensure that you remove any rough edges and smooth out any imperfections before proceeding.
After sanding the window sill as required, you can paint or stain the window sill at this stage (if desired).
Install the Window Sill
To install the window sill in the basement window cavity, start by applying construction adhesive to the rough in window frame lumber.
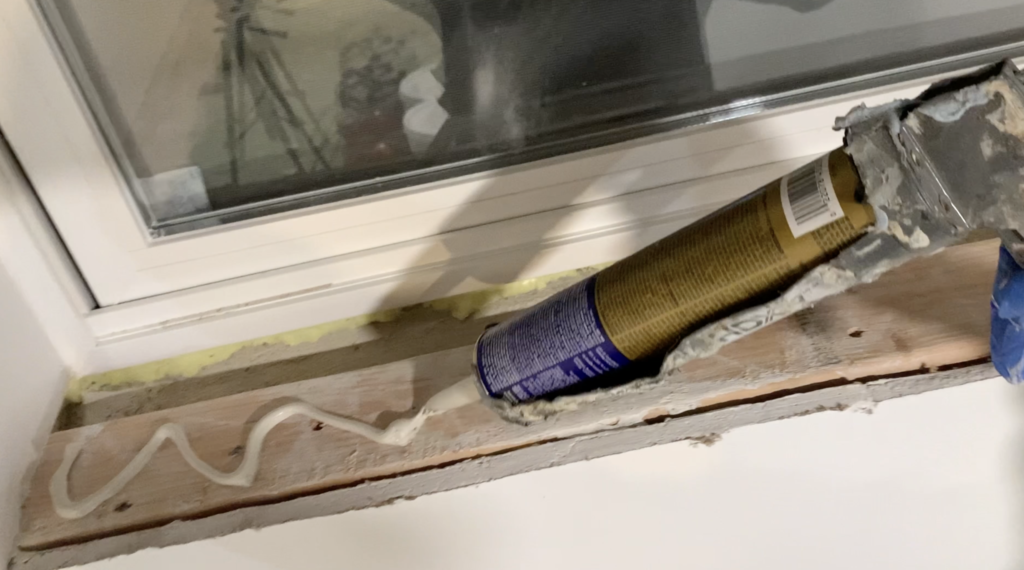
Next, take the window sill and position it in place within the window cavity. Be sure to firmly embed the bottom side of the window sill into the adhesive.

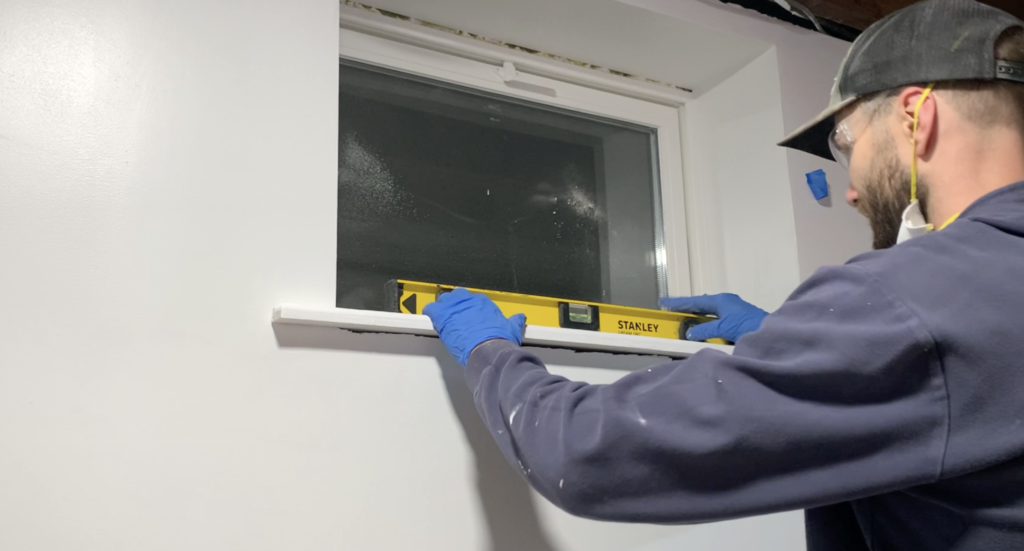
Next, use a level to check that the window sill is perfectly level in the window cavity. Check level length -wise and width-wise. After confirming that the window sill is perfectly level, use a brad nailer and 2.5″ brad nails to fasten the window sill to the wall framing below.
Caulk Around the Window and Window Sill
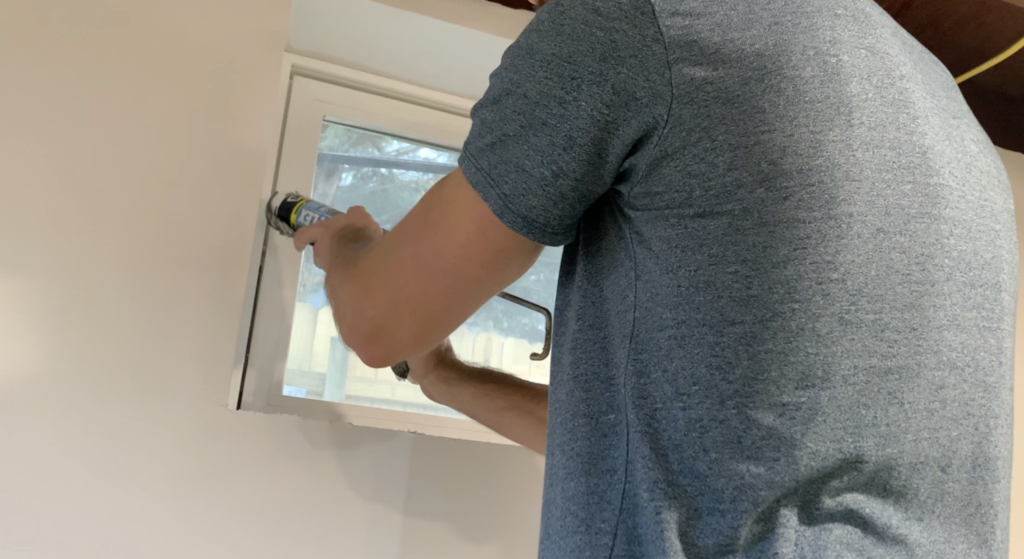
At this point, use caulk gun and a high quality caulk to seal any gaps between the window, drywall, and window sill. Apply caulk around the window frame where it contacts the drywall and window sill using an even bead of caulk. Additionally, don’t forget to caulk the underside of the windowsill.
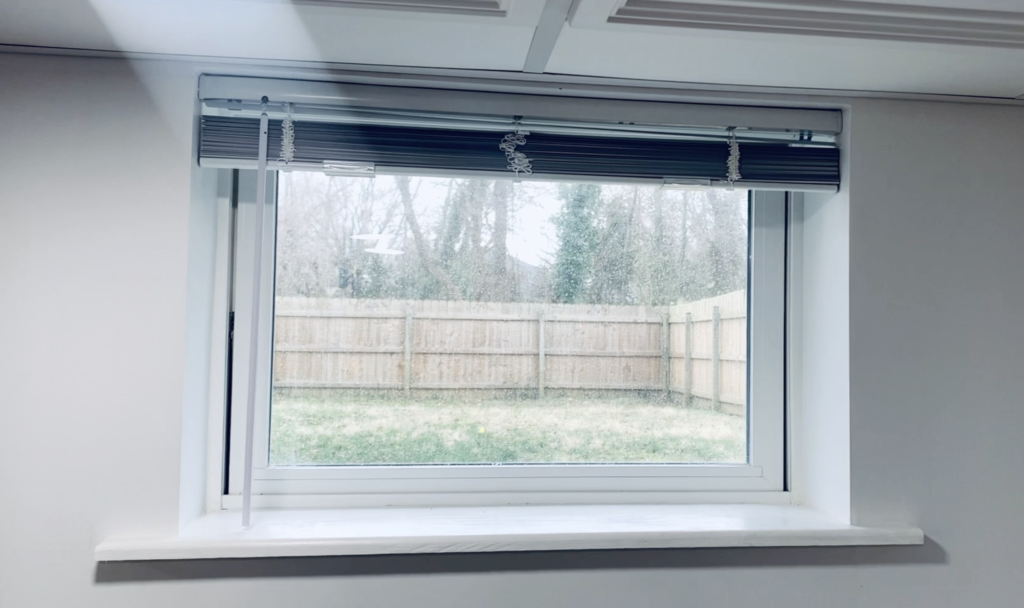
After installing caulk around the window, you have successfully installed a drywall return and window sill around a basement window.
If you are more of a visual learner, you can watch my “How to Drywall Around a Basement Window” Youtube video linked below.
If you need to replace a basement window, you can check out my article linked here or my “How to replace a basement window” YouTube video below:
Thanks so much for checking out ATImprovements! If you learned something from this project, you might also like these other DIY Projects:
- How to Build a Concrete Slab Shed Foundation: https://atimprovements.com/how-to-build-a-shed-base-concrete-slab-step-by-step-diy-guide/
- How to Frame a 10’x10′ Shed Base: https://atimprovements.com/how-to-build-a-shed-floor-base-diy-step-by-step-guide/
- How to Frame Shed Walls:https://atimprovements.com/how-to-frame-a-shed-how-to-frame-walls-for-a-10×10-modern-shed-step-by-step-with-pictures/
- How in Install a Shed Window: https://atimprovements.com/shed-window-installation-how-to-install-a-window-in-a-shed-diy/
- How to Install a Roll Up Door in a Shed or Garage:https://atimprovements.com/roll-up-door-installation/
- How to Build a Fence: How to Build a Fence (DIY Guide) – AT Improvements
- How to Build a Fence Gate: How to Build a Fence Gate (7 Steps with Pictures & Video) – AT Improvements
- How to Install a DIY deck Wire Railing: DIY Cable Railing – How to Install Cable Railing Step-by-Step – (atimprovements.com)
- How to Build a Concrete Paver Patio: DIY PAVER PATIO – Easy DIY Paver Patio Ideas – (atimprovements.com)
Thanks!
DISCLAIMER: This is a reference guide only. Consult local code requirements. Links included in this article might be affiliate links. If you purchase a product or service with the links that I provide, I may receive a small commission. There is no additional charge to you! Thank you for supporting ATimprovements so I can continue to provide you with free content each week!