

When building a shed or outdoor structure, there are many different siding options to choose from. However, T1-11 siding or LP SmartSide panels are the most commonly installed for exterior building applications. Both T1-11 siding and LP SmartSide Siding are great siding options for a shed with nearly identical installation instructions.
To install T1-11 or LP SmartSide Siding, begin by establishing the desired siding height on the shed or exterior structure. Next, install a ledger board or temporary ledger nails at the base of the shed wall that will serve as the ledge in which the siding panels will rest as you install them. Ensure that the ledger board or temporary ledger nails are at the correct height based on your desired siding height and then place your siding panels on the ledger. Attach the siding panels to the shed using a nails spaced every 6″-8″ on center. Cut any T1-11 or SmartSide Panels to length as needed. Finally, install trim at the outside corners where the siding intersects.
Installing T1-11 or LP SmartSide Siding is a relatively easy project that the average homeowner can tackle. This guide will show you all of the steps needed to successfully install T1-11 or LP SmartSide on a shed or outdoor structure.
What is T1-11 Siding

T1-11 Siding is a pine plywood material that is typically used for exterior siding applications such as sheds, dog houses, chicken coops, etc. T1-11 is weather resistant and resists impact marks and denting. Additionally, T1-11 siding can be painted or stained to suit the look you are going for. Although T1-11 Siding does not offer a manufacturer’s warranty, it is still commonly viewed as a durable exterior siding option.
What is LP SmartSide Siding
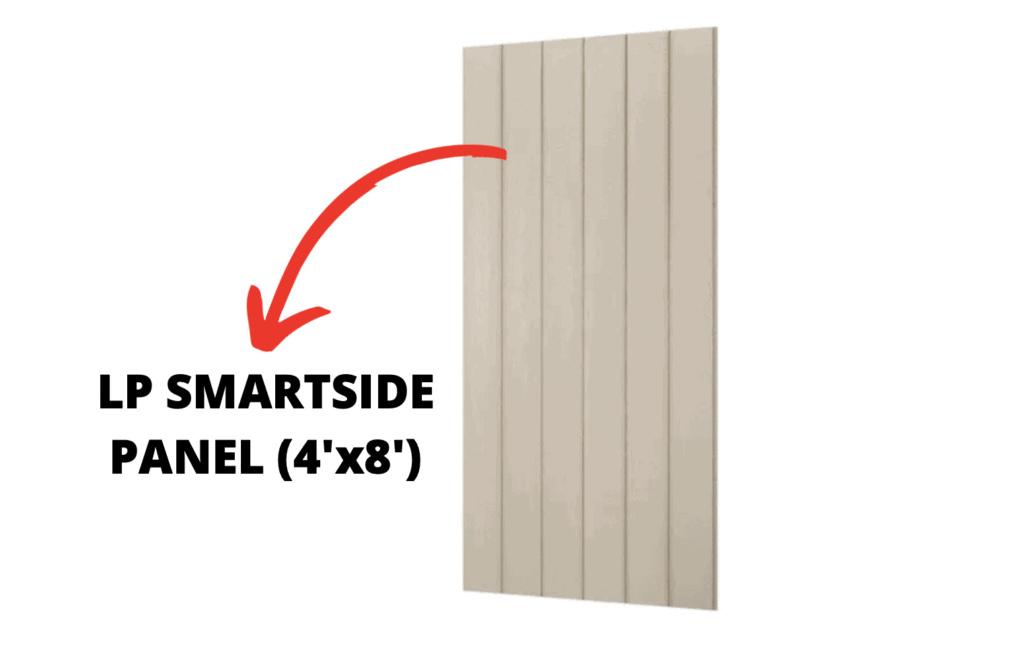
LP SmartSide Siding is a 4’x8′ pressure treated engineered wood panel that is commonly used for exterior siding applications. LP Smartside comes pre-primed with excellent pain adhesion and is manufactured with “overlap” and “underlap” edges for a seamless installation. This product comes with a 50 year manufacturer’s warranty and is strong enough to be nailed directly to to wall studs – eliminating the need for additional sheathing in many applications.
Comparing T1-11 Siding to LP SmarSide Panels
Although T1-11 and LP SmartSide Siding are similar in nature, there are a few differences. A comparison between T1-11 and LP SmartSide Paneling is listed in the following table.
T1-11 vs LP SmartSide Siding Comparison Table
| T1-11 Siding | LP SmartSide | |
| Panel Size | 4’x8′ | 4’x8′ |
| Panel Material | Weather Resistant Pine | Treated Engineered Wood |
| Approx. Cost per Panel (2022) | $39.72 | $42.98 |
| Warranty | None | 50 year |
| Paintable | Yes | Yes |
Although LP SmartSide Siding is slightly more expensive than T1-11 Siding, the warranty and additional pressure treatment give it a slight leg-up over T1-11. However, both T1-11 and LP SmartSide Panels are fantastic options for shed siding.
Now that you have been presented with all of the information needed to decide whether T1-11 or LP SmartSide Panels is best for your shed siding application, we can begin looking at the installation process.
Although the installation of T1-11 and LP SmartSide is VERY similar, this guide will be slightly catered towards to LP SmartSide – since that is what I installed on my shed.
Tools and Materials Needed to Install T1-11 or LP SmartSide Siding

To successfully install T1-11 or SmartSide Panel you will need the following tools and materials:
- Safety Equipment (Glasses, gloves, boots, etc.)
- Tape Measure
- Drill
- Exterior Screws
- Circular Saw
- Air Compressor
- Framing Nailer
- Exterior Framing Nails (for nail gun)
- T1-11 Siding or LP SmartSide Siding
With all necessary tools and materials on hand, you can now begin installing the T1-11 or LP SmartSide Panels.
How to Install T1-11 or LP SmartSide Siding
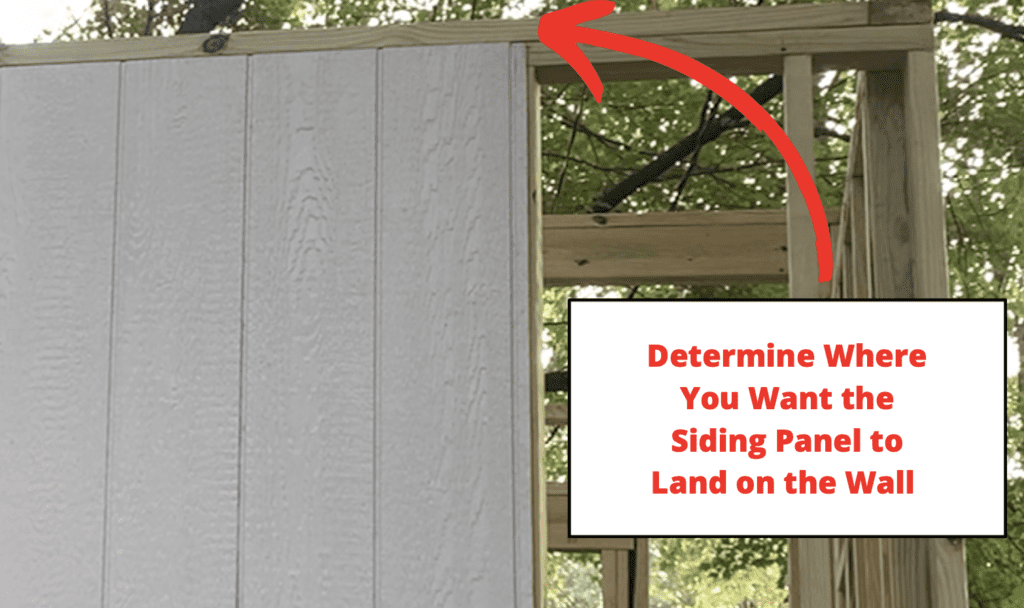
1. Establish Where the Siding will Attach to the Shed Walls
Because T1-11 and LP SmartSide Panels are 4’x8′ in size, 16″ O.C. Stud spacing on the shed walls is recommended to ensure that the edges of the siding panels will land in the center of a wall stud.
For more information on how to frame shed walls, check out my “How to frame shed walls” Blog Article Linked here.
Depending on the height of your shed, you may need to trim your SmartSide Panel height to suit. Additionally, if you have a tall shed, you may need to stack multiple siding panels.
Measure the distance from the bottom of your shed walls to the desired height of your smart side panel.
Note – A minimum of 6″ of clearance between the bottom of the siding and grade is recommended. This will prevent the likelihood of water contacting the bottom of the siding, reducing the useful life of the product.
When framing your shed, consider framing the walls so that you can can use a full 8′ high siding panel sheet for your shed walls. This is the approach I took when framing my shed walls.
After establishing the desired height of where you want your siding panels to land on the walls, you can move on to the next step of the T1-11 or LP SmartSide Installation.
2. Install a Ledger Board or Temporary Ledger Nails
After establishing the height for your panel siding, it is recommended that you install a trim board at the bottom of your shed wall which will serve as a ledger board in which you can rest your Siding Panels Upon.
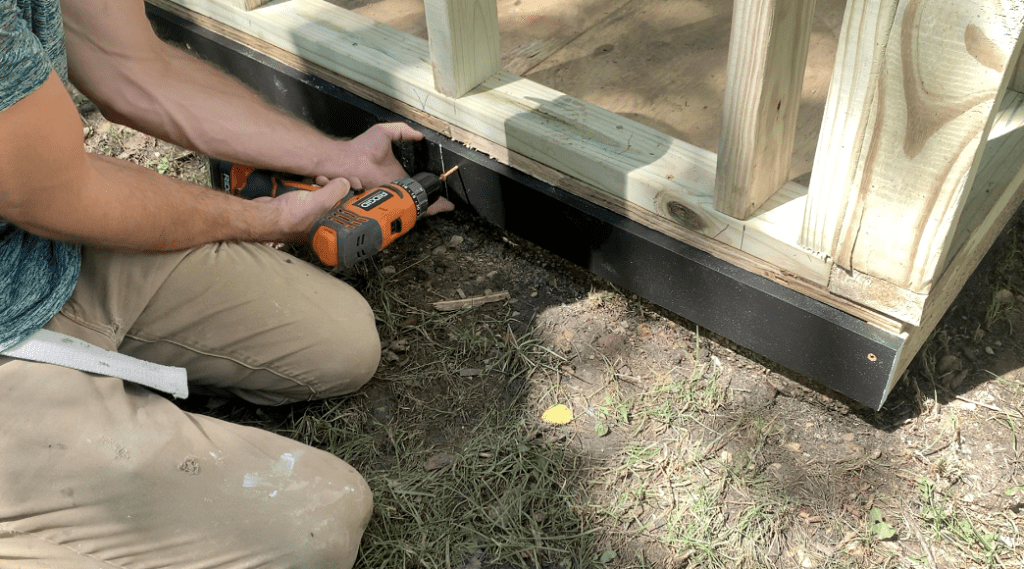
If you don’t plan on installing a piece of trim at the bottom of your shed, you can install a few temporary “ledger” nails in which you can place your siding panels upon.
This trim board (or the temporary ledger nails) will allow you to rest your siding panels on the ledger so that they are positioned at your desired height.
Consider using a laser level to ensure that your ledger board (or temporary ledger nails) is perfectly level around the entire perimeter base of the shed.
After installing the ledger trim or temporary ledger nails, you can install your first piece of T1-11 or LP SmartSide Siding.
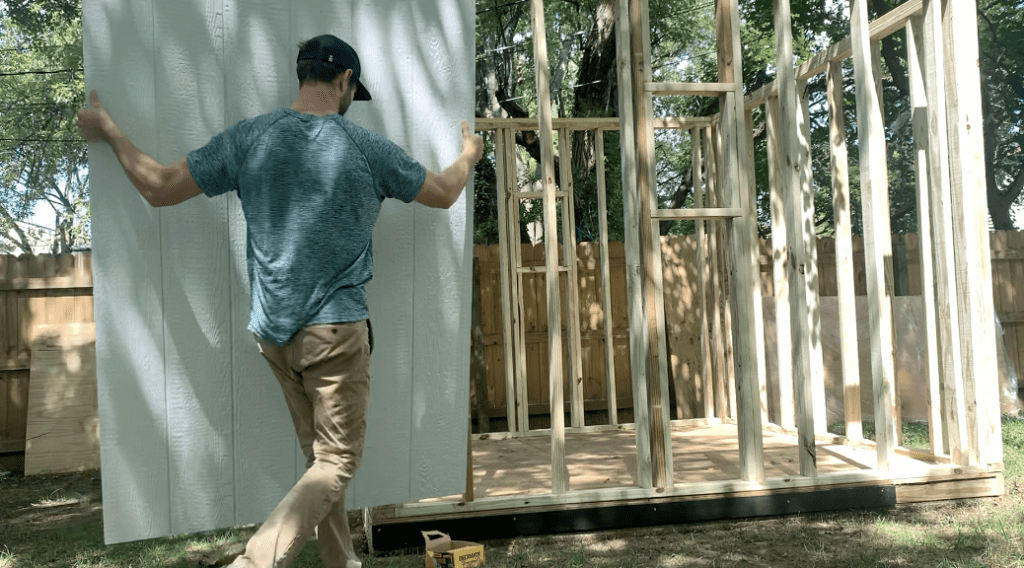
3. Install the First Panel of T1-11 of LP SmartSide Siding.
Install the first piece of T1-11 or LP SmartSiding by placing it on on top of the ledger board on the corner of the shed.
The “overlap” side of the siding panel should be placed at the corner of the shed and the “underlap” side of the panel should land directly on a wall stud. Refer to the images below:
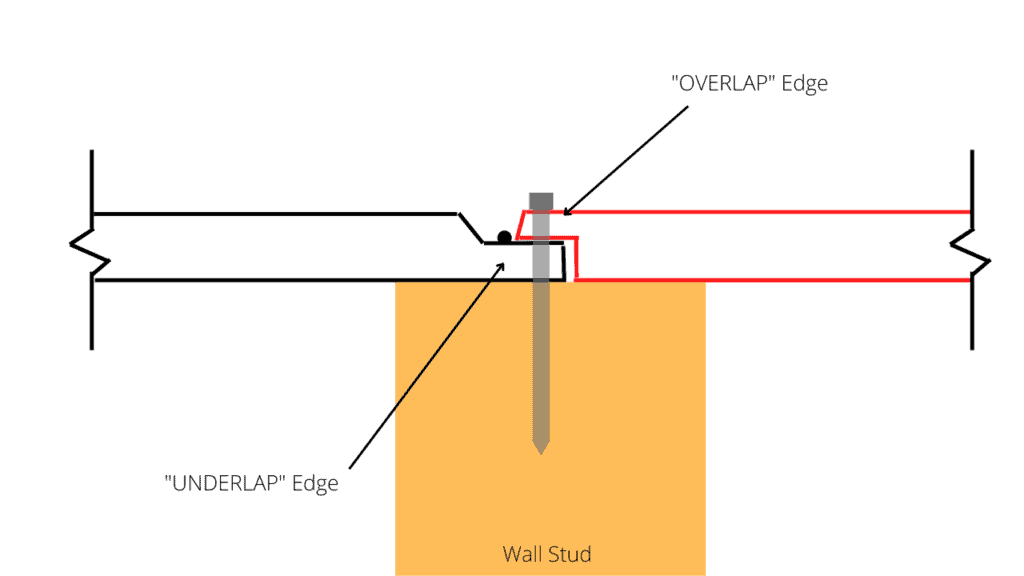
As shown below, the “underlap” side of the T1-11 or LP SmartSide panel should land directly in the center of a wall stud.
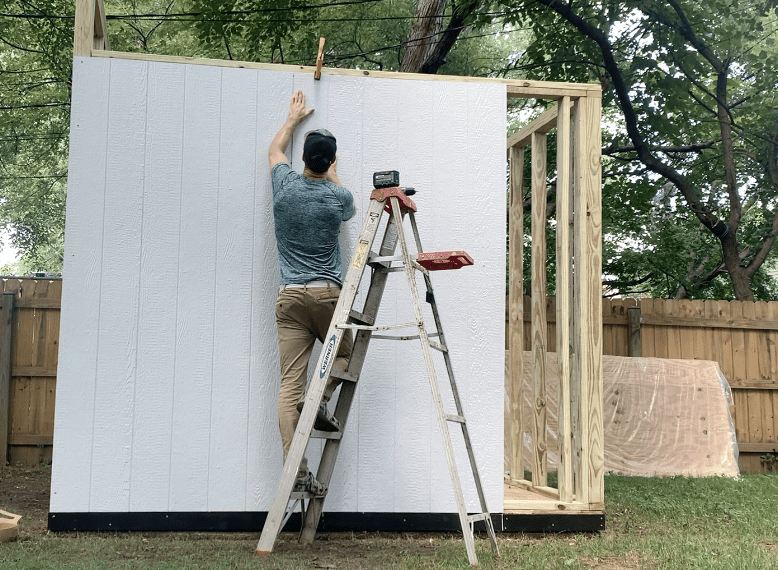
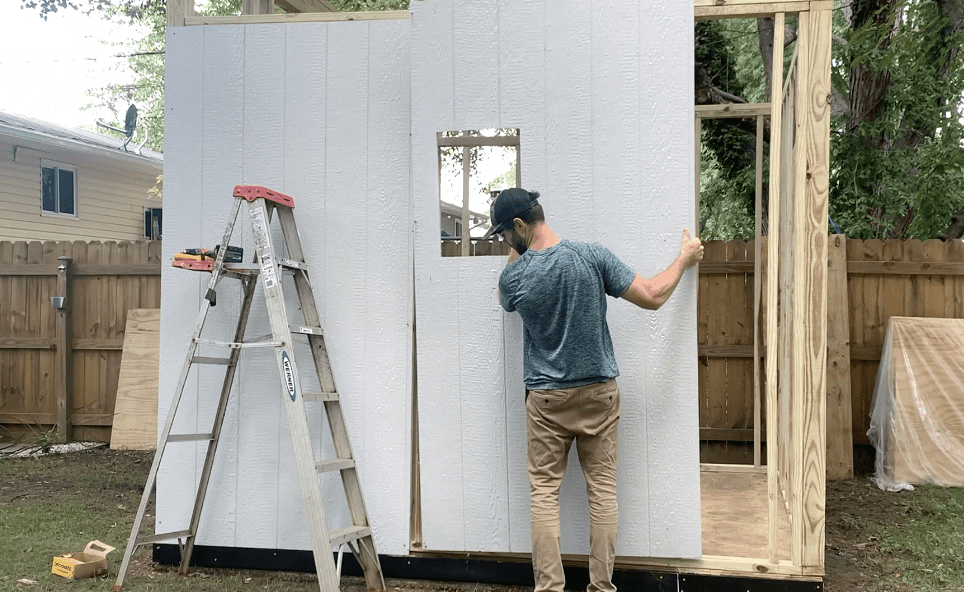
Ensure that the Siding panel is perfectly plum and perfectly in line with the front of the shed or outdoor structure wall – as shown below:
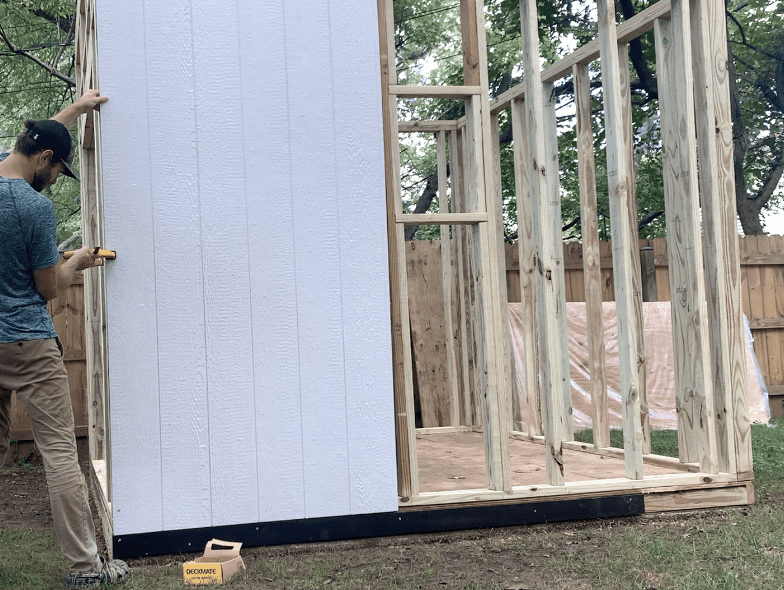
Use bar clamps (as needed) to secure the siding in place while you fasten the siding to the shed.
Fasten the T1-11 or SmartSide Siding to the shed using exterior rated screws or nails every 6″-8″ on center.

Do not install too many fasteners into the “underlap” side of the siding at this stage. This side of the panel will be attached to the shed as part of the next step.
4. Install the Second Piece of Panel Siding
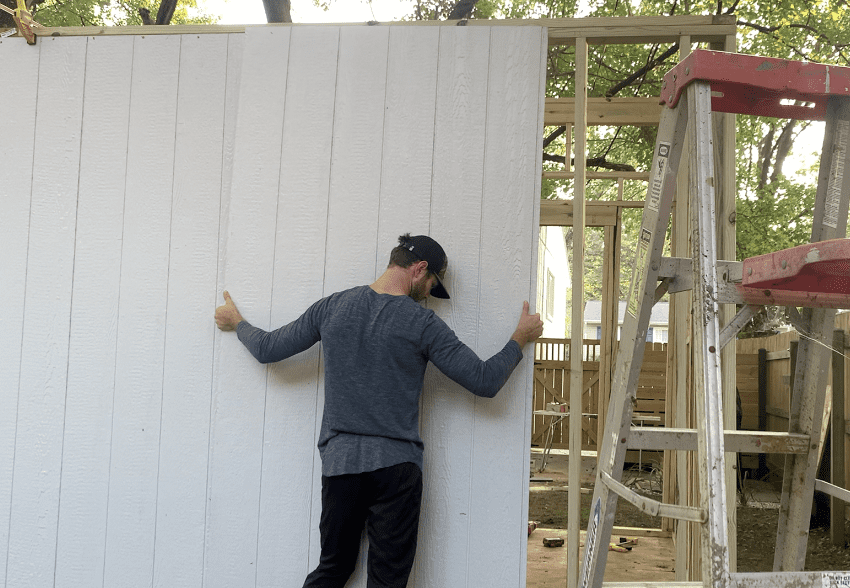
After installing the first piece of T1-11 or LP SmartSide Siding, you can position the second piece of siding in place.
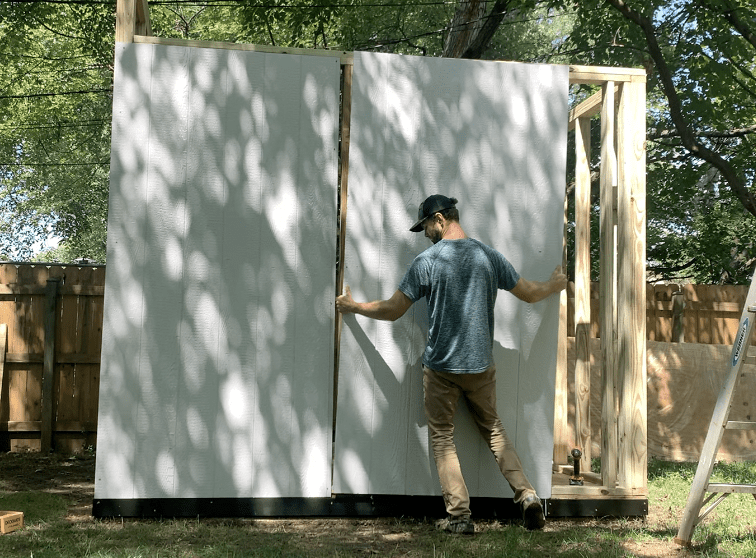
Because the “underlap” Side of the first panel was attached to the wall stud, you will position the “overlap” side of the second piece of siding such that it contacts the “alignment bead”. Refer to the figure below:
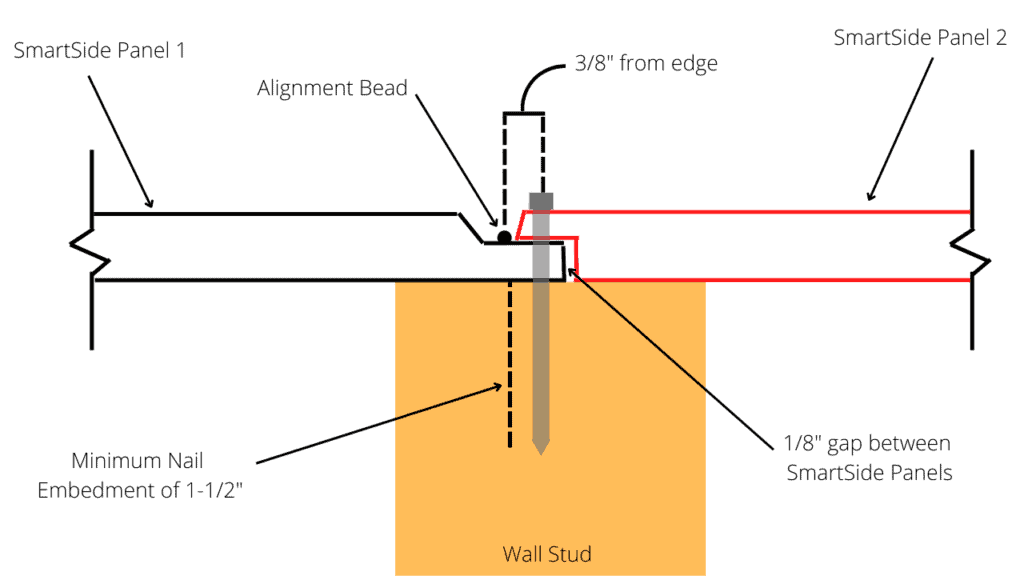
Position the second panel of siding as shown on the figure above and temporarily secure it in place using bar clamps.
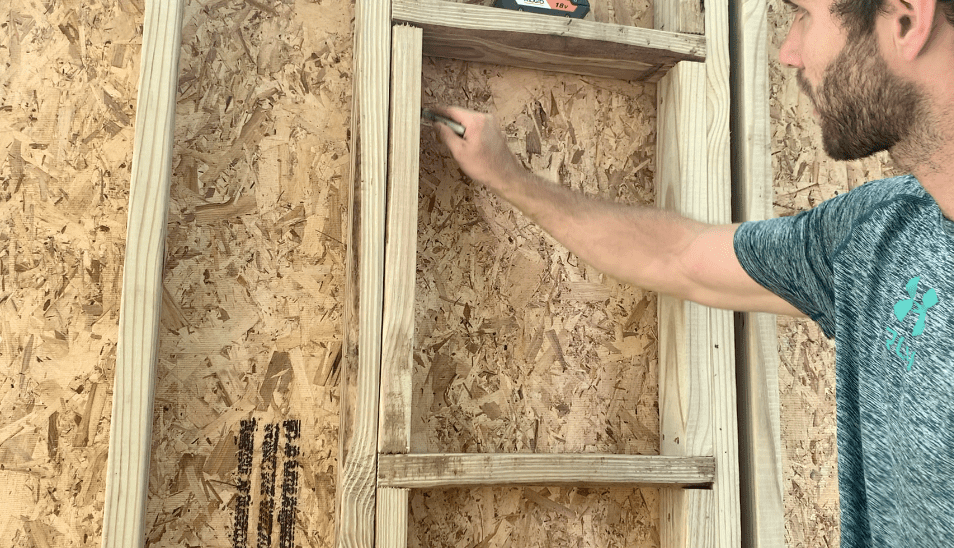
If you are installing windows for your shed or outdoor structure, consider marking the window rough opening on the inside of the shed as shown below:
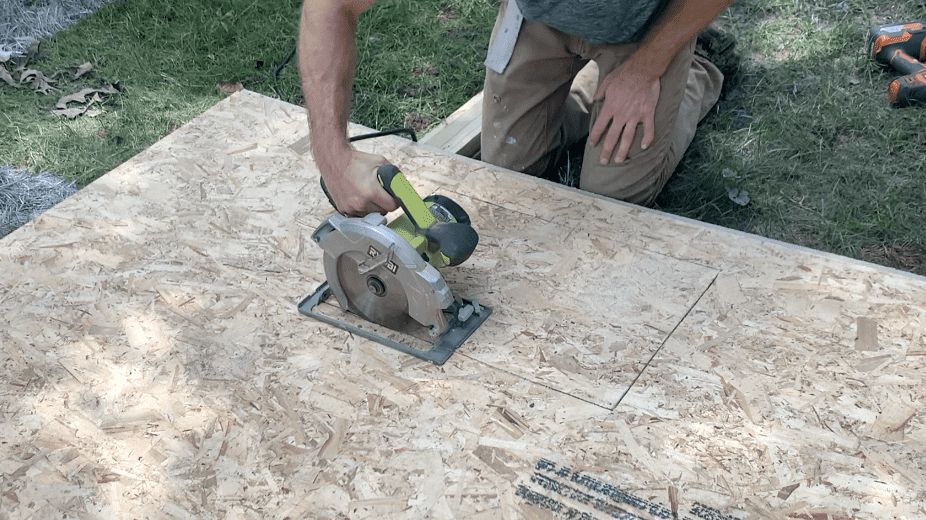
Use a circular saw to Cut out the window rough opening in the siding (as shown).
After cutting out any rough openings required in the T1-11 or LP SmartSide Panel, re-position it in place on the shed.
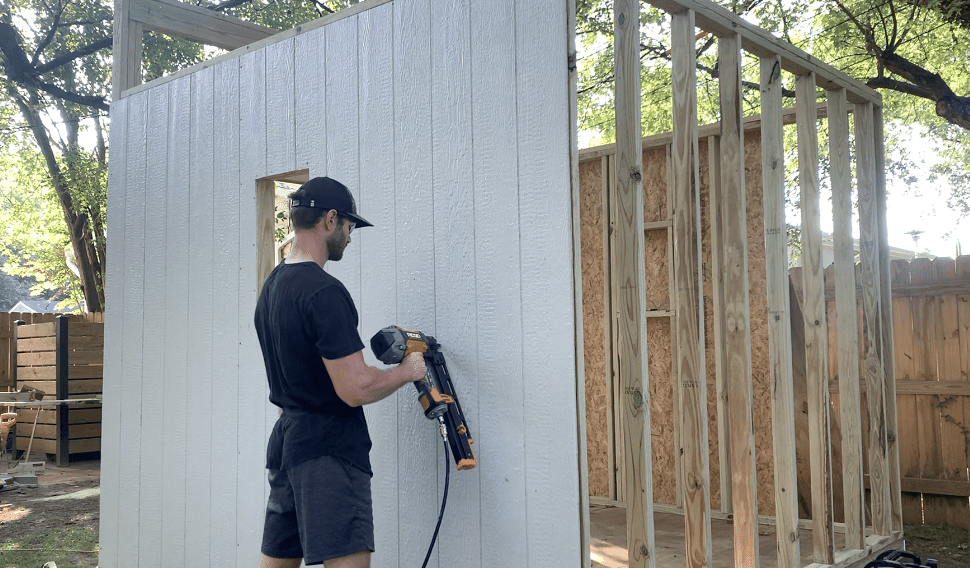
Permanently attach the T1-11 or LP SmartSide Siding to the shed or exterior structure using a framing nailer and galvanized nails.
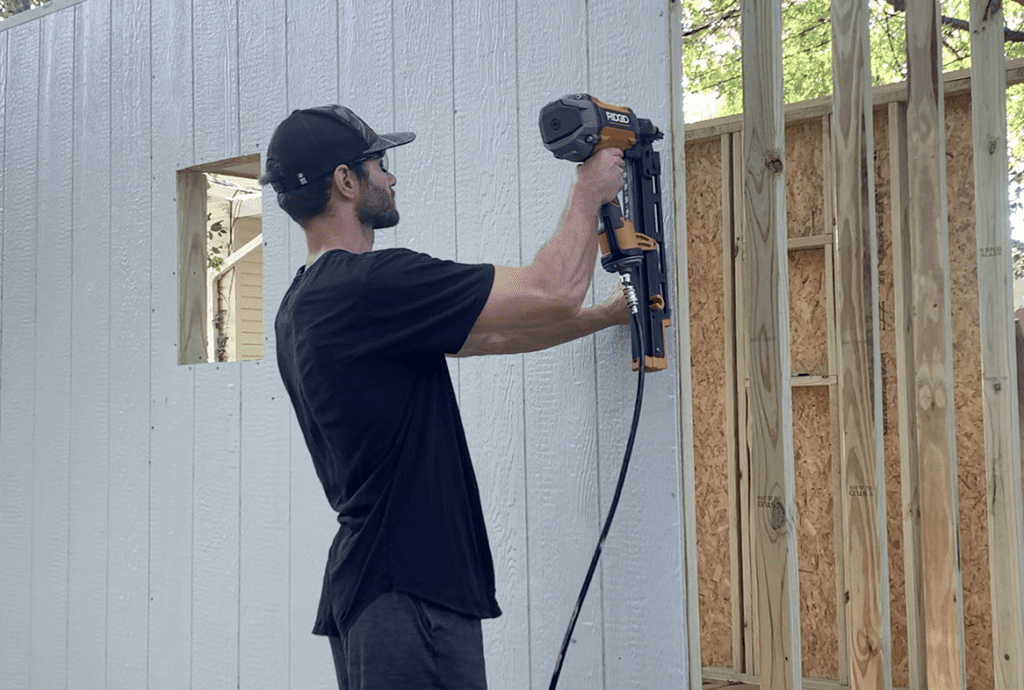
Be sure to fasten the Siding to all of the wall studs behind the the panel. Use a tape measure as needed to identify the stud locations that are behind the T1-11 or LP SmartSide Panels.
Attach nails though the siding and into the studs every 6″-8″ O.C.
Note – Nails should be driven so that they seat snug to the face of the siding. Nails should not be overdriven such that the siding surface is distorted. If nails are overdriven, it is recommended that you apply sealant (caulk, or wood sealer). It is recommended that the exposed nail heads be painted.
5. Install the Remaining T1-11 or LP SmartSide Siding Panels.
At this stage, continue to install the T1-11 or LP SmartSide panels – following the same procedure as above.
Continue to position the “overlap” side of the siding on top of the “underlap” side of the siding, ensuring that each panel lands in the center of a stud.
6. Cut T1-11 or LP SmartSide Panels to Size (as needed)
For nearly all T1-11 or SmartSide Panel installations, you will be required to trim the panels to length. To cut or trim T1-11 or SmartSide panels, measure the distance from the alignment bead of the previously installed panel to the end of the shed. Next, transfer this mark over to your Siding panel.
Cut along the marked line using a circular saw – as shown.
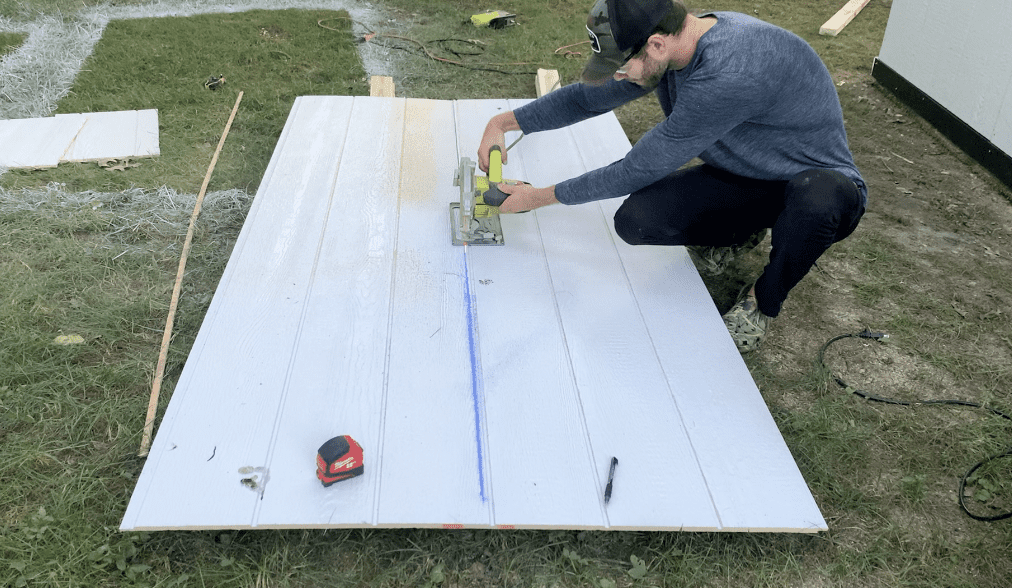
After cutting the T1-11 or SmartSide Panel to length, position it in place on the shed wall.

PRO TIP – Be sure that you have cut the correct side of the T1-11 or LP SmartSide Panel. In other words, be sure to measure from the correct side of the panel to ensure that the “underlap” and “overlap” edges mate together properly.
After confirming fit, attach the trimmed piece of T1-11 or SmartSide Panel in place.
After installing T1-11 Siding (or LP SmartSide) siding on all four walls of the shed or structure, you can begin to install trim on the outside corners.
7. Install the Siding Trim at Corners
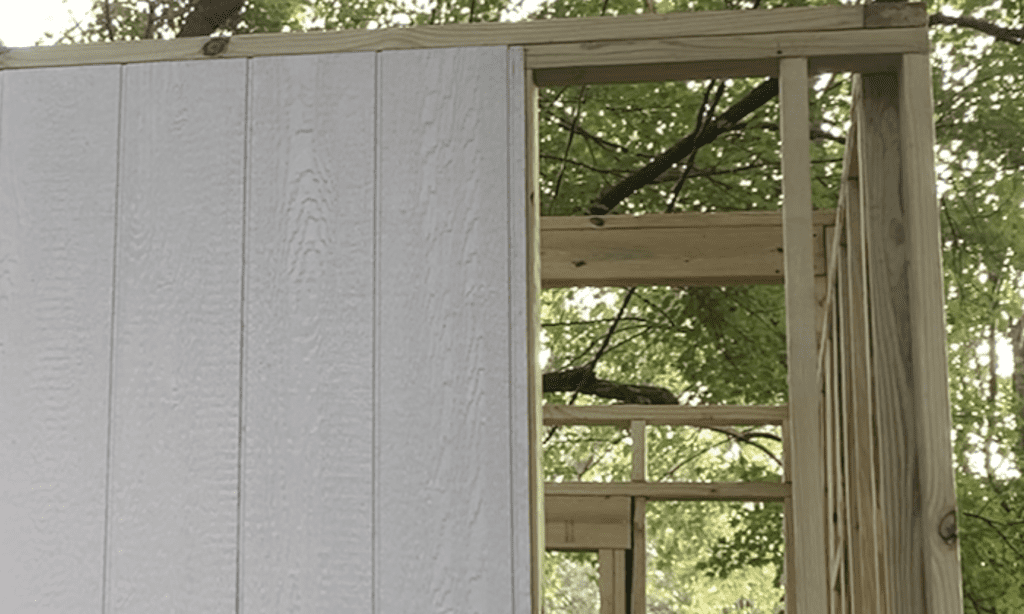
When installing T1-11 or LP SmartSide panels, you will likely notice that there is a butt joint at all of the outside corners of the shed – as shown below:
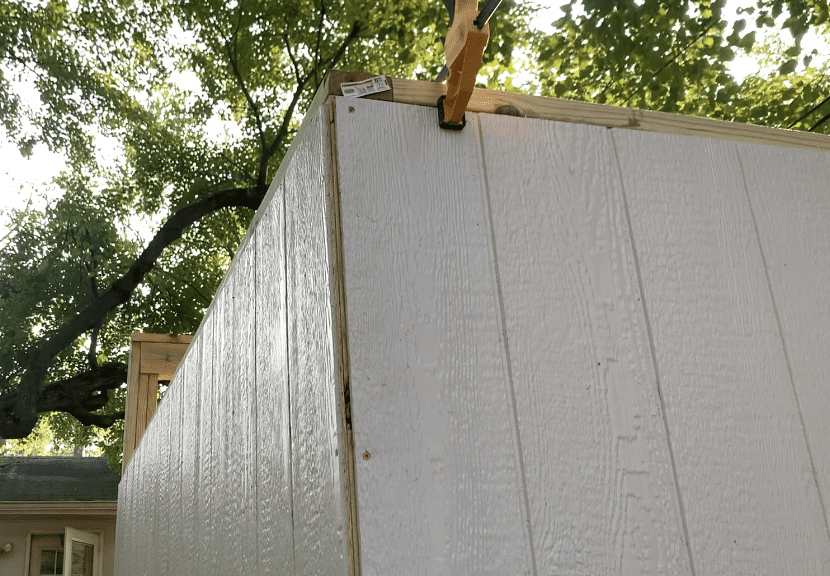
To cover this up, it is recommended that you install trim boards on the corners.
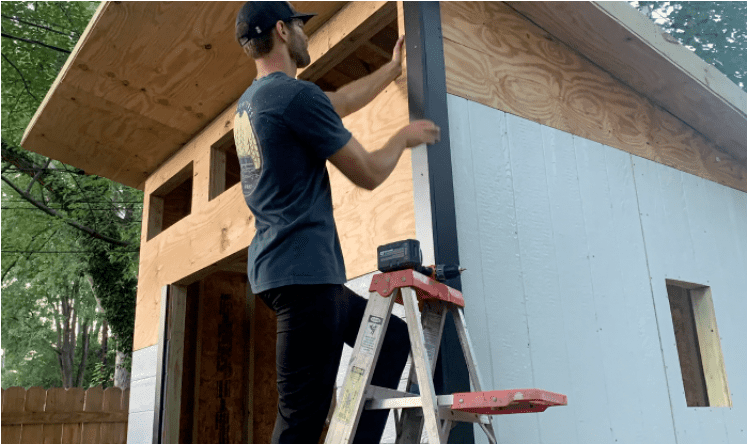
To install Shed corner Trim Boards, start with the less visible side (i.e. the side of the shed) and install the trim board so that it is flush with the front of the siding.

Next, install the trim board on the more visible side of the shed (i.e.the front of the shed) such that it is flush with the previously installed trim board. Refer to the images below:
Be sure to install the second piece of trim so that it creates a flush, 90 degree angle with the previously installed piece of trim. Refer to the image below.
Repeat this process as necessary to install trim over all the T1-11 and SmartSide Panel outside Corners.
8. Paint the T1-11 or LP SmartSide Panel Siding as Needed
You have two options when painting your T1-11 Siding or LP SmartSide Panels:
- You can paint all of your T1-11 or LP SmartSide Panels BEFORE installing them on your Shed
- You can paint all of your T1-11 or LP SmartSide Panels in place once you have already installed the panels on the shed.
To paint my SmartSide Siding panels, I painted all of them on the ground (prior to installing the siding panels) on the shed using my paint sprayer.

In my opinion, it is easier to pre-paint your siding panels ahead of time since since you don’t need to worry about masking anything off. You can use a paint roller or a paint sprayer to paint all of the panels before they are installed on the shed.
Paint the T1-11 or LP SmartSide Panels with the “grain” (parallel) to the texture of the panel – if applicable.
After installing the T1-11 or LP SmartSide Panels on the Shed, you can perform any touch-up paint (i.e. to cover up the nails) as needed.

At this point, your T1-11 or LP SmartSide Siding Installation is Complete!
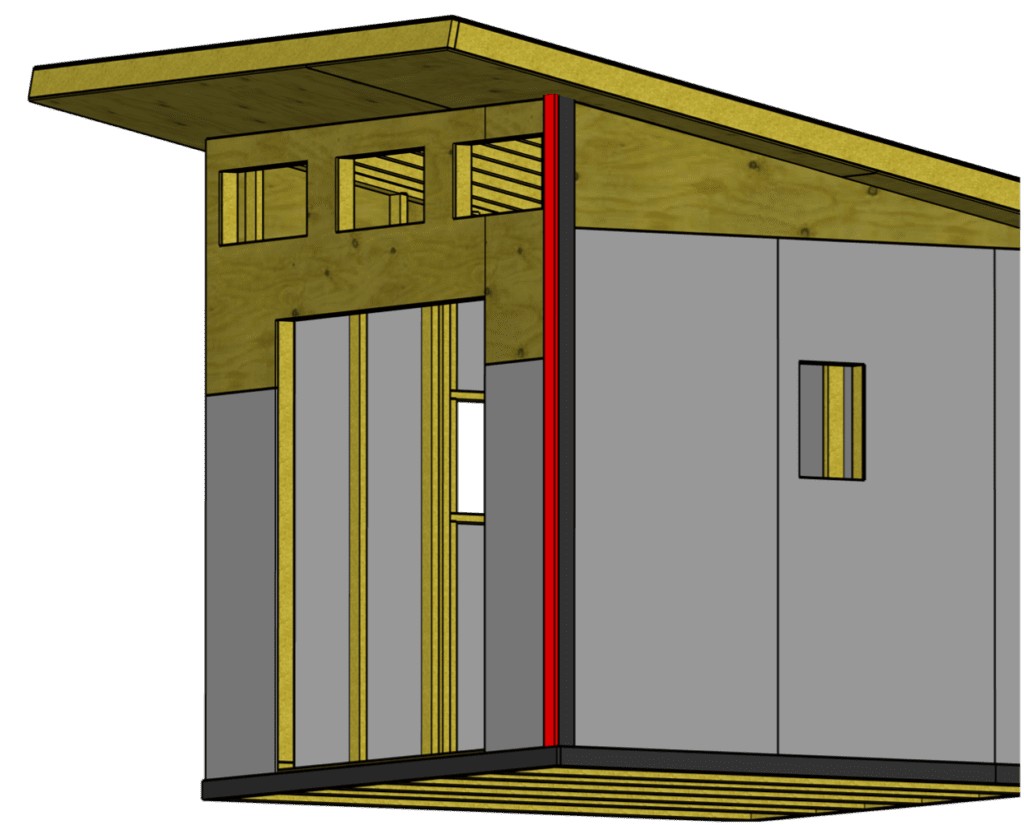
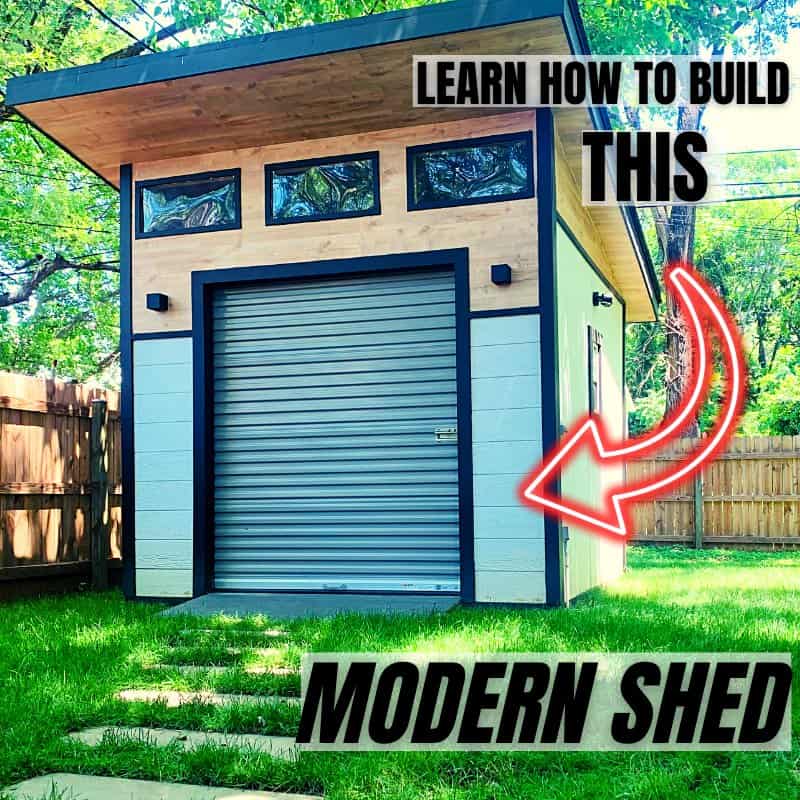
If you want to learn how to build the Modern Shed you see below, Check out my “How to Build a Modern Shed Course” Linked Here. This Course includes a detailed materials list, tools lists, lumber cut lists, and step-by-step video instructions for each step of the project!
For more information on how to Build a 10’x10 Modern Shed from start to finish, check out ATimprovements.com or watch my step-by-step tutorial videos on Youtube.
Thanks!
Thanks so much for checking out ATImprovements! If you learned something from this project, you might also like these other DIY Projects:
- How to Build a Concrete Slab Shed Foundation: https://atimprovements.com/how-to-build-a-shed-base-concrete-slab-step-by-step-diy-guide/
- How to Frame a 10’x10′ Shed Base: https://atimprovements.com/how-to-build-a-shed-floor-base-diy-step-by-step-guide/
- How to Frame Shed Walls:https://atimprovements.com/how-to-frame-a-shed-how-to-frame-walls-for-a-10×10-modern-shed-step-by-step-with-pictures/
- How in Install a Shed Window: https://atimprovements.com/shed-window-installation-how-to-install-a-window-in-a-shed-diy/
- How to Install a Roll Up Door in a Shed or Garage:https://atimprovements.com/roll-up-door-installation/
- How to Build a Fence: How to Build a Fence (DIY Guide) – AT Improvements
- How to Build a Fence Gate: How to Build a Fence Gate (7 Steps with Pictures & Video) – AT Improvements
- How to Install a DIY deck Wire Railing: DIY Cable Railing – How to Install Cable Railing Step-by-Step – (atimprovements.com)
- How to Build a Concrete Paver Patio: DIY PAVER PATIO – Easy DIY Paver Patio Ideas – (atimprovements.com)
Thanks!
DISCLAIMER: This is a reference guide only. Consult local code requirements. Links included in this article might be affiliate links. If you purchase a product or service with the links that I provide, I may receive a small commission. There is no additional charge to you! Thank you for supporting ATimprovements so I can continue to provide you with free content each week!