
Replacing a basement window may seem like a daunting task, but with the right tools and materials, it can be a straightforward DIY Project. Whether you want to improve the energy efficiency of your home or update the look of your basement, replacing a window is a home improvement project that can be completed in a few hours.
To replace a basement window, start by removing the existing window with a reciprocating saw. Next, purchase replacement windows that will fit within the existing rough opening. Place the new windows in place and check level and plumbness. Once the window is positioned correctly, apply spray foam insulation between the window and the rough opening to seal the window in place. Cut off any excess spray foam with a utility knife and caulk around the window as needed.
This article will outline every step of the basement window replacement process from start to finish. If you are more of a visual learner, you can watch my “How to Replace a Basement Window” Youtube video linked at the end of this article.
Tools and Materials Needed to Replace a Basement Window

To replace a basement window, you will need the following Tools and Materials.
Now that you know what tools and materials are needed to replace a basement window, we can begin the replacement process.
Purchase Replacement Window(s)
The first step in replacing basement windows is to order your replacement window(s). To do this, measure the rough opening of you concrete foundation window penetration and compare those dimensions to available replacement window dimensions. There are many different sizes and styles of windows, so spend sufficient time ensuring that the replacement window you purchase will fit within your existing window penetration.

Typically, this will mean that your window will be approximately 1” smaller than the concrete rough opening. For example, if you concrete foundation window rough opening is 25” wide by 19” tall, you will want a window that is approx. 24” wide x 18” tall. You will fill in the slight gap between the window and the rough opening with expanding spray foam insulation in the next steps.
Remove the Existing Window
The first step in replacing a basement window is to remove the existing window. Start by removing any screws or nails that are holding the window in place. Then, remove the glass panels (if possible).
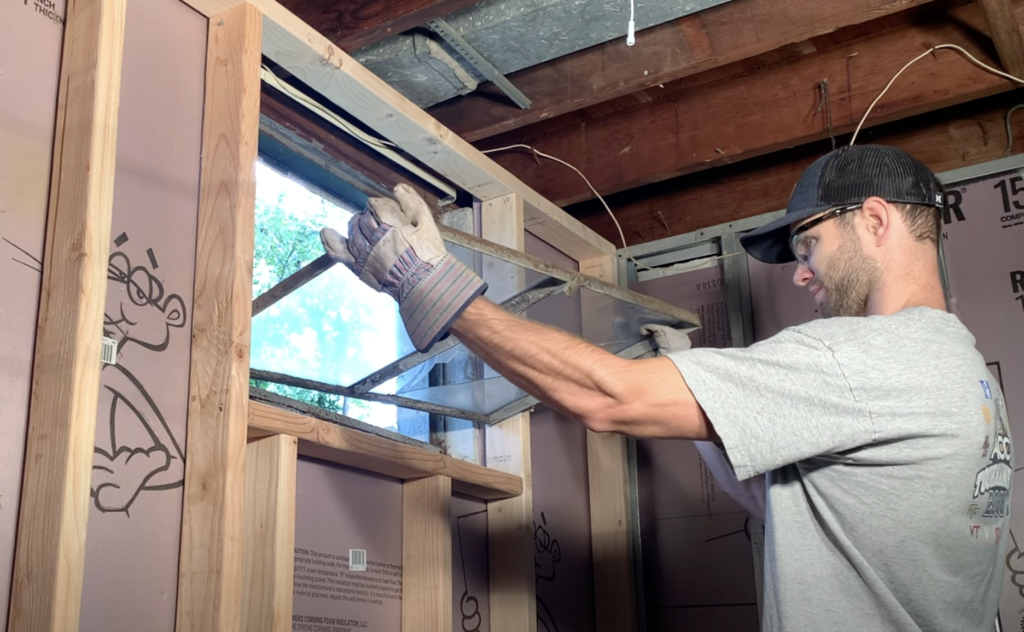
Next, use a reciprocating saw to cut the top of the window frame and then try to loosen the frame from the concrete it is embedded within.
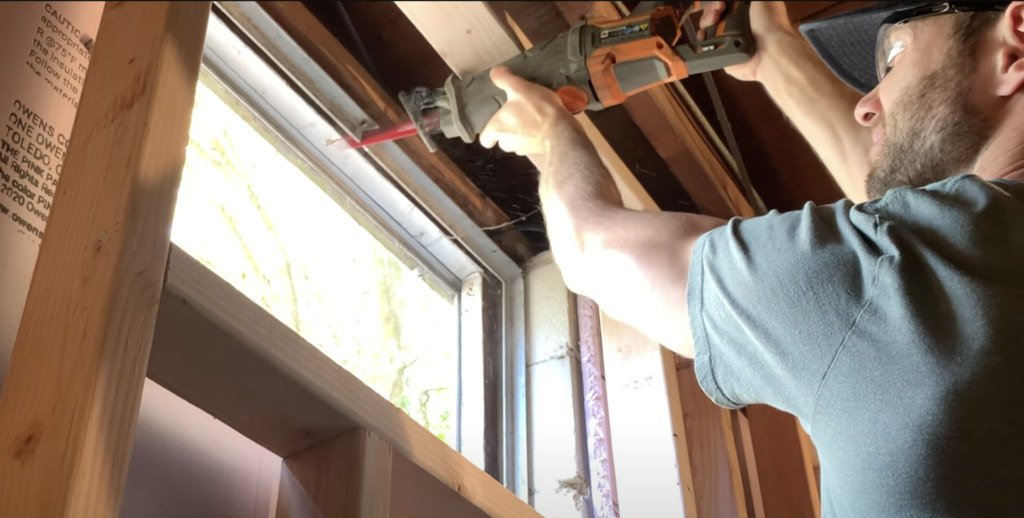
If the window is stuck, use a pry bar to carefully loosen it from the home’s foundation.
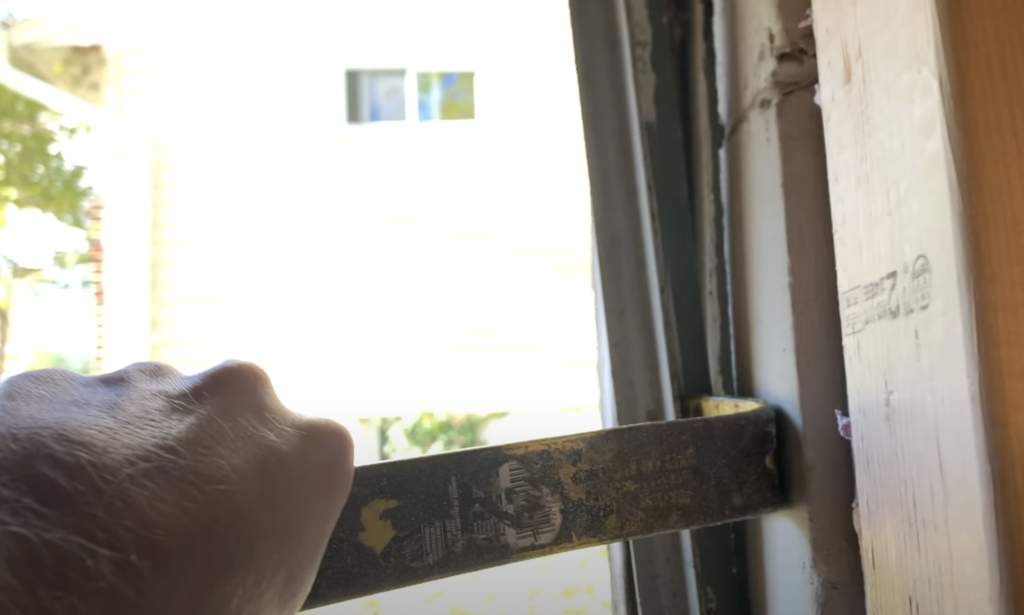
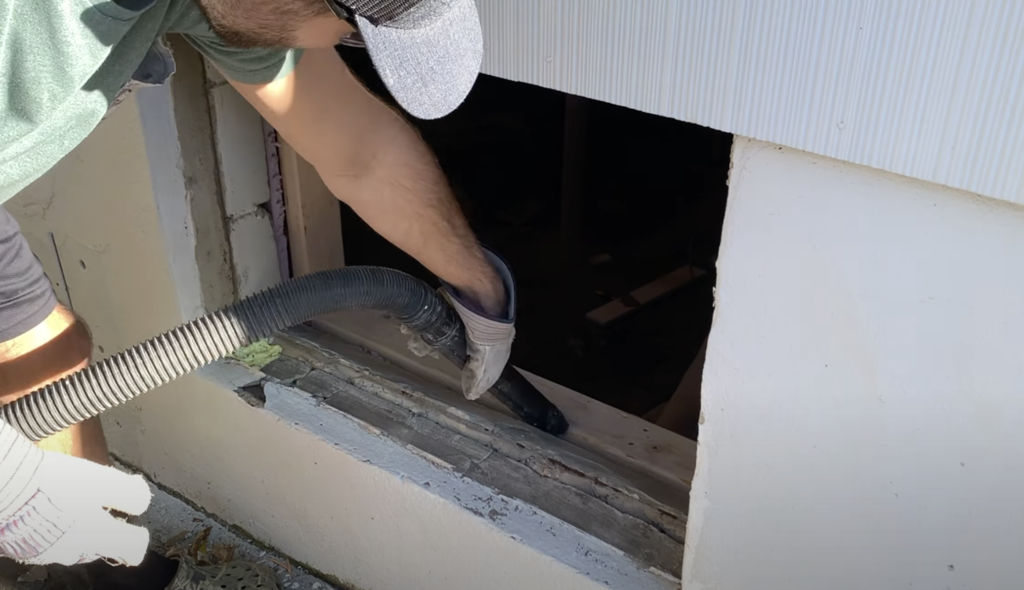
Be sure to wear gloves and protective eyewear during this step to avoid injury. After removing the existing window, clean up any dirt or debris with a vacuum.
Install the Replacement Window
At this stage of project, place the replacement windows in the windows rough opening and confirm fit.
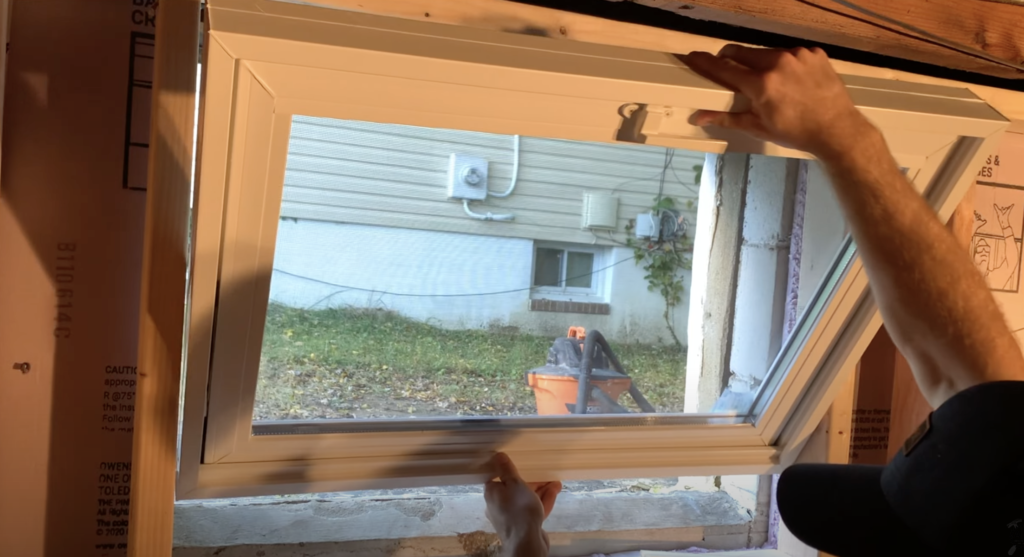
There should be a slight gap between the the window and the rough opening – which we will fill in the next few steps.
Level the Window and Install Shims
To ensure the replacement window is level, use a carpenter’s level to check for any unevenness.
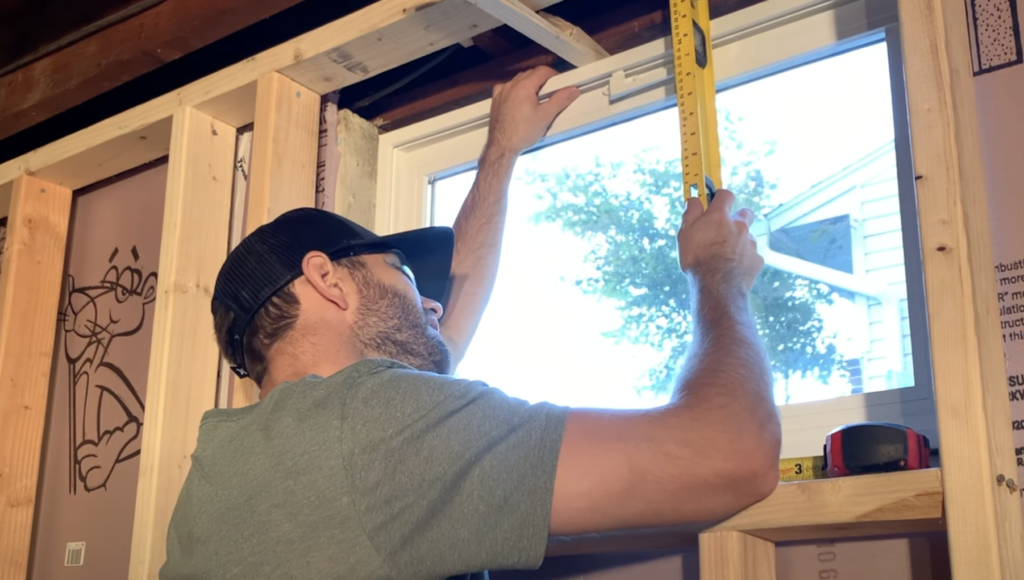
Use shims to make any necessary adjustments to the window’s level, placing them in the gap between the window and the rough opening.
Start by inserting shims at the bottom of the window, then work your way up.
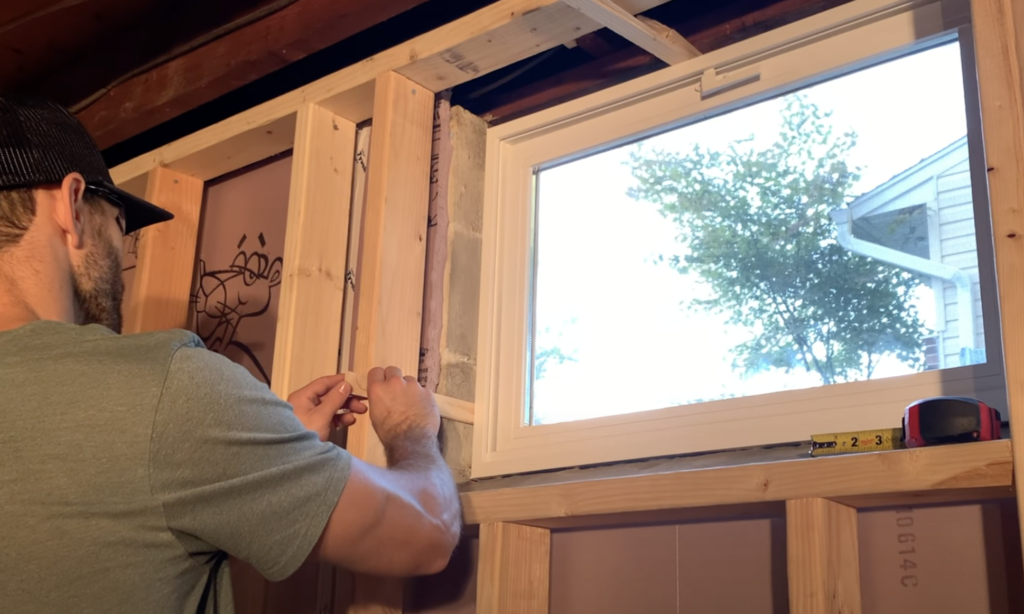
Apply Spray Foam around the Perimeter of the Window
Once the window is in place, secured with shims, and level, apply spray foam insulation around the perimeter of the window.
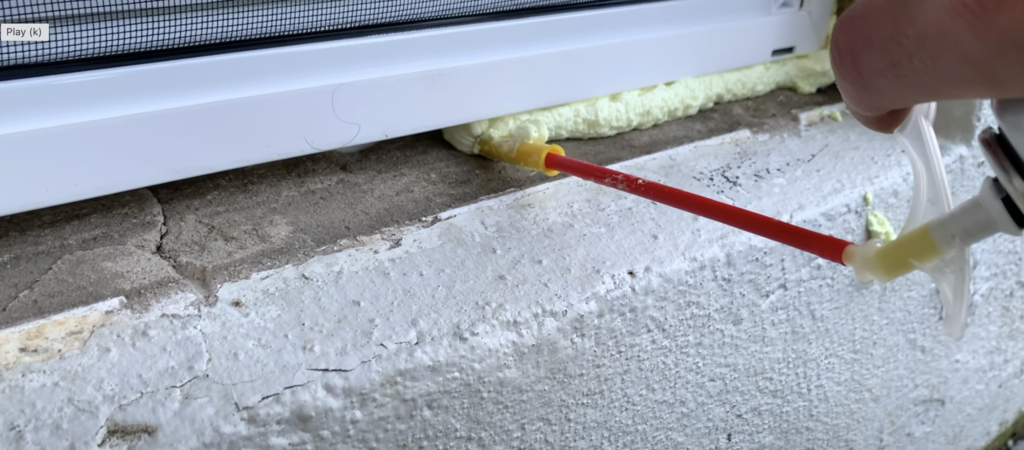
The spray foam will help seal any gaps and improve the energy efficiency of your home. Be sure to follow the instructions on the spray foam can and wear gloves and protective eyewear during this step. Additionally, if you window has mounting holes for screws, you can install those at this time. Pre-drill holes through the opening and into the concrete foundation using a carbide tipped masonry bit. Next, use a drill to drive Tapcon screws through the window and into the basement’s foundation wall.
After allowing for the spray foam to fully harden, you can cut off the excess shims with a utility knife.

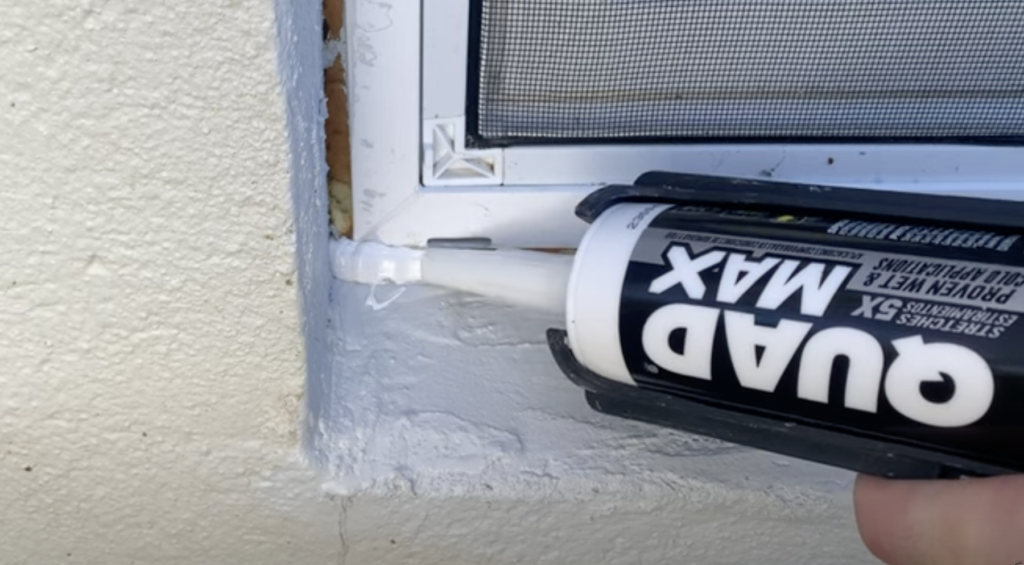
Cut off Excess Spray Foam and Caulk Around Window
After the spray foam has dried, use a utility knife to cut off any excess foam that is sticking out.

Then, apply caulk around the exterior of the window to seal any remaining gaps. This will help prevent air and water from entering your basement.
If you have a damaged any of the concrete around your window, you can repair it with rapid setting concrete and trowel at this stage of the project.
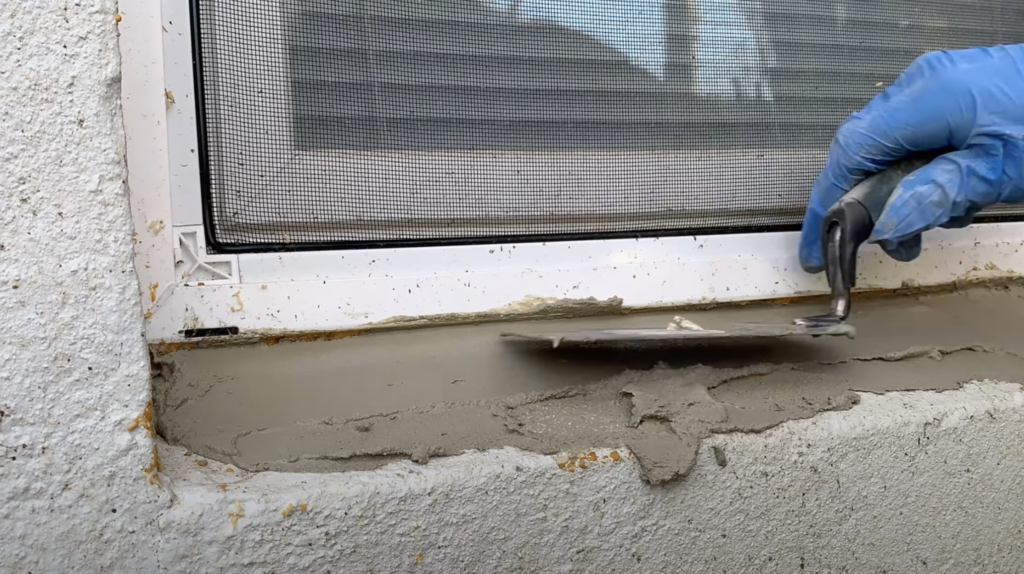
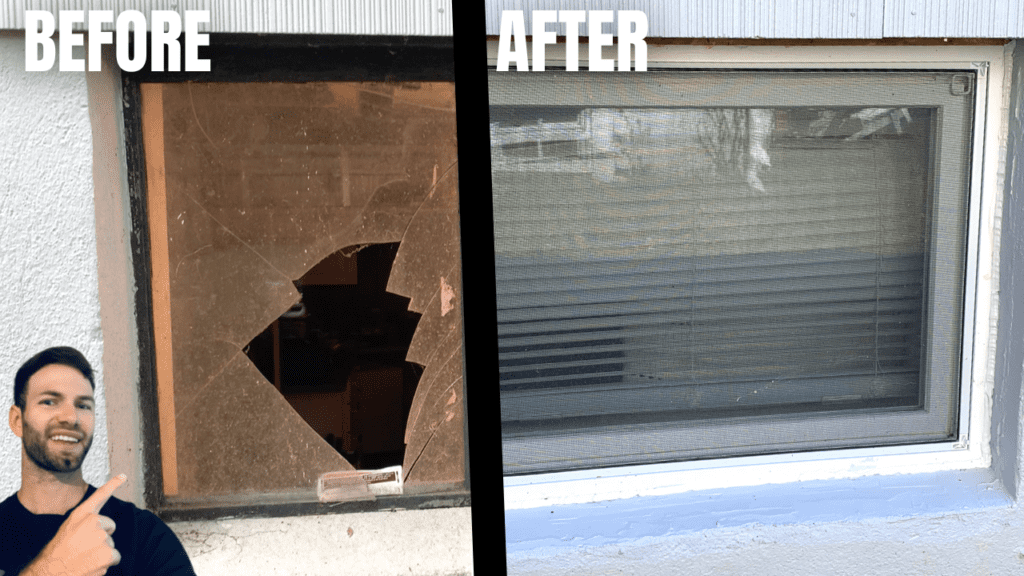
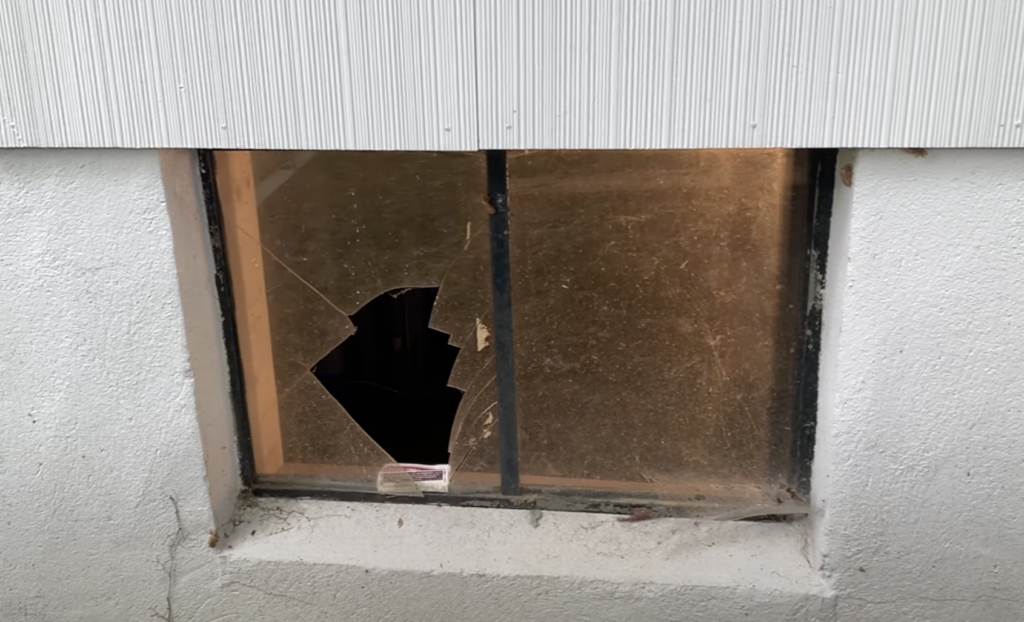
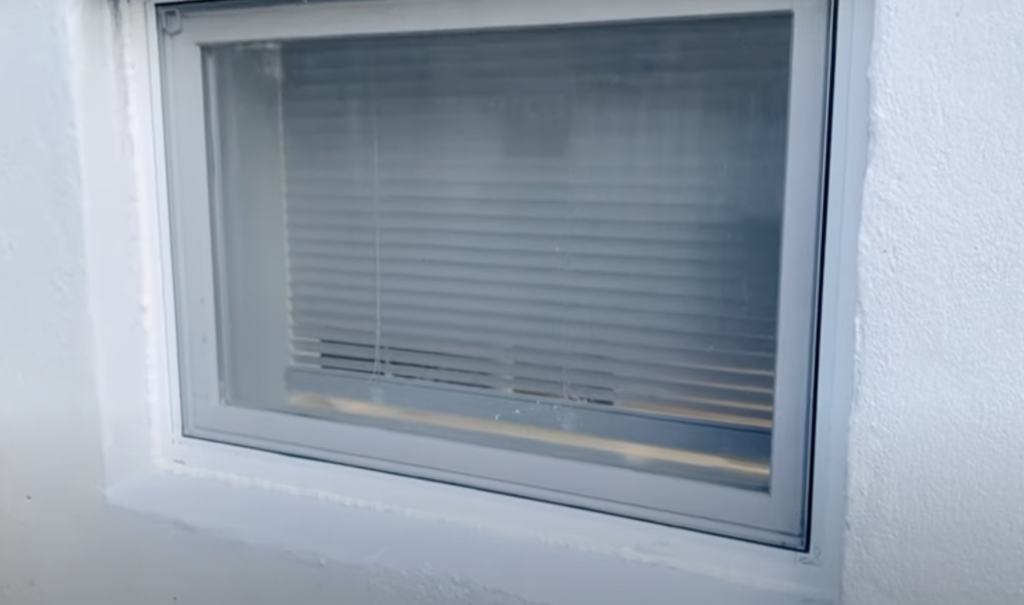
At this point, perform any touch up painting as needed. Here is a look at the basement window before it was replaced:
And here is a look at the new basement window that was installed as part of this DIY Project:
In conclusion, replacing a basement window is a manageable DIY project that can improve the energy efficiency and overall look of your home. Be sure to take the necessary safety precautions, measure the size of the opening accurately, and use the right tools and materials for the job. With these steps, you can replace a basement window with ease and enjoy the benefits of a more comfortable and efficient home.
If you are more of a visual learner, you can watch my “How to replace a Basement Window” Youtube Video below:
Additionally, I have an article showing how to trim out the inside of window linked here and a YouTube Video showing the process below:
Thanks so much for checking out ATImprovements! If you learned something from this project, you might also like these other DIY Projects:
- How to Build a Concrete Slab Shed Foundation: https://atimprovements.com/how-to-build-a-shed-base-concrete-slab-step-by-step-diy-guide/
- How to Frame a 10’x10′ Shed Base: https://atimprovements.com/how-to-build-a-shed-floor-base-diy-step-by-step-guide/
- How to Frame Shed Walls:https://atimprovements.com/how-to-frame-a-shed-how-to-frame-walls-for-a-10×10-modern-shed-step-by-step-with-pictures/
- How in Install a Shed Window: https://atimprovements.com/shed-window-installation-how-to-install-a-window-in-a-shed-diy/
- How to Install a Roll Up Door in a Shed or Garage:https://atimprovements.com/roll-up-door-installation/
- How to Build a Fence: How to Build a Fence (DIY Guide) – AT Improvements
- How to Build a Fence Gate: How to Build a Fence Gate (7 Steps with Pictures & Video) – AT Improvements
- How to Install a DIY deck Wire Railing: DIY Cable Railing – How to Install Cable Railing Step-by-Step – (atimprovements.com)
- How to Build a Concrete Paver Patio: DIY PAVER PATIO – Easy DIY Paver Patio Ideas – (atimprovements.com)
Thanks!
DISCLAIMER: This is a reference guide only. Consult local code requirements. Links included in this article might be affiliate links. If you purchase a product or service with the links that I provide, I may receive a small commission. There is no additional charge to you! Thank you for supporting ATimprovements so I can continue to provide you with free content each week!