Replacing a damaged segment of a concrete sidewalk is a relatively easy DIY project that the average homeowner can tackle. Whether you are replacing a small area of sidewalk or tackling a large sidewalk replacement project, this article will cover everything you need to know.
To Replace a cracked or damaged segment of sidewalk, start by removing the old sidewalk with a jackhammer. Excavate and compact the soil as needed and apply a 4” gravel subbase beneath the sidewalk area. Next, use lumber to “form” the sides of the sidewalk and apply concrete to the sidewalk area. Screed the concrete surface to get a uniform layer and then finish the sidewalk concrete surface using a hand trowel and edging trowel. Apply a broom-finish to the concrete surface and add control joints as needed. Finally allow the concrete sidewalk to cure.
This article will outline every single step of the concrete sidewalk replacement process from start to finish. Specifically, this article will focus on how to replace a damaged section of concrete sidewalk at the end of a driveway.
Finally, if you are more of a visual learner, I recommend that you watch my “How to Replace a Concrete Sidewalk” YouTube video linked at the end of this article.
Table of Contents (Skip Ahead to Specific Sections)
Plan out your Sidewalk project
Before you can pour a concrete sidewalk, you will need to spend some time planning out the project. Things you will need to think about before starting the project are:
How much concrete will you need to replace the segment of sidewalk?
How thick will the concrete sidewalk be?
What type of concrete reinforcement (steel mesh or rebar) will be used (if any)?
Will a gravel subbase be used?
Will this sidewalk replacement project present a hazard to pedestrians?
Additionally, you will need the following tools and materials to pour a new concrete sidewalk:
Jackhammer (To remove the existing sidewalk – typically rented)
Demolish and Remove the Existing Concrete Sidewalk
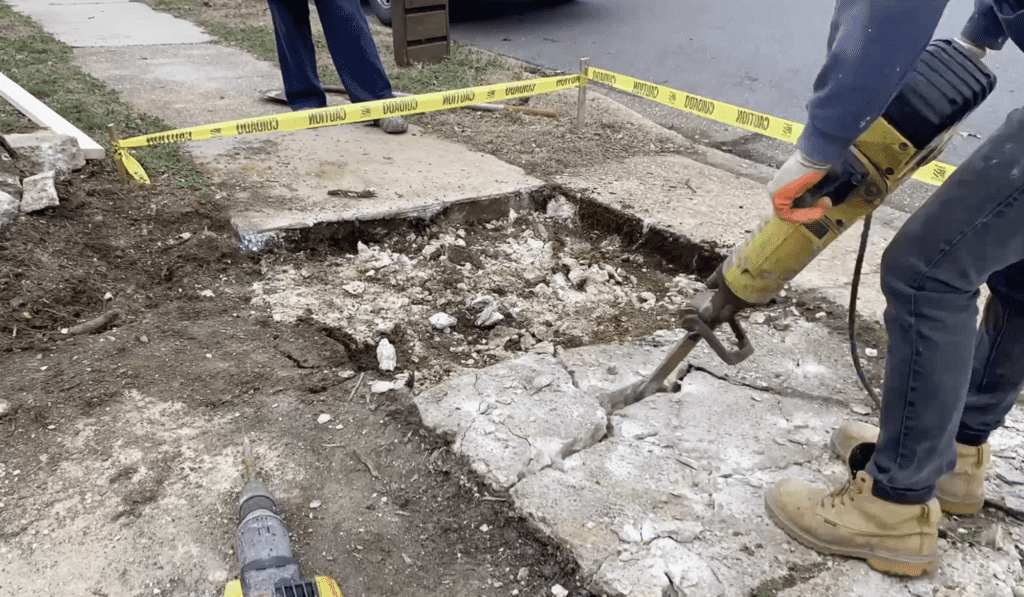
The first step in replacing a damaged segment of concrete sidewalk is to remove the existing sidewalk. To remove an existing sidewalk, it is recommended that you rent a jackhammer from your local big box store so that you can break up the concrete into smaller, more manageable chunks.
Use a Jackhammer to demolish the existing sidewalk
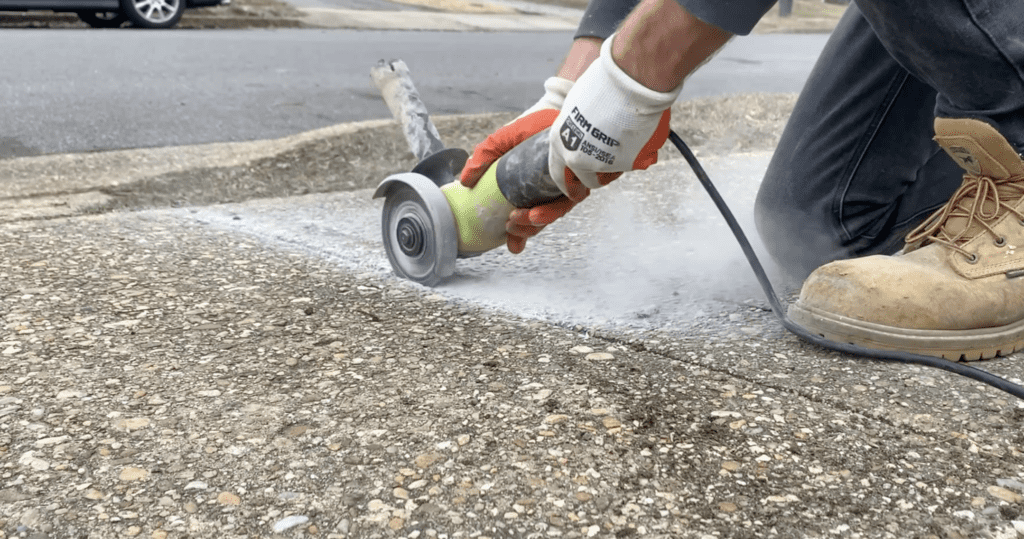
Additionally, use a concrete saw or an angle grinder to cut a control line in the concrete. This will allow you to use the jackhammer to remove a clean, straight line in the concrete.
Use an angle grinder to cut deep into the sidewalk’s control joint
PRO TIP: be sure to use the appropriate personal protective equipment (PPE) when doing any demolition work.
Use a jackhammer to break the sidewalk into smaller pieces and remove the rubble from the project area. Typically, you will dispose of the rubble at your local land fill.
Additionally, you will want to ensure that there are no tree roots or other obstructions in the area that will impact the construction of a new concrete sidewalk. After preparing for the new sidewalk, you can begin the excavation process.
Excavate the New Sidewalk Area as Needed
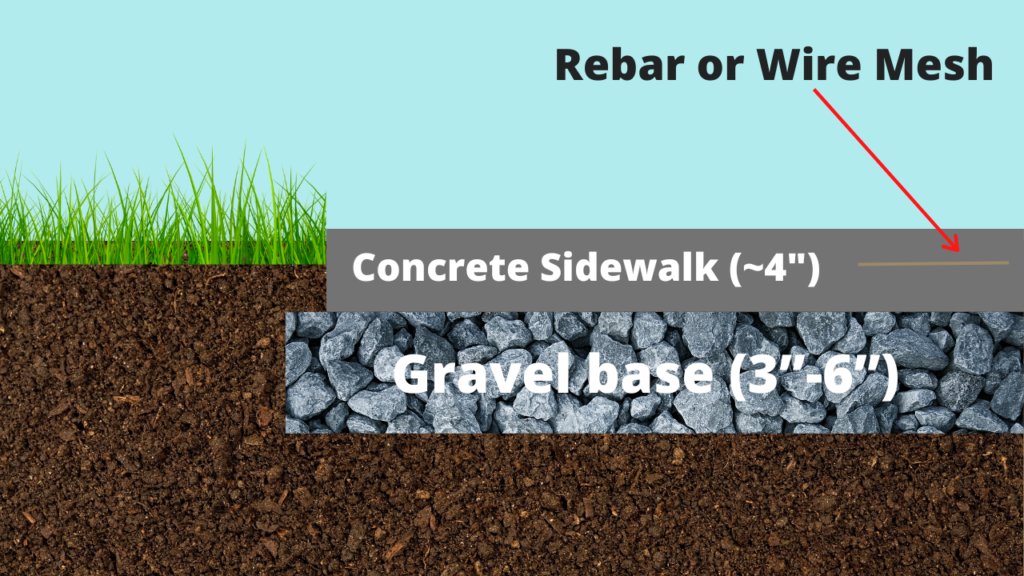
For most new sidewalks, I recommend that you excavate approximately 8” below grade. This will allow for a four inch gravel sub-base and four inches of sidewalk concrete thickness. Refer to the image below which illustrates the overall gravel and concrete thicknesses for most sidewalks.
Typical Excavation Depth, Gravel Subbase layer, and concrete sidewalk thickness
Although the figure above represents the “best practice” (in my opinion), there are many contractors that do not use a gravel subbase beneath sidewalks. If you choose to omit the gravel sub-base (not recommended) you may not need to excavate at all.
For small sidewalk replacement projects, a shovel is really all that you need to perform excavation. Use a shovel and rake to move the soil around as needed to get a level surface.
Compact the Soil
After excavating the area beneath the concrete sidewalk and checking that the soil is relatively level, you will want to compact the soil using a hand tamp. Compacting the soil is a very important step since it will help to prevent the new concrete sidewalk from settling over time. For small concrete sidewalk areas, a hand tamp should be all that you need to manually compact the soil. For large slabs, however, you may want to consider renting a mechanical compactor.
Apply Gravel Sub-base to the New Sidewalk Area (recommended)
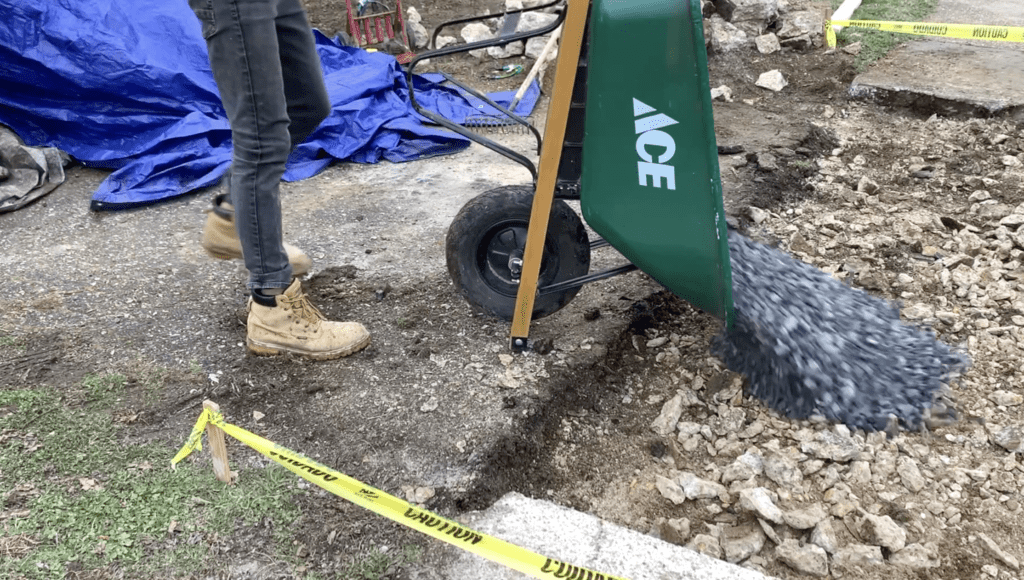
After compacting the soil, you will want to apply approximately 4” of a gravel subbase to the excavated area. Typically, No. 57 stone is used for the gravel subbase, but recycled concrete aggregate and crushed stone is also acceptable.
Apply gravel subbase
Applying a gravel subbase is important for two reasons:
Gravel serves as a strong base for the sidewalk to be poured on top of.
Gravel allows for excellent drainage beneath concrete sidewalk – preventing water from ponding underneath it.
Although some contractors and DIY’ers do not apply a gravel subbase beneath sidewalks, I highly recommend that you do not skip this step. Overall, a gravel subbase will result in a stronger concrete sidewalk and will minimize settling over time.
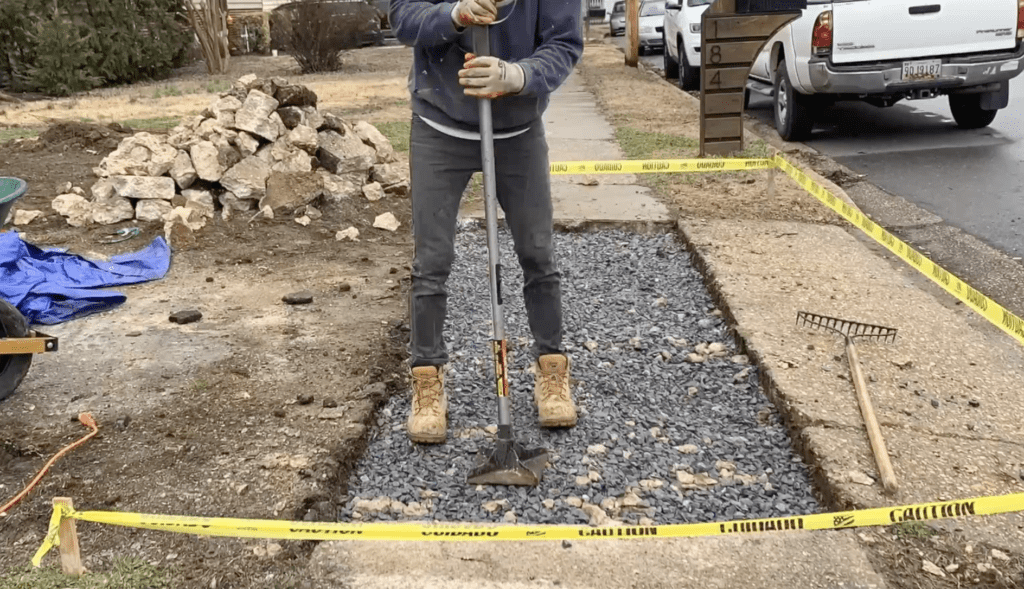
Compact the Gravel Sub-Base
After applying gravel to the new sidewalk area, you will want to compact the gravel subbase using a hand tamp – just as was done for the soil. Compacting the gravel will further protect the new concrete sidewalk from settling over time. For small concrete sidewalk projects, a hand tamp should be all that you need to manually compact the gravel subbase layer. For large sidewalk projects, however, you may want to consider renting a mechanical compactor to ensure proper compaction of the gravel.
Compact the gravel subbase with a hand tamp
PRO TIP: Do not take soil and gravel preparation and compaction lightly. It is likely that the reason the existing concrete needs to be replaced is because the foundation was not properly prepared and compacted in the first place.
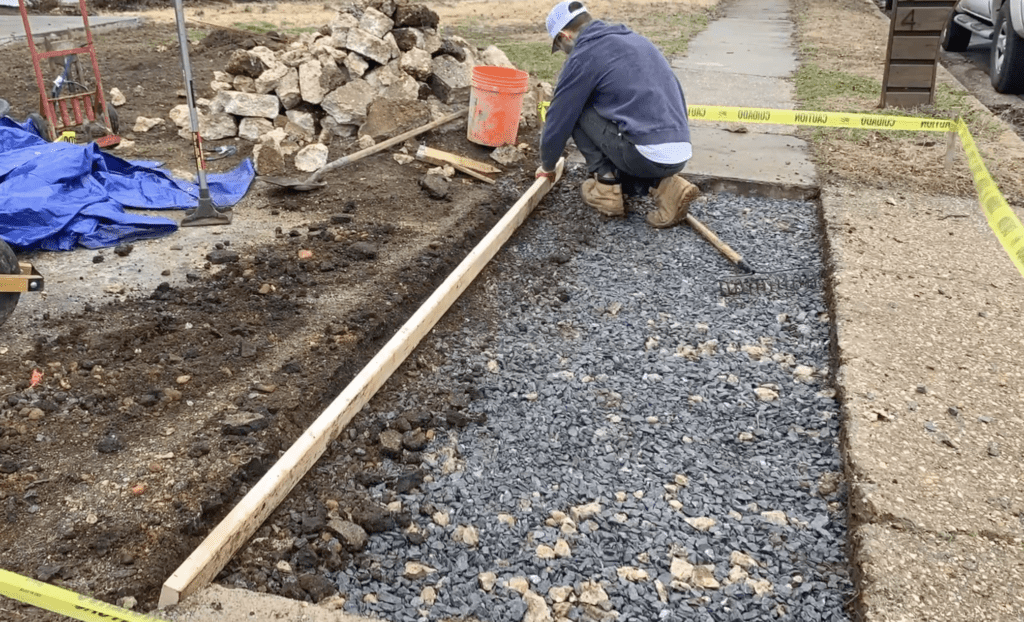
Construct Your Concrete Forms and Position Them in Place
After applying gravel to your new concrete sidewalk area, you will want to construct the concrete “forms” for your sidewalk. Concrete “forms” are simply the frame/perimeter for your sidewalk. To construct the forms, it is recommended that you use 2”x4” lumber. If you are replacing a curved section of sidewalk, you will need to use a flexible form material (for example, Hardboard ripped down into 4″ strips).
Build the concrete sidewalk forms
Build the forms as needed depending on your specific sidewalk project and secure the pieces of lumber together using screws or nails.
Confirm that your concrete forms are level on both sides of the sidewalk and then use stakes to secure the “forms” along the entire length.
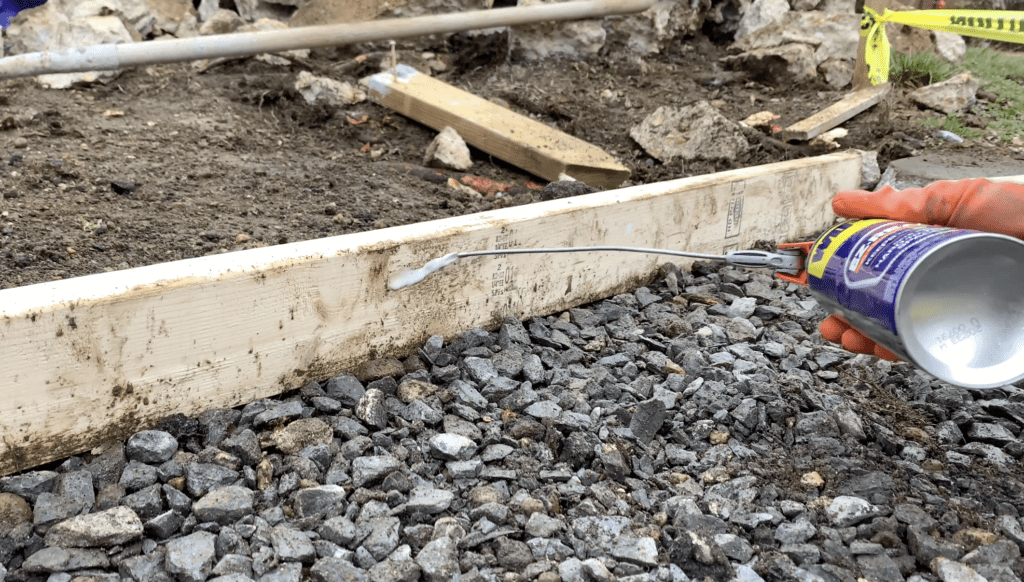
PRO TIP: Considering applying a “form release agent” to the face of the form that will be contacting the concrete. A “form release agent” is typically an oil-like coating that will help the form to easily “release” from the concrete. If a “form release agent” is not applied, you may find that the forms get stuck to the concrete – making them difficult to remove later. Motor oil, cooking spray, and WD-40 are all suitable form release options that you probably have around the house.
Apply a from release agent like WD-40 to the concrete forms
Additionally, be sure that the top of your forms is even with any adjoining sidewalks (to prevent a tripping hazard).
Reinforce the Concrete sidewalk (if necessary)
After assembling your forms, you will want to decide if your concrete sidewalk will need reinforcement. Although concrete has great compressive strength, it is prone to cracking when subjected to tensile forces. As a result, steel “rebar” or steel wire mesh is sometimes added to concrete to give it additional strength and to help prevent it from cracking.
For small concrete sidewalk projects, steel reinforcement is not typically installed. Instead, fiberglass reinforced concrete mix is typically used. The fiberglass strands added to the concrete help to reinforce the concrete and prevent it from cracking.
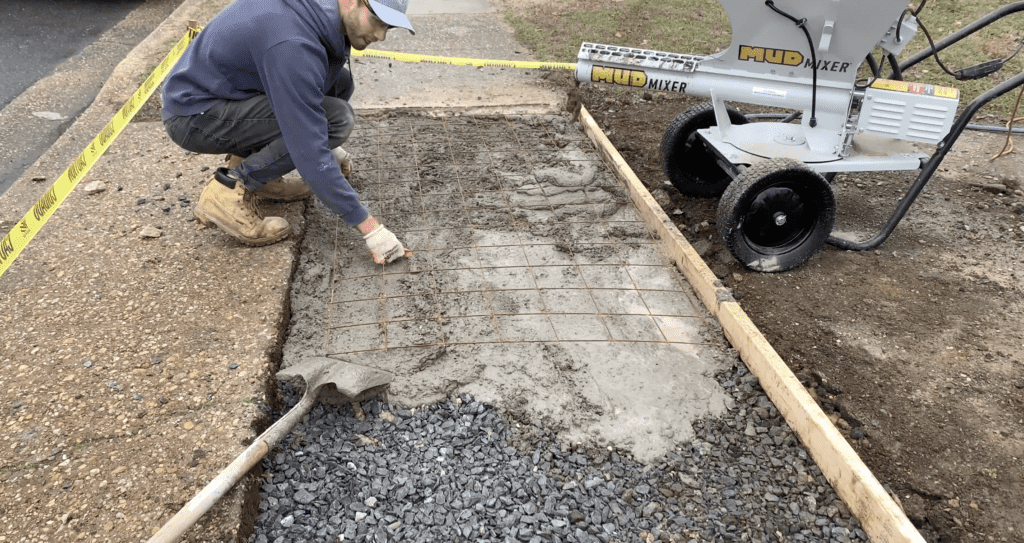
For larger sidewalks, or sidewalks that will experience heavy traffic, you will likely want to add reinforcement. For my sidewalk, I used steel wire mesh for reinforcement. Trim the steel wire mesh to the required size using an angle grinder (with a metal cutting wheel) or bolt cutters.
Apply steel wire mesh reinforcement as needed
You will want to position the reinforcement so that it is positioned in the middle of the concrete sidewalk. To do this, you can place the reinforcement on small pedestals called “concrete chairs” OR you can apply 2” of concrete, add reinforcement, and then pour the remaining 2” of concrete. Either method will work.
Additionally, ensure that the edges of the reinforcement are approximately 1″ from the forms. You don’t want the reinforcement to be visible on the sides of the sidewalk.
Apply Concrete to the Concrete Sidewalk Application Area
At this point, it is time to apply concrete to the new concrete slab application area. When pouring a new concrete sidewalk, you have two options:
You can mix the concrete by hand using dry concrete bags
You can have premixed concrete delivered to your project site.
For small concrete sidewalk replacement projects, it is often more economical to mix up your own concrete by hand. There are many different dry concrete mixes that you can pick up at your local big box store – so pick the right type of concrete mix for your specific application. In the past, I have poured concrete sidewalks using the following concrete mixes, but the choice is ultimately yours:
Apply concrete to the sidewalk area
Rapid Set 24/6 mix (sets rapidly – best for small projects)
Sakrete High-strength Concrete Mix
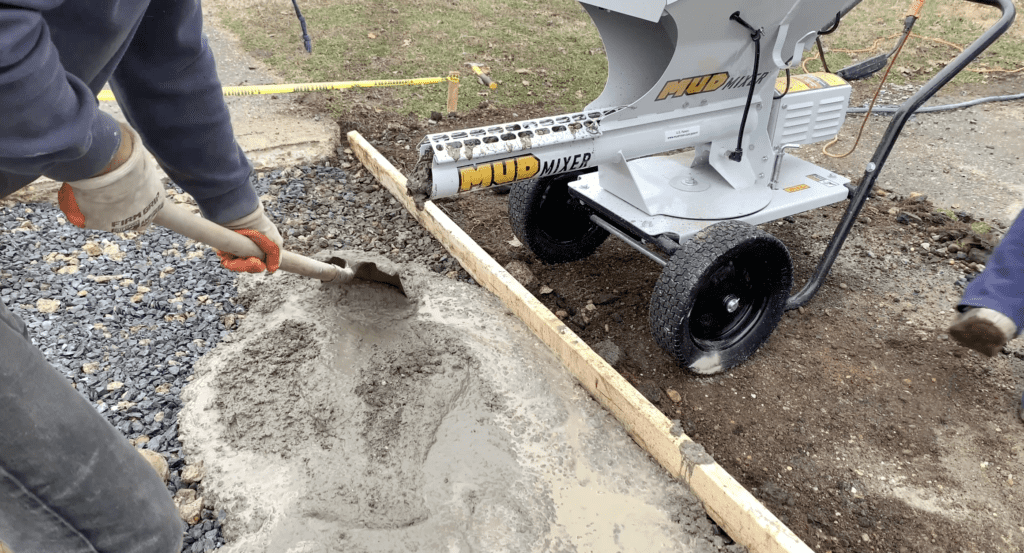
To mix concrete by hand, add the dry concrete mix and the appropriate amount of water to a wheelbarrow and mix it up using a shovel. Next, simply pour the concrete within the sidewalk form area. The wheelbarrow method of mixing concrete should only be used for very small concrete projects – since it is labor intensive.
To speed up the concrete hand-mixing process, I recommend that you rent a mechanical concrete mixer. It will make the concrete mixing process much quicker and easier.
I had the luxury of using the MudMixer for my concrete sidewalk replacement project, which made the concrete mixing process a breeze. The MudMixer can mix up to 40 bags in one hour with makes the mixing process a breeze.
PRO TIP: Moisten the sidewalk sub-base gravel with water (using a spray bottle) prior to applying concrete. This will help to prevent the concrete from drying out prematurely.
If you have a large concrete sidewalk replacement or repair project, it is much easier to simply have the concrete delivered via concrete truck from a local concrete supply company. However, this convenience comes at a price. Do some research and call few different concrete companies to see if concrete delivery is the right choice for your sidewalk.
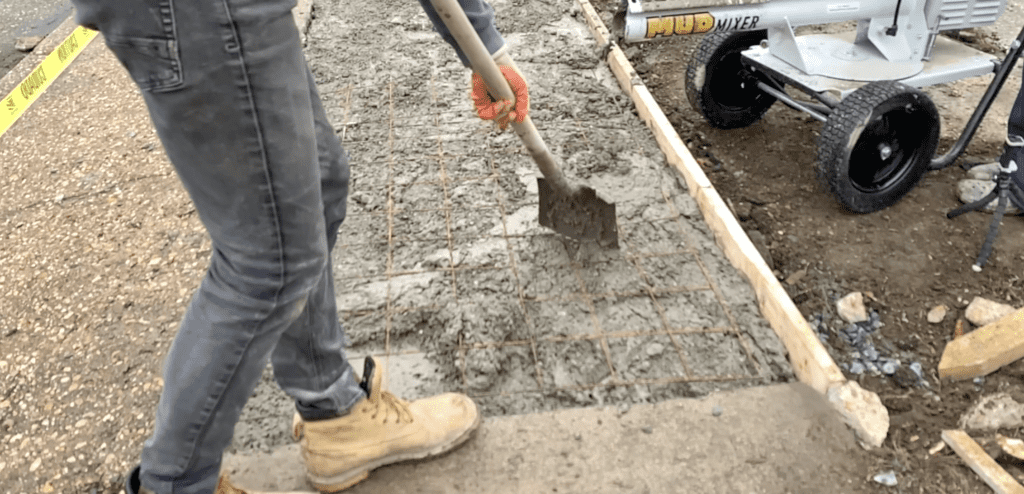
Whether you choose to mix concrete by hand or have it delivered, the application process is the same. Simply pour the concrete into the new concrete sidewalk area (on top of the compacted gravel subbase) and continue to apply concrete until the entire “form” area is filled with concrete. If you have a little excess concrete within the form area, this is not a problem. It will be removed in the next step.
Fill up the entire sidewalk form area with concrete
PRO TIP: Use a concrete volume calculator to determine the amount of concrete you will need to purchase for your concrete sidewalk repair and replacement project.
Finish the Concrete
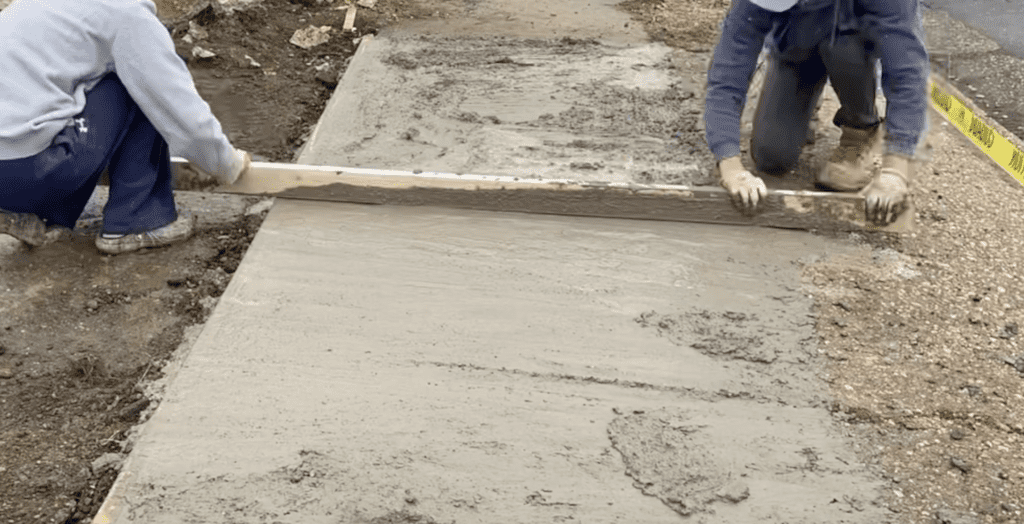
After applying concrete to the sidewalk form area, you will need to “finish” the concrete. Start by using a long, straight piece of lumber to screed the surface of the concrete. Use the forms as “rails” to run the screed board across.
Screed the surface of the concrete sidewalk
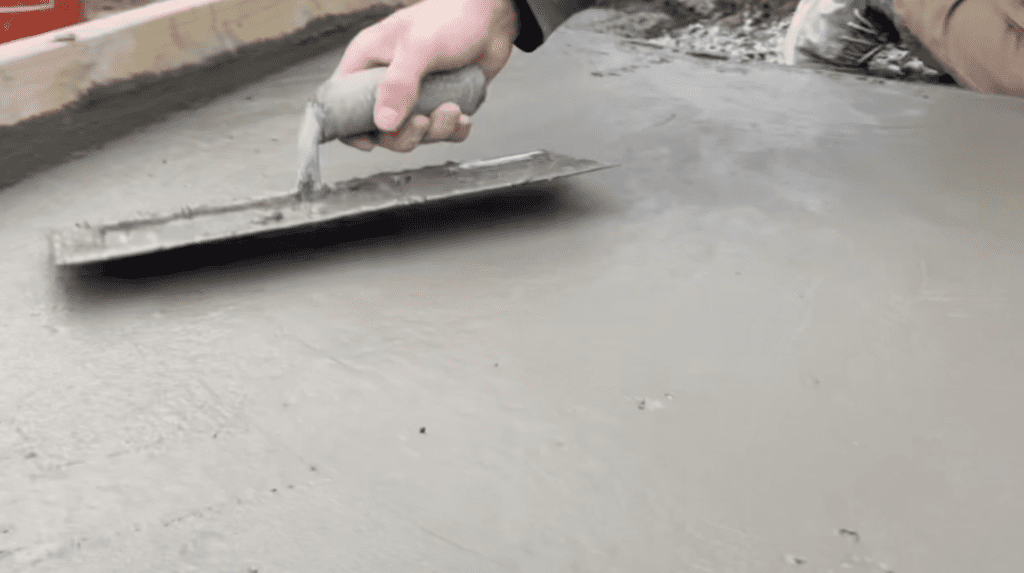
After getting the concrete surface relatively level and flat using the screed board, you will want to use a concrete hand trowel or a bull float to smooth out the surface of the concrete. For a small sidewalk, a hand trowel should be all that you need. For larger sidewalk projects, however, you will want to consider renting a bull float from your local big box store.
Smooth out the surface of the concrete using a hand trowel
Run the hand trowel or bull float along the concrete surface until a nice, even finish is achieved.
PRO TIP: Concrete finishing with a hand trowel is an “art”. I recommend that you spend some time watching a few YouTube videos on the concrete finishing process so that you have the knowledge needed for a successful application.
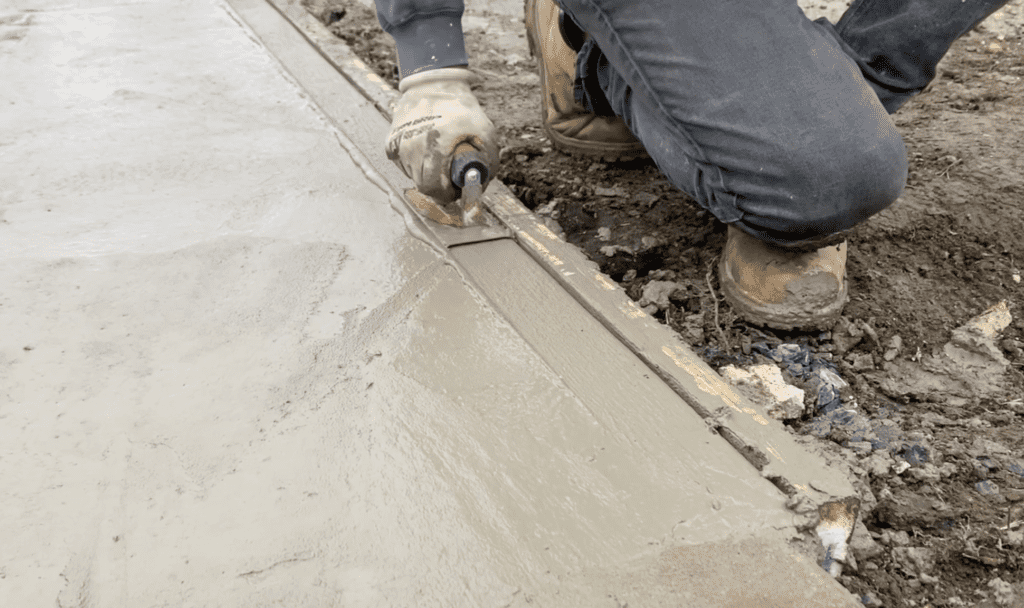
You may also want to use an “edging trowel” on the edges of the concrete sidewalk to give your concrete sidewalk a rounded edge. To do this, simply run the edging trowel back and forth between the edge of the concrete surface and the concrete “form”.
Use an edging trowel to round-over the edges
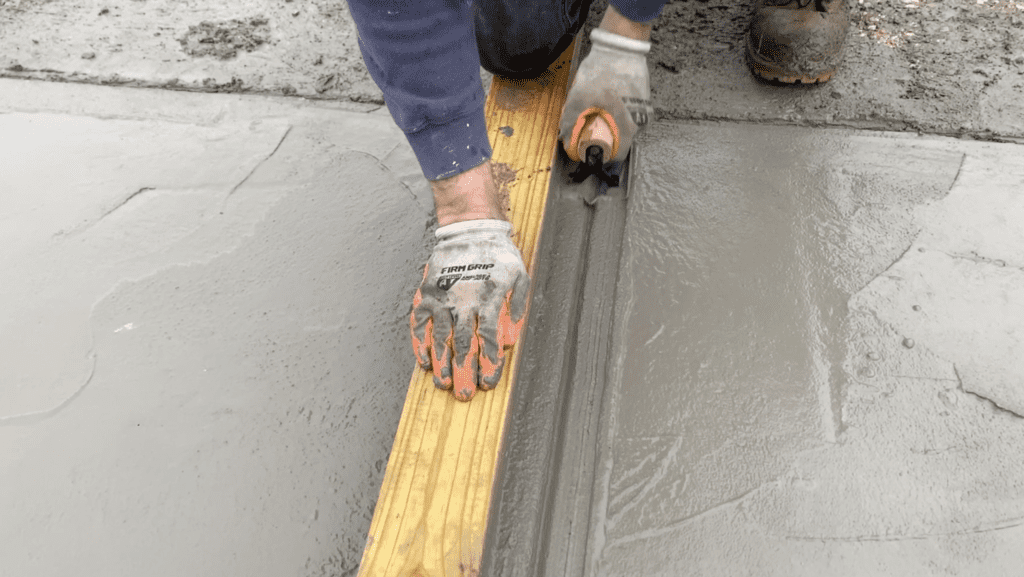
Lastly, you may want to consider adding “control joints” in your sidewalk. One thing is guaranteed about concrete – it will crack. However, you can try and control where the concrete will crack by strategically placing “control joints” in the concrete. A “control joint” is a shallow relief cut along the concrete surface that serves as an intentional weak point. The goal of these relief cut weak points is for the concrete to crack along them – as opposed to cracks randomly forming.
For concrete sidewalks, it is recommended that you place a control joint every 4 feet along the entire length of the sidewalk. However, you should match the joint spacing of any adjoining sidewalk (for uniformity).
Add control joints to the concrete sidewalk every 4 feet on center
You can either saw cut control joints after the concrete has cured using an angle grinder or a concrete saw OR you can make the control joints while the concrete is still wet using a “joint/grooving trowel”. Since adding control joints after the concrete has dried creates a lot of dust, I recommend that you add the control joints while the concrete is still wet.
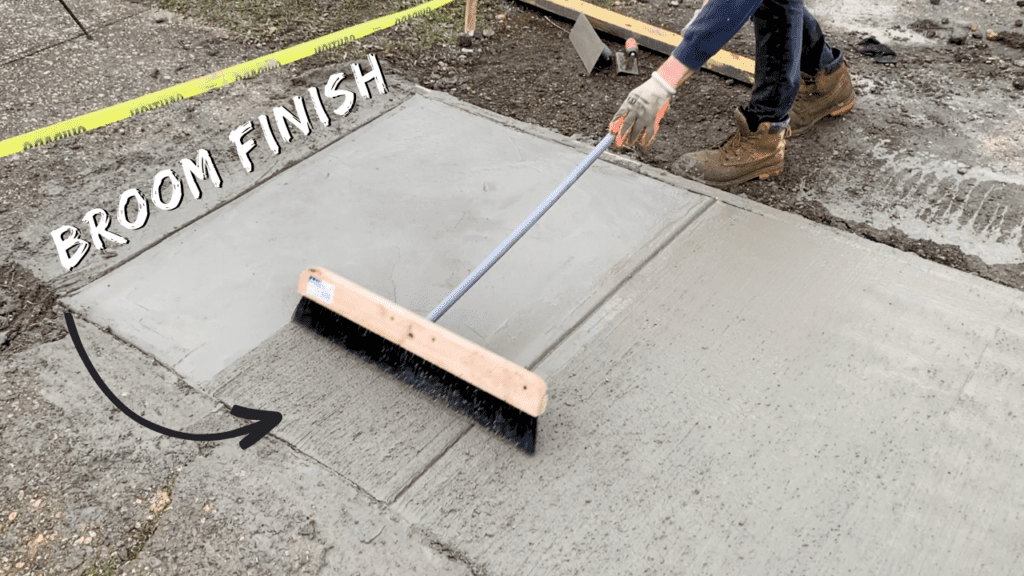
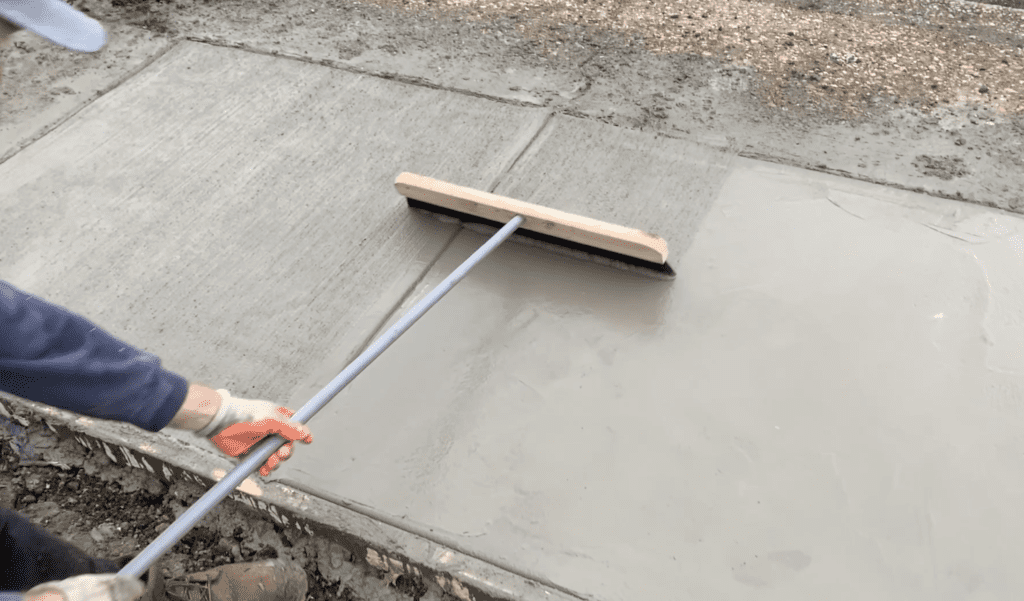
After applying the concrete and smoothing it out evenly with a hand trowel, it is generally recommended that you apply a “broom finish” to the concrete slab surface.
A broom finish is one of the most common concrete sidewalk finishing practices and it is achieved by pulling the bristles of a broom over the surface of the concrete. This broom finishing process accomplishes two things:
Broom finishing provides a textured non-slip concrete surface that is much less slippery when wet.
A broom finish provides an aesthetic textured surface that hides any imperfections in the concrete.
For the reasons listed above, it is recommended that you apply a broom finish to your new concrete sidewalk.
To apply a broom finish, wait for the concrete surface to cure SLIGHTLY. Do not let the concrete surface become too hard. Next, simply take a concrete broom and brush it along the surface of the concrete. Apply light, even pressure and simply pull the broom along the entire concrete surface.
Apply a broom finish to the concrete sidewalk
If performed correctly, you will be left with uniform, textured “bristle marks” that give your new concrete sidewalk a finished look.
Allow the Concrete to Cure Resurfacing Product to Fully Cure
After finishing the concrete and applying a broom finish (if desired), simply allow the freshly applied concrete to cure according to the manufacturer’s recommendations. Typically, concrete takes around 24-48 to cure before you can walk on it. Concrete takes approximately 28 days to reach its full strength.
Remove the Concrete Forms
After allowing the concrete to cure according to the manufacturer’s recommendations, you will want to remove the wooden forms from around the concrete sidewalk. Remove the nails/screws that you used to temporarily told the form together and gently pry the forms off the vertical face of the concrete.
PRO TIP: Use a prybar as needed to remove the forms – but be sure not to chip or damage the concrete in the process.
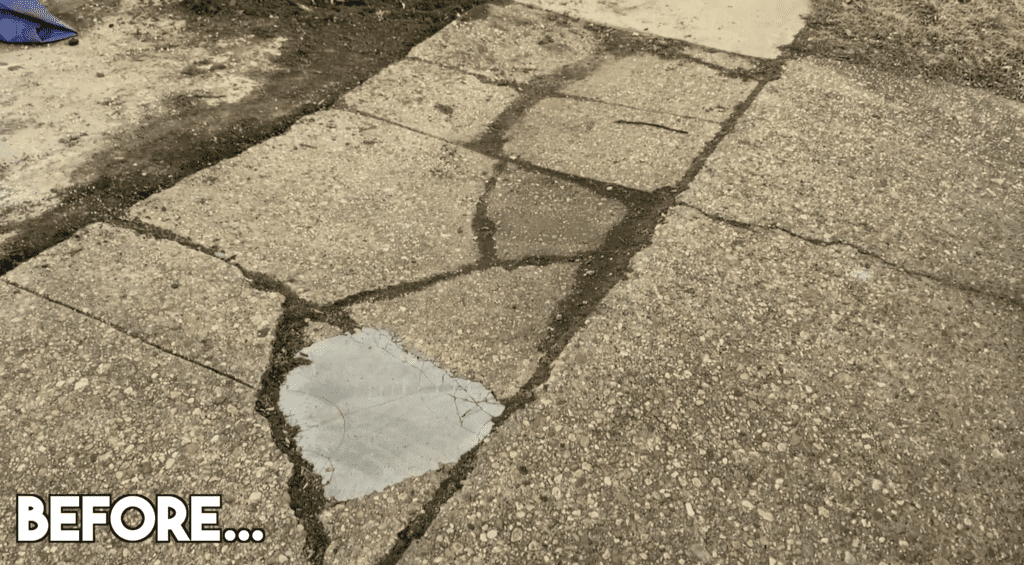
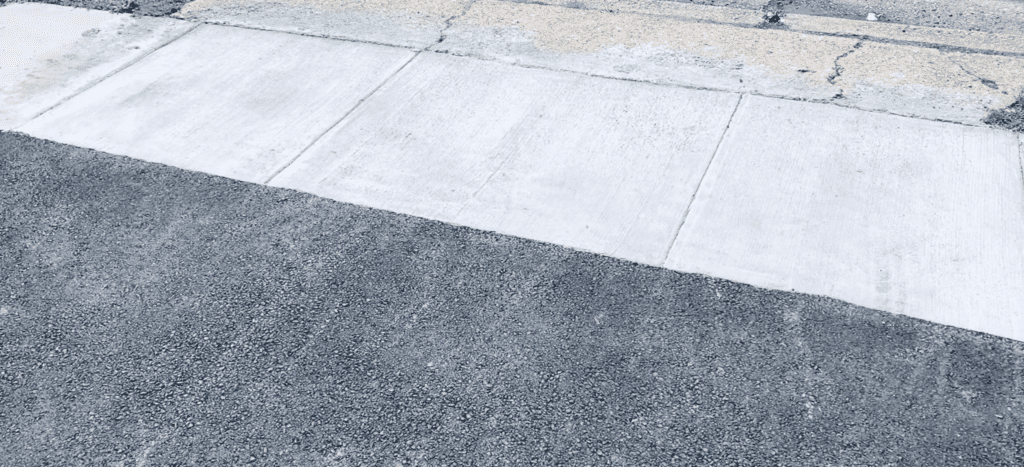
After removing the concrete forms, you have successfully replaced a concrete sidewalk. After applying sealer to your concrete slab, your project is complete. Take a look at the before and after photos below:
Final result of the replaced concrete sidewalk
If you are more of a visual learner, you can watch my “How to Replace a Damaged Concrete Sidewalk” YouTube video linked below:
Learn How to Replace a Segment of Sidewalk with my DIY Instruction Video
Thanks so much for checking out ATImprovements! If you learned something from this project, you might also like these other DIY Projects:
DISCLAIMER: This is a reference guide only. Links included in this article might be affiliate links. If you purchase a product or service with the links that I provide I may receive a small commission. There is no additional charge to you! Thank you for supporting ATimprovement
Andrew Thron has established himself as an expert in the field of home renovation helping millions with their DIY home renovation and home improvement projects through detailed YouTube video tutorials, Instagram project ideas, and step-by-step blog articles.
Adding a gable porch roof overhang to an existing house is one of the best ways to add curb appeal. Rancher style homes in particular can benefit from this project since the gable porch overhang will...
Floating Mantles and floating shelves have become increasingly popular in recent years - and it's easy to see why! The hidden hardware/brackets make the mantel look more sophisticated and the look of...