
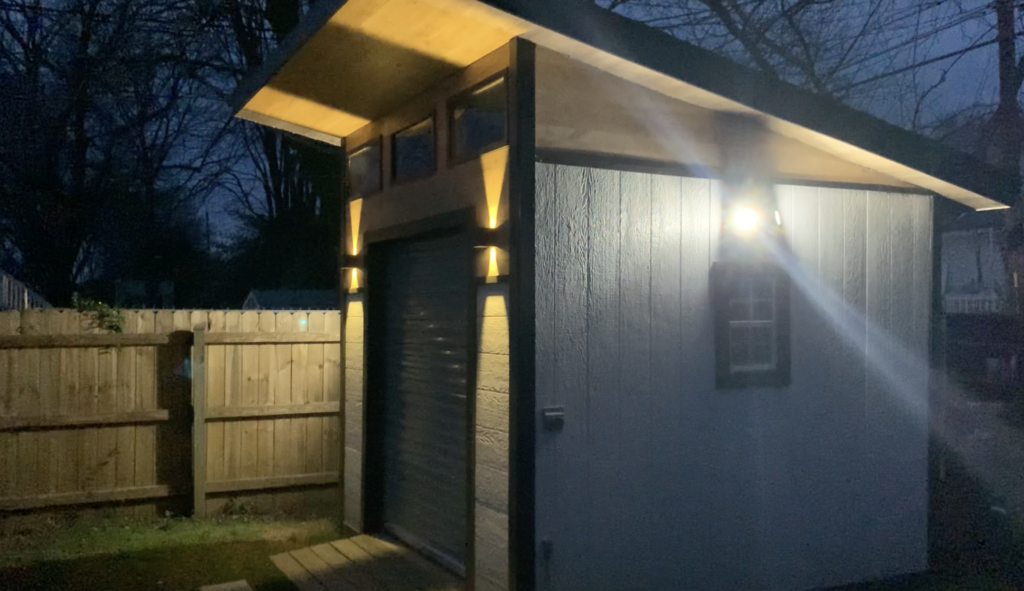
Running electricity to a shed is a DIY project that will allow you to add lights, outlets, etc. which can significantly improve your working space. For this reason, adding electricity to a shed is a project that many homeowners are interested in tackling. If you spend a lot of time working in your shed, having electricity is a MUST.
To run electricity to a shed or outdoor building, start by planning out the the electrical cable routing. Next, add a GFCI outlet or Circuit Breaker to the home’s electrical panel and route the the new circuit wire to the home’s exterior. Excavate your electrical cable trench to the proper depth and install conduit. Finally, run the electrical cable through the conduit and into the shed. Backfill the trench and test all connections.
Although every shed electrical project will be a little different, this guide will give you the general steps needed for the successful addition of electrical to your shed. Additionally, if you are more of a visual learner, you can watch my “How to Run Electricity to a Storage Shed” YouTube video at the end of this article.
DISCLAIMER– This is a reference guide only. Electrical work should always be performed by a licensed electrician in adherence with all local codes.
Tools and Materials Needed to Run Electricity to a Shed

To successfully Run Electricity to Your Shed, you will need the following tools and materials:
- Safety Equipment (Glasses, gloves, boots, etc.)
- Tape Measure
- UF-B electrical cable
- PVC Conduit
- PVC Conduit Cement / Glue
- GFCI Outlet
- Shovel / Post Hole Digger
With all necessary tools and materials on hand, you can now begin running electricity to a shed.
1. Plan Out Your Electrical Layout

The first step in running electricity to your shed is to plan out your electrical cable routing. Typically, a shed’s electricity will be supplied from your home’s main electrical panel. However, there are also other options.
I recommend that you consult with a local electrician to have them come take a look at your shed, home, etc. so you can get their thoughts on the best source of electricity. Typically, you can get an electrician to come out and give you a quote/ideas for no charge.
For my specific shed electricity application, I had a local electrician come out and we discussed my specific shed electricity application.
After some discussion, it was decided that the best way to supply the shed with electricity would be to add a GFCI circuit to the existing electrical panel in my home. Electrical cable would then be run through my basement (up along the floor joists) and routed to my home’s exterior – near the shed.
Obviously, everyone will have a slightly different electrical routing for their specific shed electricity application. Therefore, spend some time planning out how your electrical wire will:
- Get from your home’s electrical panel to the exterior of your home.
- How the electrical cable will get below grade and be buried.
- How the electrical cable will be routed below grade to the shed.
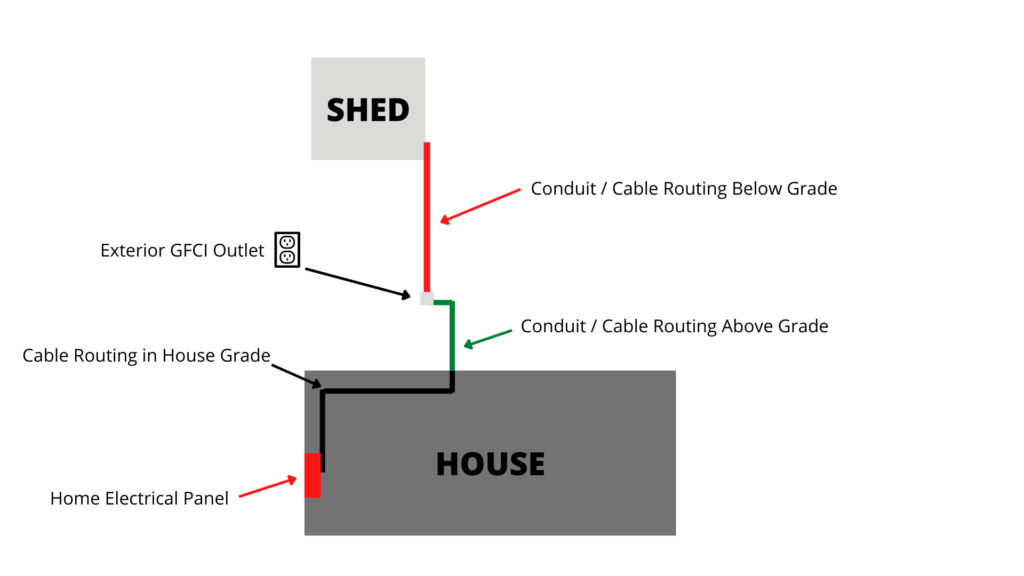
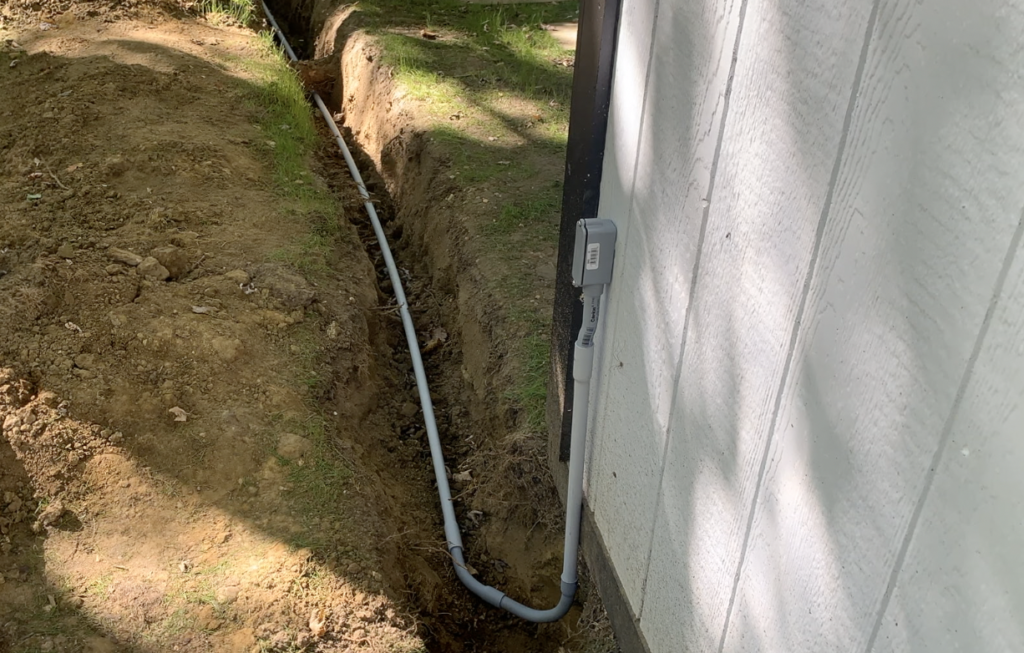
In my case, I decided to route the electrical cable from my home’s electrical panel to my home’s exterior. Next, I planned to route my conduit above grade along my deck joists to the end of my deck. I decided to install an exterior outlet at the end of my deck which would be GFCI protected. After the electrical outlet, the electrical cable would run below grade and be routed underground to the side of my shed – refer to the figure above.
Again, feel free to consult an electrician for the best electrical cable routing for your application. Once you have a good idea of how you will run your electrical cable from your house to your shed, you can move on to the next step of the project.
2. Install a Dedicated GFCI Shed Circuit and Run Electrical Cable to the Exterior of Home
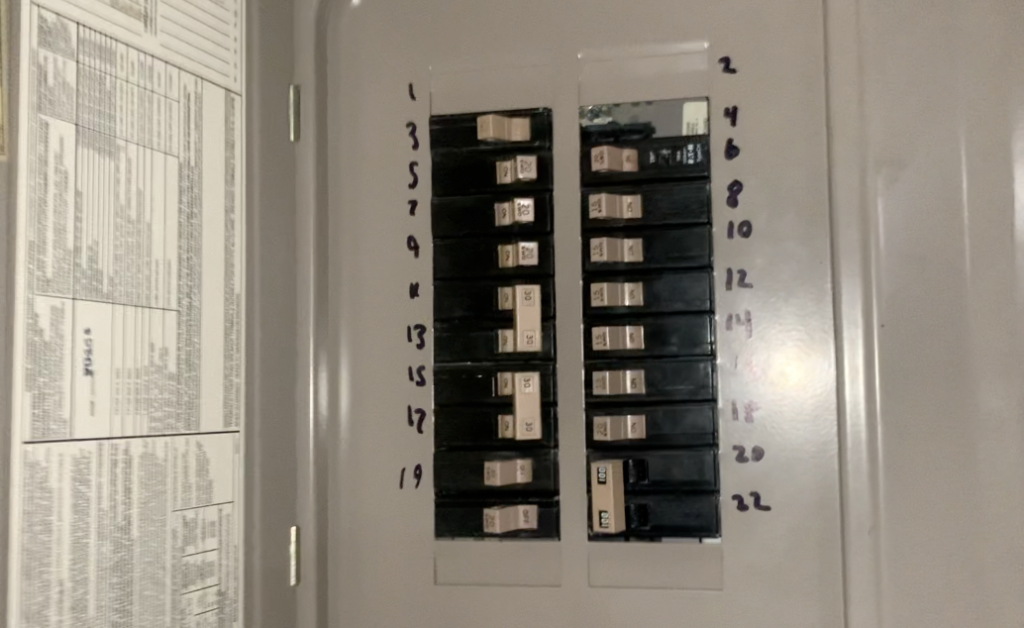
Although I am comfortable with performing a lot of electrical work on my own, I always hire an electrician to work in my electrical panel (i.e. when circuits need to be added) and to inspect any work that I self-perform.
In this case, the first step in running electrical cable to the shed was to hire an electrician to add a dedicated 20 amp GFCI circuit to my electrical panel.
Disclaimer – Electrical work should ONLY be performed by a licensed electrician in adherence with all local codes.
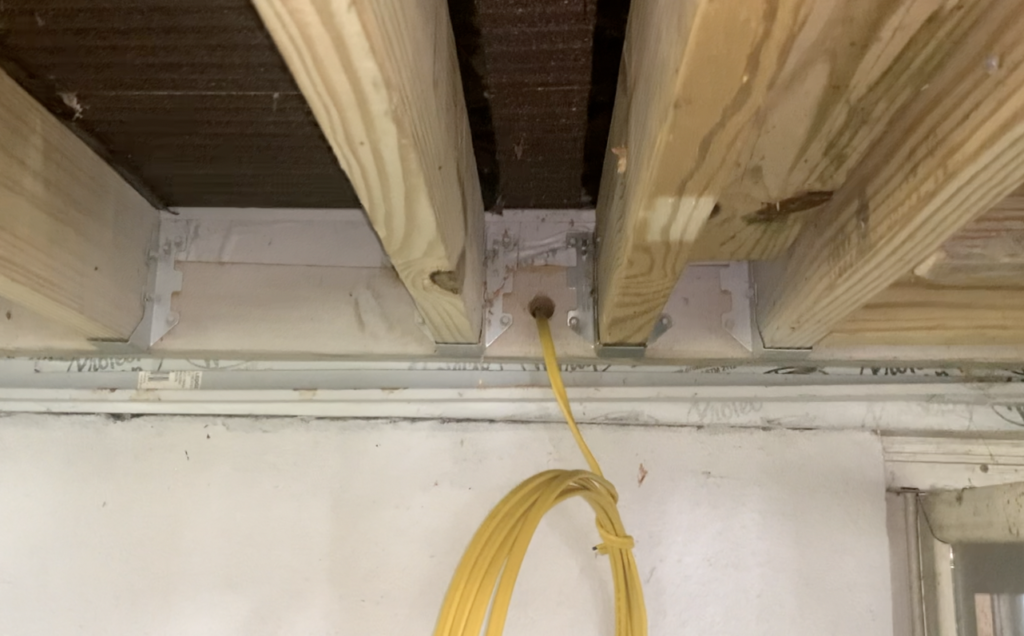
After the electrician added the circuit to my home’s existing panel, I routed the new circuit’s electrical wire across my basement to the band joist of my homes framing. I then drilled a small (1/2”) hole through the band joist to allow for the electrical cable to reach the exterior of my home.
I ran the cable through the hole to the exterior of my home and left approximately 25’ coiled up – which was enough length to reach the location of the exterior outlet (to be installed in a later step)
3. Excavate Your Electrical Cable Trench
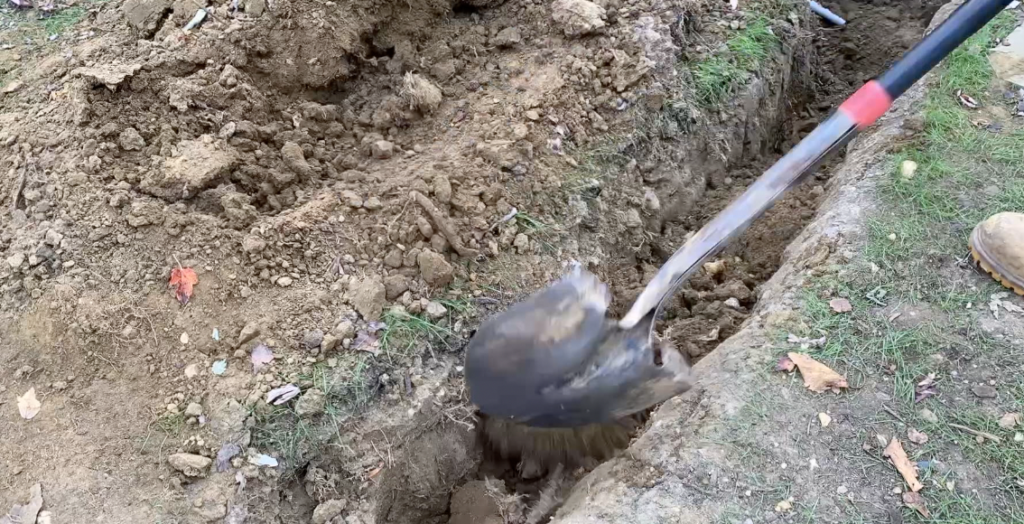
Before you begin running conduit (if applicable) from your home’s exterior to your shed, it is recommended that you complete any and all excavation beforehand.
The depth of excavation you will need depends on the type of conduit you will be installing. Further, there are also electrical cable options that can be directly buried without the use of any conduit whatsoever.
Let’s discuss the various electrical conduit and electrical cable options available for this shed electricity application.
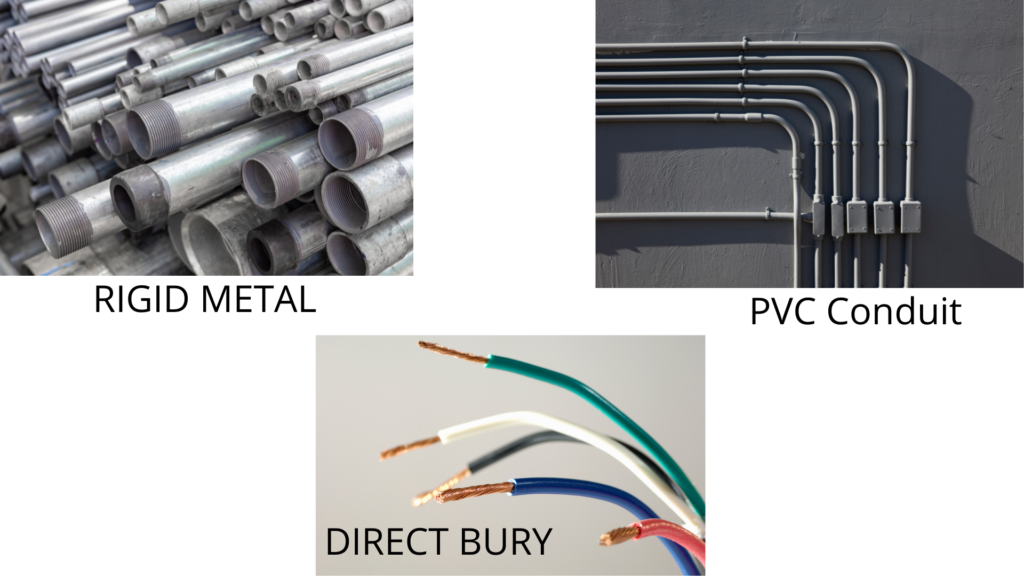
There are many different conduit and cable options when running electrical cable below grade. The type of cable/conduit cable you select will determine the bury depth you will need.
Again, consult with all local electrical codes regarding buried cable materials and depths. All electrical work should be performed by a licensed electrician.
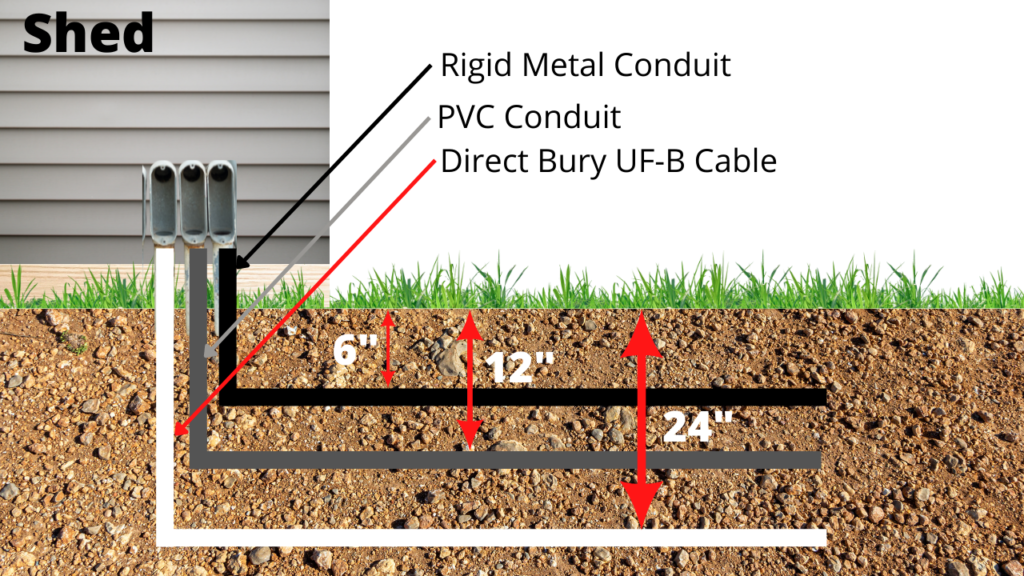
If you are using rigid metal conduit, you only need to bury your conduit 6″ below grade. If you plan on using PVC conduit, you will need to bury your conduit 12″ below grade.
Note: 12″ burial of PVC conduit is contingent on the following:
- The cable within the PVC conduit is GFIC protected before in routed below grade
- The circuit is limited to 120 Volts and is protected by no more than a 20-amp circuit breaker
If your application does not meet the requirements above, you will likely need to bury your PVC conduit at 18″-24″. Refer to your local building codes.
Lastly, there is a type of electrical cable called “UF-B” that can be directly buried with no conduit. This type of cable must be buried a minimum of 24″ below grade. Refer to the conduit / cable burial depth guide listed below.
After establishing your conduit/cable routing and after you have determined what type of cable/conduit you plan on using , simply excavate as needed for your required depth.
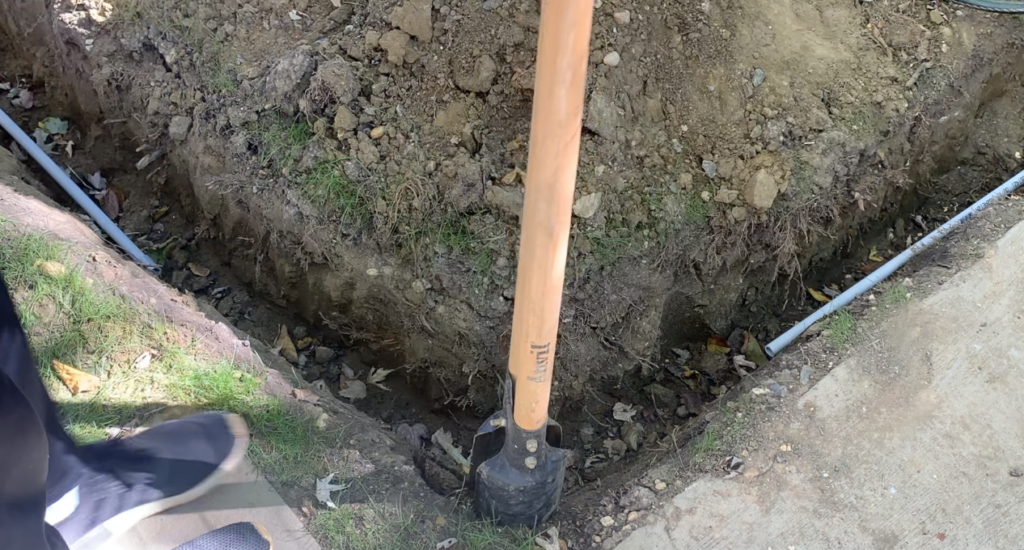
I recommend that you use a shovel and post-hole digger for shallow bury depths. It may be beneficial to rent a mechanical auger/excavator for deeper/longer burial applications.
PRO TIP – Be sure to contact your local utility location company to mark any existing underground utilities prior to excavating.
After excavating, you can can begin installing your conduit and cable.
4. Install Conduit (If Applicable)
After deciding what conduit is best for you application (if any), you can begin installing the conduit.
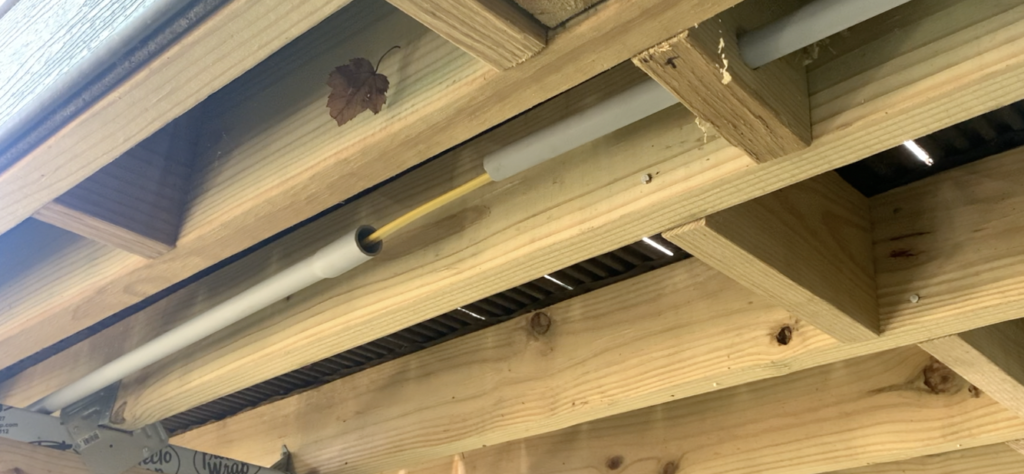
For my application, I used ½” PVC conduit, with various bends and elbows (as required for my specific conduit routing).
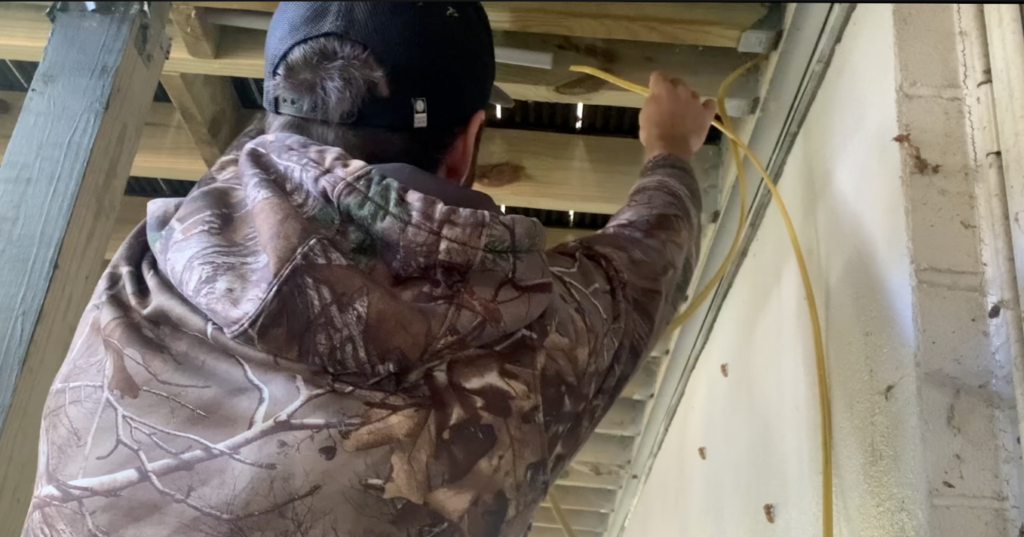
To begin my conduit installation, I placed my first piece of conduit at my home’s exterior and ran the electrical cable though it. I found that incrementally installing the conduit and then running the electrical cable though it piecemeal was the easiest approach.
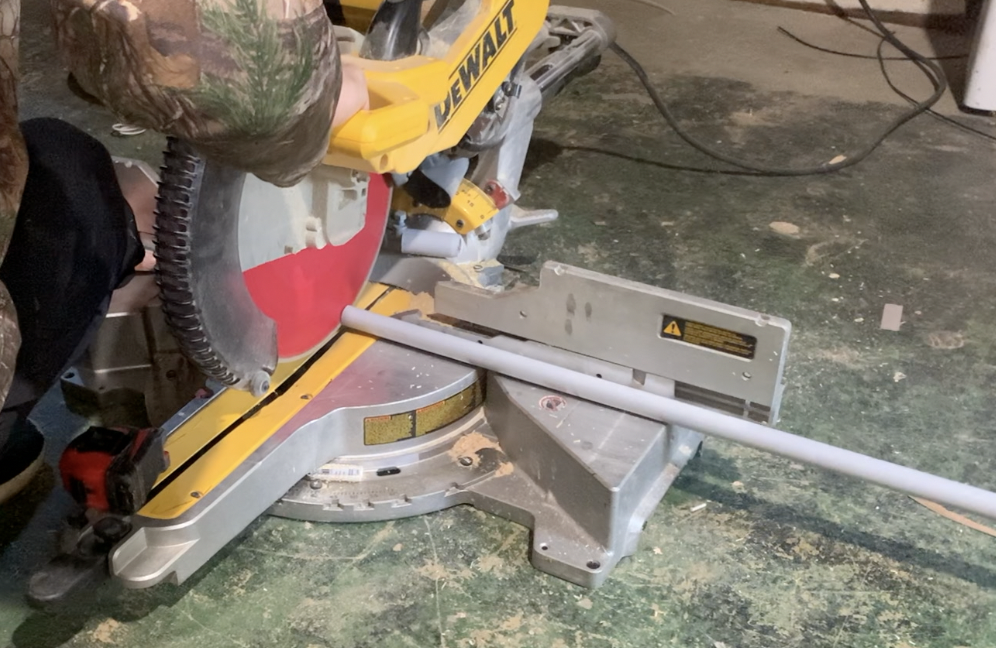
You will need to trim some of your conduit as you install your conduit layout. Measure and cut your conduit to size using a miter saw, hack saw, etc.
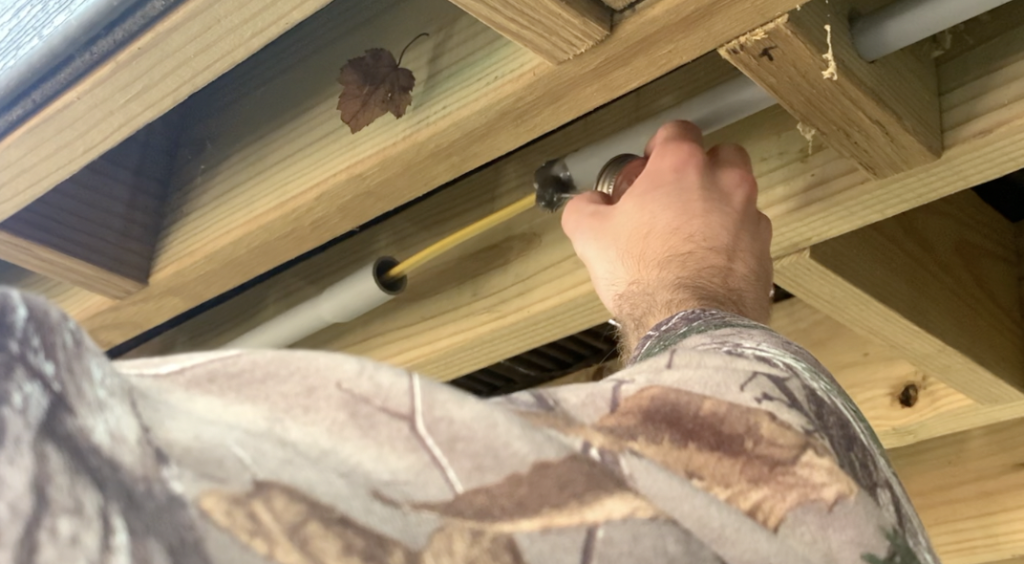
To attach pvc conduit together, you will need to use PVC coduit cement glue. Apply the PVC cement glue to each end of the PVC conduit segments that you are joining together and firmly press and hold the two ends together for 20-30 seconds.
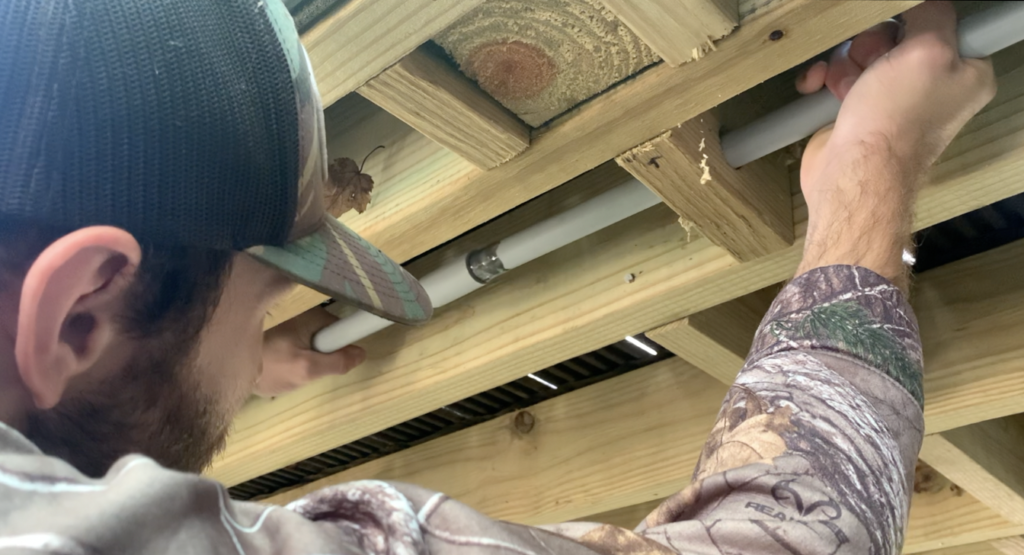
Once I got routed the PVC conduit to the end of my deck, I installed a 90 degree bend to allow the conduit to transition from horizontal to vertical.
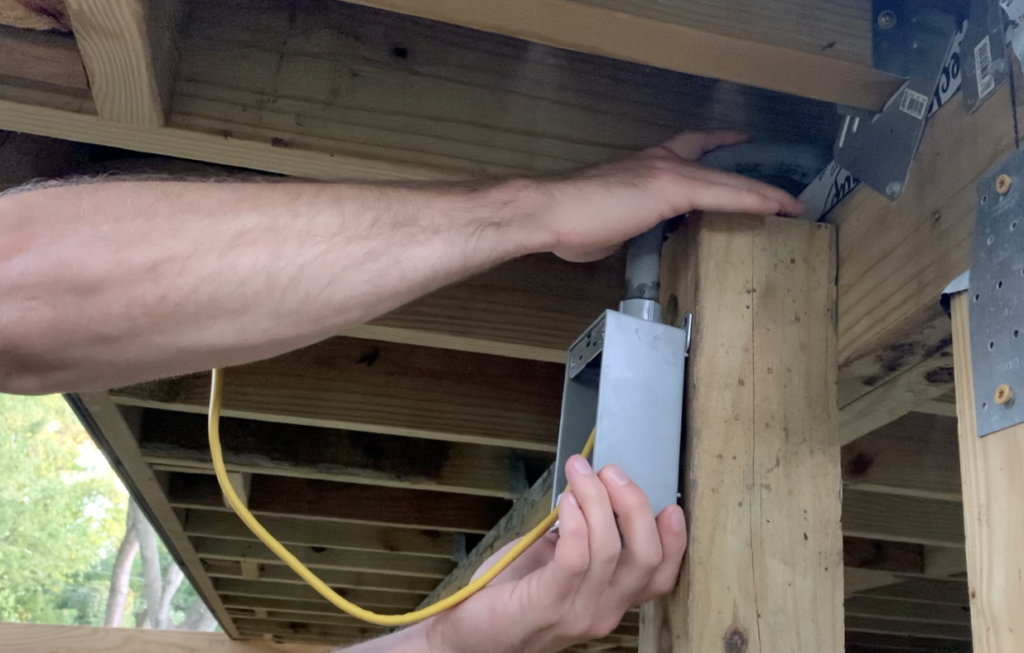
I then mounted a 4”x4” pressure treated backing board to my shed (as a brace) and then installed a GFCI exterior outlet – which will be discussed in the next step.
5. Install An Exterior GFCI Outlet (Optional)
In my opinion, you can never have too many exterior outlets. As a result, I highly encourage you to consider adding an exterior rated GFCI outlet to your shed (or home) exterior as part of your shed electricity project.
To add an exterior GFCI outlet, start by selecting an appropriate exterior outlet for your application. In my case, I used an exterior GFCI outlet that had an integral waterproof outlet cover.
Typically, exterior outlets will have mounting brackets that will allow you to fasten the outlet box to your mounting block (which is the 4″x4″ piece of lumber in this application).
Additionally, exterior outlet boxes will usually have built in conduit connections which will allow you to run conduit/cable into and out of the outlet.
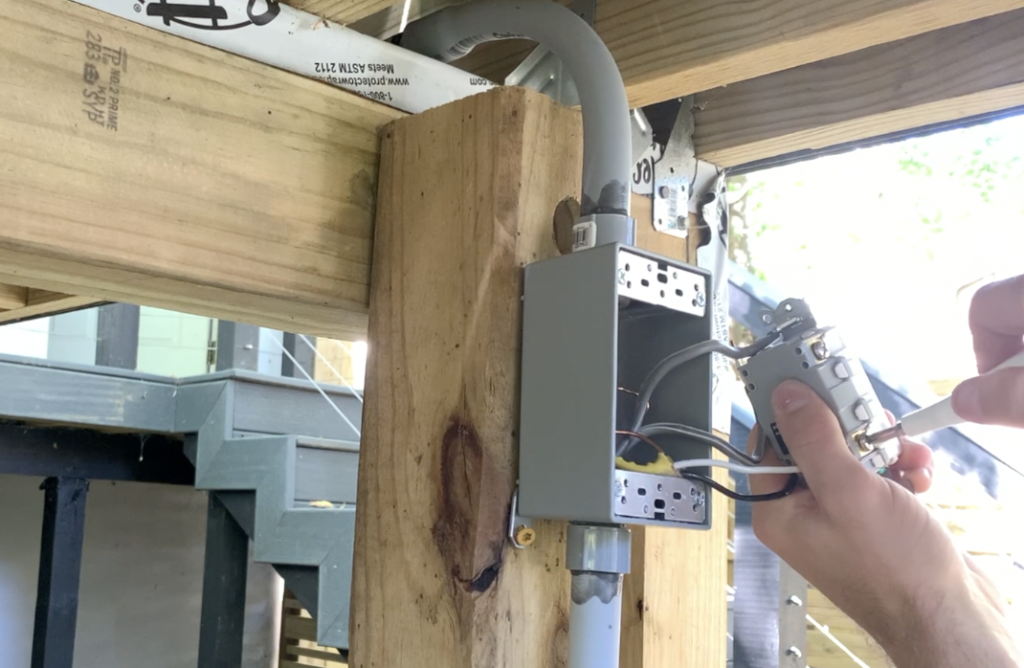
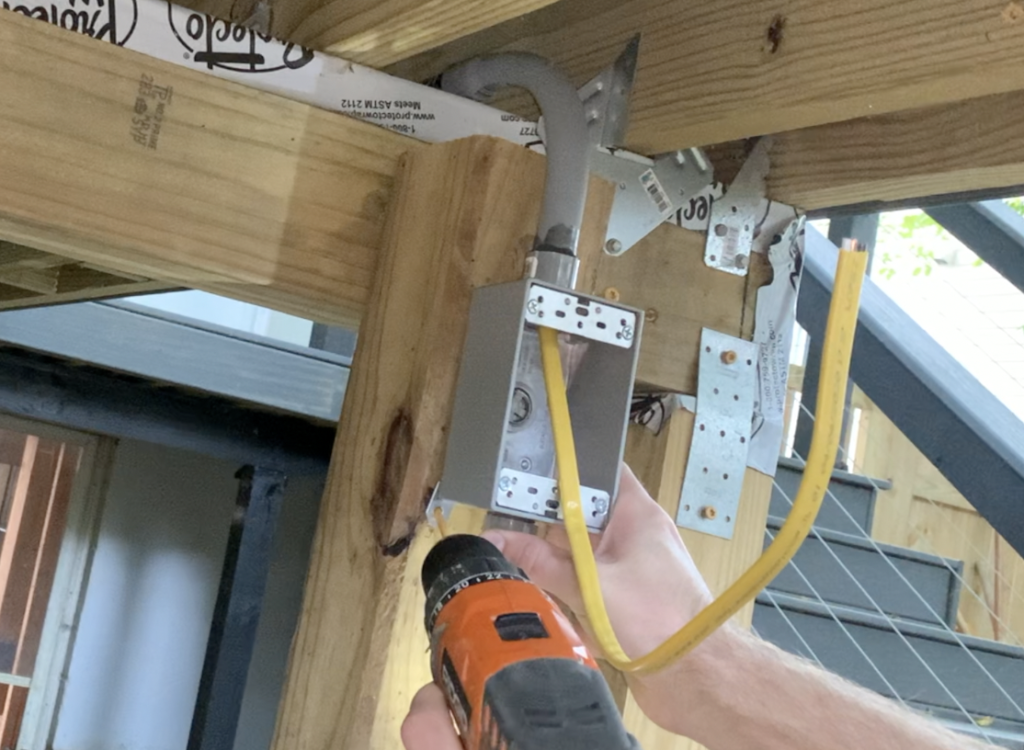
Follow the manufacturer’s instructions and install the outlet accordingly. Test to make sure that the GFCI function is working properly.
Next, you can continue to run electrical cable and conduit along your established electrical routing layout.
6. Run Electrical Cable Through Conduit
At this stage, it is recommended that you run the electrical cable through the conduit in an incremental fashion. It is very difficult to pull a cable through 1/2″ conduit over a long stretch – especially if there are many bends and elbows.
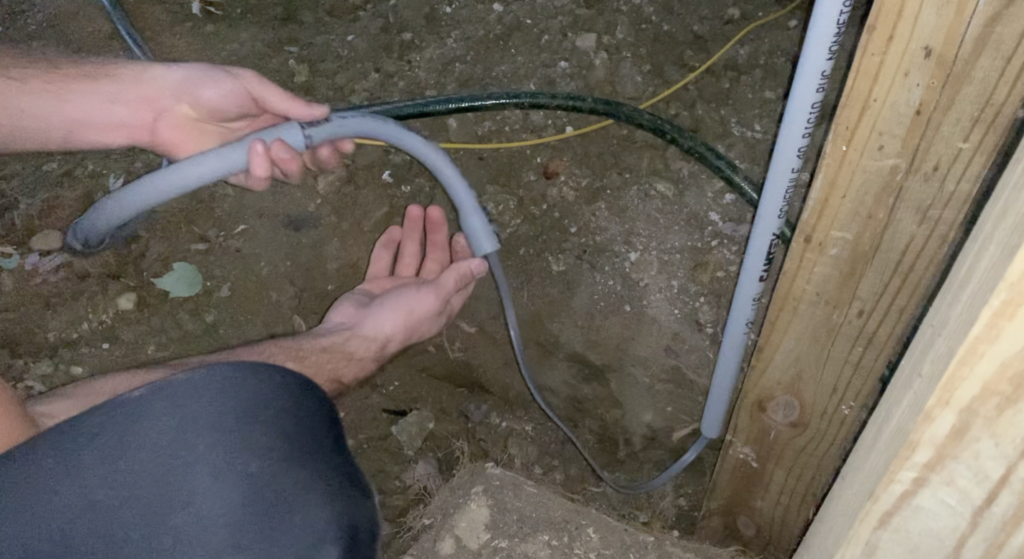
As a result, I simply installed two or three pieces of conduit / fittings and then threaded the electrical cable through that segment. I repeated this process until all of the conduit and cable was installed.
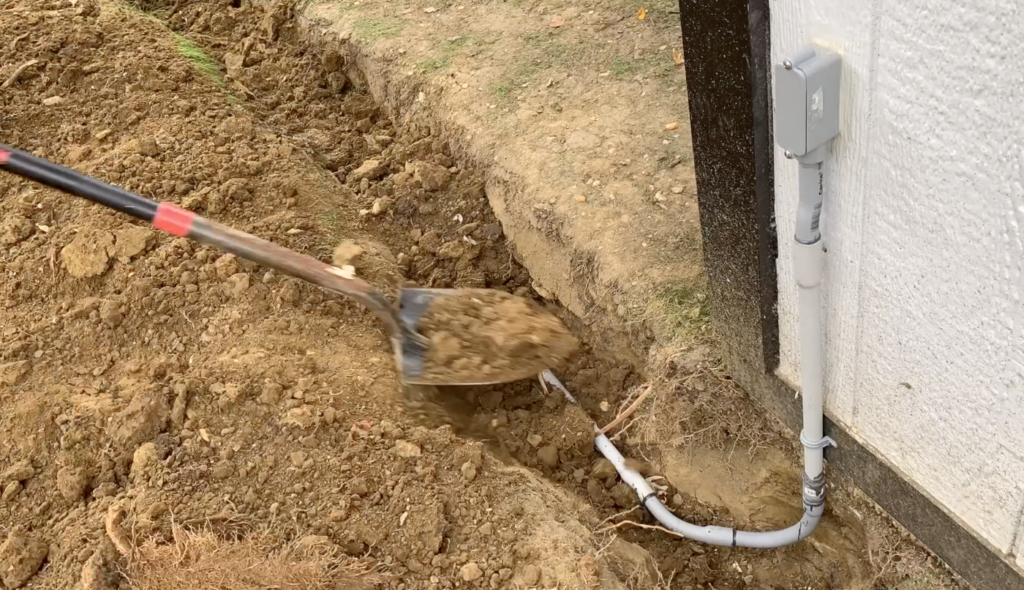
7. Terminate Electrical Connection at Shed.
After running the electrical cable and conduit below grade to the area adjacent to my shed, I installed a 90 degree bend fitting and routed it out of the ground to an area 12″ above grade.
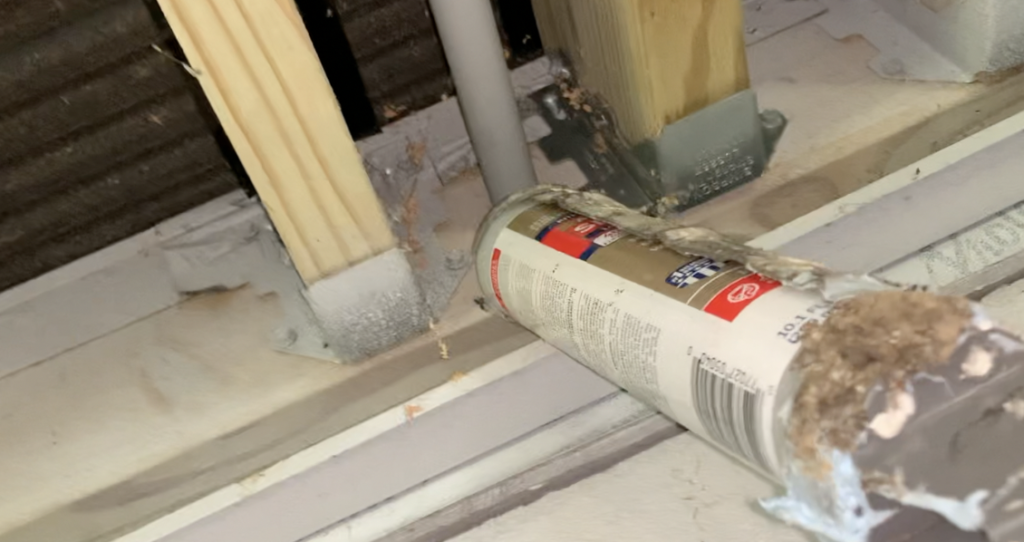
Next, I drilled a 3/4″ hole in my shed siding where the cable/conduit would be routed inside my shed.
I then installed a 1/2″ type LB conduit body (as shown below) and attached it to my shed with PVC conduit clamps.

Next, I simply pulled the electrical cable through the conduit and Type LB conduit body and into my shed.
8. Add outlets, lights, etc.
Once you have routed your electrical cable into your shed, you simply need to wire up your desired receptacles, switches, lights, etc.
For my application, I first installed another GFCI outlet within the shed. This outlet will be used to charge my power tools, etc.
Next, I installed a light switch and an LED bay-light to illuminate my shed at night.
Finally, I installed some exterior light switches to control the exterior lights on my shed.
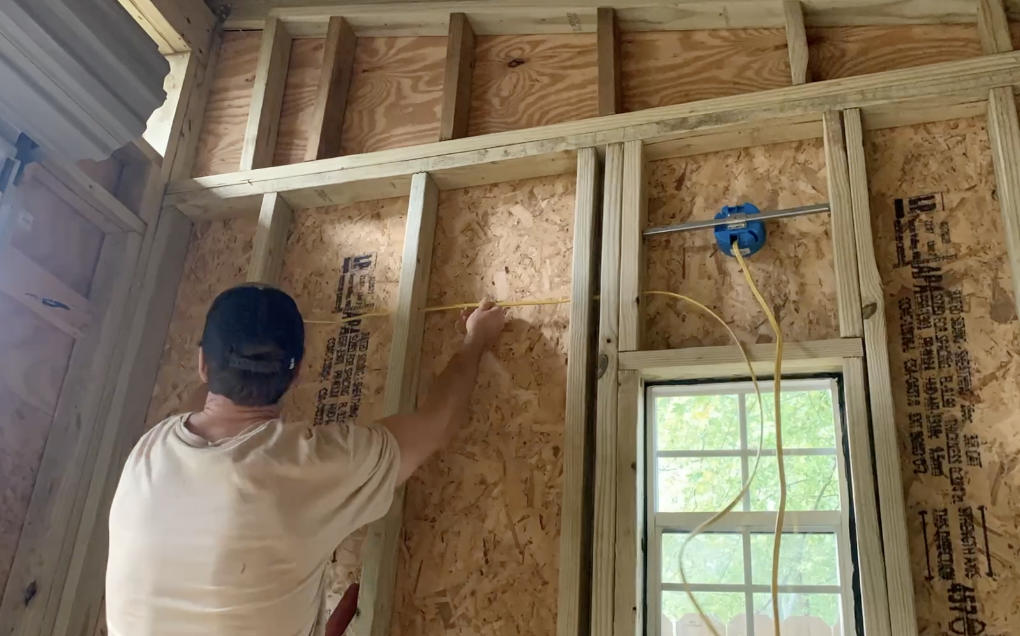
Obviously, the type and quantity of outlets, lights, fixtures, etc. will be different for each shed electrical application. Install the required lights, outlets, and fittings as required for your specific shed electrical application.
9. Test all Connections, Receptacles, etc.
At this stage, you will want to test all of your GFCI outlets, lights, switches, etc. in order to ensure that everything is installed correctly and that everything is functioning as intended.
Again, a licensed electrician should perform and/or check all electrical work and connections.
After confirming that everything is working appropriately, seal all conduit connections at the shed and house exterior with a high quality exterior caulk. You will also want to caulk around all exterior light fixtures, etc.
After checking all connections and caulking as necessary, your shed electrical project is nearly complete.
10. Backfill the Cable and the Electrical Cable Trench
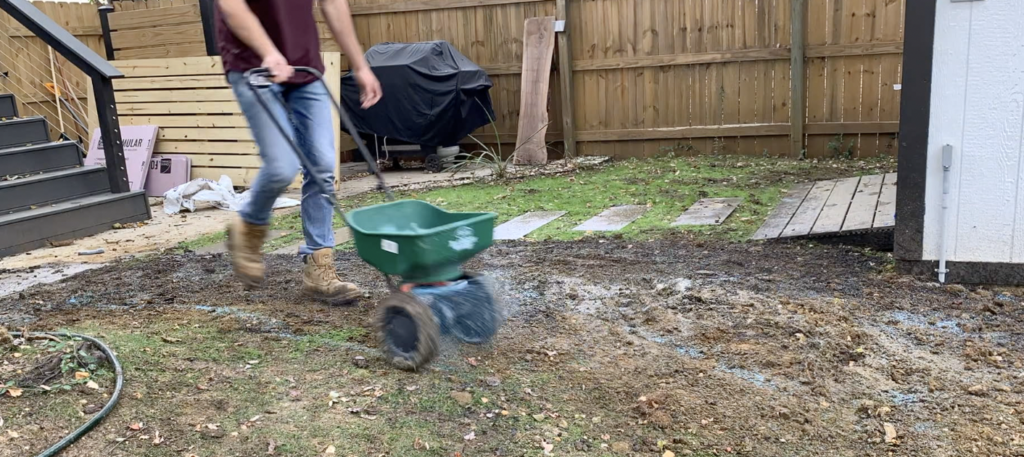
At this stage, simply backfill the conduit/cable trench and compact the area using a hand tamp. Plant grass seed, etc. as necessary.
Once you have backfilled the electrical conduit and cable, you have successfully run electrical to your shed. Congratulations!
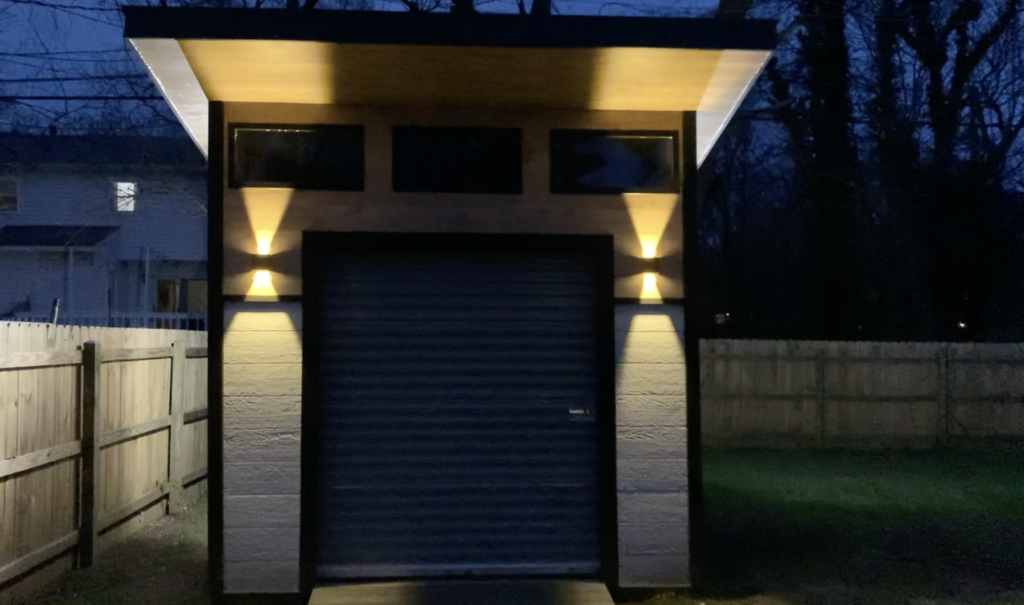
At this point, all there is left to do is enjoy your shed’s newfound electrical supply and additional utility.
If you are more of a visual learner, you can watch my “How to Run Electricity to a Shed” YouTube Video below:
This shed electrical project was performed as part of my 10’x10′ Modern Shed Build Project – See below:
For more information on how to Build a 10’x10 Modern Shed from start to finish, check out ATimprovements.com or watch my step-by-step tutorial videos on Youtube.
Thanks!
Thanks so much for checking out ATImprovements! If you learned something from this project, you might also like these other DIY Projects:
- How to Build a Concrete Slab Shed Foundation: https://atimprovements.com/how-to-build-a-shed-base-concrete-slab-step-by-step-diy-guide/
- How to Frame a 10’x10′ Shed Base: https://atimprovements.com/how-to-build-a-shed-floor-base-diy-step-by-step-guide/
- How to Frame Shed Walls:https://atimprovements.com/how-to-frame-a-shed-how-to-frame-walls-for-a-10×10-modern-shed-step-by-step-with-pictures/
- How in Install a Shed Window: https://atimprovements.com/shed-window-installation-how-to-install-a-window-in-a-shed-diy/
- How to Install a Roll Up Door in a Shed or Garage:https://atimprovements.com/roll-up-door-installation/
- How to Build a Fence: How to Build a Fence (DIY Guide) – AT Improvements
- How to Build a Fence Gate: How to Build a Fence Gate (7 Steps with Pictures & Video) – AT Improvements
- How to Install a DIY deck Wire Railing: DIY Cable Railing – How to Install Cable Railing Step-by-Step – (atimprovements.com)
- How to Build a Concrete Paver Patio: DIY PAVER PATIO – Easy DIY Paver Patio Ideas – (atimprovements.com)
Thanks!
DISCLAIMER: This is a reference guide only. Consult local code requirements. Electrical work should ONLY be performed by a licensed electrician in adherence with all local codes. Links included in this article might be affiliate links. If you purchase a product or service with the links that I provide, I may receive a small commission. There is no additional charge to you! Thank you for supporting ATimprovements so I can continue to provide you with free content each week!