
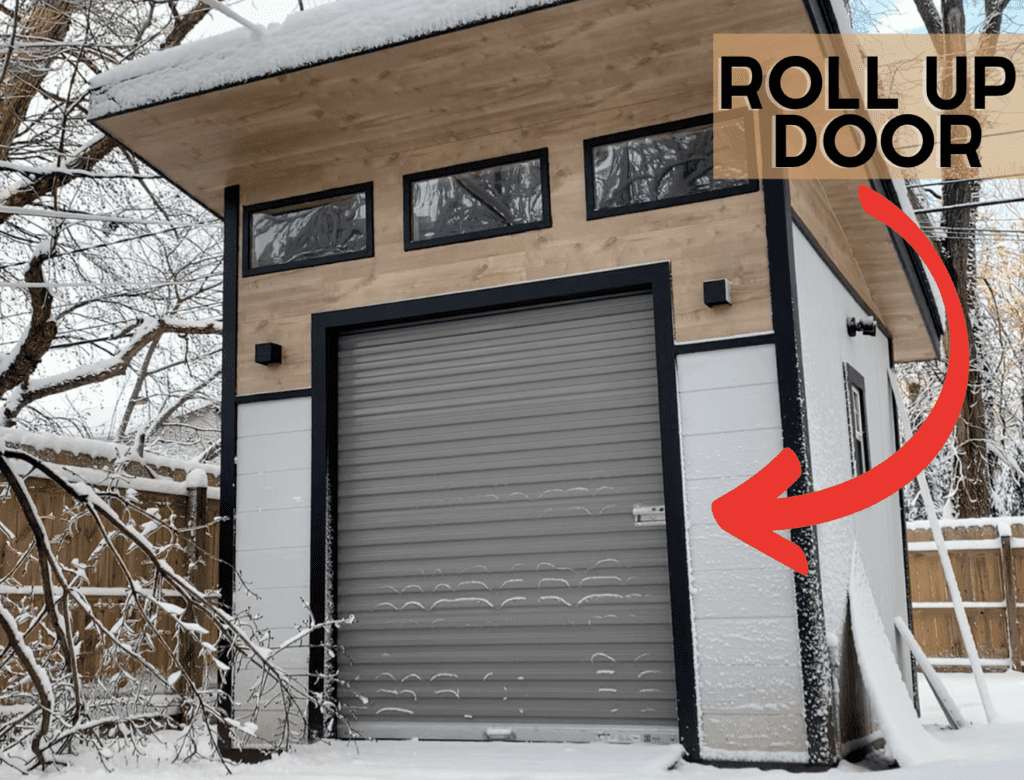
A roll up door is a great option for any garage or shed door opening. Roll up doors are durable, secure, and easy to install, making them an ideal door option for many residential and industrial applications.
In order to install a roll up door, you first need to measure your door’s rough opening and purchase a compatible roll up door. Next, position the frame guides (legs)of the roll up door at each end of the door’s rough opening and then lift the roll up door vertically into place. Confirm that the roll up door is level and plumb and then secure the roll-up door frame to the rough opening through the mounting holes. Finally, adjust the tension on the roll up door (as needed) and install hardware (handle, etc.).
Installing a roll up door is an easy project that the average homeowner can tackle. By following the tips and tricks presented in this guide, you will learn how to install a roll up door step-by-step.
Tools and Materials Needed to Install a Roll Up Door

To successfully install a roll up door in a shed or garage, you will likely need the following tools and materials:
- Safety Equipment (Glasses, gloves, boots, etc.)
- Tape Measure
- Drill
- Screw Driver
- Roll Up Door
With all necessary tools and materials on hand, you can now begin installing your Roll Up Door.
1. Purchase a Roll Up Door Suitably Sized for Your Rough Opening

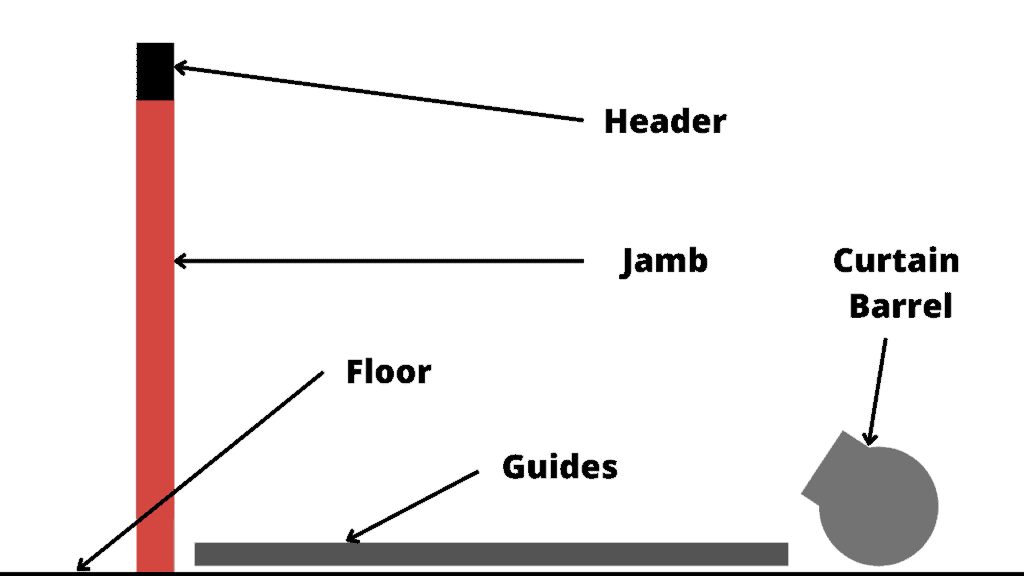
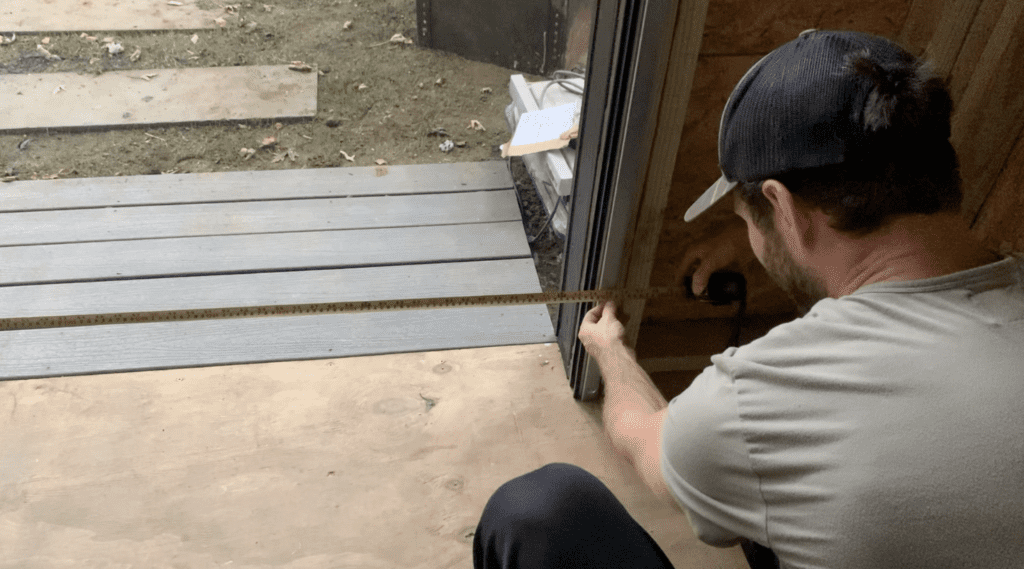
Although this goes without saying, you need to purchase a roll up door that is suitable for your specific door rough opening application. To determine the rough opening, simply measure the distance from wall to wall (opening width) and Floor to Door Header Above (Opening Height). For the purposes of example, let’s assume that we have a 6′ rough opening width and a 7′ rough opening height.
Most Roll Up Doors are ordered based on the ROUGH OPENING. The Roll Up Door will be made slightly larger than the the rough opening such that the guide rails will mount on the rough opening frame. Therefore, for a 6’x7′ rough opening, you would order a 6’x7′ Roll Up Door.
PRO TIP – Roll Up Doors have a “headroom” requirement for the clearance needed above the Roll Up Door’s Barrel Curtain. Typically, Roll Up Doors will require approximately 16″ above the rough opening and 4″ of sideroom to either side of the rough opening. Confirm requirements with your specific Roll Up Door.
After establishing your roll up door rough opening, spend some time shopping around for an appropriate roll up door for your application.
Selecting a Roll Up Door Manufacturer and Model

There are many different Roll Up Door Manufacturer and Models Available. Some of the most common Roll Up Door manufacturers and Vendors are listed below:
I recommend that you spend some time researching the various Roll Up Doors Manufacturers to determine which manufacturer will be best for your application. After choosing a Roll Up Door Manufacturer, spend some time evaluating the various Roll Up Door Models and Features. Some things to consider when selecting an appropriate roll up door model for your application are listed below:
- Light Duty VS Heavy Duty Roll up Door
- Manual Operation VS Motorized Operation VS Chainwheel Operation
- Insulation VS No Insulation
- Interior Mount VS Exterior Mount
As shown above, there are a lot of options and door features available when selecting a roll up door for your application. Select a Roll Up Door based on your specific needs.
For this specific installation, we are installing a 6′ wide x 7′ tall Janus Model 650 Roll Up Door (exterior mount) in the silhouette gray color.
2. Connect the Roll Up Door Guides (Legs) to the Barrel and Curtain
After ordering your Roll Up Door, it will typically be delivered unassembled. However, assembly is very simple since there are only a few components and all the hardware (screws, bolts, etc.) is typically included.
The first step in the Roll Up Door Assembly process is to attach the Roll Up Door Guides (Legs) to the Barrel and Curtain.
PRO TIP – Assemble your Roll Up Door in the location and orientation in which it will be installed. This will prevent you from having to move the roll up door after it is assembled.
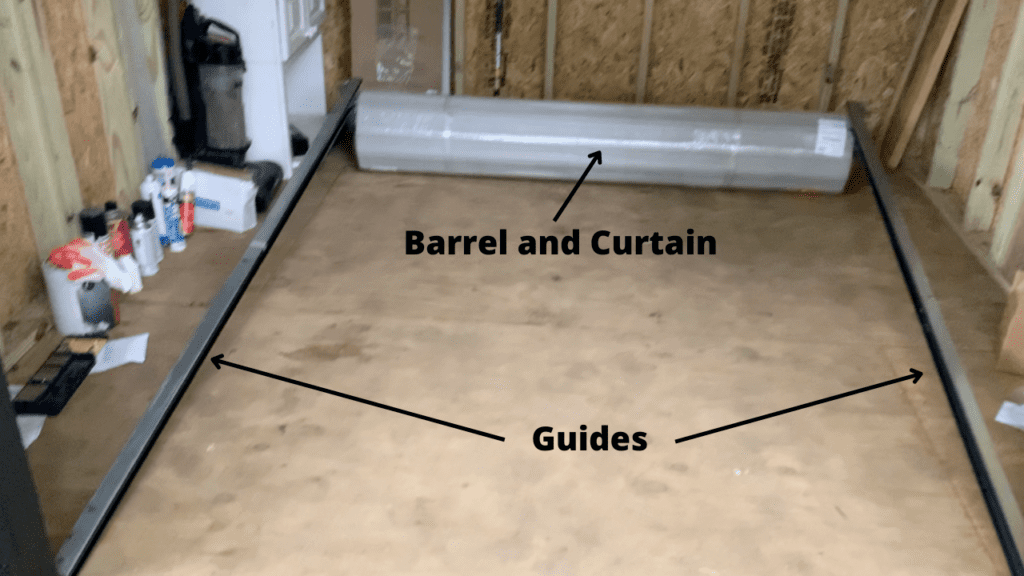
Use the provided hardware to attach the Guides to the to the Barrel Curtain. Below are the typical steps necessary for assembly. Refer to the manufacturer’s instructions for specific assembly instructions for your specific Roll Up Door.
- Line up the Roll Up Door Guide Penetrations with the Barrel Penetrations as shown below.
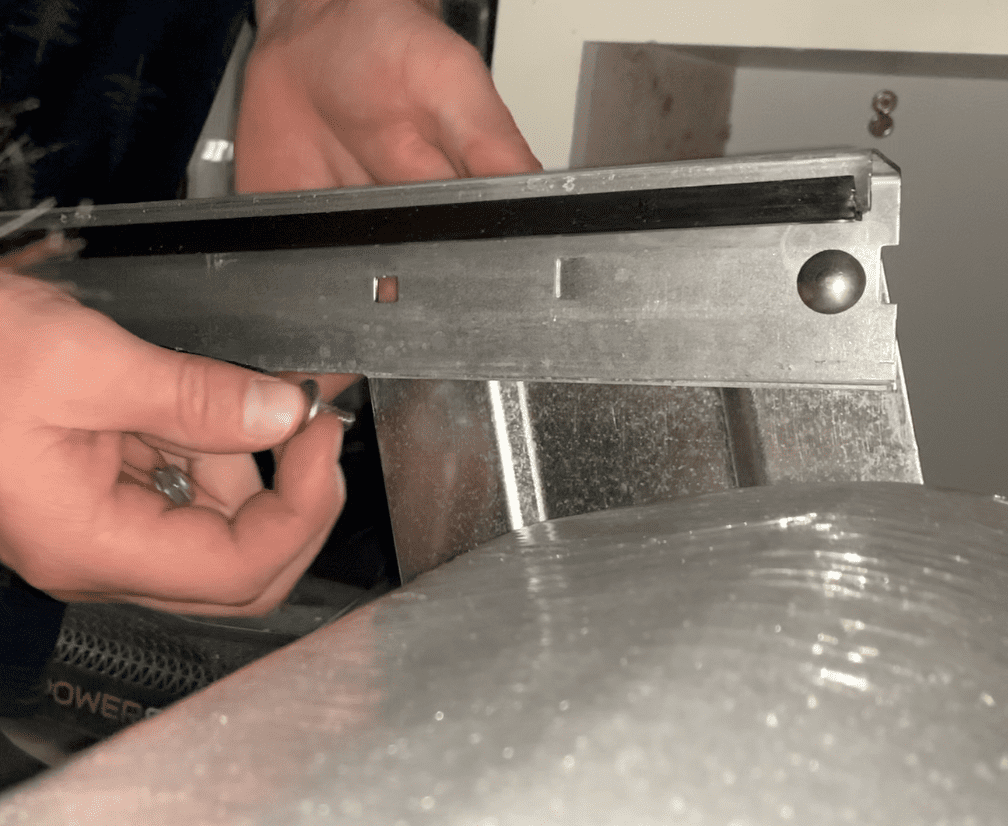
2. Insert the provided hardware (typically a threaded bolt) through both the guide and barrel and hand tighten the provided nut on the other side.
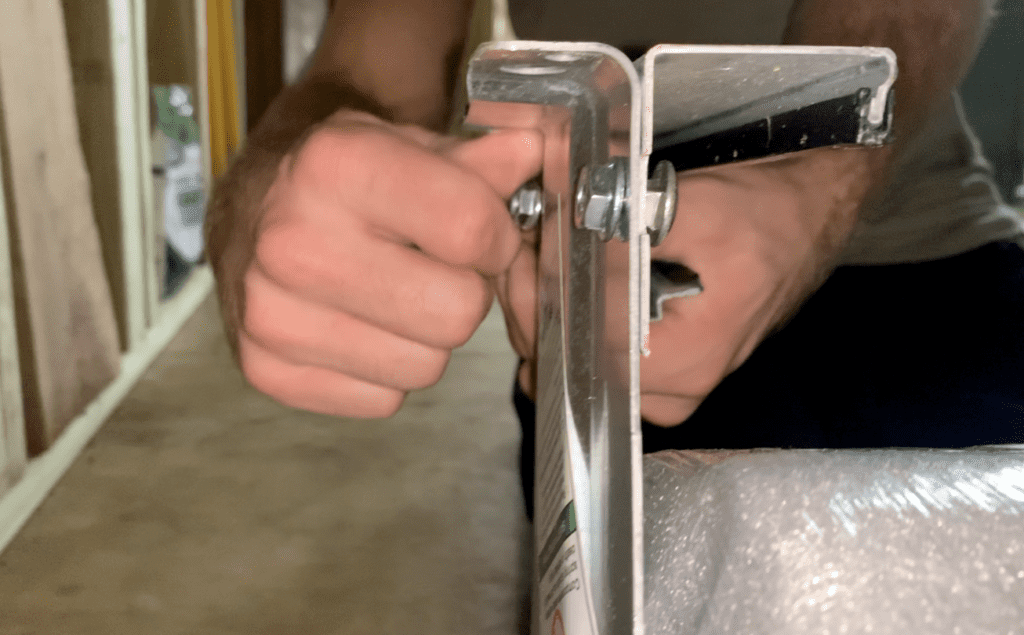
3. Finally, use a wrench to fully tighten the mounting hardware. Do this for all Guide/Barrel Connections.
Once you have attached the Roll Up Door guides to the Barrel, you can move on to the next step in the Roll Up Door Installation.
3. Position the Roll Up Door Guides In Place at the Base of the Rough Opening
At this stage, you want to position the Roll Up Door in place near the rough opening. Basically, you want to have the base of the guides pushed up against the rough opening of the door, as shown:

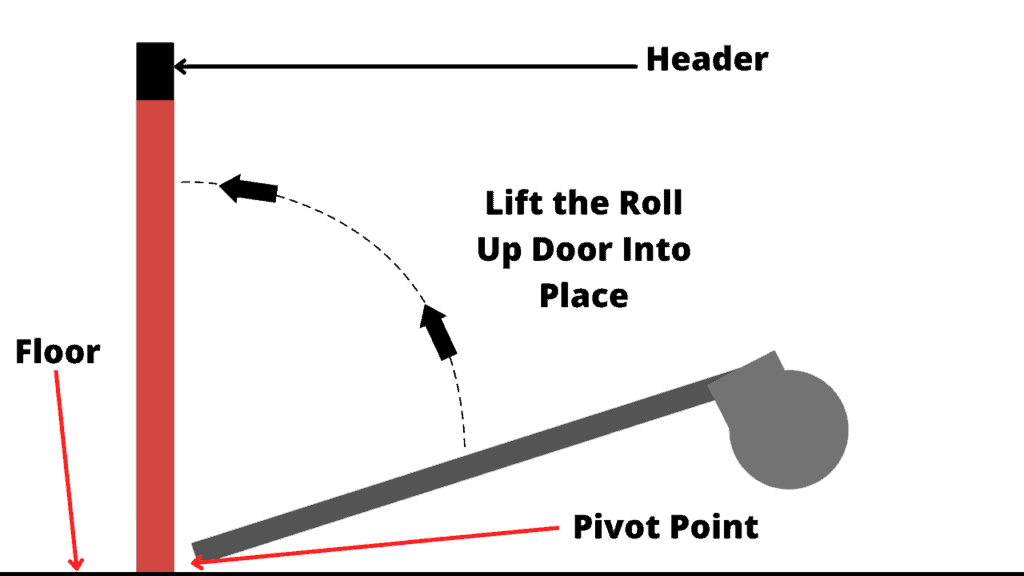
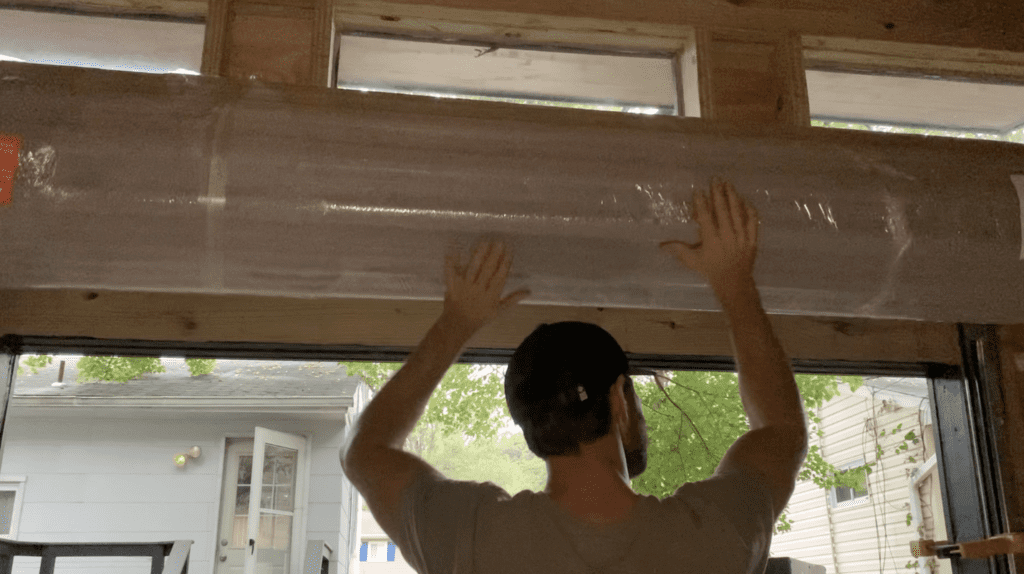
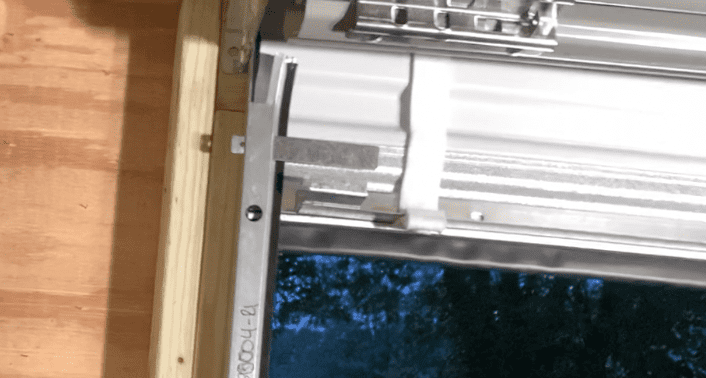
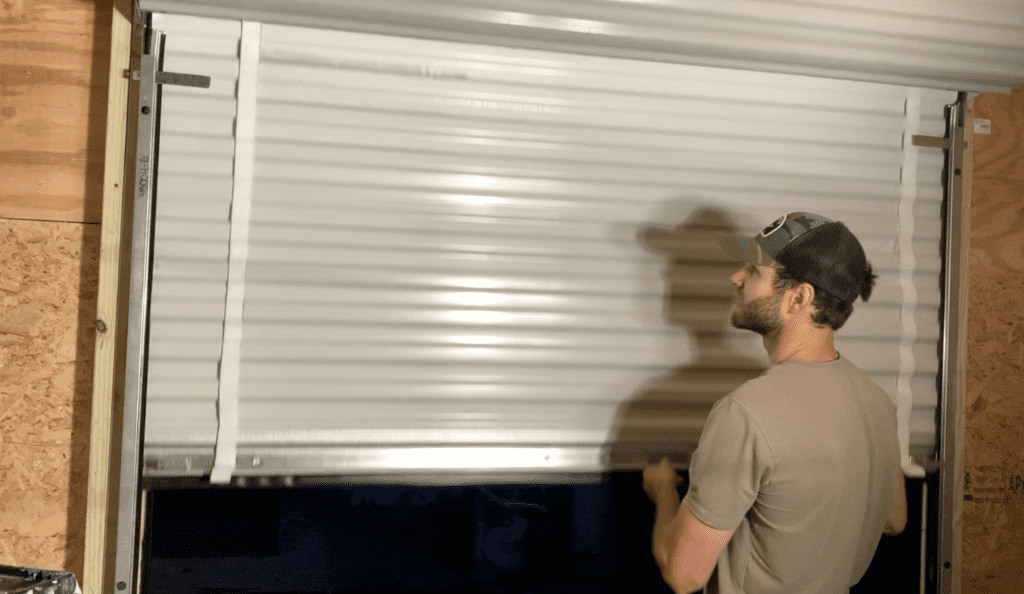
4. Lift the Roll Up Door into Place
After attaching the Guides to the Barrel and positioning the assembled Roll Up Door in place within the Rough Opening, lift the Roll Up Door vertically into place.
It is highly recommended that you get help lifting the roll up door into place to prevent damage (bending) to the guides.
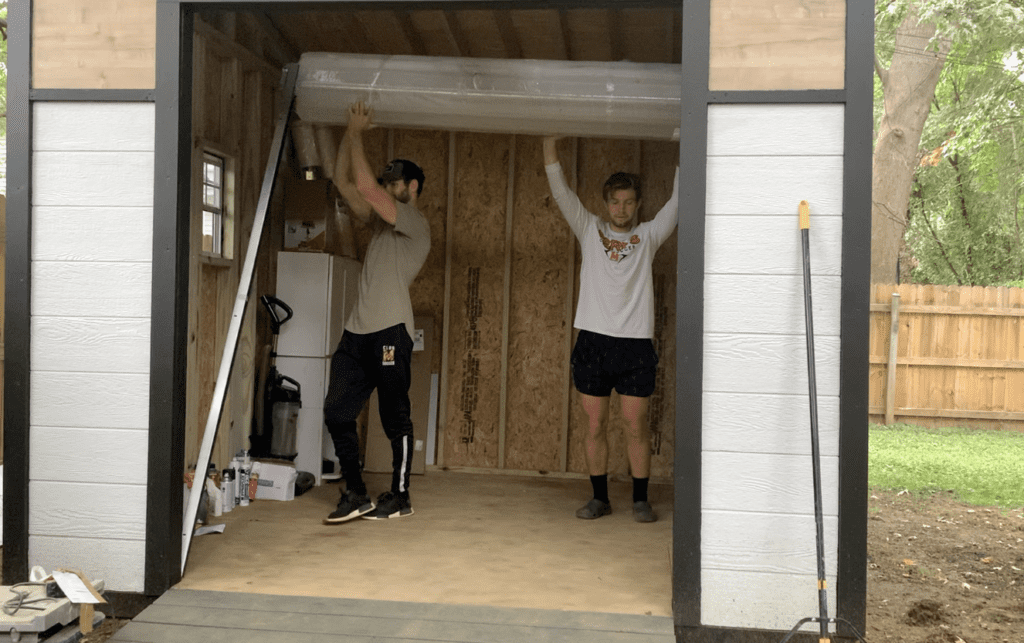
Continue to lift the Roll Up Door until the guides come into contact with the rough opening frame.
Consider using a bar clamp to hold the roll up door in place against the rough opening frame as shown:
After lifting the Roll Up Door into place and temporarily securing it in place with clamps, you can move on to the next step of the Roll Up Door Installation Process.
5. Confirm Uniform Spacing Between the Roll Up Door Guides
Before securing your guides to the rough frame, you must ensure that the spacing between the guides is completely uniform over the entire height of the Roll Up Door.
To do this, measure the guide spacing at the top of the door near the Barrel. This measurement should be ~6′.

Next, measure the distance between Roll Up Door guides at the bottom of the door.
The distance between the guides at the top of the roll up door should be the same as the distance between the guides at the bottom of the door. If these measurements are not the same, make adjustments as needed.
PRO TIP – use a 6′ level against the Roll Up Door Guides to confirm plumb.
After confirming that the Roll Up Door guides are spaced evenly, you can proceed with fastening the guides to the rough opening frame.
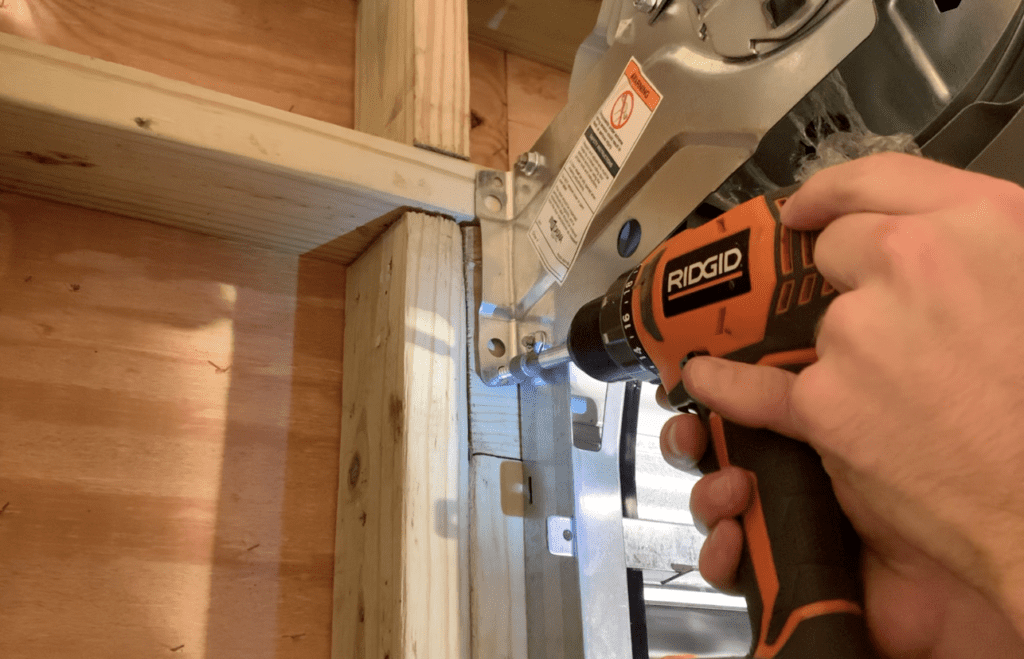
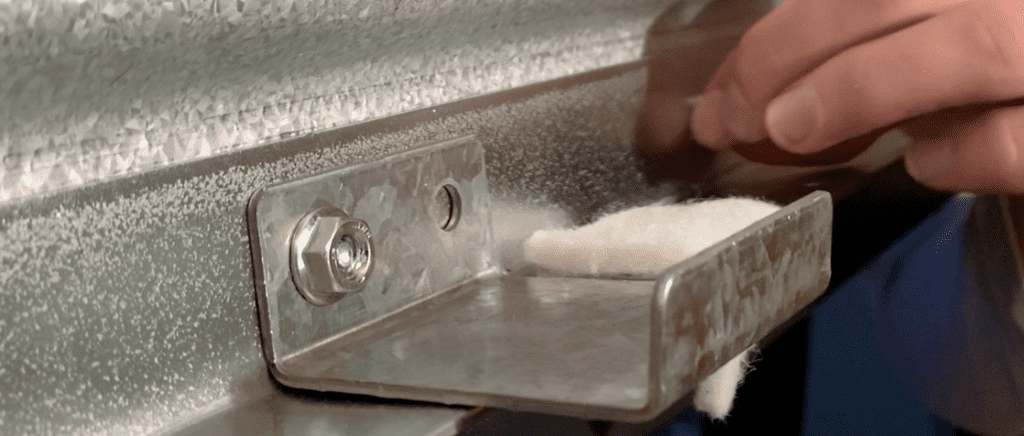
6. Fasten the Roll Up Door to the Rough Opening Frame
After confirming uniform spacing between the guides, fasten the Roll Up Door to the rough opening frame using the provided hardware. You will usually install fasteners at the bottom, middle, and top of the guides – as shown below.
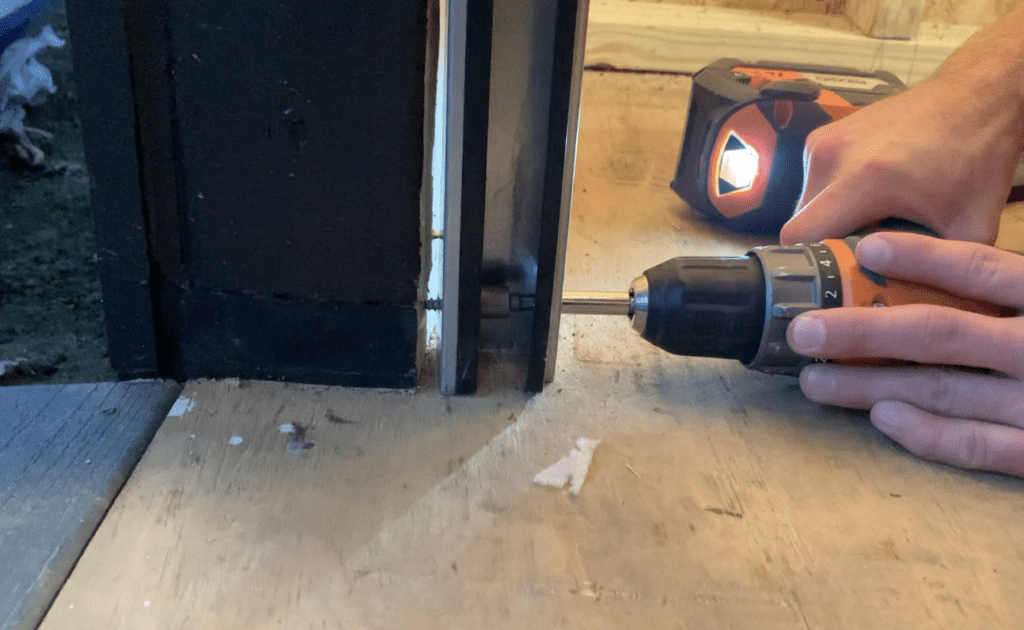
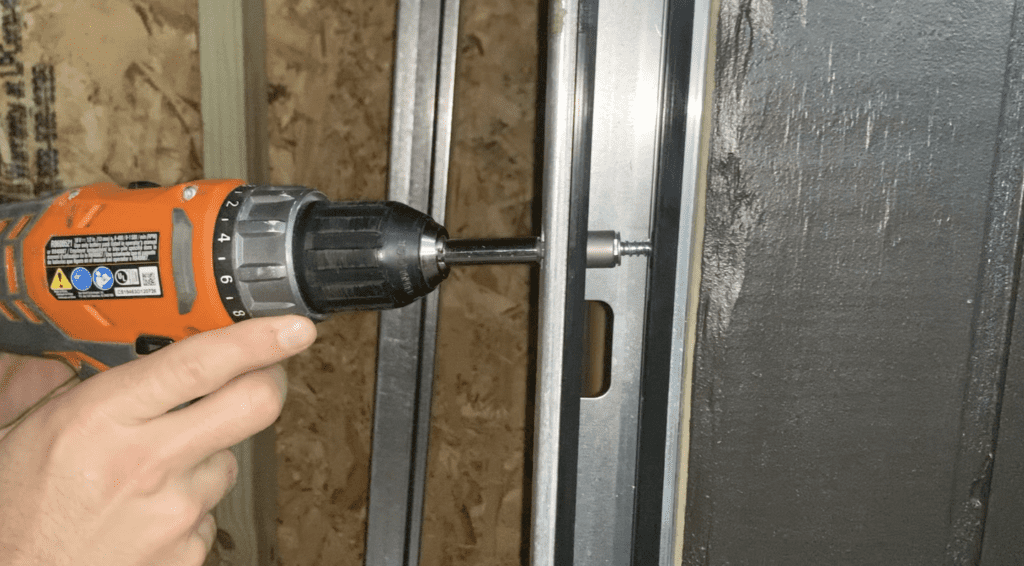
Additionally, there are usually two mounting locations on the roll up door Barrel as well.
After Installing fasters through all of the mounting locations on the Roll Up Door guides and the Barrel, you can proceed to the next step of the Roll Up Door Installation.
7. Adjust Roll Up Door Spring Tension As Needed
At this stage, the Roll Up Door curtain will be pulled down within the guides. Before doing this, however, you need to set the initial spring tension.
Set Initial Spring Tensions for the Roll Up Door
To set the initial spring tension for the roll up door, simply rotate the barrel two (2) revolutions in the direction that would send the bottom bar of the curtain through the guides.
After pre-tensioning the barrel, pull the roll up door curtain down through the guides.

After pulling the curtain down through the guides, open and close the roll up door a few times to determine if tension needs to be added or removed.
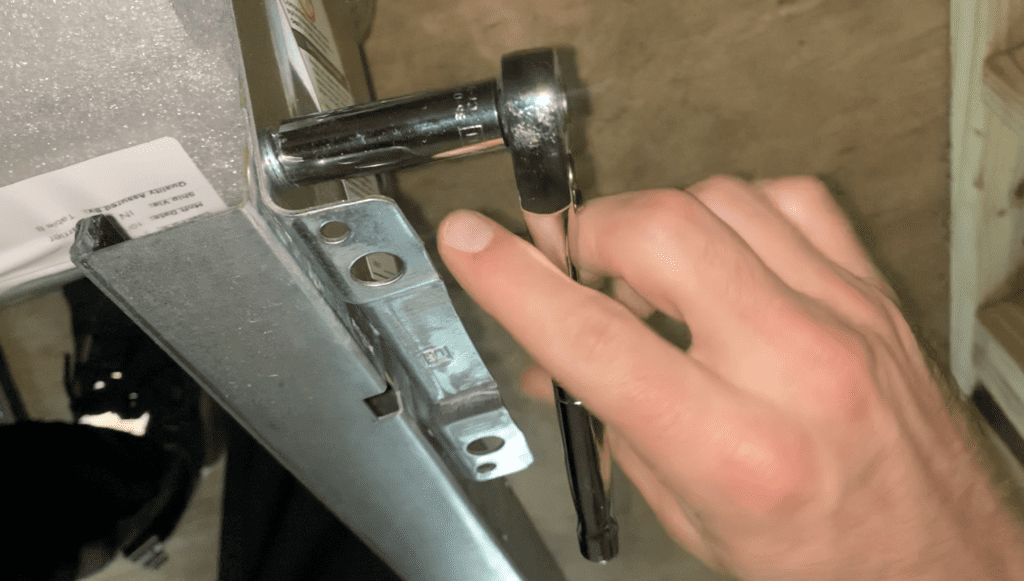
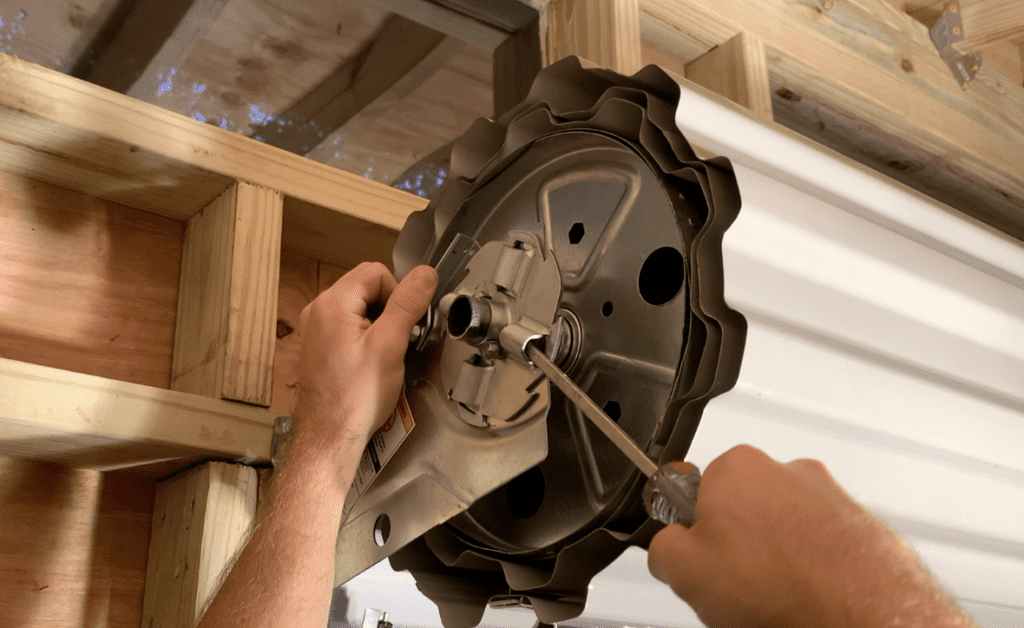
Adjusting Roll Up Door Tension (if needed)
To adjust the roll up door tension, lift the tensioner prawl (left hand) and insert a screwdriver (or similar) into one of the openings in the tensioner ratchet wheel (right hand).
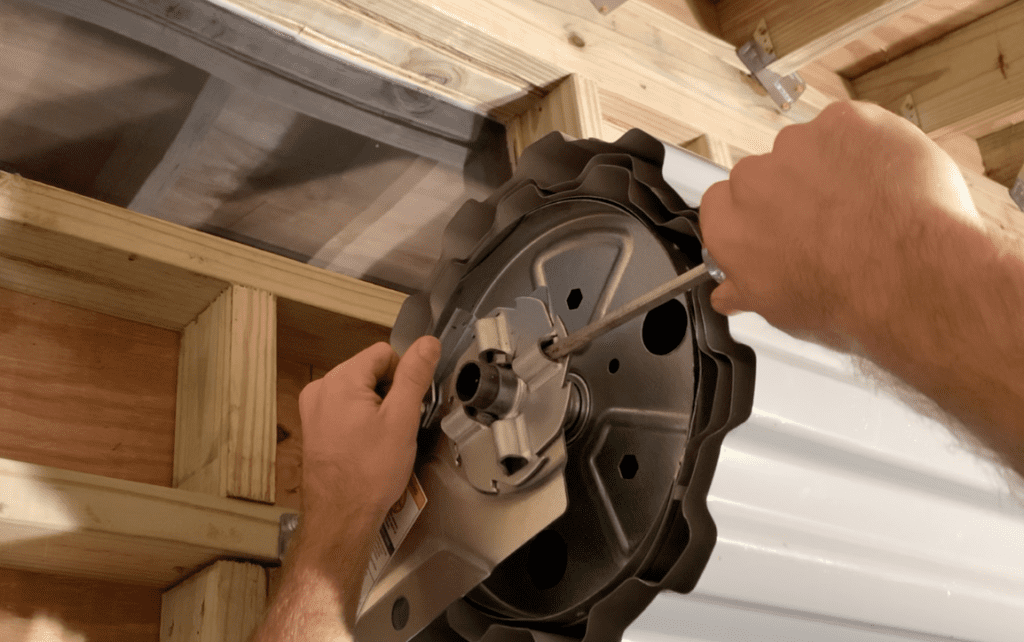
To increase the tension in the roll up door, rotate the tensioner wheel “downward”. To decrease the curtain tensions, rotate the tensioner wheel “upward”.
Continue to test your roll up door and make any adjustment to the tension as necessary. Once you have established the appropriate tension for your specific roll up door application, your roll up door installation is nearly complete.
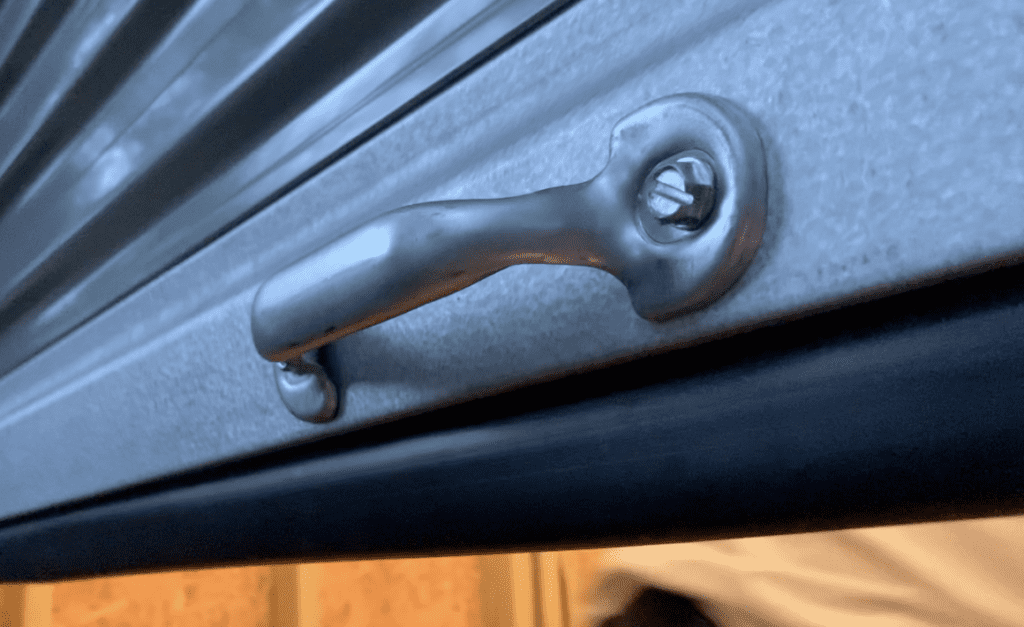
8. Install Roll Up Door Hardware (Handle, Head Stops, Mini-Clip, etc.)
At this point, The only thing left to do is install the roll up door hardware.
First, install the door handle using the provided mounting hardware.
Next, install the head stops which will keep the roll up door from fully extending back into the barrel.
Next, install the mini-clips that will contact the head stops as the curtain is fully open.
After installing the hardware, give your roll up door a few tests to make sure that everything is functioning properly.
Lastly, if your roll up door height is greater than 6′, you may want to install a pull string to allow for you to reach the curtain when it is fully open.

At this stage, your roll up door installation is complete!
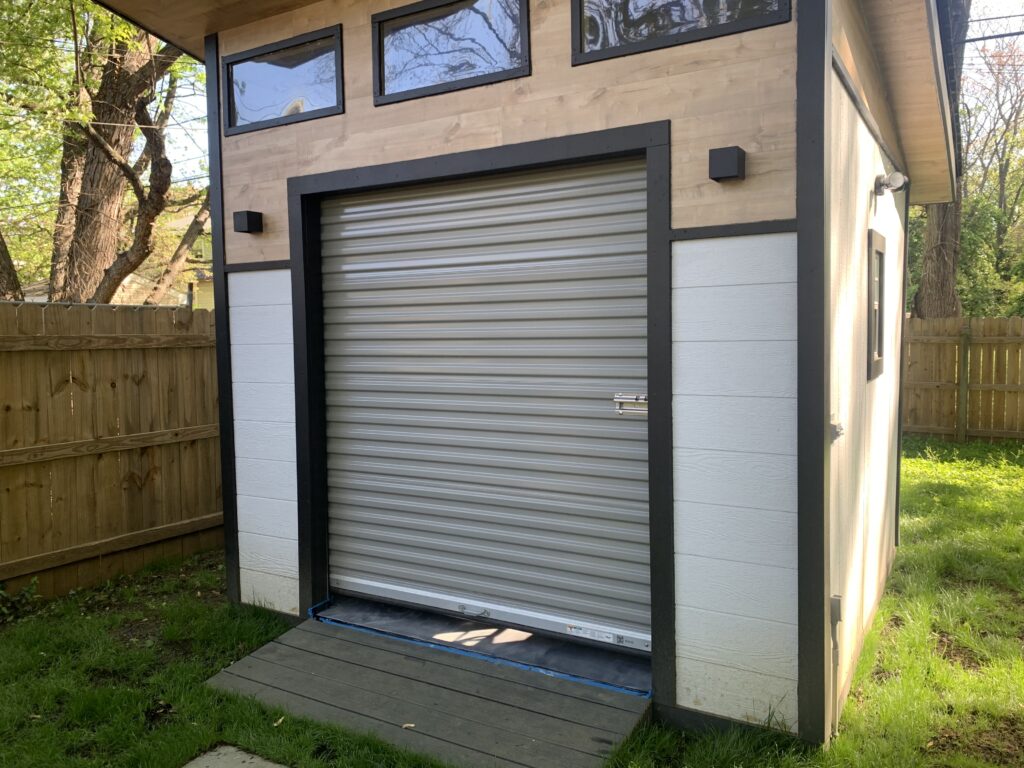
This Roll Up Door was installed as part of the 10’x10′ Modern Shed Build Project. For more information on how to Build a 10’x10 Modern Shed from start to finish, check out ATimprovements.com or watch my step-by-step tutorial videos on Youtube.
Thanks!
Thanks so much for checking out ATImprovements! If you learned something from this project, you might also like these other DIY Projects:
- How to Build a Concrete Slab Shed Foundation: https://atimprovements.com/how-to-build-a-shed-base-concrete-slab-step-by-step-diy-guide/
- How to Frame a 10’x10′ Shed Base: https://atimprovements.com/how-to-build-a-shed-floor-base-diy-step-by-step-guide/
- How in Install a Shed Window: https://atimprovements.com/shed-window-installation-how-to-install-a-window-in-a-shed-diy/
- How to Build a Fence: How to Build a Fence (DIY Guide) – AT Improvements
- How to Build a Fence Gate: How to Build a Fence Gate (7 Steps with Pictures & Video) – AT Improvements
- How to Install a DIY deck Wire Railing: DIY Cable Railing – How to Install Cable Railing Step-by-Step – (atimprovements.com)
- How to Build a Concrete Paver Patio: DIY PAVER PATIO – Easy DIY Paver Patio Ideas – (atimprovements.com)
Thanks!
DISCLAIMER: This is a reference guide only. Consult local code requirements. Links included in this article might be affiliate links. If you purchase a product or service with the links that I provide, I may receive a small commission. There is no additional charge to you! Thank you for supporting ATimprovements so I can continue to provide you with free content each week!