
Building a shed ramp is usually necessary in order to easily remove equipment (lawnmowers, etc.) from your shed. This guide will show you exactly how to build a ramp for a shed, step-by-step.
To build a shed ramp, determine the desired shed ramp width and cut the ledger board and bottom bottom support to your desired width. Next, Determine how long you want the shed ramp to be. Typically the shed ramp length will be a multiple of the decking board width. Cut your shed ramp joists to length. Next, determine the shed ramp slope angle and make the angled cut on the end of the joists. Finally, attach the ledger board, joists, and bottom support brace together and install your shed ramp decking.
A shed ramp is a relatively easy project with low risk consequences if you get it wrong – so just go for it! There is no right or wrong way to build a shed ramp. However, there are a few “best practices” for building a shed ramp that will be discussed in this article.
Tools and Materials Needed to Build a Shed Ramp

To successfully construct a shed ramp, you will likely need the following tools and materials:
- Safety Equipment (Glasses, gloves, boots, etc.)
- Tape Measure
- Drill
- Exterior Screws
- Circular Saw OR Miter Saw
- Pressure Treated Lumber
With all necessary tools and materials on hand, you can now begin building your shed ramp.
1. Determine Your Shed Ramp Width
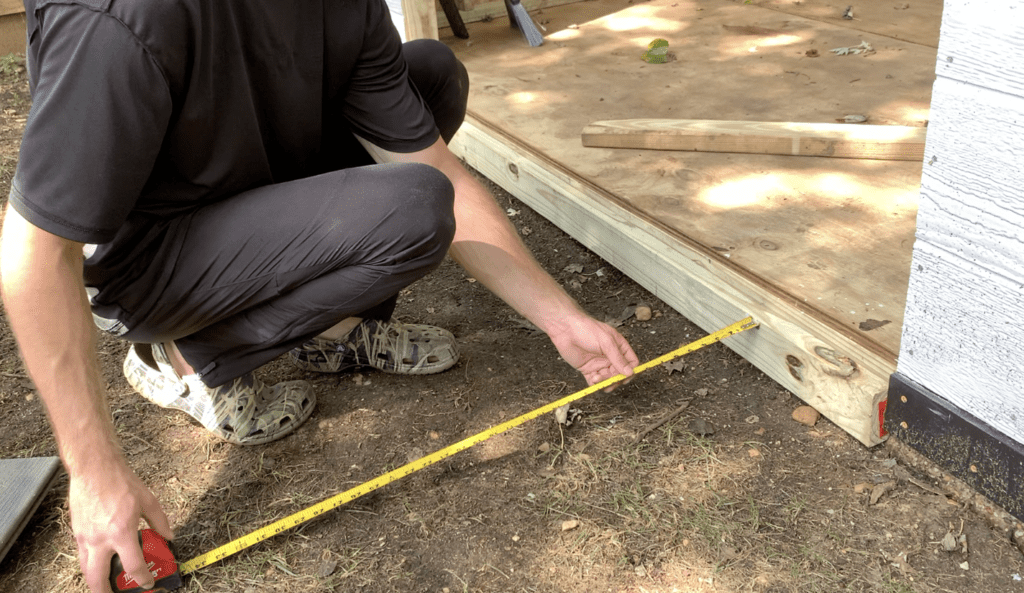
The first step in building a shed ramp is to determine your shed ramp width. Typically, your shed ramp width will be as wide as the shed door opening.

Spend some time thinking about your shed width opening based on the size of your shed door opening and the type of tools and equipment you will bringing in and out of the shed.
The shed ramp width will dictate the length of your ledger board and bottom support brace – as shown below.
After determining your shed ramp width, you can begin to determine you shed ramp length.
2. Determine Your Shed Ramp Length
After determining your shed width, you will need to determine your shed ramp length. There are a few things to keep in mind when selecting your shed ramp length:
- The greater the height difference between the shed entrance and grade elevation, the longer the shed length should be (to avoid too steep of a shed ramp angle).
- Consider choosing a shed ramp length that is a multiple of the decking board width you plan to install. This way, you won’t need to trim any of the decking boards. For example, if you are using decking boards with a 6″ width, consider a shed ramp length of 24″, 30″ or 36″. (However, be sure to account for any spacing between the decking boards)
There is no specific shed ramp length that is “correct”. Simply choose a shed ramp length that is appropriate for your specific shed ramp application.
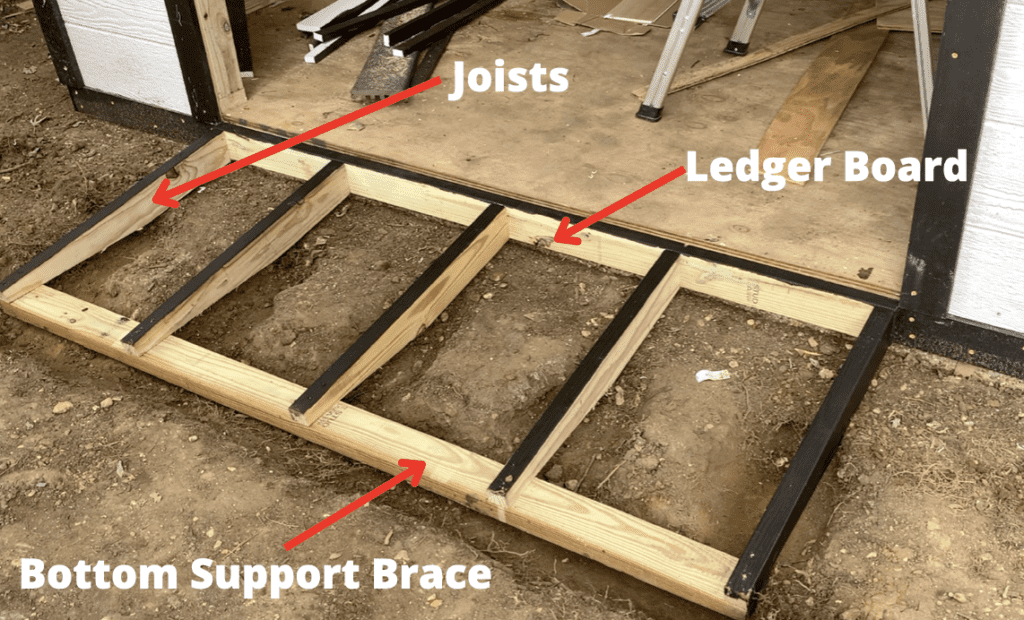
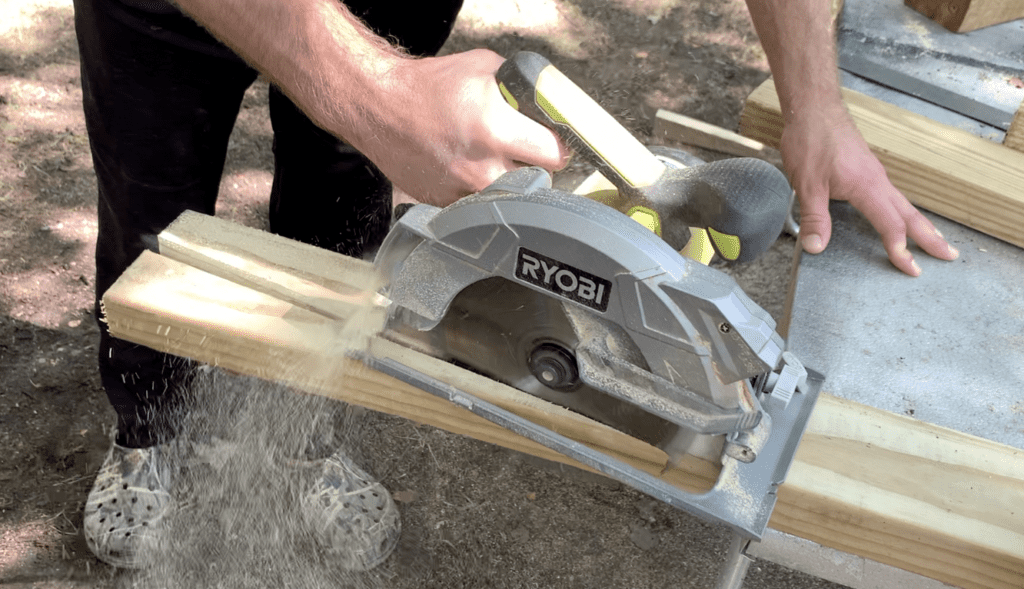
3. Cut your Ledger Board, Joists, and Bottom Support Braces to Length
After selecting your Shed Ramp width and length, you can cut your ledger board, joists, and bottom support brace to size.

Basically, your ledger board and bottom support brace will be the same length. Additionally, all of your shed ramp joists will be the same size.
It is recommended that you cut enough shed ramp joists so that you have a maximum spacing between them of 16″. For example, a 6′ wide shed ramp would require 5 joists – As shown below:
After cutting your your shed ramp components to size, you can determine the required shed ramp joist angle that needs to be cut.
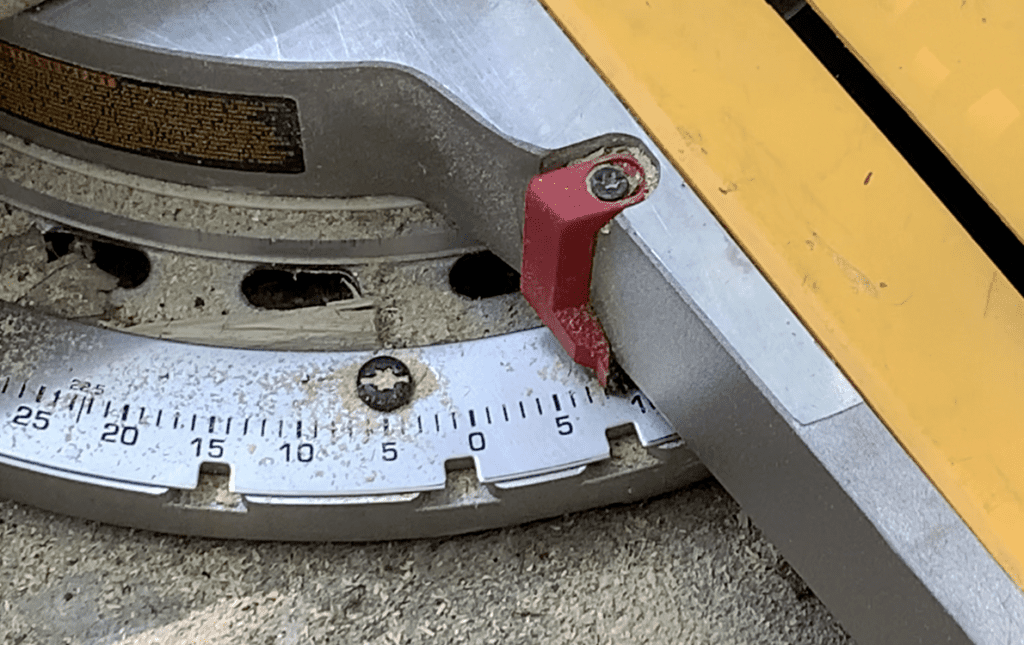
4. Establish your Shed Ramp Angle
At this point, you must establish an appropriate shed ramp angle based on the height delta between the shed entrance and the outside grade.
Although there are ways to calculate the shed ramp angle, it is usually sufficient to visually estimate the angle. Because you are able to excavate the outside of the shed and make adjustments, you can almost always make minor adjustments as needed.
I recommend that you use your miter saw and a few scrap pieces of lumber to make a few “test cuts” at different angles.
If you don’t expect that you will need much of an angle for your shed ramp, I recommend that you start with 10 degree angle to see how that looks.
If you anticipate needing a steeper angle, maybe start with a 20 degree angle.

“dry-fit” the angle against the shed to see what adjustments are needed.
Make any adjustment to the angle as needed for your specific shed ramp application.
After determining the necessary angle for your shed ramp, cut the end of each joist at the angle required.
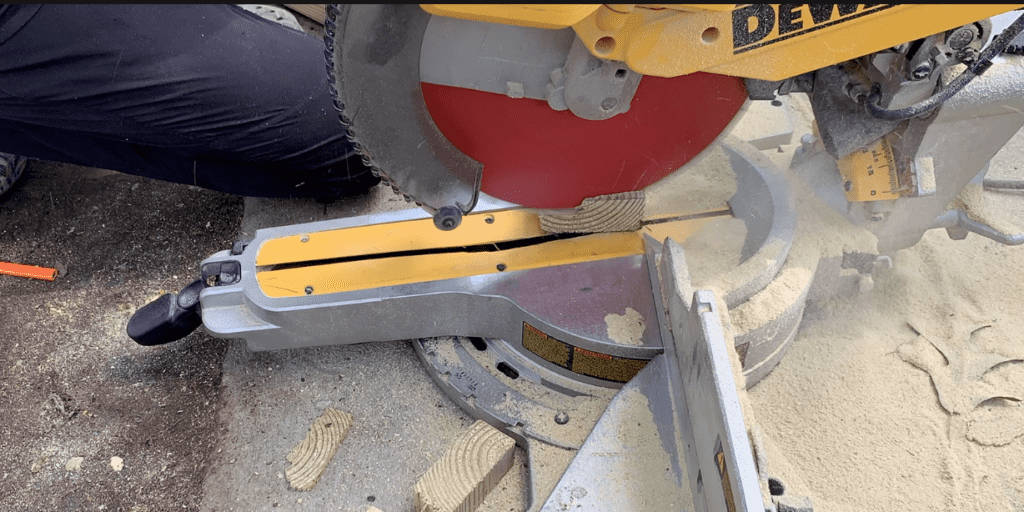
After cutting the necessary angle on the end of your shed ramp joists, you can move on to the next step.
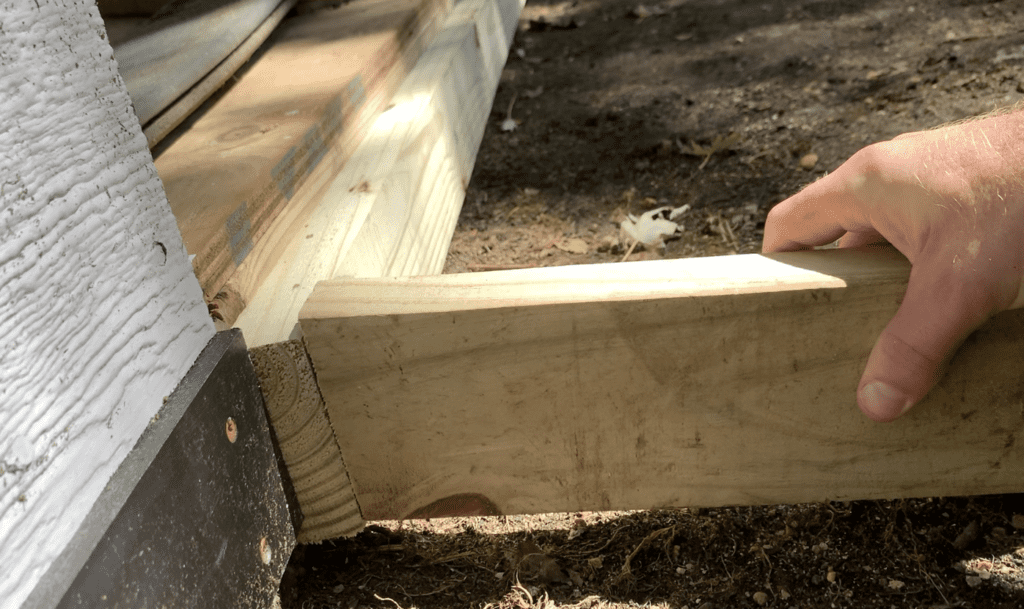
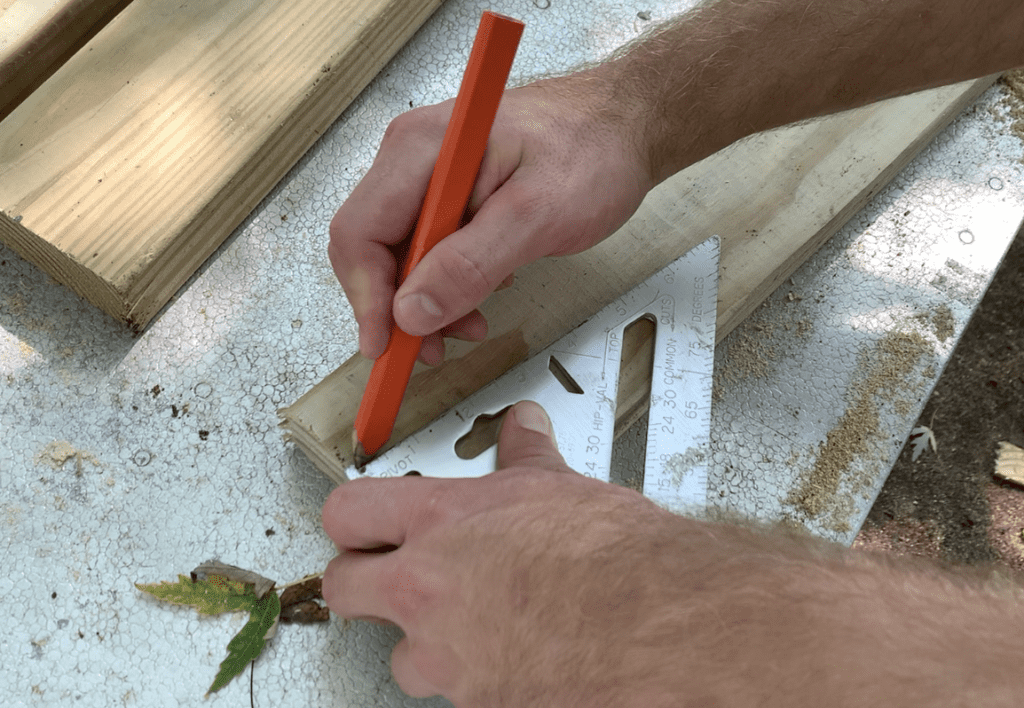
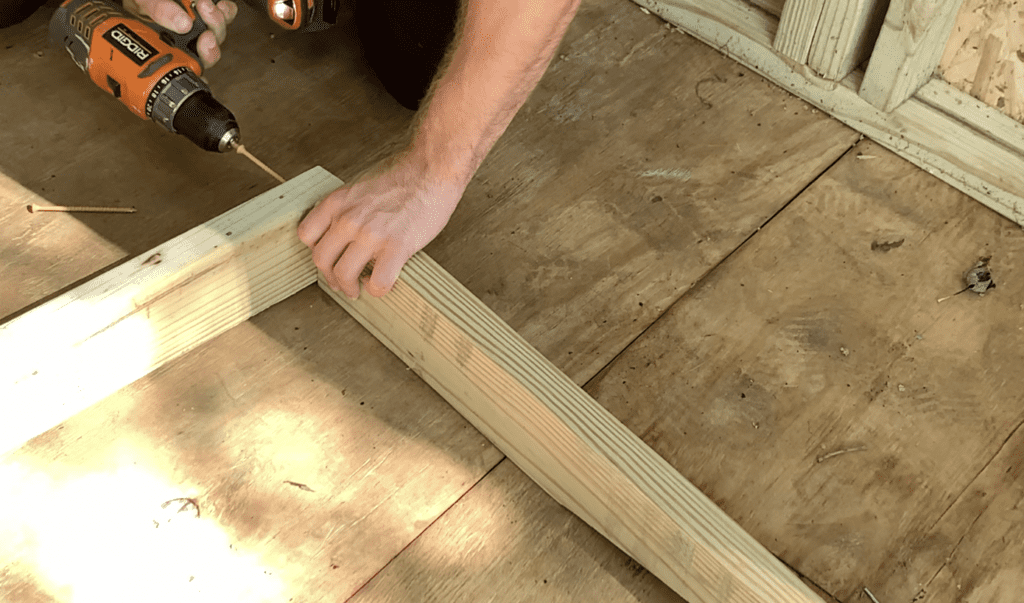
5. Match your Shed Ramp Angle on the Bottom Support Brace
After determining the shed ramp angle and making the angled cut on the ledger board side of the joists, you will then need to match that angle cut on the bottom of the support brace.
To do this, use a carpenters square to mark the same angle that was used at the front end of the joist.
Remember, the goal is to cut the bottom of the shed ramp joist such that is will sit flat on the ground once positioned in place. Cut the angle with a circular saw as shown below:
6. Attach all of the shed Ramp Components Together
At this stage, attach all of the shed ramp components together. Use 3″ exterior rated screws and secure the shed ramp joists to the ledger board as shown below:
Next, attach the support brace at the bottom of the joists.
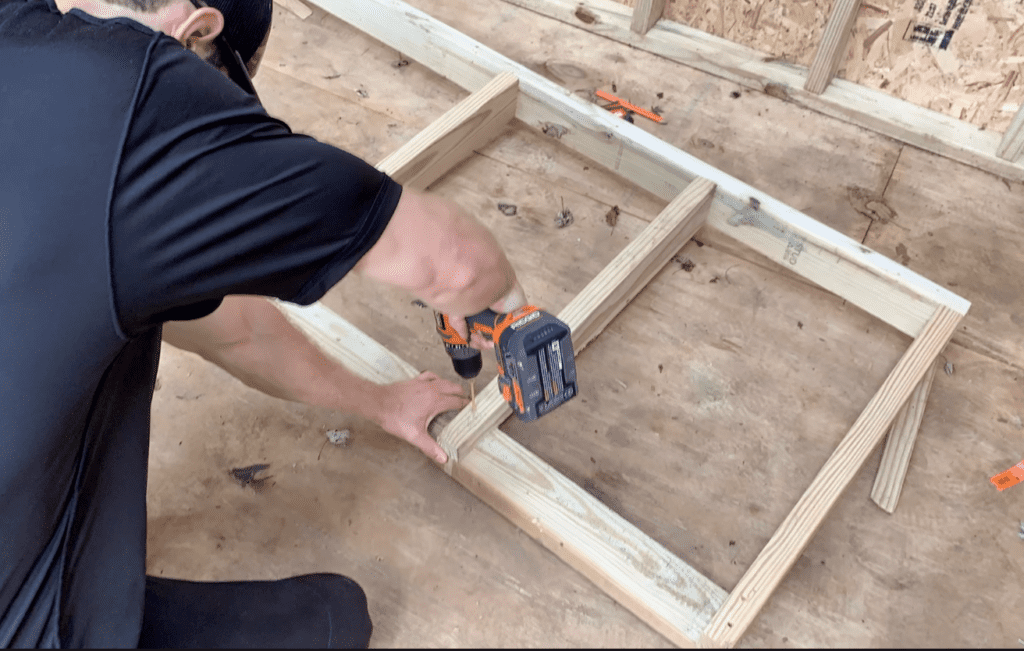
Be sure to space the shed ramp joists evenly.
After securing the shed ramp pieces tougher, consider coating any of the cut edges with a lumber sealer. This will help to waterproof the cut edges and extend the useful life of the shed ramp.
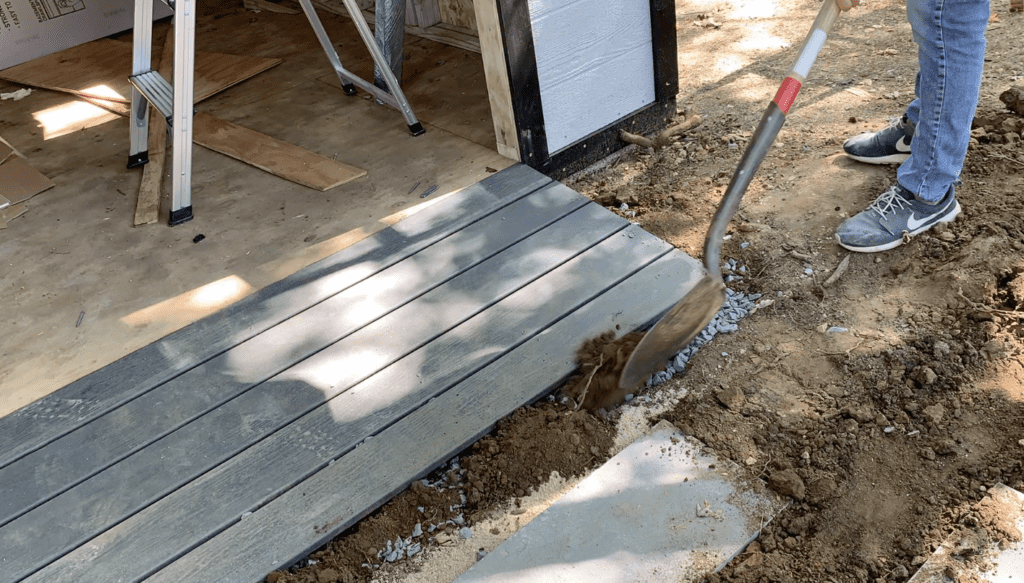
7. Dry Fit the Shed Ramp in Place and Excavate as Necessary
At this stage, place the ledger board of the shed ramp against the shed and see how the shed ramp looks in place.
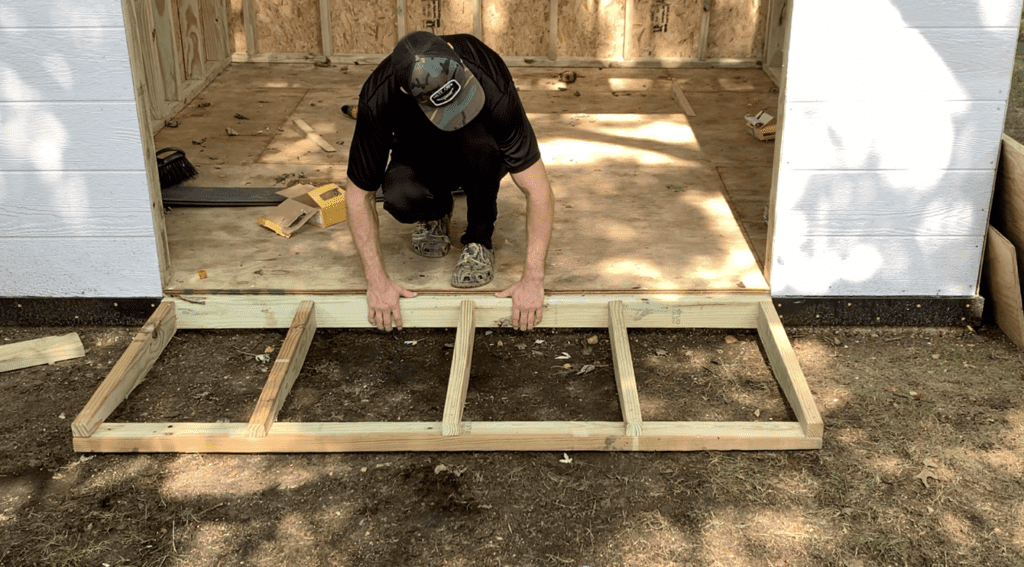
It is likely that you will need to excavate around the base of the shed ramp in order to get the shed ramp level.
Make adjustments as needed until the ledger board fits flush against shed.
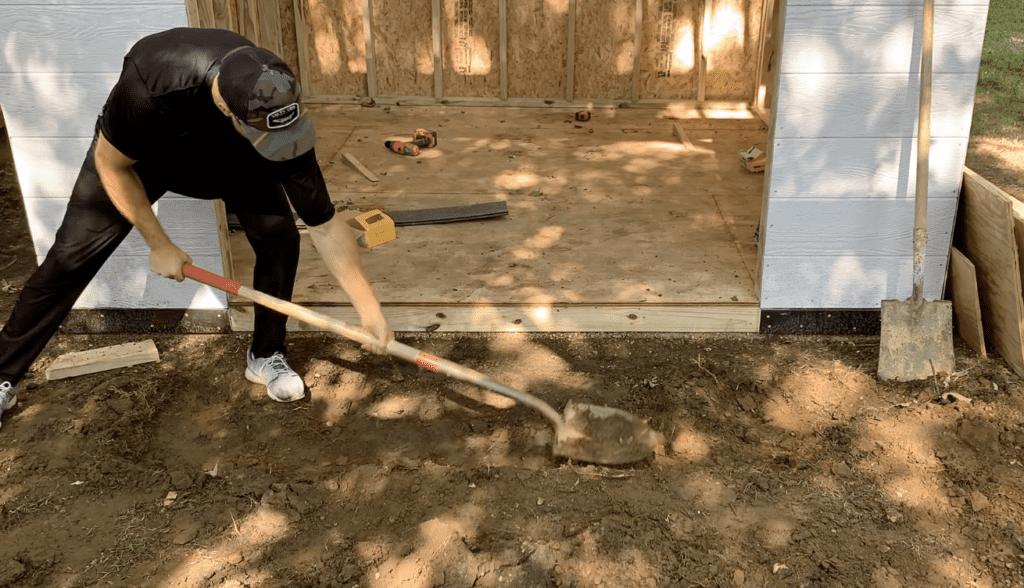
8. Apply Stone Beneath the Shed Ramp
When excavating around the base of the shed ramp, it is often best practice to excavate down an additional 2″ in order to allow for a 2″ stone layer to be placed at the base of the shed ramp.
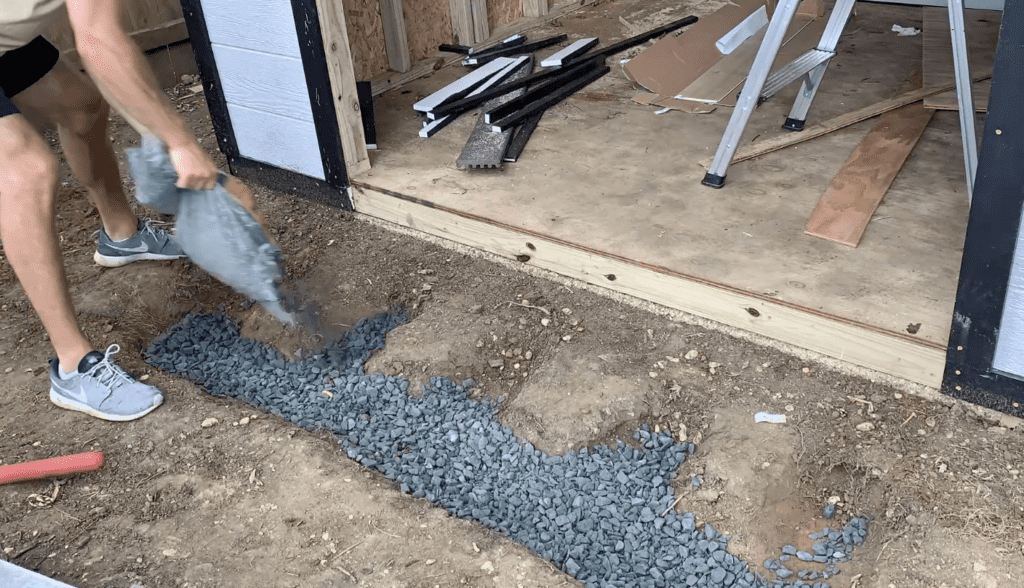
By applying stone to the base of the shed ramp (where it contacts the ground, you will facilitate drainage and prevent premature rotting of the shed ramp lumber.
Further, the stone layer will make it easier to level the shed ramp.
9. Attach Ledger Board to Shed
After excavating at the base of the shed ramp and backfilling with stone, attach the shed ramp ledger board to the shed as shown below.

Use 3″ exterior rated screws to attach the shed ramp ledger board to the shed at various locations. Make sure that the ledger board is level when installing.
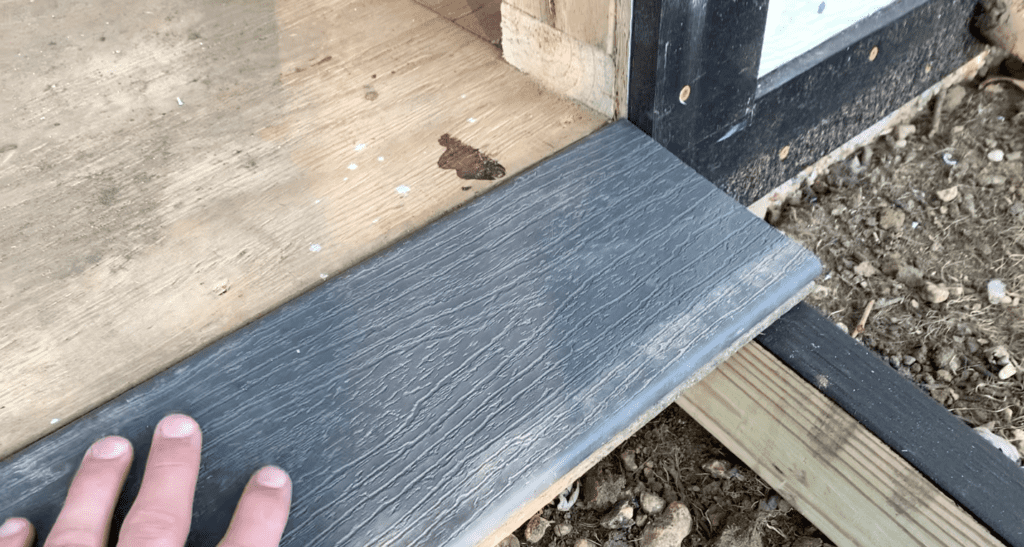
PRO TIP – Install the shed ramp ledger board at a height where the decking board will be perfectly flush with the shed subfloor – as shown below:
10. Level the Shed Ramp
After attaching the shed ramp ledger board to the shed, confirm that all of the shed ramp joists are perfectly level.
Place a level over the shed ramp joists and make adjustment as needed until the shed ramp is level.
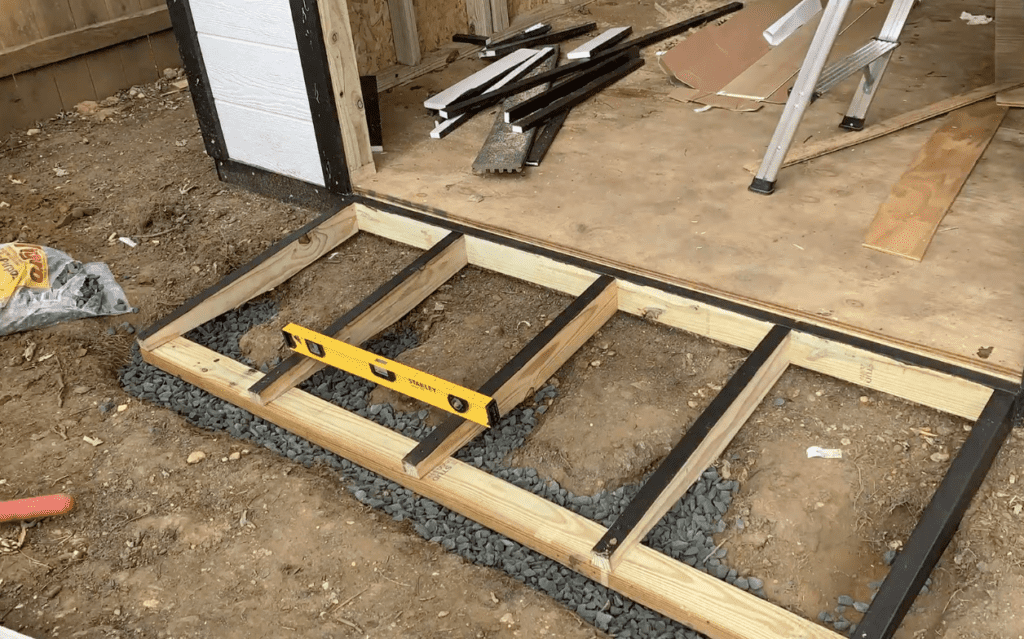
To make adjustments, add or remove stone from the base of the shed ramp until the desired level is achieved.
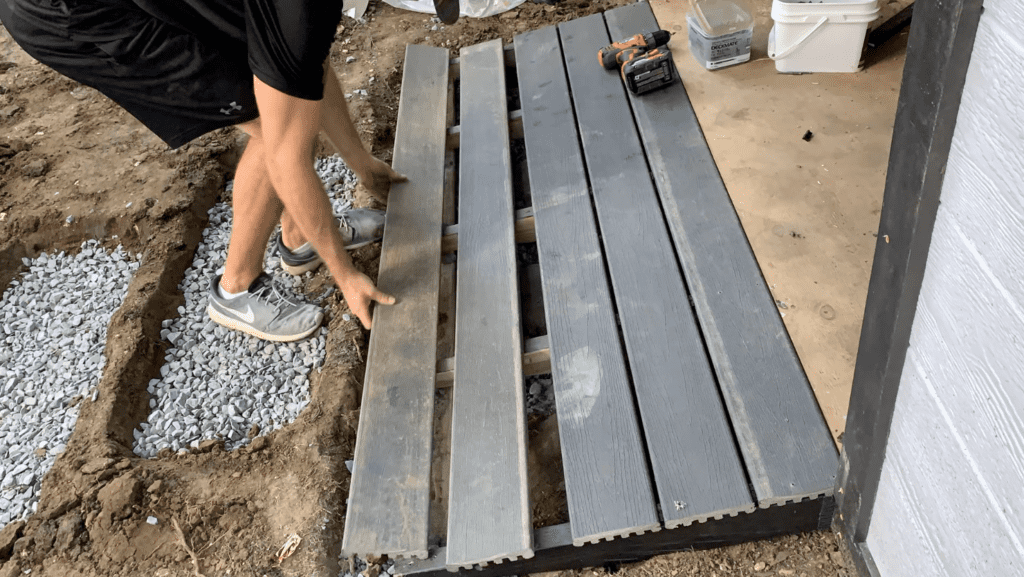
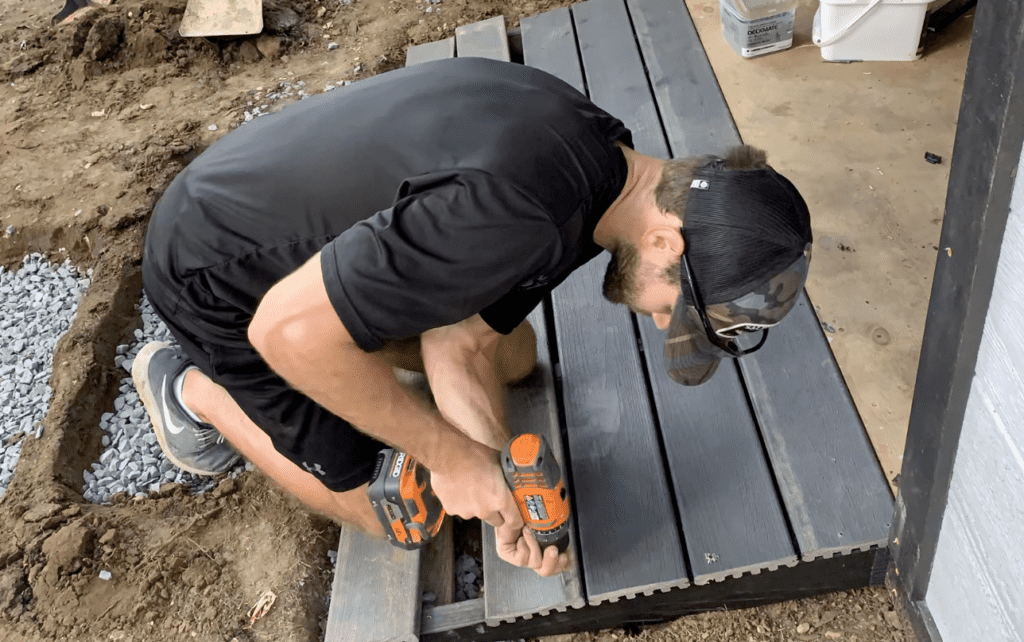
11. Attach Shed Ramp Decking Boards
After attaching the shed ramp ledger board to the shed and leveling the entire shed ramp, you can begin installing your shed ramp decking boards.
Typically, 2″x6″ pressure treated lumber or composite decking is used as shed ramp decking boards. However, select shed ramp decking boards as desired for your specific shed ramp installation.
Cut your shed ramp decking boards to the same length as your shed ramp (or slightly larger to allow for a 1/2″ overhang) and install them perpendicular to the shed ramp joists.
Secure the decking boards at each joist location using two fasteners. Ensure uniform spacing between each decking board.
After attaching all of the shed ramp decking boards to the shed ramp frame, your project is nearly complete.
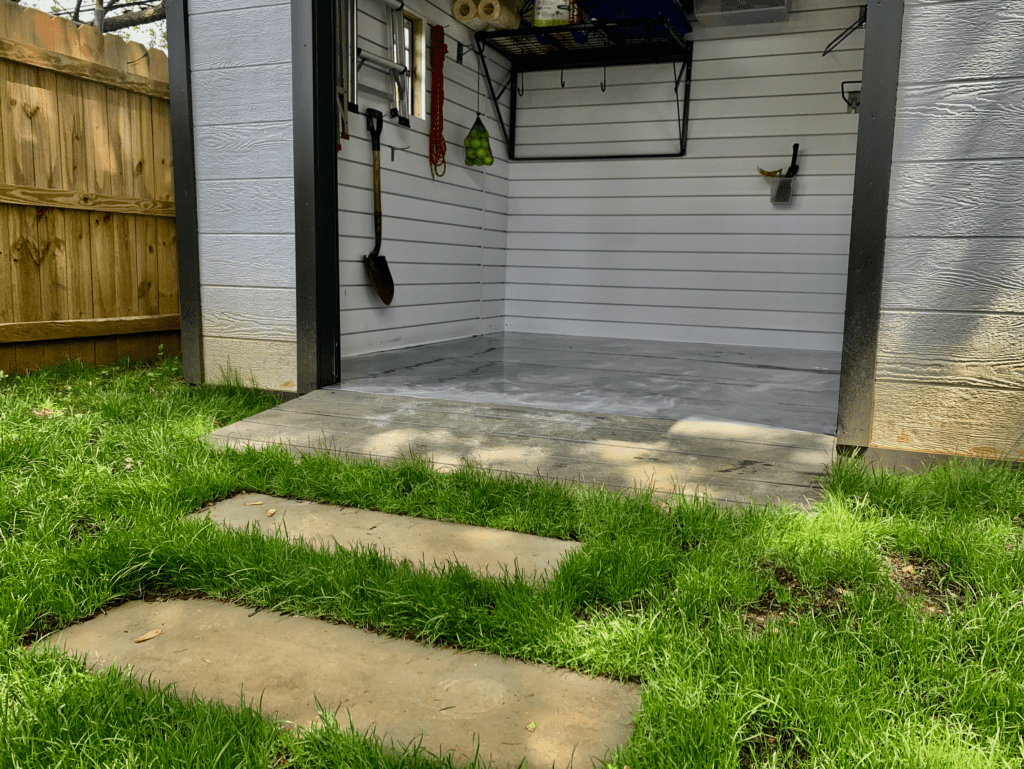
12. Backfill Around the Shed Ramp
The last step in the shed ramp construction process is to backfill around the shed ramp.
Backfill the voids around the shed ramp as needed to match the adjacent grade.
Plant grass seed or landscape around the shed ramp as desired.
At this stage, you have successfully completed you shed ramp construction project.
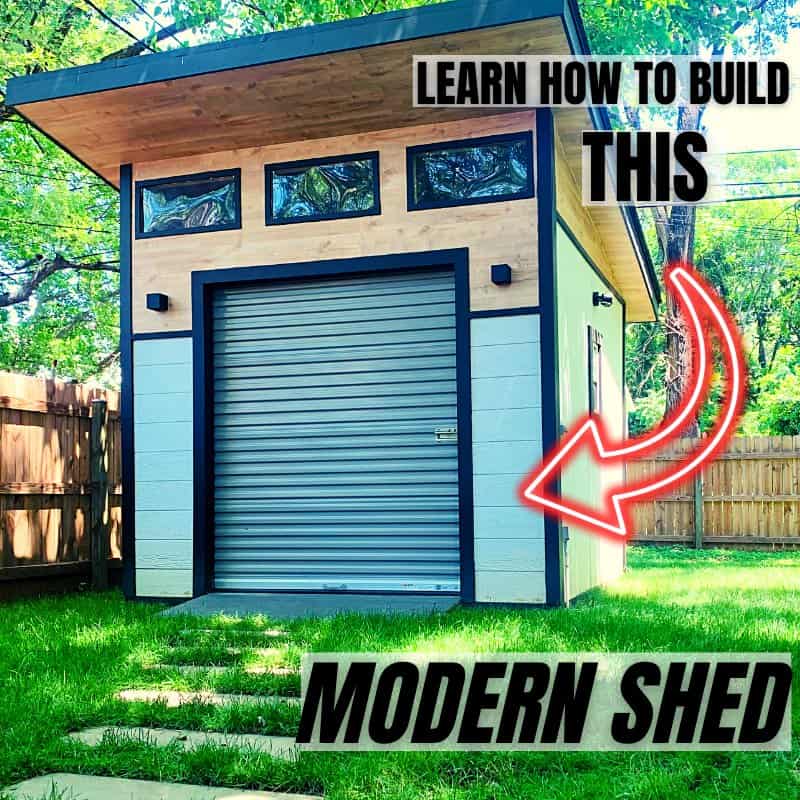
If you want to learn how to build the Modern Shed you see below, Check out my “How to Build a Modern Shed Course” Linked Here. This Course includes a detailed materials list, tools lists, lumber cut lists, and step-by-step video instructions for each step of the project!
For more information on how to Build a 10’x10 Modern Shed from start to finish, check out ATimprovements.com or watch my step-by-step tutorial videos on Youtube.
Thanks!
Thanks so much for checking out ATImprovements! If you learned something from this project, you might also like these other DIY Projects:
- How to Build a Concrete Slab Shed Foundation: https://atimprovements.com/how-to-build-a-shed-base-concrete-slab-step-by-step-diy-guide/
- How to Frame a 10’x10′ Shed Base: https://atimprovements.com/how-to-build-a-shed-floor-base-diy-step-by-step-guide/
- How to Frame Shed Walls:https://atimprovements.com/how-to-frame-a-shed-how-to-frame-walls-for-a-10×10-modern-shed-step-by-step-with-pictures/
- How in Install a Shed Window: https://atimprovements.com/shed-window-installation-how-to-install-a-window-in-a-shed-diy/
- How to Install a Roll Up Door in a Shed or Garage:https://atimprovements.com/roll-up-door-installation/
- How to Build a Fence: How to Build a Fence (DIY Guide) – AT Improvements
- How to Build a Fence Gate: How to Build a Fence Gate (7 Steps with Pictures & Video) – AT Improvements
- How to Install a DIY deck Wire Railing: DIY Cable Railing – How to Install Cable Railing Step-by-Step – (atimprovements.com)
- How to Build a Concrete Paver Patio: DIY PAVER PATIO – Easy DIY Paver Patio Ideas – (atimprovements.com)
Thanks!
DISCLAIMER: This is a reference guide only. Consult local code requirements. Links included in this article might be affiliate links. If you purchase a product or service with the links that I provide, I may receive a small commission. There is no additional charge to you! Thank you for supporting ATimprovements so I can continue to provide you with free content each week!