
Installing stepping stones in your yard is a great way to protect your lawn while also providing a functional walkway path. There are many different types of stepping stone materials, but the installation is very similar for each type. Fortunately, installing stepping stones is a relatively easy project that the average homeowner can tackle in few hours.
To install stepping stones, start by planning out your stepping stone walkway layout. Next, temporarily place your stepping stones in place and mark each stone’s outline with spray paint. Remove the stepping stones and excavate the marked area beneath each stepping stone to approximately three to four inches below grade. Next, install a thin layer of gravel sub-base beneath each stepping stone and then apply a thin layer of leveling sand on top of the gravel sub-base. Place the stepping stones on top of the sand layer and level the stepping stone by adding or removing sand as needed.
By following the steps in this guide, you will learn how to install a stepping stone pathway step-by-step.
If you are more of a visual learner, you can check out my “How to Install Stepping Stones” installation video at the end of this article.
Tools and Materials Needed to Install Stepping Stones

To successfully install Stepping Stones, you will need the following tools and materials:
- Safety Equipment (Glasses, gloves, boots, etc.)
- Tape Measure
- Hand Tamp
- Shovel
- Level
- Gravel
- Sand
- Stepping Stones
With all necessary tools and materials on hand, you can now begin installing the Stepping Stone walkway.
1. Select Your Stepping Stone Material
Before you can begin installing your stepping stone pathway, you will need to select your stepping stone material. There are many different types of stepping stone materials available. A few of the most common stepping stone options are listed below:
- Flagstone
- Fieldstone
- Slate
- Concrete
Select a stepping stone material based on “look” and aesthetic you are going for. I recommend that you spend some time exploring your local landscape supply store to get a good feel of what stepping stone option will be best for your specific application.
After selecting you stepping stone size and type, you can proceed to the next step in the stepping stone installation process.
2. Plan Your Stepping Stone walkway layout
Just like all projects, a successful stepping stone installation project begins with planning. At this stage of the stepping stone project, spend some time thinking about how your stepping stones will be arranged and positioned in your yard.
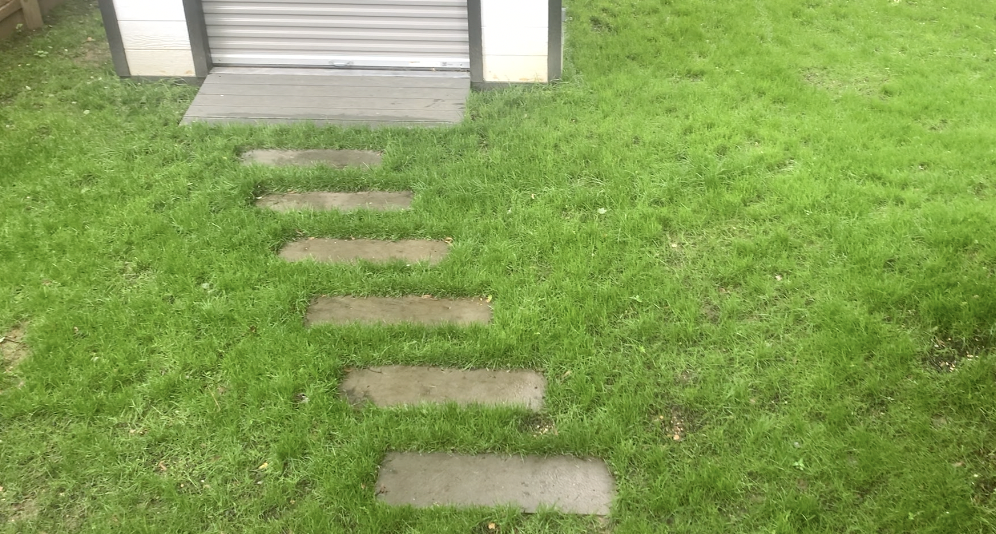
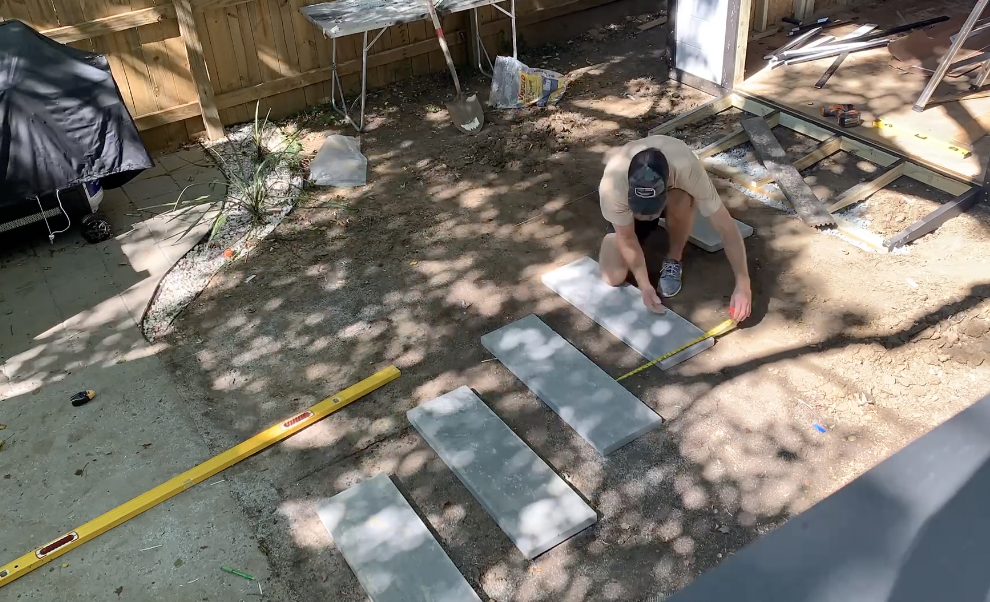
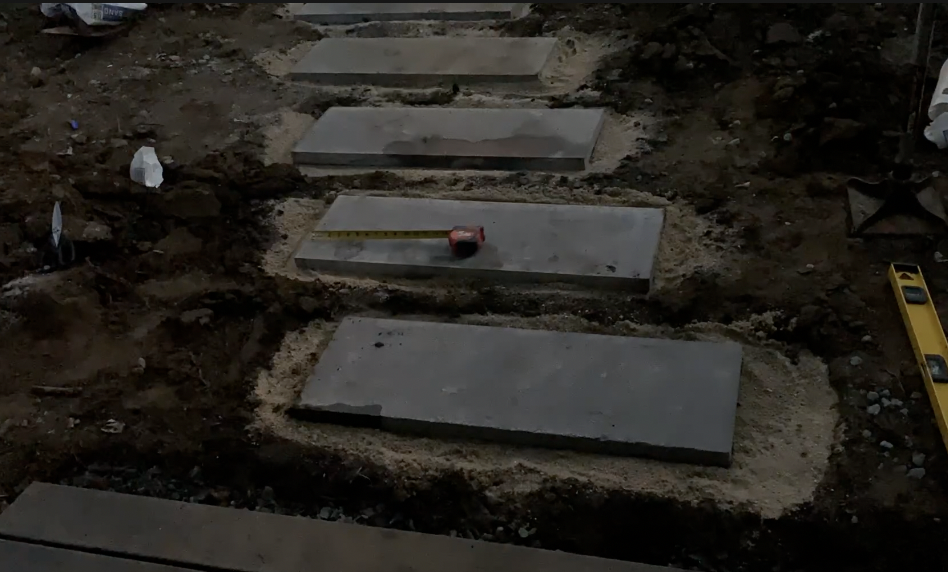
For my specific stepping stone project, my goal was to have the stepping stones centered between my deck stairs and my shed door opening – See below:
To determine the spacing and layout of your stepping stones, I recommend that you start by measuring the total distance that your stepping stone pathway will span.
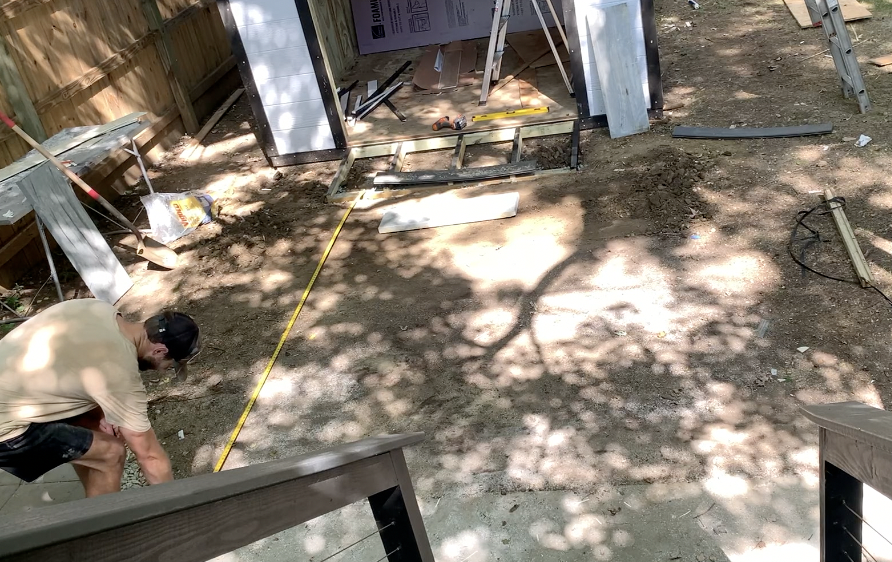
Next, confirm the width of your stepping stones using a tape measure – as shown below:
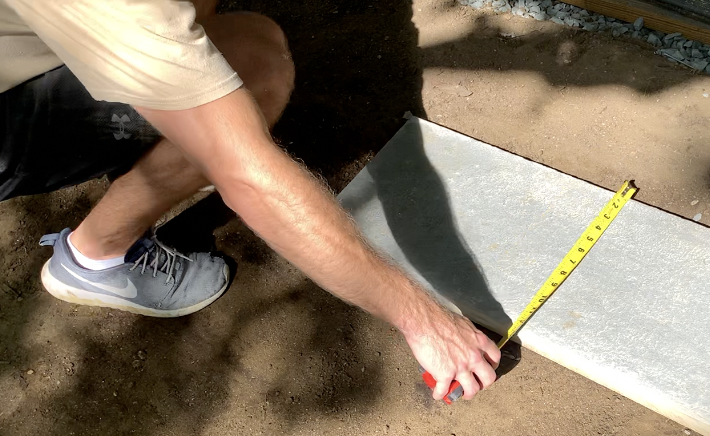
Once you know the total distance that your stepping stone pathway will span and the width of each stepping stone, you can calculate the spacing between each stepping stone. Spend some time planning out your layout, measuring the spacing, and preliminary placing each stepping stone in place.
After preliminarily positioning each of your stepping stones in place along the walkway, you can move on the to next step in the installation process.
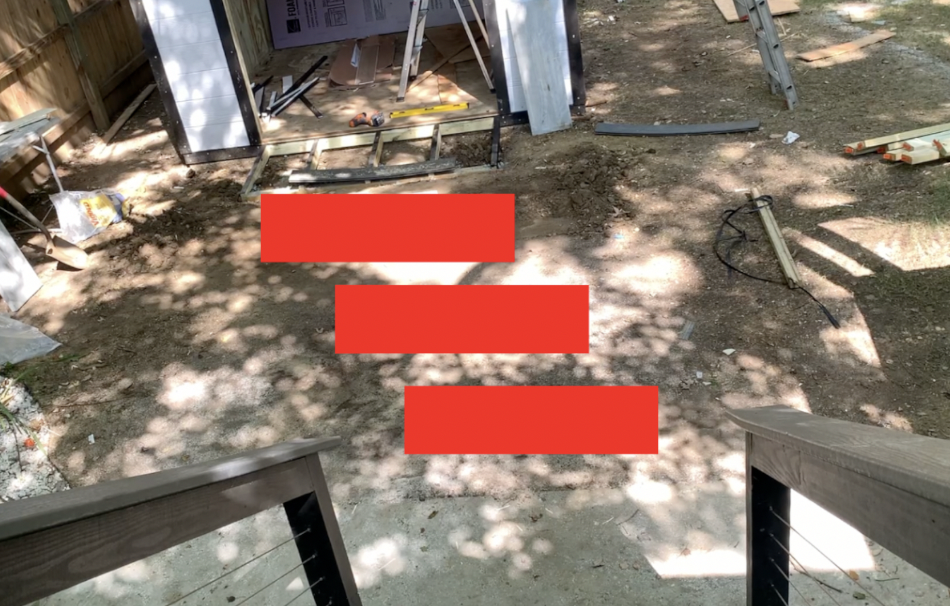
3. Mark Your Stepping Stone Locations
At this point in the stepping stone installation process, it is recommended that you use spray paint to mark the perimeter outline of each stepping stone – as shown below:
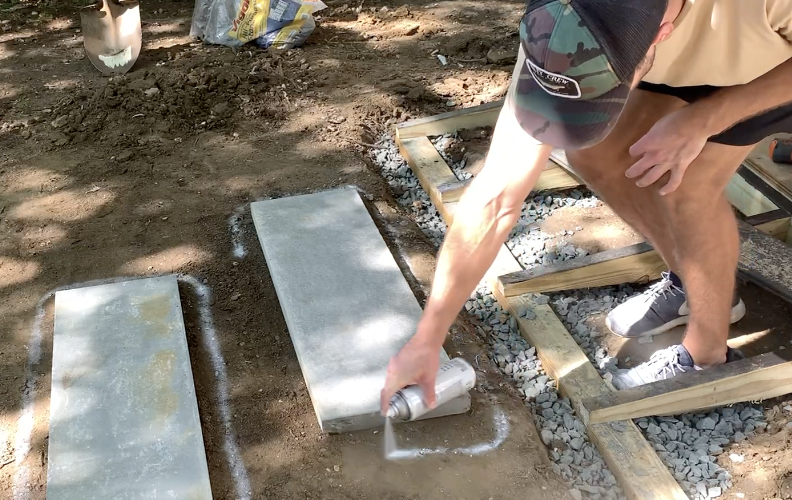
Repeat this spray paint marking for each stepping stone so that you will know exactly where each stepping stone will be positioned.
Once the outline of each stepping stone has been marked, temporarily move each stepping stone out of the way in preparation for the next step.
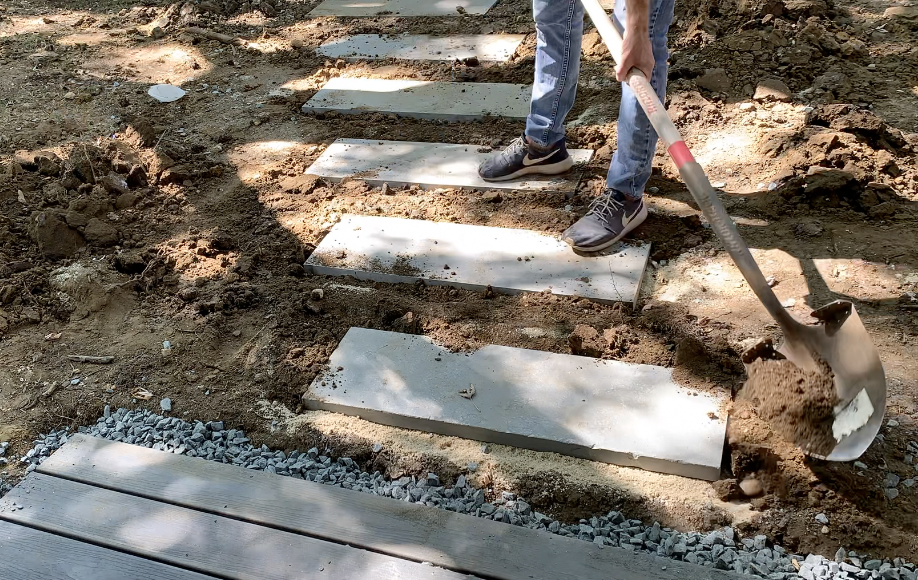
4. Excavate Beneath the Stepping Stones as Needed
In order to prevent your stepping stones from settling and shifting over time, it is highly recommended that you install a gravel sub-base beneath each stepping stone. Additionally, it is also recommend that apply a thin (1/4″) layer of sand on top of the gravel sub-base so that you can level the stepping stones more easily.
Refer to the image below for the general stepping stone sub-base arrangement:
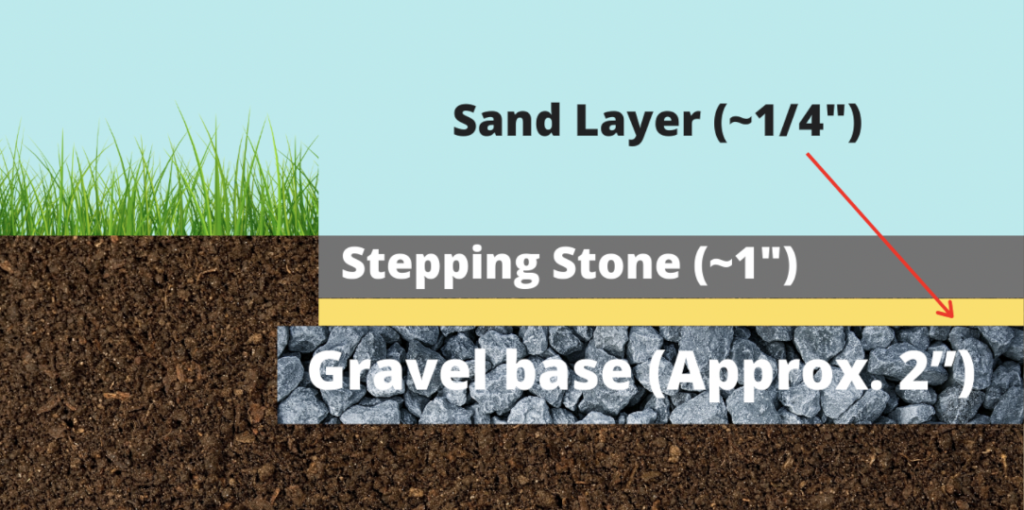
Based on the dimensions listed on the stepping stone excavation guide above, you will need to excavate approximately 2-1/4″ to account for the gravel and sand layers. You will then need to excavate the additional thickness of your stepping stone.
Basically, you want to excavate to a depth that allows for the stepping stone to be flat with the surrounding grade.
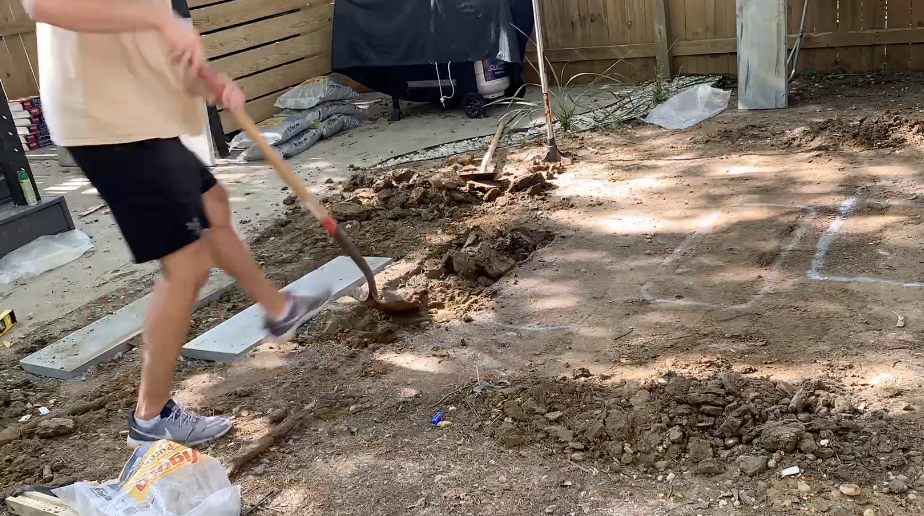
After excavating the area beneath your stepping stones to the required depth, compact the soil using a hand tamp.
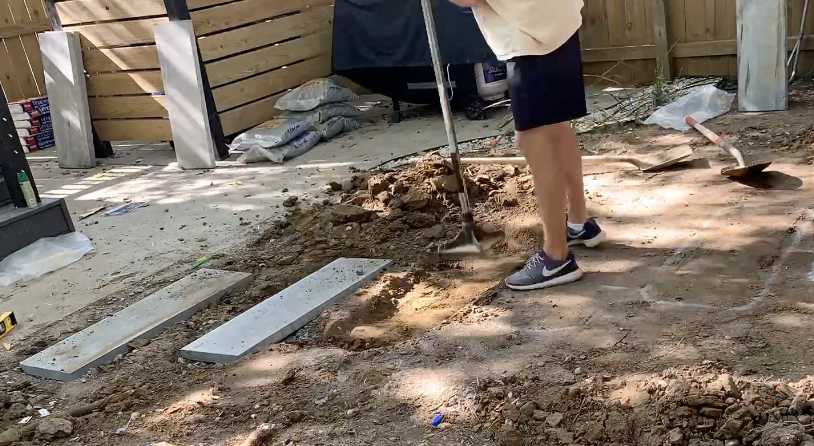
After excavating and compacting the soil beneath each of your stepping stones, you can move on to the next step of the stepping stone pathway installation process.
5. Apply Gravel Stepping Stone Sub-Base
As mentioned previously, it is highly recommended that you install a gravel sub-base beneath each stepping stone. This stone base will help to keep your stepping stones from settling over time and will also assist in drainage.
To apply gravel beneath each stepping stone, I recommend that you buy a few of the multi-purpose gravel bags from your local big box store.
Then, simply pour a thin layer of stone in the excavated area beneath each stepping stone.
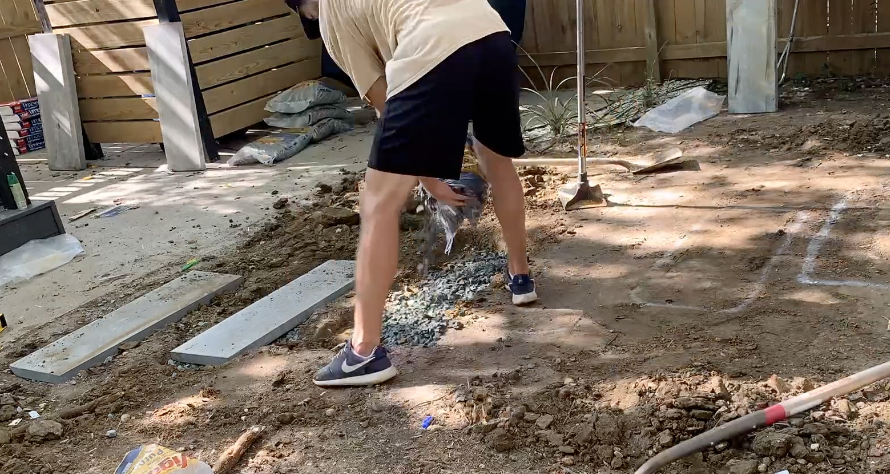
After applying your gravel sub-base, compact the gravel with a hand tamp.
With the gravel sub-base applied beneath each stepping stone, you can move on to the next step.
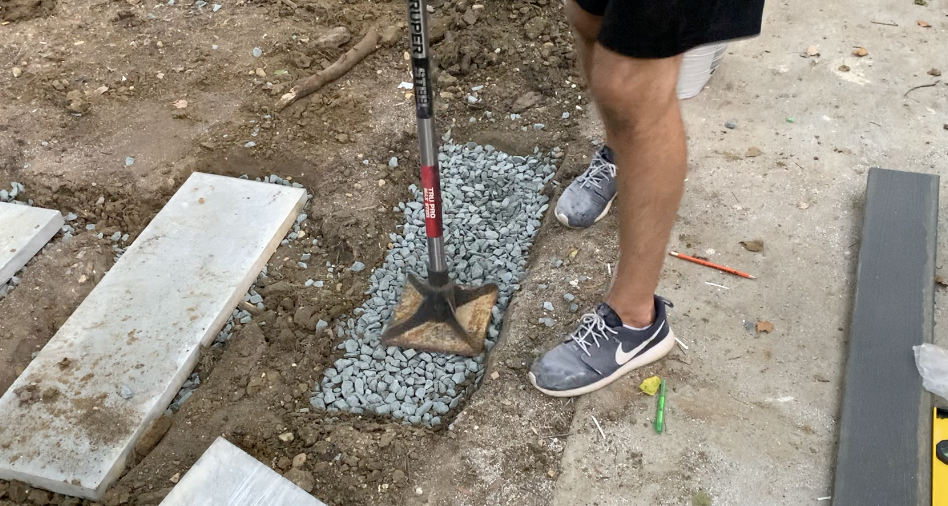
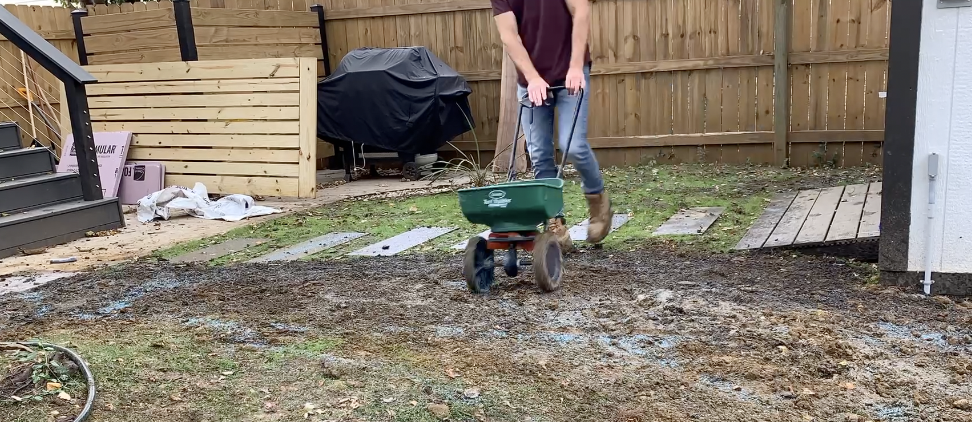
6. Apply Sand layer above the gravel Sub-Base
At this stage, apply a thin (1/4″) layer of leveling sand on top of the gravel sub-base layer. This sand will allow for you to level your stepping stones much more easily.
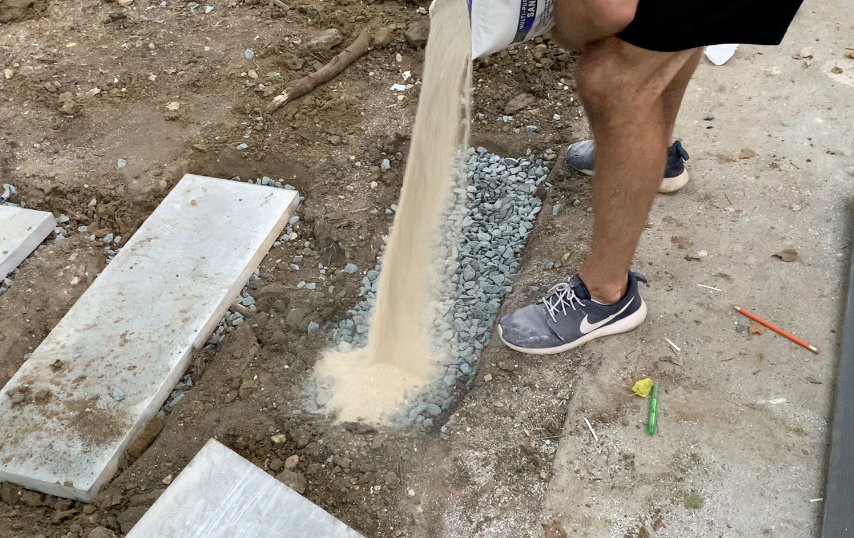
After pouring an appropriate amount of sand to the stepping stone application area, spread out the sand layer to ensure that you have an even layer of coverage over the gravel sub-base.

I recommend that you pour a bit of water on your sand layer prior to compaction. This will help to make the compaction process a bit easier. I used a watering can to apply water – as shown below.
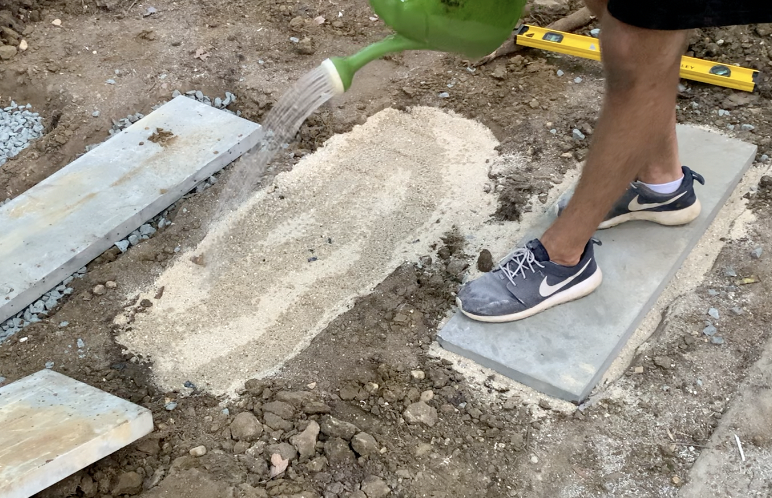
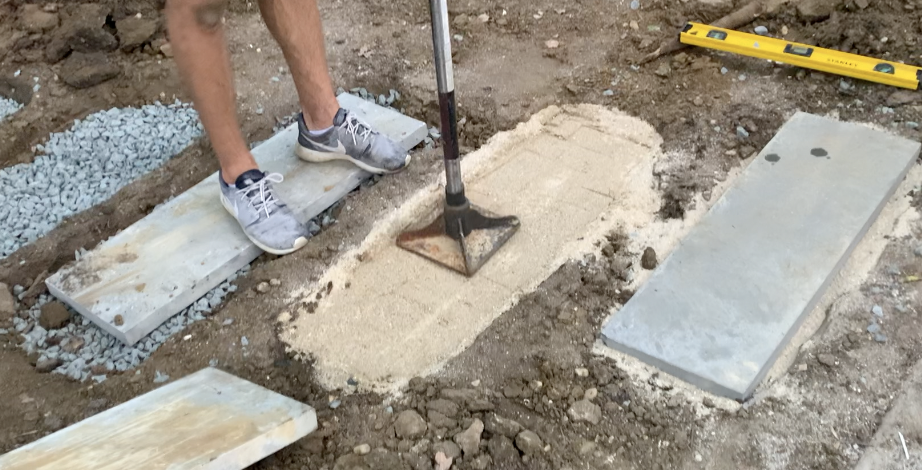
After applying a bit of water to the sand layer, compact the sand using a hand tamp.
Once the sand layer has been installed and compacted for each stepping stone, you can begin positioning the stepping stones in place.
7. Position the Stepping Stones in Place
At this stage, simply place your stepping stones in place on top of the sand layer.
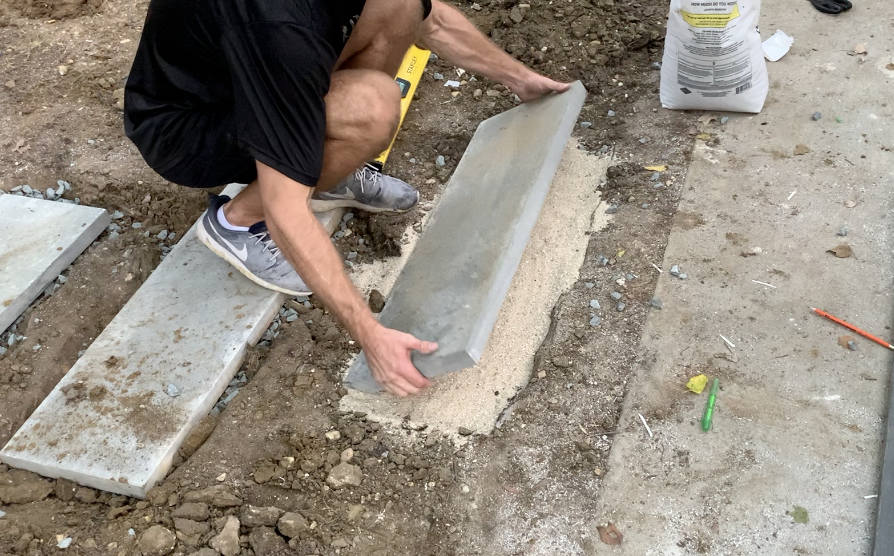
Repeat this process for all of the stepping stones in your pathway.
Once all of the stepping stones have been preliminarily positioned in place, you can make the final leveling and positioning adjustments.
8. Level the Stepping Stones and Make Necessary Adjustments
At this point in the stepping stone installation process, use a level to check that each stepping stone is perfectly flat.
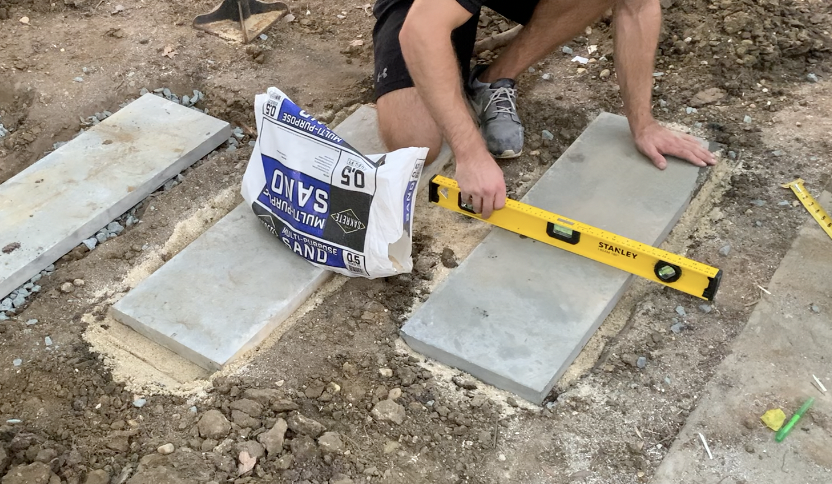
Be sure to check both directions of the stepping stone for level.
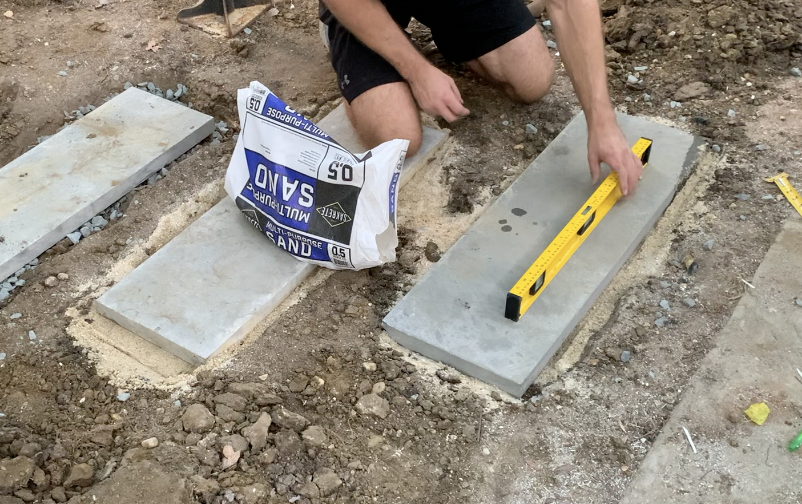
If you find that any of your stepping stones need to be adjusted, simply add or remove sand beneath the stepping stone as necessary. Repeat this process until each stepping stone is flat and level.
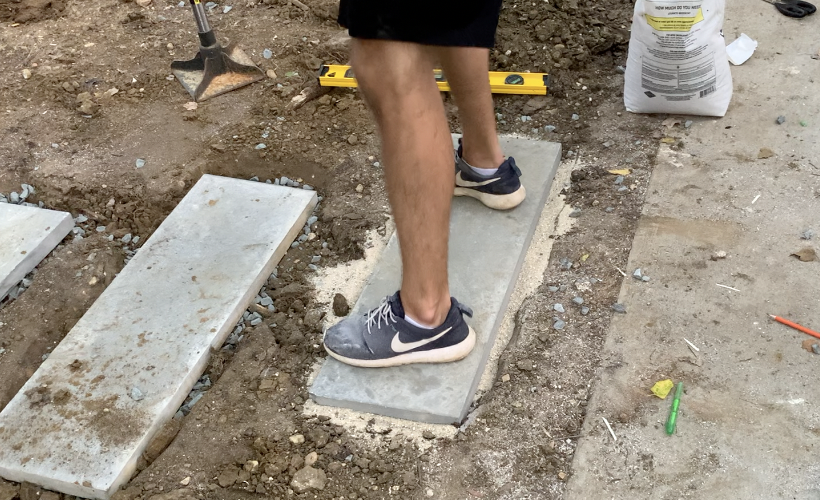
Once you are happy with each stepping stone, I recommend that you “compact” each stepping stone using your body weight.
9. Backfill Around the Stepping Stones as Needed
Once you are satisfied with the positioning and level of each stepping stone, simply backfill the area around each stepping stone.
In my case, I backfilled around each stepping stone with soil. I then compacted the soil around each stepping stone using a hand tamp.
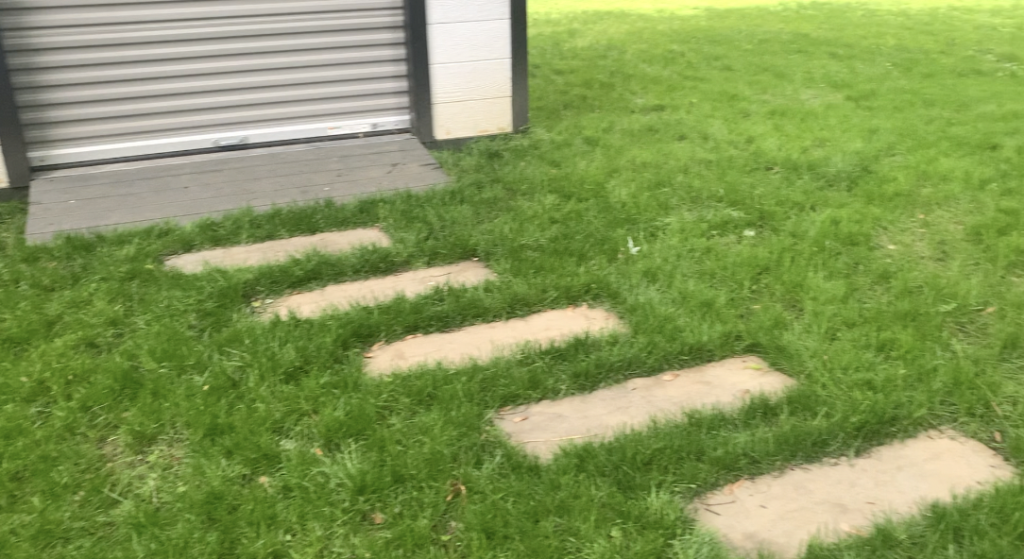
At this stage, simply perform any touch up work. For my application, this involved planting grass seed around each of the stepping stones.
At this point, your stepping stone installation is complete! All that is left to do is wait for the grass to grow.
If you are more of a visual learner, you can watch my Stepping Stone Installation video below:
Thanks so much for checking out ATimprovements! If you learned something from this project, you might also like these other DIY Projects:
- How to Build a Fence: How to Build a Fence (DIY Guide) – AT Improvements
- How to Build a Fence Gate: How to Build a Fence Gate (7 Steps with Pictures & Video) – AT Improvements
- How to Install a DIY deck Wire Railing: DIY Cable Railing – How to Install Cable Railing Step-by-Step – (atimprovements.com)
- How to Build a Concrete Paver Patio: DIY PAVER PATIO – Easy DIY Paver Patio Ideas – (atimprovements.com)
Thanks!
DISCLAIMER: This is a reference guide only. Links included in this article might be affiliate links. If you purchase a product or service with the links that I provide I may receive a small commission. There is no additional charge to you! Thank you for supporting ATimprovements so I can continue to provide you with free content each week!