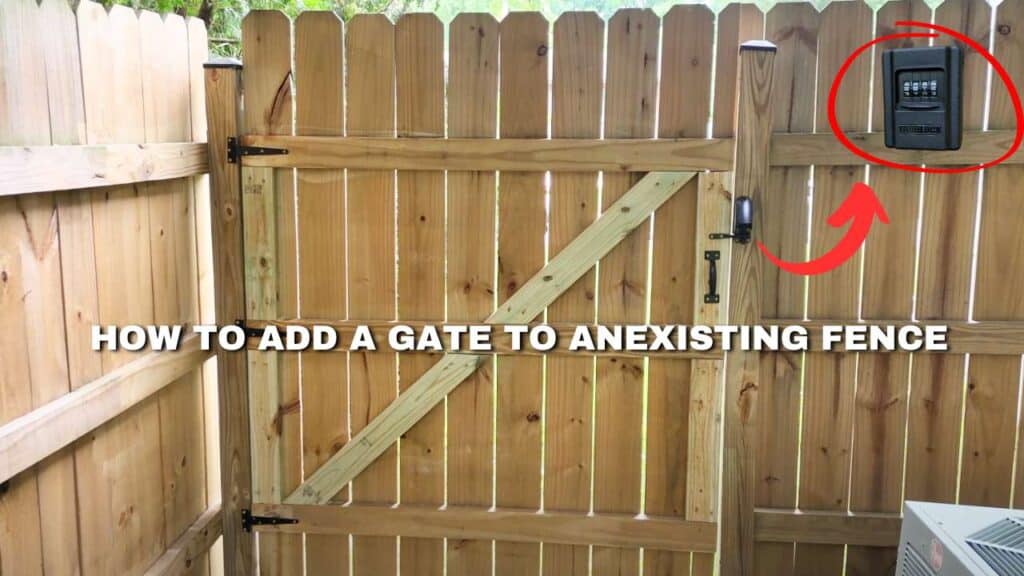
Adding a gate to an existing fence can enhance the functionality and accessibility of your yard. Whether you want to create an entryway, improve access for gardening tools, or add a new path, installing a gate can be a rewarding DIY project. I recently added a gate to my existing fence and this is my step-by-step guide that will show you the whole gate addition process from start to finish. I also installed a pretty cool (and secure) gate latch called the YARD LOCK GATE LOCK which you can check out with this link.
Additionally, if you are more of a visual learner, you can skip the article and just watch my “How to Add a Gate to an Existing Fence” YouTube linked below (Note that the Yard Lock gate lock installation is shown in detail in this video).
Materials and Tools Needed
Before you begin, gather the following materials and tools:
- Hinges (I bought mine off Amazon)
- Latch (I went the Yard Lock gate latch – it’s pretty cool)
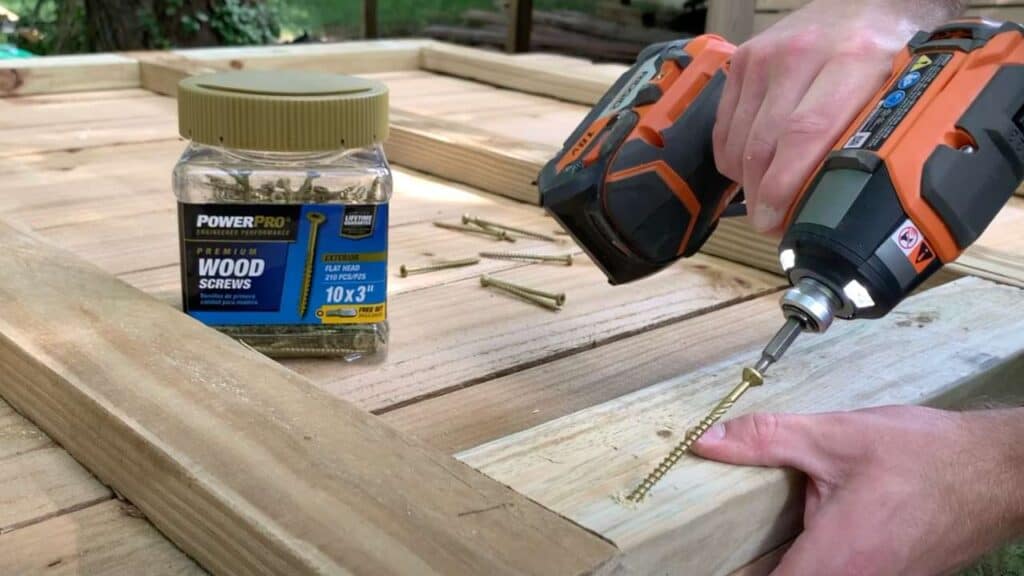
- Screws (I went with 3” and 1.5” PowerPro Screws)
- Measuring tape
- Level
- Drill (or impact driver)
- Saw (I used a circular saw)
Step-by-Step Instructions on Adding a Gate to a Existing Fence:
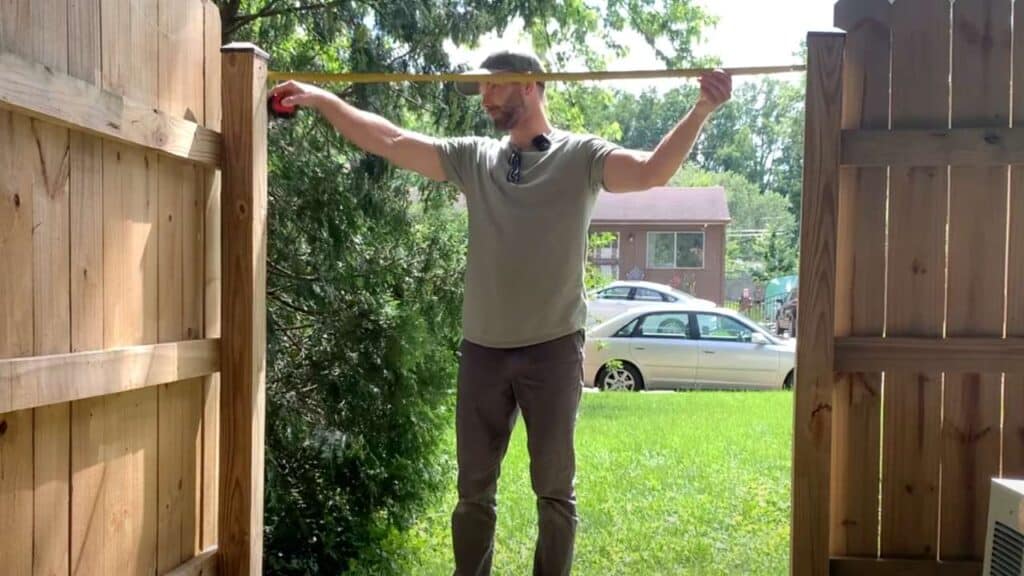
Plan and Measure
- Determine the Location: Choose the ideal spot for your gate. Ensure it’s easily accessible and fits the intended purpose (e.g., garden access, side entrance). I chose an area of my yard that had solid 4”x4” posts on either side.
- Measure the Opening: Measure the width of the opening where the gate will be installed. Standard garden gates are usually 3 to 4 feet wide, but you can customize based on your needs.
- Check for Level Ground: Ensure the ground where the gate will swing is level. If not, consider leveling the area or adjusting the gate height accordingly.
Prepare the Gate and Posts
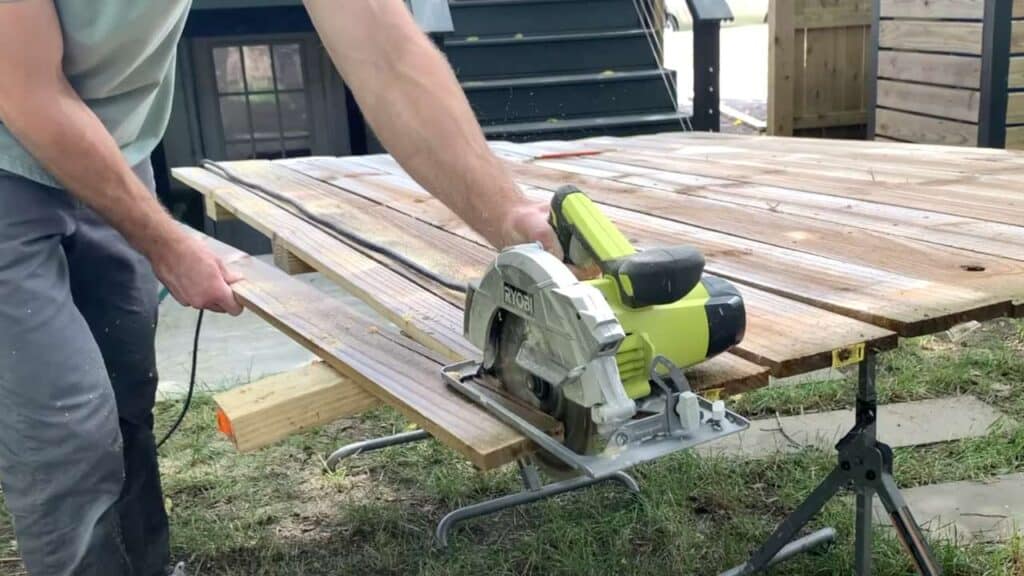
- Cut the Fence: If your existing fence is continuous, mark the section where the gate will be. Using a reciprocating saw, cut the fence to create the opening. Make sure to cut straight and smooth edges.
- Install Gate Posts: If your gate requires additional posts, dig holes for the posts on either side of the opening. The holes should be at least 2 feet deep to ensure stability. Place the posts in the holes, use a level to ensure they are vertical, and fill the holes with concrete. Allow the concrete to set according to the manufacturer’s instructions. Fortunately, I did not have to install any additional vertical fence posts for my gate.
Build the Gate
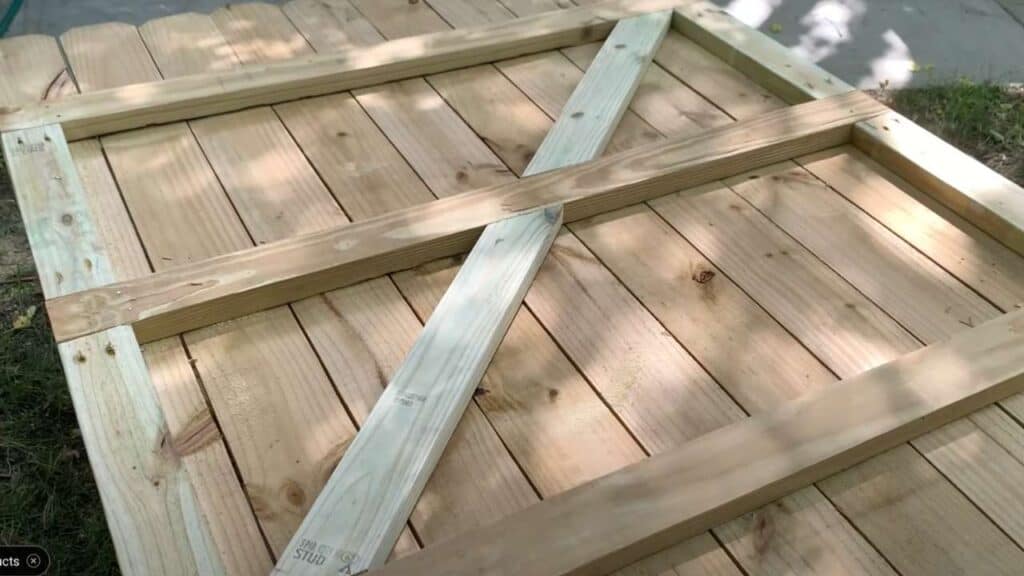
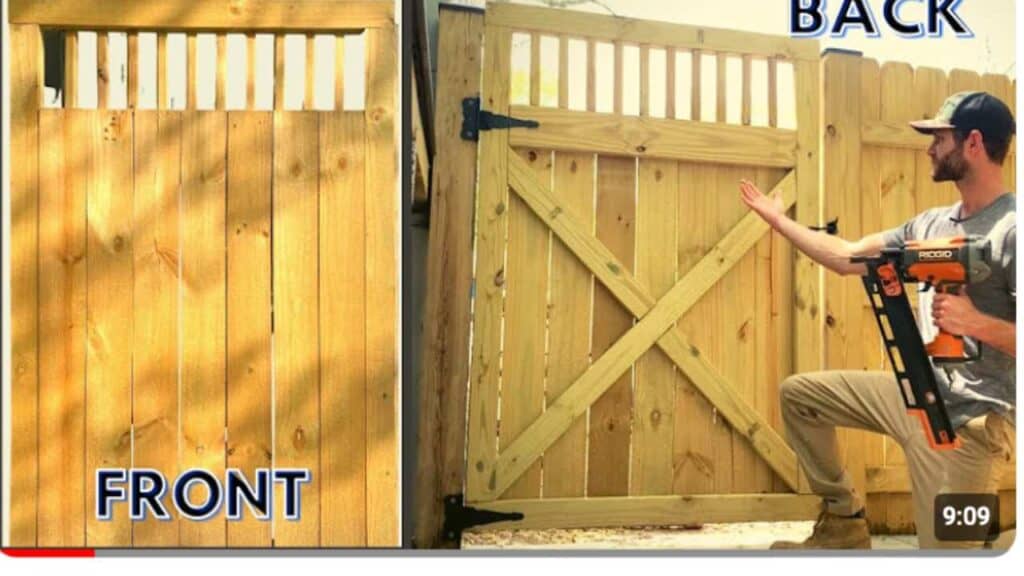
- Take the cut section of fence from the previous step and add blocking to the sides. You will also want to add a diagonal brace as shown below.
- Attach the blocking to the gate frame using 3” exterior rated screws. You will want to “toe-nail” the screws into the existing fence rail. For more information on building the gate, check out my YouTube video linked here.
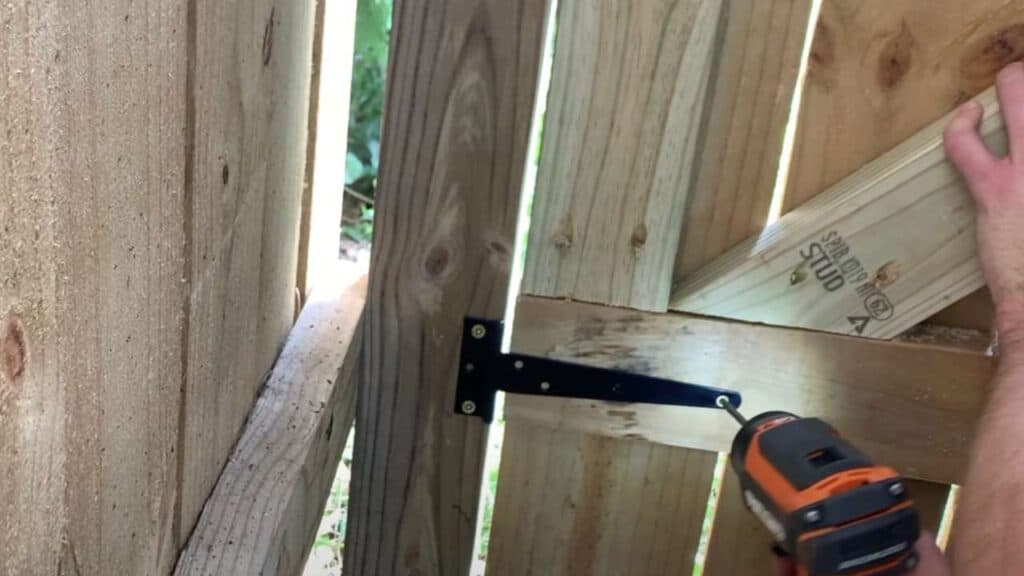
Attach the Gate to the Fence Post with Hinges
- Position the Gate: Place the gate in the opening. Ensure there is enough clearance at the bottom to prevent dragging on the ground and at the top for smooth operation.
- Attach Hinges: Secure the hinges to the gate frame. Typically, two hinges are sufficient, but larger gates may require three. Position one hinge near the top and one near the bottom of the gate.
- Mount the Gate: With the help of another person, hold the gate in place and attach the hinges to the gate posts or existing fence posts. Use a level to ensure the gate is straight and adjust as necessary.
Install the Gate Latch
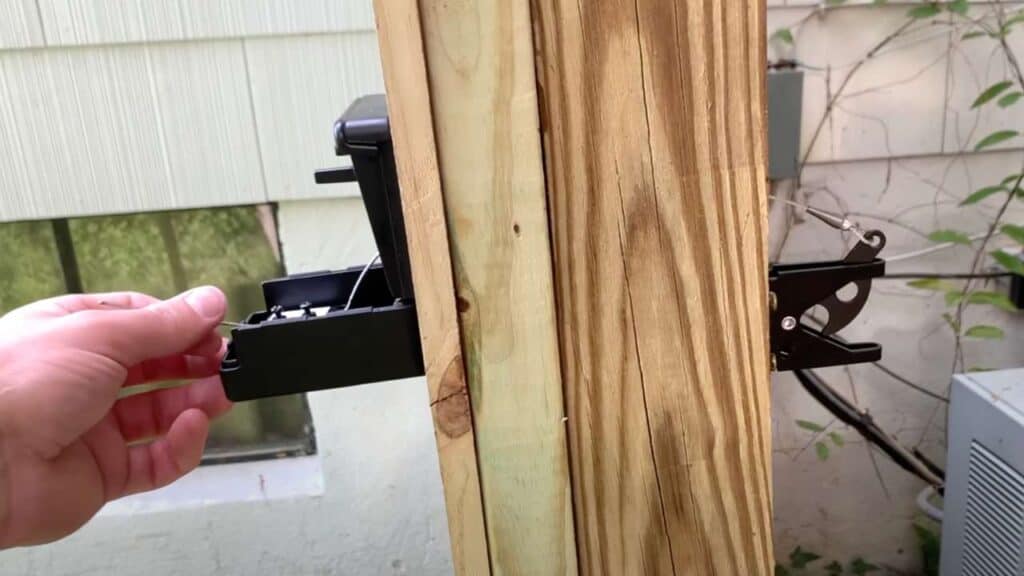
- Position the Latch: Determine the best spot for the latch based on convenience and height. Mark the location on both the gate and the post or fence where it will be secured.
- Attach the Latch: Using a drill and screws, attach the latch to the gate. Ensure it aligns properly with the catch on the post or fence for secure locking.
For my gate addition, I chose to install the Yard Lock Gate lock. It is a pretty cool keyless gate lock that has a combination box that is used for entry. For more information on the Yard Lock Gate Lock, check out the link here.

Test and Adjust
- Test the Gate: Open and close the gate several times to ensure it swings freely and latches securely. Check for any obstructions or uneven ground that might affect its operation.
- Make Adjustments: If the gate doesn’t swing smoothly or align properly, make necessary adjustments to the hinges, latch, or posts. Tighten any loose screws and ensure all components are securely fastened.
Finishing Touches
- Treat the Wood: If you used wooden materials, apply a wood preservative or paint to protect against weathering and extend the lifespan of the gate.
- Install Gate Stop: Consider adding a gate stop to prevent the gate from swinging too far and damaging the hinges or latch.
Conclusion
Adding a gate to an existing fence can be a practical and aesthetically pleasing enhancement to your property. With careful planning, the right tools, and some basic DIY skills, you can successfully install a gate that provides convenient access and adds value to your home. Follow these steps, take your time, and enjoy the satisfaction of completing a useful and rewarding project.
If you want to see how I built a similar gate completely from scratch, check out my YouTube video linked below or my Blog Article linked here.