
Building a privacy fence around your home can add security and enhance the overall aesthetic of your property. Although building a fence is a labor intensive project, it is relatively straightforward and can be accomplished by the average homeowner.
To build a fence, start by planning out the fence layout. Space vertical posts every 8 feet and and secure them in the ground with concrete. Attach horizontal rails to the bottom, middle, and top of your vertical mounting posts. Attach fence pickets to the mounting rails and place post caps on the top of your vertical mounting posts. Finally, stain or seal the fence for increased longevity.
This article will show you How to Build a Fence with DIY friendly instructions and specific tips and tricks that I learned when building my own DIY Privacy Fence. If you are more of a visual learner, I have linked my “How to Build a Fence” Youtube video at the end of this article.
1. Plan your Fence Layout

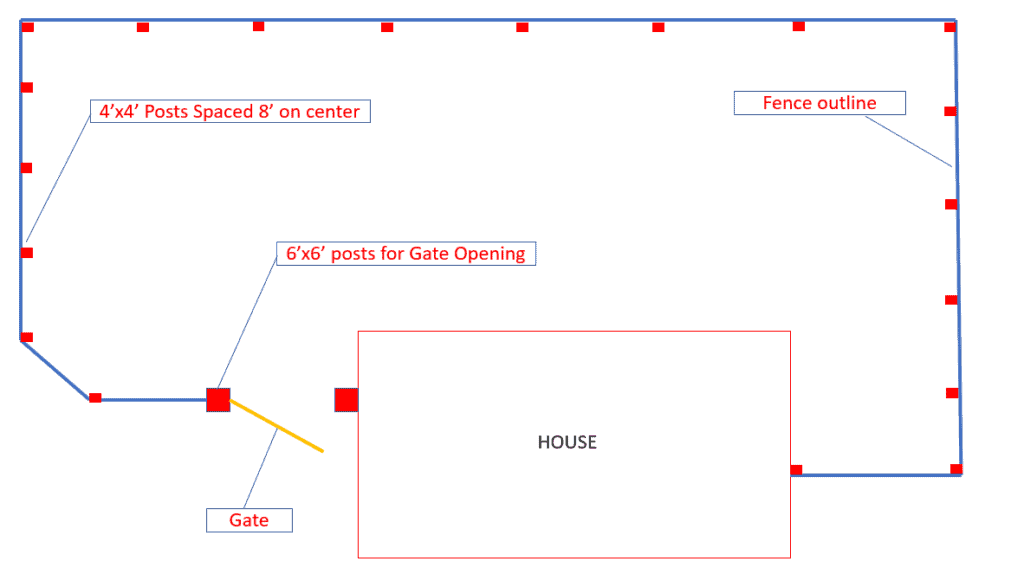
The first step in a successful fence build project is to plan your fence layout. Although planning you fence layout is relatively straightforward, there are a few things to keep in mind:
- Check with local building code requirements to determine if you will need a permit to build your fence
- Confirm your property boundaries (Survey, Property Data, etc.) to ensure that your fence layout is within your property line.
- Consider reviewing your fence layout plans with your neighbors prior to building your fence. This proactive approach will help to mitigate any “surprise” disputes and will give your neighbors the chance to voice any concerns.
- Use your fence layout to determine the total linear footage of the fence. This linear footage will serve as the basis for your materials list.
- If you are using fence panels instead of individual fence pickets, consider the fence panel length in your planning process.
- Consider fence gate access and fence openings as part of your fence design.
- Determine what material type you will use for your fence. Typically, pressure treated lumber or cedar is the best wood type for exterior fence projects.
Although your specific fence installation may require additional coordination or planning, the list above provides a good starting point.
Once you have thoroughly planned out your fence layout, you can begin to purchase your fence materials.
2. Purchase your Fence Materials
Before purchasing your fence materials, it is helpful to have an idea of the different fence components. Typically, fences are made up of the following materials and components:
Building a fence requires various tools and materials, with lumber being the primary construction component. In order to successfully complete a DIY fence build project you will need the following Tools and Materials:

Tools:
- Post level
- Tape Measure
- Level
- Exterior Screws (2.5″-3″)
- Nail Gun
- Exterior Nails
- Stakes
- String
- Hammer
- Pry Bar
- Paint Brush or Paint Sprayer
- Post hole digger
- Shovel
Materials:
- 4″x4″x8′ vertical fence posts
- 2″x4″ Horizontal Fence Rails
- Fence Pickets
- Gravel
- Concrete
- Post Caps
Although your specific DIY fence build project may require more/less than the tools and materials listed above, these are a good start for planning purposes.
Because most of the materials needed to build a fence are bulky, heavy, and require large quantities, I highly recommend that you place a delivery order with your local big box store. Having the materials delivered to your project site will greatly simplify your project and is, in my opinion, well worth the delivery fee.

With your fence layout planned and your materials and tools on site, you can now begin the DIY Fence Building process.
3. Measure and Layout your Vertical Fence Post Spacing
To begin your DIY fence installation, start by using stakes and a string line to mark the perimeter of your fence. Ensure that your layout is square (if applicable) using the right triangle squaring method. Once the perimeter is marked, you can begin marking your vertical fence post spacing. Based on the dimensions determined during your fence planning stage, begin marking the vertical fence post locations with spray paint.
PRO TIP: Fence post spacing should not exceed 8 feet. Ensure that fence post spacing is consistent between all fence posts.
After measuring and marking your vertical fence post spacing, you can begin the fence post excavation process.
4. Dig Fence Post Holes and Prepare for Vertical Fence Post Installation
With your fence post locations marked, you can begin the vertical fence post excavation process. Although you can use a manual post hole digger for small DIY fence build projects, you many want to consider renting a mechanical auger for larger projects. Manually digging for the vertical fence posts is strenuous and, as a result, renting a mechanical auger is highly recommended if you have many fence post holes to dig.
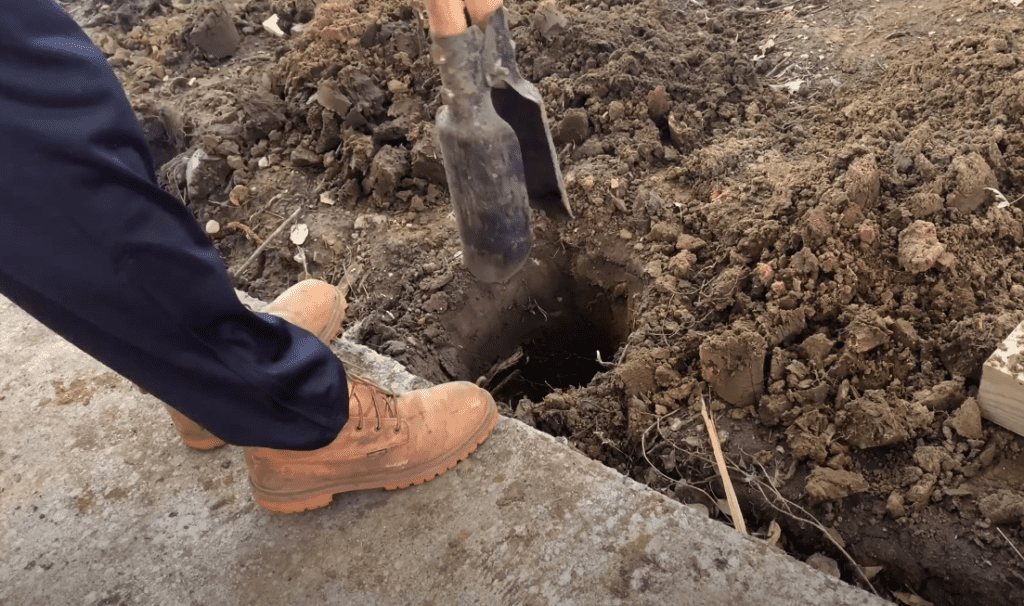
Dig your fence post holes to accommodate your desired fence height. To determine your excavation depth, consider the following.
- Fence Post Holes should be filled with approximately 2″-4″ of gravel to facilitate drainage beneath the fence posts.
- Fence posts should be located beneath the frost line in your area. If you do not excavate deep enough, your fence posts are likely to “heave” during freeze and thaw cycles.
- Coordinate your post hole depth based on your desired fence height.
For example, if I was building a fence in Georgia (5″ frost depth) and had a desired fence height of 6 feet, I would excavate approximately 27″ below grade. This would account for 3″ of gravel and 24″ of the vertical post below grade – leaving 6′ above grade.
Keep in mind that you want to have at least 2 feet of your vertical fence post below grade (2.5′ is even better). If you don’t bury your vertical fence posts deep enough, your fence may lack rigidity and strength.
Once all of your vertical fence posts have been dug to their approximate depth, I recommend that you establish the height of the first and last post in a particular fence run. To do this, add gravel (2″-4″) to the excavation until your desired post height above grade is achieved. Then, run a string line across the top of the first and last post. This line will serve as the reference height for all of the other posts in that fence run.
Continue to add/remove gravel to your fence post holes to get the appropriate vertical post height for each post in your fence installation.
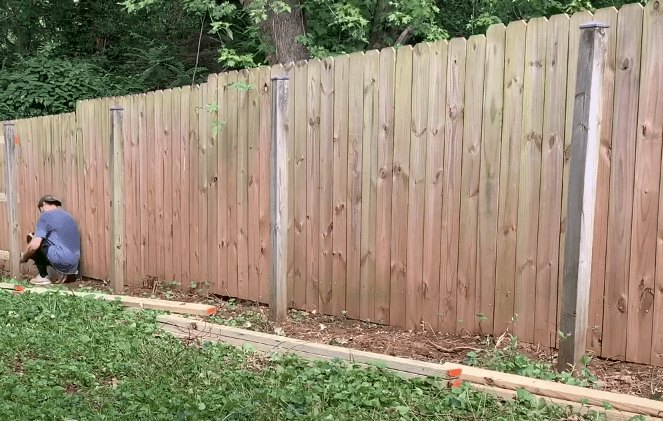
5. Install Vertical Fence Posts
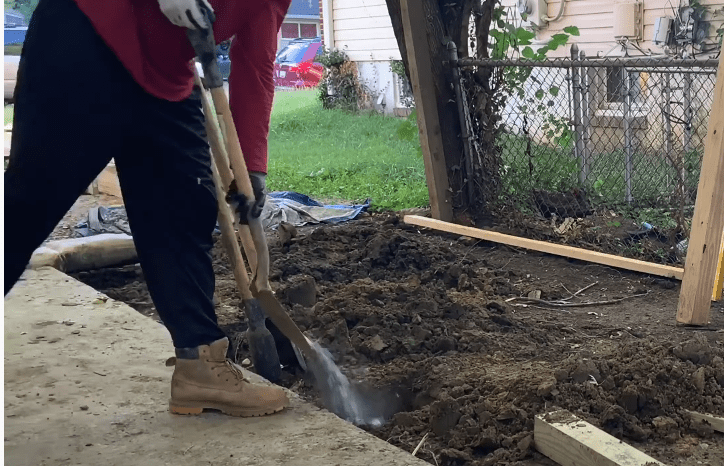
After adding gravel to your fence post holes and establishing the correct height for each of your fence posts, you can can begin permanently installing your vertical fence posts by adding concrete to the annular space in the post holes.
First, position your posts on top of the gravel within your vertical fence post hole. Next, add concrete.
There are two methods for adding concrete to your fence post holes:
- Mix up concrete in a Wheelbarrow, Concrete Mixer, Bucket, etc. according to the manufacturer’s recommendations and then add the mixed concrete to the fence post hole (recommended).
- Add dry concrete mix to the fence post hole and then add water once the fence post and concrete are already in the post hole.
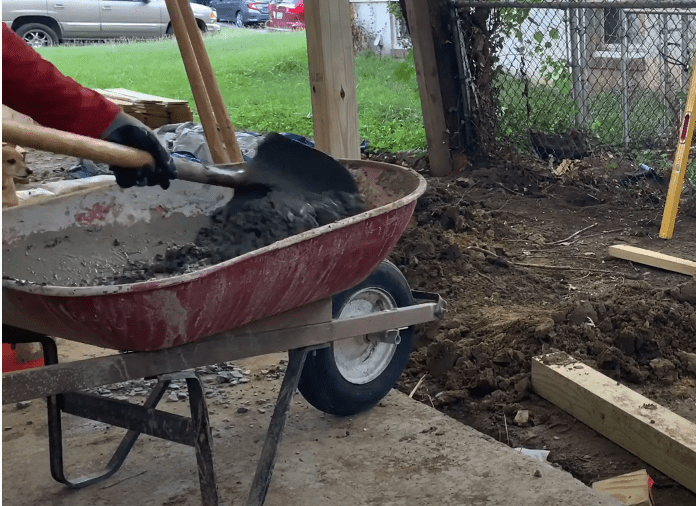
Mixing the concrete before adding it to your fence post hole is the recommended concrete application procedure. However, I have seen fence installers add dry concrete mix to their fence post holes and then add water (with a hose) once the dry concrete is already in the post hole. You would then mix up the concrete (as best as you can) using a shovel.
When adding concrete to your fence post holes, it is often helpful to have a second person hold the fence post in the center of the fence post hole while you are adding concrete. Obviously, the fence post should be positioned in the center of the hole with concrete all around it.
PRO TIP: The concrete surface should be slightly sloped away from the concrete post – this will help to prevent premature water damage to your vertical fence post. In other words, ensure that the surface of the concrete is not concave towards the wooden fence post.
After adding concrete to your vertical fence post holes, ensure that the post is centered within the post hole and use a post level to verify that the post is perfectly level and plumb. Depending on the consistency of your concrete, you may need to brace your concrete posts to prevent them from moving while the concrete cures.
After placing concrete in all of your fence post holes and ensuring that your fence posts are perfectly level and plumb, allow 2-4 days for your concrete to cure.
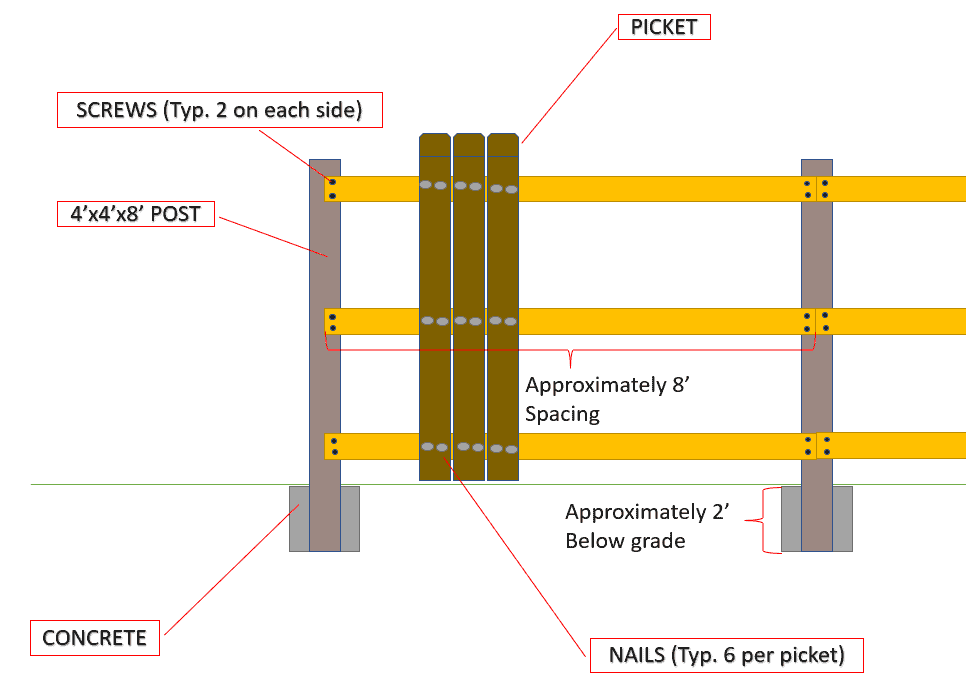
6. Install Horizontal Fence Rails
Once the concrete around your vertical fence posts has fully cured, you can begin the installation of your horizontal fence rails.
The horizontal fence rails run perpendicular to the vertical fence posts and are situated at the bottom, center, and top of the vertical fence posts.

Typically, you want to have the bottom fence rail a minimum of 6″ above the ground to prevent excessive exposure to moisture. Additionally, the top horizontal rail is typically positioned around 3″ from the top of your vertical fence posts.
When marking the locations for your horizontal fence posts, it is often helpful to use a string line to ensure that your fence rails run straight.

When ordering fence rails, it is typically better to use 2″x4″x16′ rails since they will span over three vertical fence posts. Using 2″x4″x8′ lumber will also work, but it won’t be as strong as the 16′ option.
To attach the horizontal fence rails to the vertical fence posts, use 3″ exterior screws and screw the rails to the posts, following your marked string line. Two screws per fence rail/fence post is adequate.

Continue to install your horizontal fence rails along the bottom, center, and top of your fence.
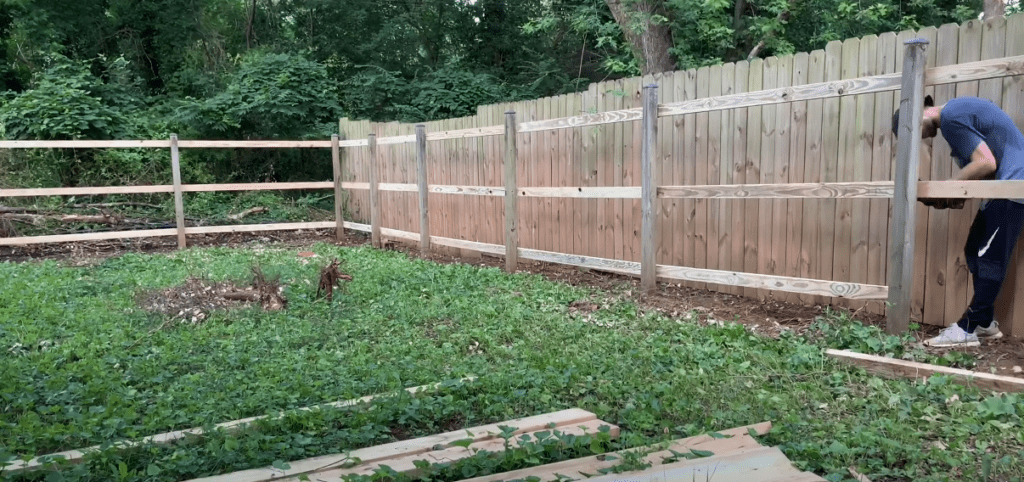
Once all of the horizontal fence rails have been installed, you can begin to install your fence pickets.
7. Install Fence Pickets
Once the horizontal fence rails have been fastened to the vertical fence posts with exterior screws, you can begin installing the fence pickets.
Fence pickets come up in a variety of different thicknesses and styles and are mounted to the horizontal fence rails that were installed in the previous step. To attach fence pickets to your horizontal fence rails, start at the corner of your fence and position the fence picket in place. Ensure that the fence picket is plumb using a level and use a nail gun to fasten the fence picket to the horizontal fence rails.

Using your nail gun, fasten the fence picket with two nails per horizontal fence rail. For example, each picket should be attached to the horizontal fence rails using 6 nails (2 nails per rail).
It is recommended that you position your fence pickets so that there is no gap between them. Over time and as the lumber dries, it will shrink – causing a small gap to form between each fence picket. After every 3-4 fence pickets you install, double check that the fence pickets are still plumb. Make any adjustments (as needed) prior to proceeding. Continue installing fence pickets in this manner until the all of the fence pickets have been installed.

8. Stain or Treat the Fence
Once your fence has been constructed, it is highly recommended that you stain or treat your wood fence to help increase its longevity. There are many different sealants and stains that can be used for your fence depending on the “look” you are trying to achieve. As a general rule of thumb, it is recommended that you apply a wood preservative to the base of your vertical fence posts to minimize the possibility of premature rotting. Additionally, if you constructed your fence using pressure treated lumber, give the wood sufficient time to dry before staining or sealing your fence.

Before applying any stain or sealant to your wood fence, ensure that fence is clean (i.e. power washed) and ready to receive a coating. Next, apply sealant or stain to your fence according to the manufacturer’s recommendations. Typically, wood sealants and stains can be applied with a paint brush, paint roller, or a spray gun.
It is recommended that you apply new coats of sealant or stain to your fence every 2-3 years in order to maximize the fence’s lifetime.
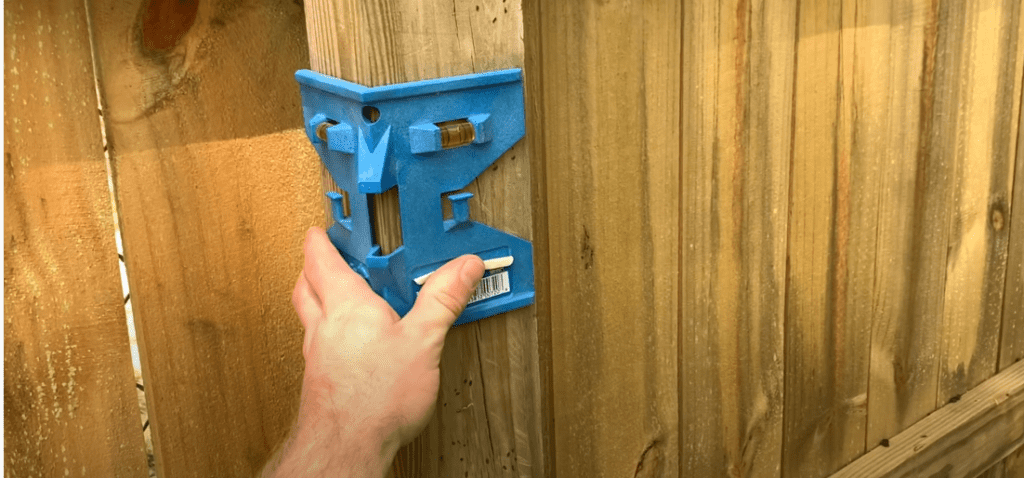
9. Install Post Caps
The final step in your DIY Fence Build Project is to install post caps on top of your vertical fence posts.
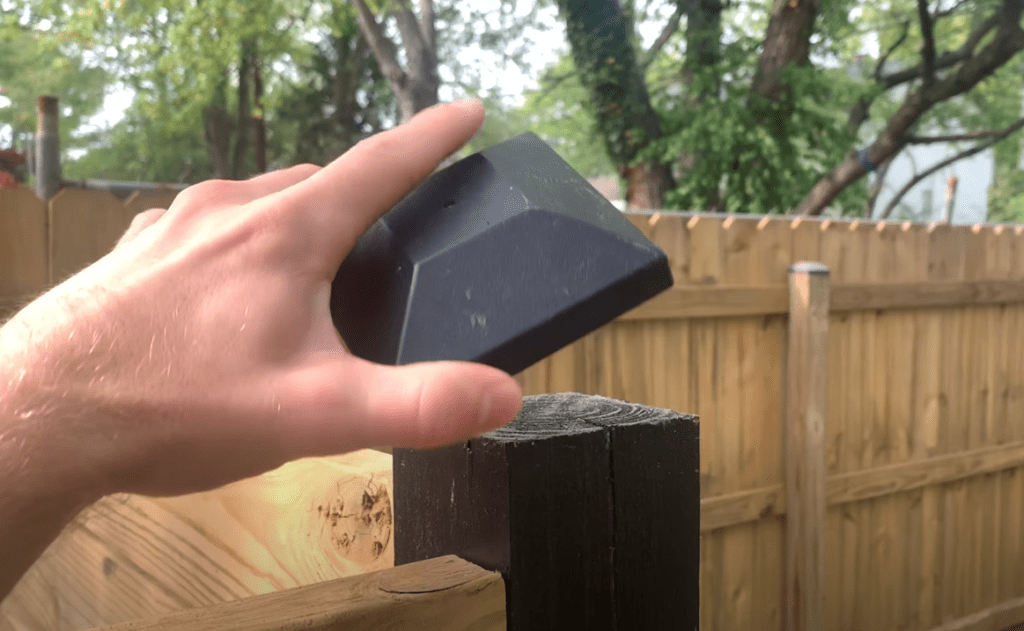
In addition to being a waterproof barrier on top of your fence posts, the fence post caps also improve the visual appeal of most fences – giving them a more finished look. Once your post caps have been installed on each of your vertical fence posts, your DIY Fence Build Project is Complete.
If you are more of a visual learner, you can watch how I completed every step of the DIY fence Build Project on Youtube!
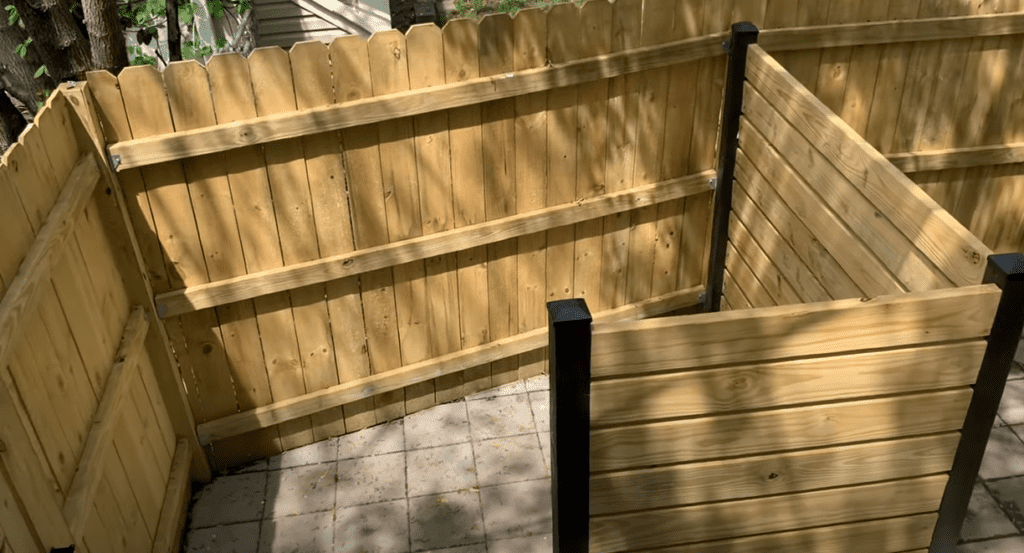
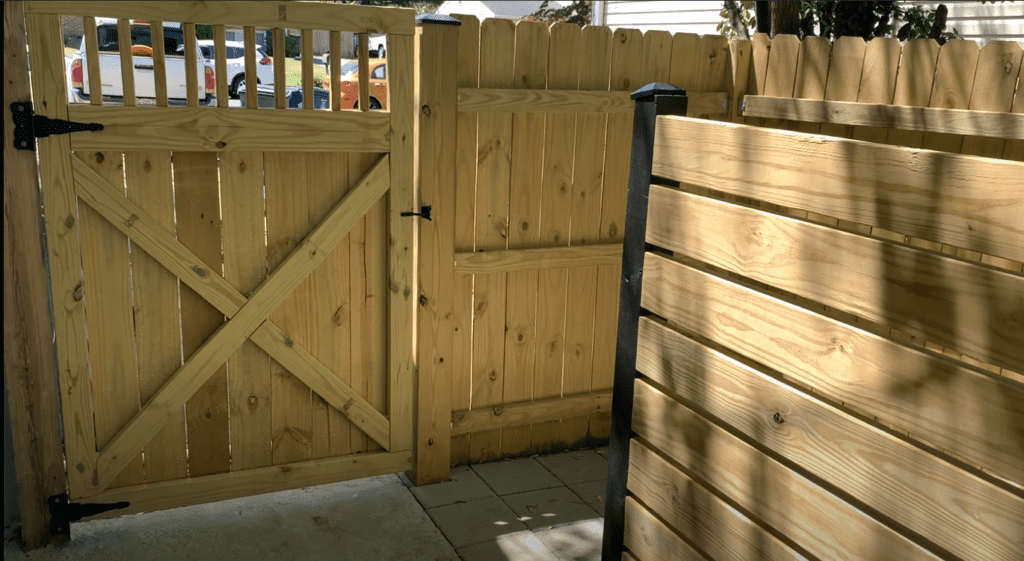
Additionally, you can learn how I built the Fence Gate you see in the above photo by checking out my “How to Build a Fence Gate” Youtube Video below:
Thanks so much for checking out ATImprovements! If you learned something from this project, you might also like these other DIY Projects:
- How to Install a DIY deck Wire Railing: DIY Cable Railing – How to Install Cable Railing Step-by-Step – (atimprovements.com)
- How to Build a Concrete Paver Patio: DIY PAVER PATIO – Easy DIY Paver Patio Ideas – (atimprovements.com)
Thanks!
DISCLAIMER: This is a reference guide only. Links included in this article might be affiliate links. If you purchase a product or service with the links that I provide I may receive a small commission. There is no additional charge to you! Thank you for supporting ATimprovements so I can continue to provide you with free content each week!