Installing the Plywood Roof Decking
The last step int he modern shed roof framing and construction lesson is to apply the plywood roof decking and attach it to the shed roof rafters.
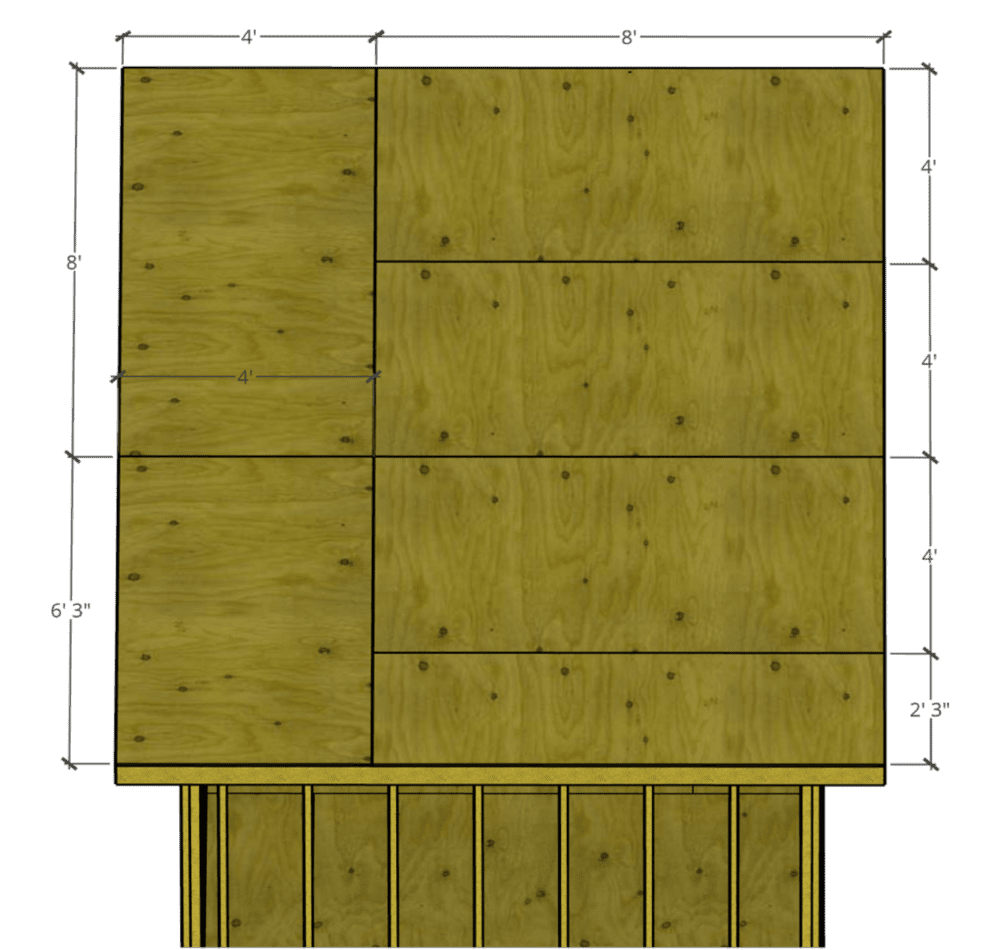
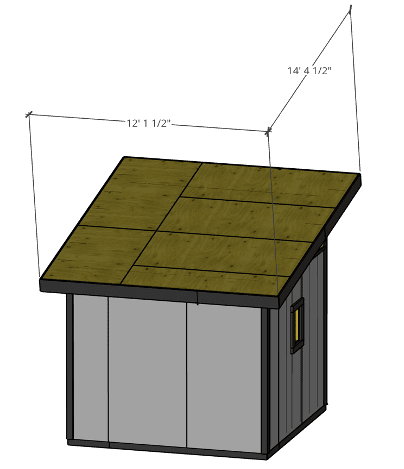
At this Stage, your 10’x10′ Modern shed roof is fully framed. The last step in the lean to shed roof framing process is to install the plywood roof sheathing. If you spaced your shed roof rafters as shown in the previous lessons, the edges of your plywood should land directly in the center of a rafter. For this 10’x10′ Modern shed, the plywood roof decking layout will look like this:
Tools and Materials Needed to Install the Plywood Roof Decking

To successfully frame and construct a lean to shed roof, you will likely need the following tools and materials:
- Safety Equipment (Glasses, gloves, boots, etc.)
- Tape Measure
- Circular Saw
- Air Compressor
- Framing Nailer
- Exterior Framing Nails (for nail gun)
- Six (6) 4’x8′ sheets of 15/32″ Plywood Roof Decking
Trim the Two Partial Plywood Sheets to Size
To install the plywood roof decking, make the following cuts:
- Trim one piece of 4’x8′ 15/32″ plywood to 4’x6-3″ (it is recommended that you field verify)
- Tim one piece of 4×8′ 15/32″ plywood to 2′-3″x8′ (it is recommended that you field verify)
Begin Installing the Plywood Decking on the Roof
This plywood layout will include four (4) full 4’x8’ sheets with two partial sheets. It is recommended that you install all of the full sheets first. Then, fill in the remaining gaps.
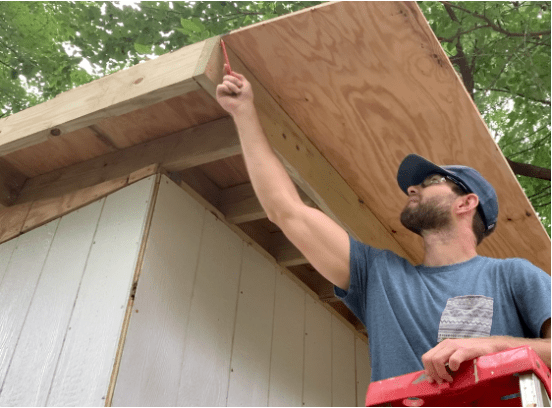
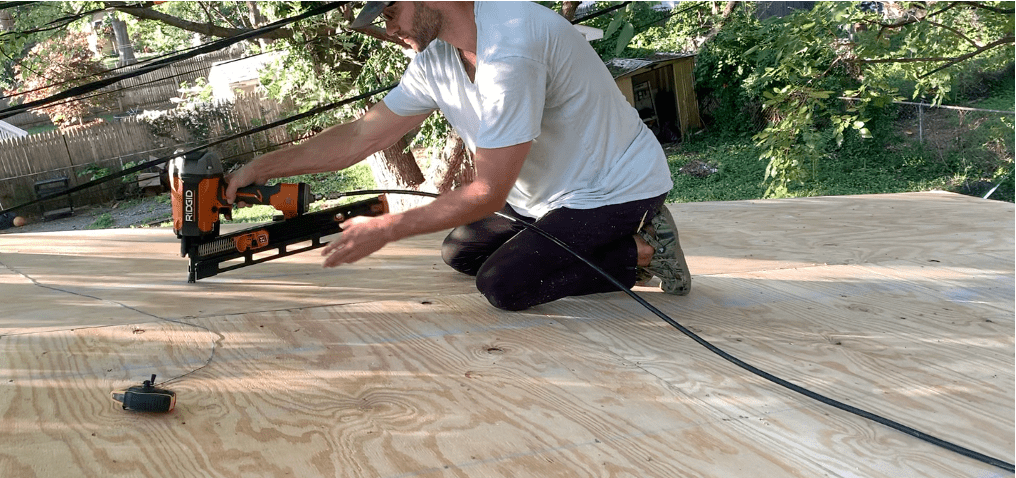
Position the each piece of plywood roof decking so that it is flush with the Fascia Board/Rafter and then attach it to the rafters/fascia boards with a framing nailer. Install nails every 12″ O.C.
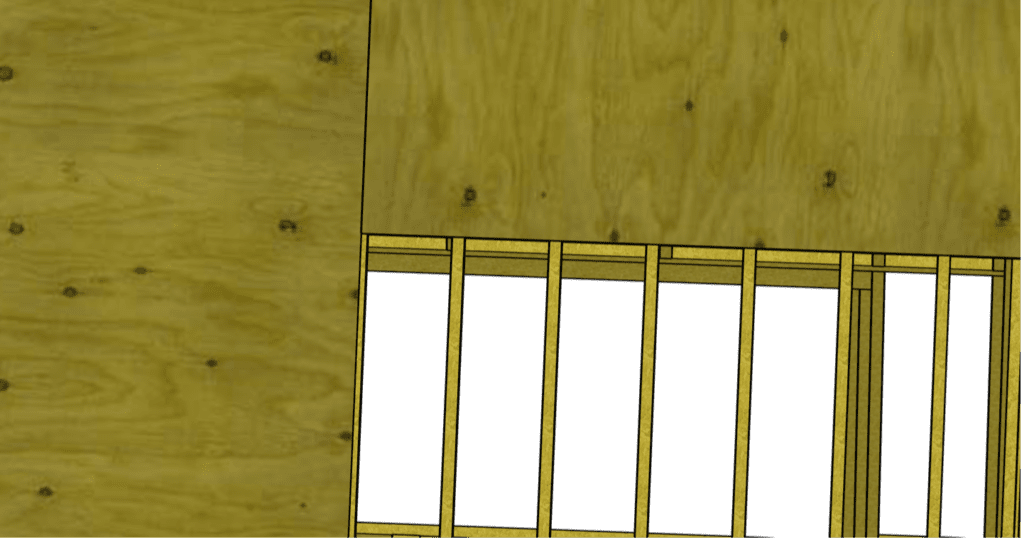
Ensure that the edges of the plywood sheathing land directly in the center of a rafter/piece of blocking.
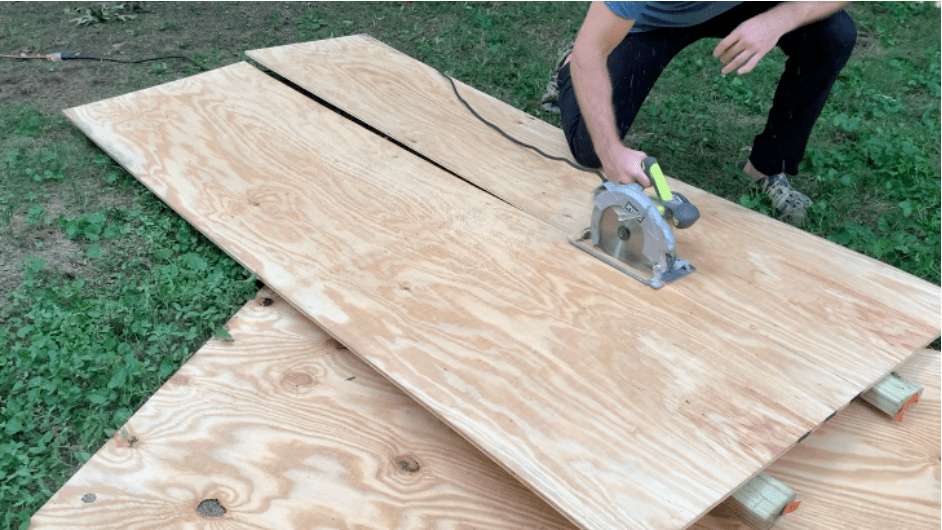
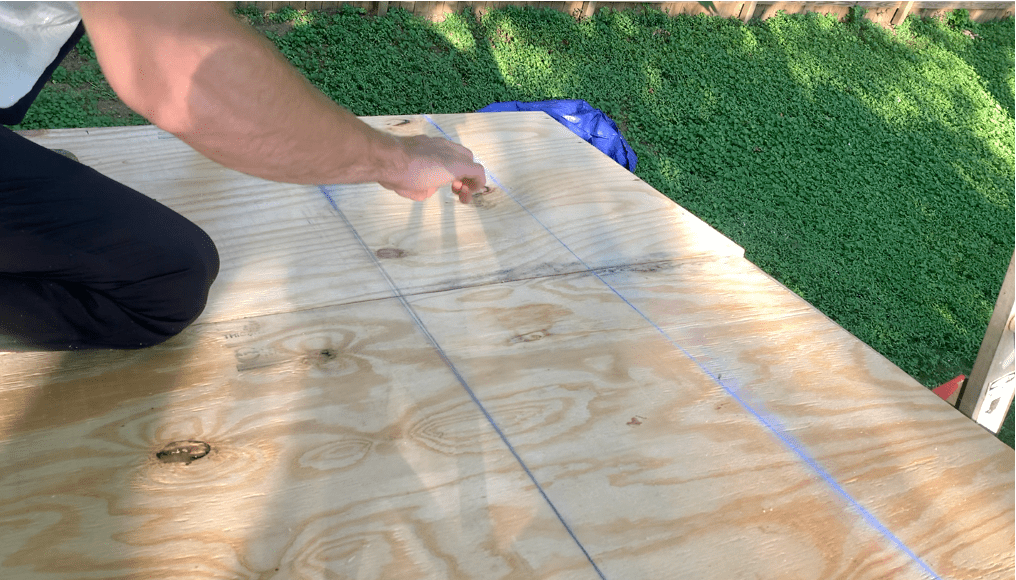
For the plywood decking that needs to be trimmed, consider dry fitting the plywood sheet in place and marking the cut line from below:
After marking the plywood roof decking cut line, make the cut with a circular saw as shown.
Again, the plywood roof decking edges should land in the center of a rafter/block – as shown below.
After placing all of your plywood roof decking in place, you may find it helpful to run a chaulk line to help identify the rafter location beneath the plywood roof decking.
Install any remaining nails needed to secure the plywood roof decking to the rafters (space nails every 12” O.C.)
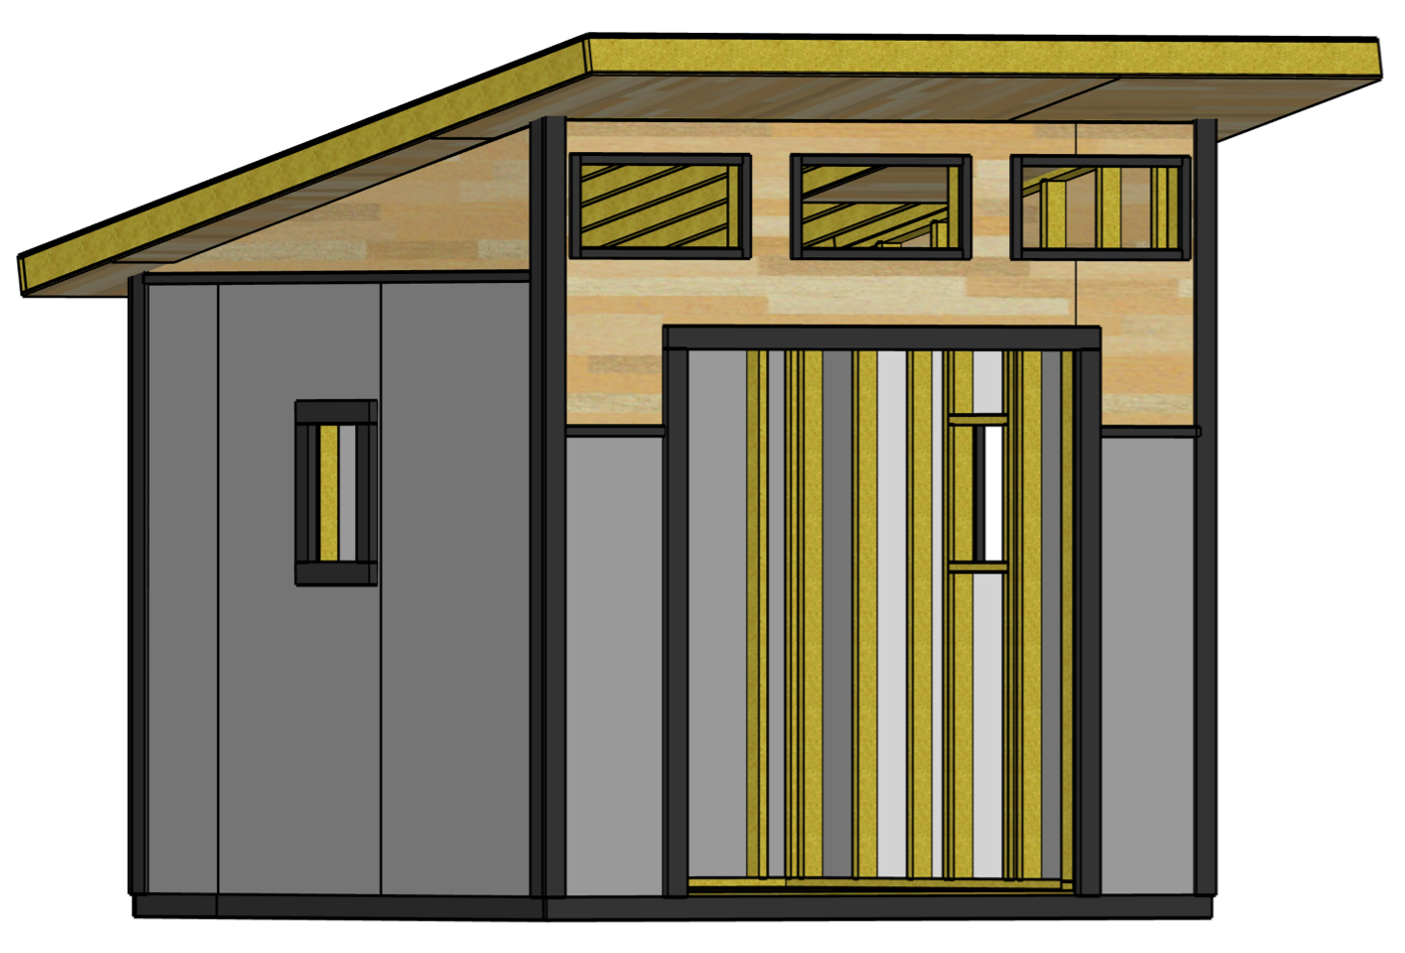
At this stage, your plywood roof decking has been installed and your lean to shed roof is fully constructed – as modeled below:
You can now move on the next lesson.