
There is really nothing worse than having a small, cramped desk…
I was the “cramped desk guy” until I built the DIY live edge desk that you see below:
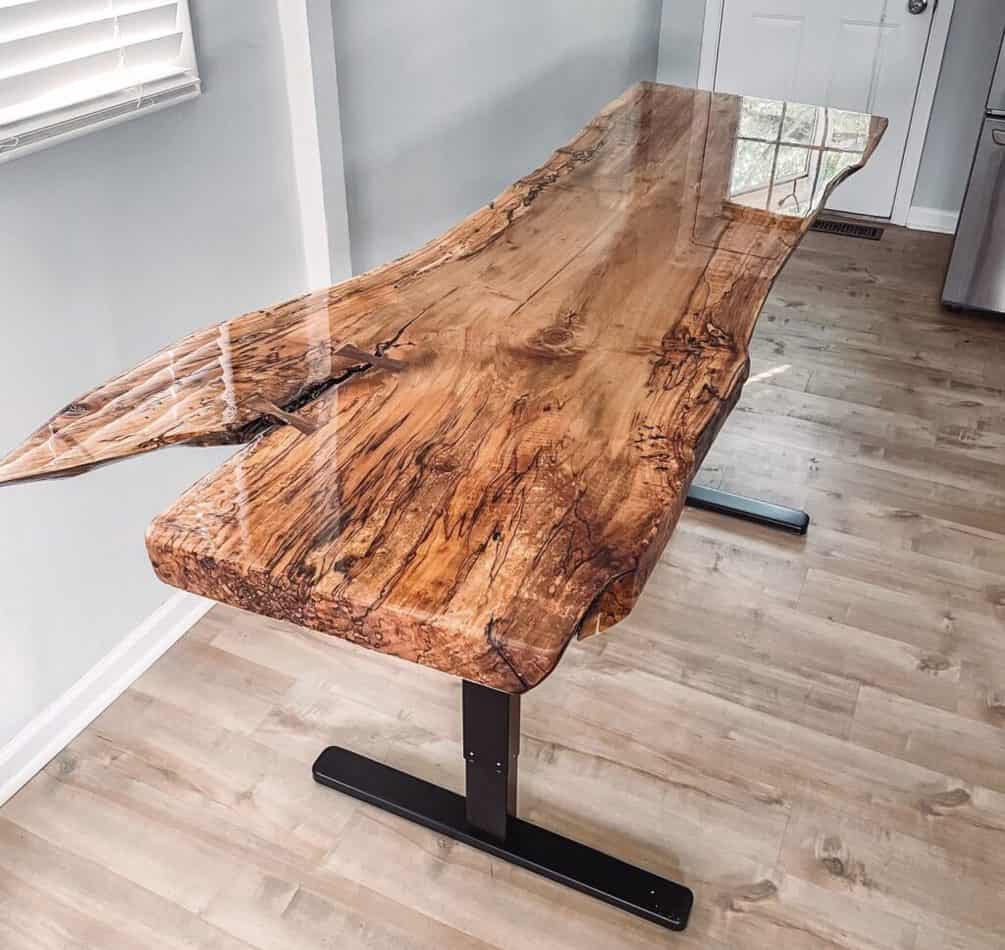
This article will show you how to build a DIY live edge desk (with motorized sit/stand legs) step-by-step. The steps to build a live edge desk are as follows:
- Step 1: Select and source the slab for your DIY live edge desk.
- Step 2: Trim the live edge slab to suit your needs.
- Step 3: Remove bark (if desired) from the live edge slab and sand down any rough edges.
- Step 4: Customize the live edge slab as you desire.
- Step 5: Finish the live edge desk slab with a protective top coat.
- Step 6: Select and assemble your live edge desk legs and attach them to the slab.
All of these steps are beginner friendly, but they do take a little bit of time. Let’s take a closer look at each of the steps above so that you can make your own a DIY live edge desk!
P.S. If you are more of a visual learner, I have linked my ‘How to build a live edge slab’ Youtube Video at the end of this article!
Step 1: Select and source the slab for your live edge desk.
Do you want the good news or the bad news? Both? Ok..
Good news: Live edge slabs are beautiful and make a for a stunning desk
Bad news: Live edge slabs can be expensive and semi-difficult to source (but it’s worth the extra effort!)
You can purchase live edge desk slabs in a variety of ways:
- Big Box Stores (e.g. Home Depot and Lowes) usually sell live edge slabs (at least online), but these are usually limited in size and species.
- There are typically local “boutique” live edge slab suppliers (brick and mortar stores) that can usually be found through a quick Google search.
- Good ole Craigslist. This is where I bought my live edge desk slab.
Although it’s hard to find a good roommate on Craigslist, it is pretty easy to find a great live edge slab for your desk. I recommend that you go on Craigslist, select your City, and search “live edge slab”. I think you will be surprised at how many results you get!
For my desk, I found a local guy who mills his own slabs and I went out to meet him at his “live edge warehouse” which was just a barn.
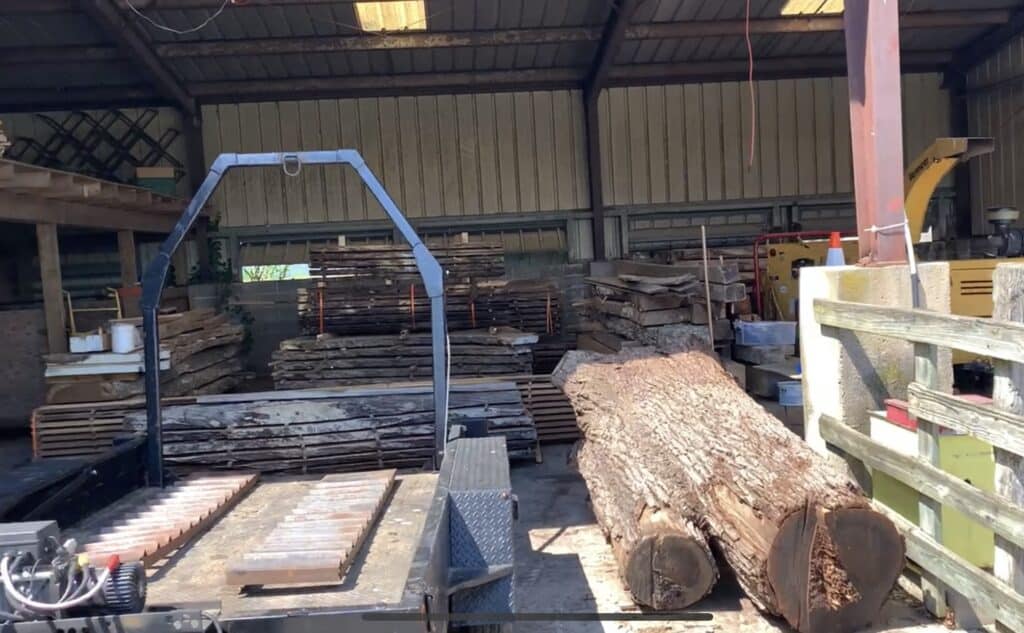
Pro Tip: If you go the Craigslist route, bring a buddy and be safe! Honestly, you will probably want to bring a buddy no matter which way you go. Slabs are heavy.
There are a BUNCH of different species of wood you can use for your desk. But I digress – I don’t want to get into all the pros and cons of each wood species in this article. However, I will give you the Specs on the slab that I purchased for my live edge desk:
Species: Ambrosia Maple
Slab Thickness: 2.5 inches
Slab Length: 6 feet
Slab width: 30 inches
Purchase Price: $200
Do some research before you head out to buy your slab so that you have a good idea of what species of wood you want. Before purchasing a slab, I recommend that you check for the following:
- Is the slab flat and plum? If not, you will likely need to mill it down to get it level. This is not easy. If your heart is set on a bowed slab, I recommend that you ask that it be milled down flat (i.e. planed) by the guy/girl selling you the slab. Chances are, they can do this a lot easier than you you can with the equipment they own. If they can’t, a quick Google search will likely yield someone in your area who can mill your slab for you for a few bucks.
- Is the slab Kiln dried? Ask how long the slab has been drying and if it has been kiln dried. Slab moisture can be a problem if the slabs have not been given adequate time to dry. Do some research on your wood species to identify the ideal moisture content of the wood species you plan on using.
- Inspect the slab for signs of water damage, termites, and insects. If there are any signs or water damage or termites, I recommend that you pick a different slab.
With your DIY live edge desk slab selected, let’s move on to step 2.
Step 2: Trim the live edge desk slab to suit your needs
The odds of the slab you purchase being perfect for your needs are slim to none. Before you start the finish work on your slab (sanding, sealing, etc.), you will want to perform any cuts required to shape your slab. For my desk, I used a circular saw to cut off two places on the slab that were protruding out further than I liked.

Additionally, if you did not ensure that your slab was perfectly level and plum in step one, you need to take care of that now.
Step 3: Remove bark (if desired) and sand down any rough edges
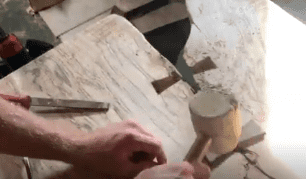
Although some people love the look of bark on their slab and want to leave it on there, I highly recommend that you remove it. Bark almost always comes off eventually – so remove it now. I used a chisel and a hammer to remove the excess bark from my slab. Usually this process will allow you to remove the bark rather easily. The bark removal process shouldn’t take long at all with the chisel and hammer method.

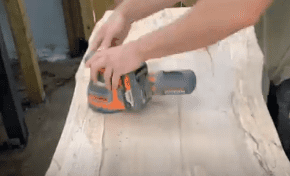
Once the large pieces of bark are removed, use an orbital sander with course grit sandpaper (e.g. 80 grit) and sand away any of the bark that remains. Use the coarse grit sandpaper to sand down any of the super rough areas of your slab and to clean up any irregularities.
Next, sand the entire slab with 120 grit sandpaper to give it a smooth finish and ensure that there are no rough edges on the surface of your slab (especially on the top of the slab). Next, move up to a fine grit (e.g. 220 grit) and give the whole slab one more sanding to ensure that the whole slab is perfectly smooth.
With the bark removed and the slab sanded, it is time to customize your slab. That is, if you want to…
Step 4: Customize the slab as you desire
One of the cool things about making your own live edge slab desk is that you get to customize it any way you want.
Although you might find that you love your desk slab just the way it is, many people like the look of “bow ties” or butterfly keys in their slab. “What is a “bow tie” or butterfly key?”, You might ask? They come in all shapes and sizes, but here is what they looked like on my live edge desk slab:
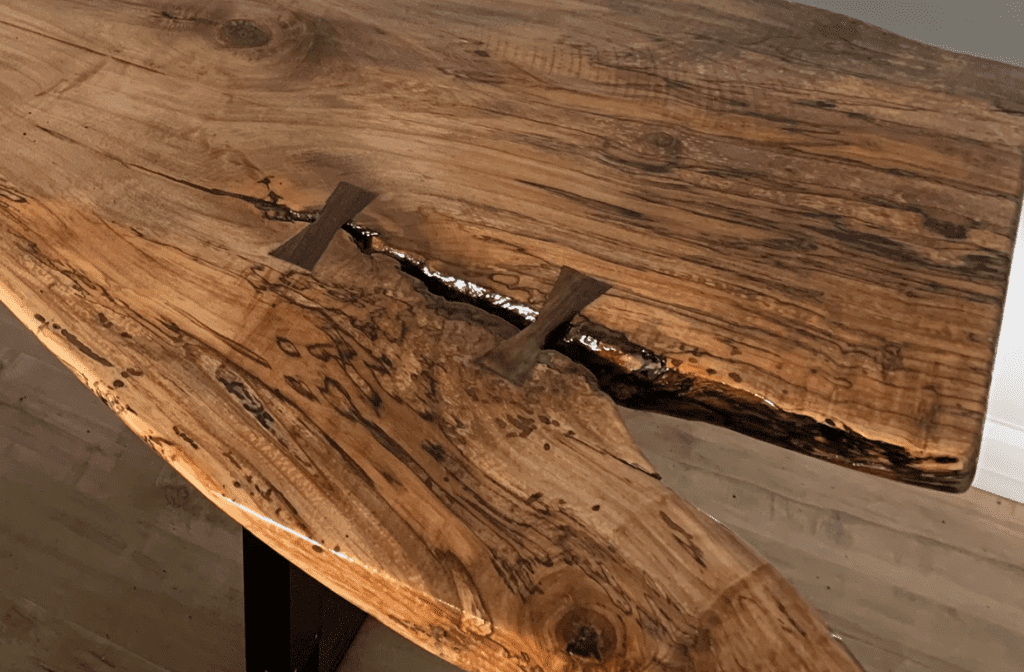
Butterfly keys are an aesthetic element that you can add to any slab that give it a nice “finished” look. Additionally, some butterfly keys are functional as well – meaning that they are used to reinforce a crack in a slab to help prevent it from cracking further in the future.
Because my slab has a “branch”, I chose to inlay two butterfly keys for both aesthetic reasons and for reinforcement. Check them out:
Installing a butterfly key can be broken down into 4 steps:
- Cutting the butterfly key
- Routing the butterfly key inlay into your slab
- Setting the key within the slab using wood glue and a mallet.
- Sand the butterfly key flush with the slab.
There is a great Youtube video breaking down the entire process for installing a butterfly key linked here.
Although butterfly keys or “bow ties” are some of the most common things to inlay into your slab, you can really inlay anything you can possibly imagination.
I have also seen some people install/inlay a wireless charging port in the bottom of their desk slab. Just an idea..
Feel free to customize your live edge slab any way that you would like. Or not at all. The choice is yours.
With your slab ready for finishing, let’s move on to step 5.
Step 5: Finish the desk slab with a protective top coat.
Although the top of your slab will be relative smooth from the 220 grit sanding that you performed in Step 3, you will want to apply a protective seal coat to your slab.
You have two basic options for finishing your live edge slab (although there are many more ways to finish/seal a slab than these). They are:
- Polyurethane, Shellac, etc.
- Epoxy
Polyurethane and Shellac are much easier to apply than epoxy and can simply be applied with a brush. Many people like the look of polyurethane because it preserves the “natural look” of the wood very well. Although these finishes are usually sufficient for protecting and sealing something like a desk, I like to go the extra mile and apply epoxy.
Epoxy is completely waterproof and is very durable. It also gives your slab a nice glossy look. Some argue that epoxy can make your slab look a bit “plastic-y”, but I honestly love the look.
To apply epoxy to your live edge slab, you will want to follow the following steps:
- Select your epoxy. I have used Incredible Solutions Table Top Epoxy on many occasions and honestly love the product. Incredible Solutions manufactures a two part Table Top Epoxy (Part A is the Base Resin and Part B is the Curing Agent).
- The mix ratio of base resin to curing agent is 1:1 by volume. So mix equal parts base resin and curing agent in a graduated measuring container.
- Mix the curing agent and base resin together thoroughly for 5-7 minutes. Be sure to scrape the sides and bottom of the container as you stir to ensure a thorough mix.
- It is highly recommended that you transfer the epoxy mixture to a second container to ensure that there are no unmixed areas or air pockets. Once you have transferred your epoxy to a second container, continue to mix for another 3 minutes (approx.). Do not exceed 10 minutes of mixing.
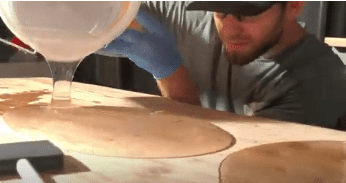
- At this point, apply your epoxy to the live edge desk slab. I generally pour out the epoxy from the container directly on the slab and then spread it out with a foam brush. Apply epoxy as required to cover the entire slab (to a maximum epoxy thickness of ¼”). The Epoxy will self-level.
- Use a heat gun or a torch to remove air bubbles. To do this, bring the heat source close to the surface of the epoxy which will cause the air bubbles to rise to the top and pop. Use this procedure to remove all air bubbles from the epoxy. Do not keep the heat in any one place for too long.
- After about 4-6 hours (or after the surface of your epoxy project has become tacky), visually inspect the epoxy. If you find that you will need to apply a second coat of epoxy to fully coat the slab and to cover up any impurities, apply a second coat the same as you did in the previous steps. However, If it appears that the epoxy has fully coated the entire slab, you may not need to apply a second coat. Simply let the epoxy cure for 24 hours. However, full hardness will likely not be achieved until 7 days have passed.
Pro Tip: Apply painter’s tape to the underside of your slab so that any excess epoxy that makes its way to the bottom of your slab can be easily peeled off along with the tape.
Step 6: Select and install you desk legs and attach them to the slab.
At this point, you should have a finished live edge desk slab. All that is left to do is select and install your desk legs.
For my desk, I wanted to have an adjustable sit/stand desk – so I opted to use the Vivo Electric Stand Up Desk that I ordered from amazon.
To actually attach my legs to the live edge desk slab, I started by assembling the Vivo Electric Stand Up Legs. Once they were assembled, I positioned by live edge slab on the legs. When I was happy with how everything was lining up, I marked the screw locations on the underside of the live edge slab.

Instead of simply screwing the slab to the legs, I decided to use ¼ inch wood insert bolts. These will allow you to easily remove the slab from the legs (in case you ever need to disassemble it for transportation) and then reattach the legs later on.
In order to install the ¼” wood inserts, I simply following the instructions on the packaging.
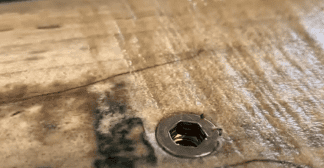
Basically, I used a drill bit just smaller than the ¼” insert (9mm, in my case. The drill bit was included with the 1/4″ wood insert bolts) and drilled into my slab to a depth just deeper than the length of the ¼” wood inserts. I used a piece of tape to ensure that I did not drill in to my slab too deep. Then I simply inserted the six, ¼” wood inserts into the slab using an Allen wrench (The Allen wrench was also included with the 1/4″ wood insert bolts that I ordered from Amazon) .
Lastly I attached the slab to the Vivo Standing Desk Legs using small ¼” machine screws.
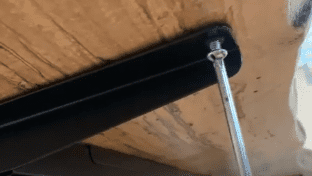
At this point, I simply attached all of the electric components to the underside of the desk and then plugged the Vivo Electric Standing Desk legs into an outlet.
At this point, pull up a desk chair and you DIY live edge standing desk project is complete.
I went with the Corechair desk chair and I highly recommend it! Check out CoreChair and receive 10% off using this link!
If you would like to see the entire Live Edge Desk Project completed from start to finish, feel free to check out my Youtube video showing the entire process:
If you like this post, you may also like:
How to go from zero to 10,000 Youtube SUBSCRIBERS in 1 year! – (atimprovements.com)
DISCLAIMER: This is a reference guide only. Links included in this article might be affiliate links. If you purchase a product or service with the links that I provide I may receive a small commission. There is no additional charge to you! Thank you for supporting ATimprovements so I can continue to provide you with free content each week!