
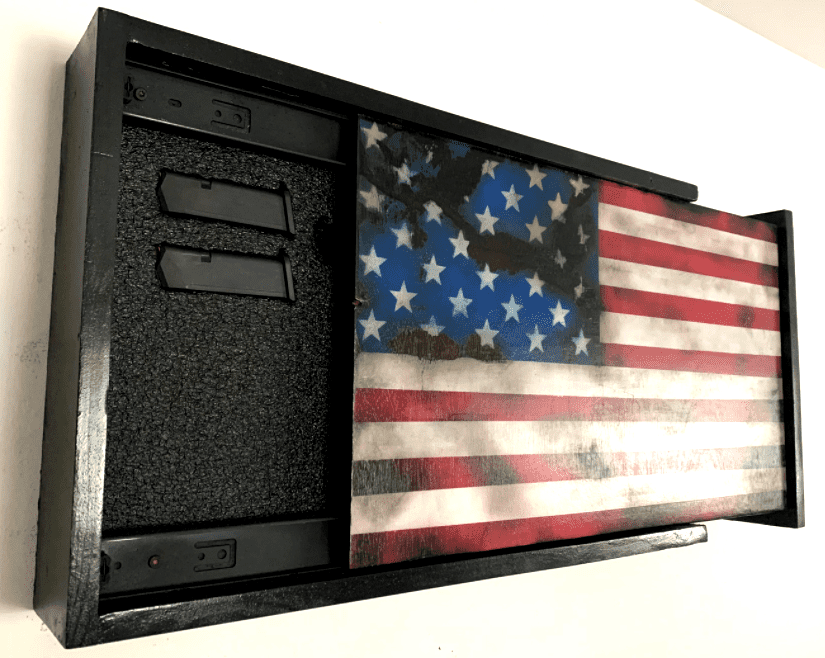
A Concealment Flag is a patriotic twist to a concealment cabinet and is a great way to conceal your prized possessions in “plain sight”. This article will show you everything you need to know so that you can build your own DIY concealment flag – similar to the one below:
For this Concealment Flag DIY Project, you will need the following:
LUMBER:
· Sheet of ½” or ¾” plywood.
· 2”x3”x8’ board
· 1”x3”x8’ board
· 1”x5”x8’ board
TOOLS:
· Circular Saw or Miter Saw
· Drill/Screwdriver
MATERIALS:
Materials (links below – some affiliate):
• Wood Glue: https://amzn.to/3iEHzzp
• 1 ½” Screws: https://amzn.to/3zvnu5s
• 3/8” Screws: https://amzn.to/3ePFTlh
• 1 ½” Corner Braces: Everbilt 1-1/2 in.(buy at Home Depot)
• 12”x16” foam: https://amzn.to/3x0LXxR
• Razor Blade: https://amzn.to/3xVH1vj
• Drawer Slides: https://amzn.to/3y0a4xH
• Polyurethane: https://amzn.to/3BBMw4r
• Cigman Laser Level: https://amzn.to/3kOaByZ
• Paint (color/selection is based on your design)
If you are more of a visual learner, feel free to check out my step-by-step tutorial video on Youtube:
There is also a free printable guide (includes materials list and 3D renderings) located here.
Now, let’s get into the build!
Step 1: Cut All Lumber to the Dimensions Shown below:
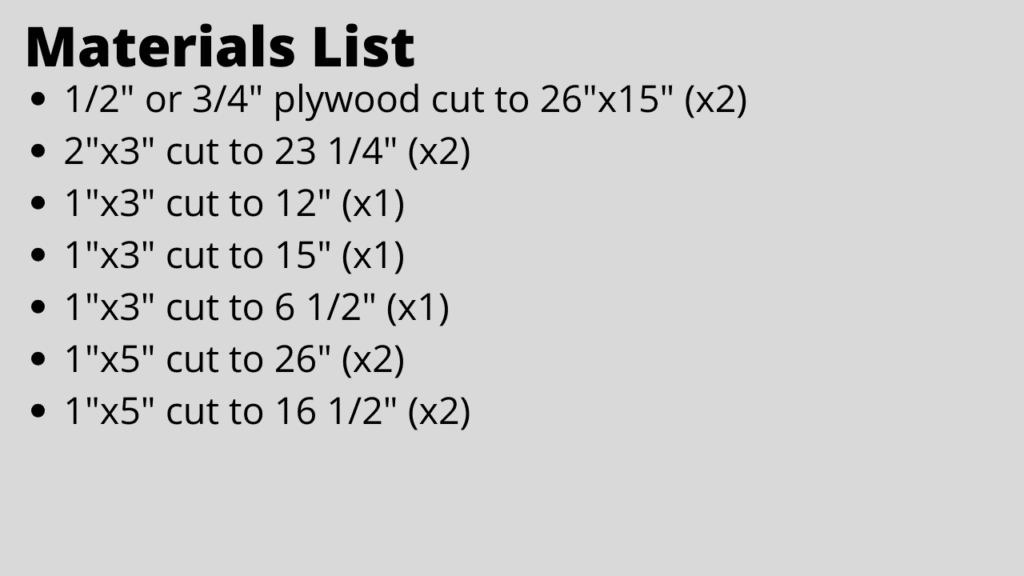
This cut list is suitable for a 12″x16″ piece of foam – so if you need a larger concealment flag, you may need to modify the design. I recommend that you sand down all of your cut lumber at this time so that you are left with smooth edges when you go to assemble everything.
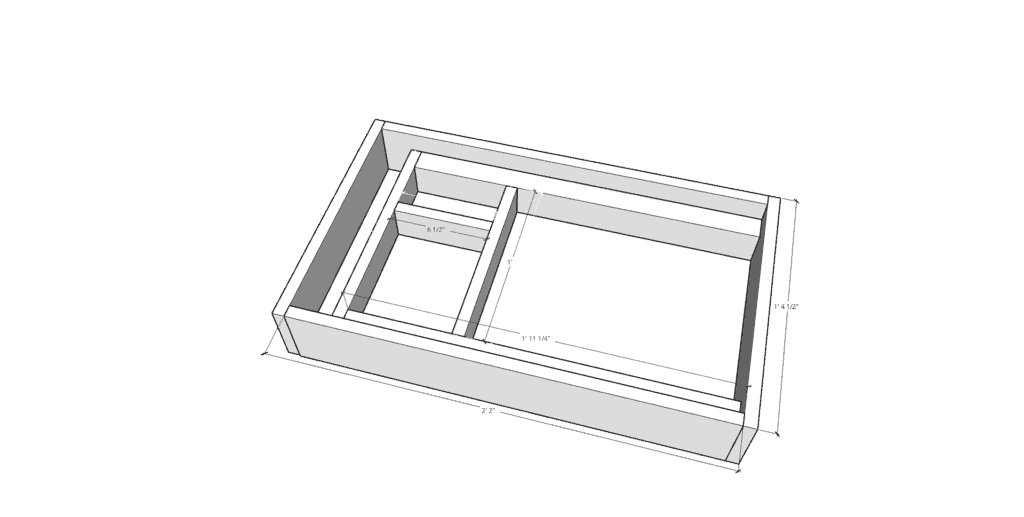
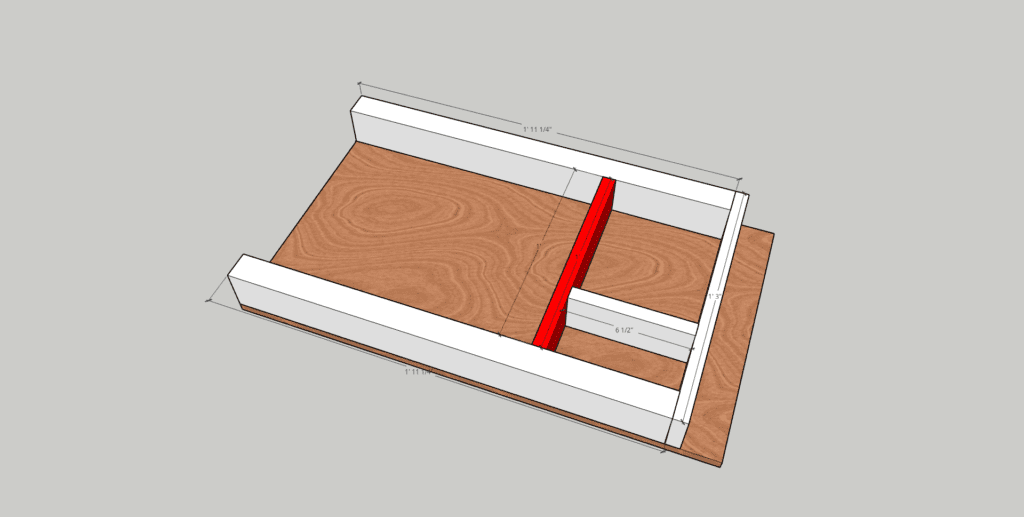
Step 2: Assemble the Frame
To assemble the frame, start by attaching your 2”x3” lumber to the plywood as shown below:
Make sure that you flush up the 2”x3” pieces to the plywood and then hold them in place with clamps while you screw them together.
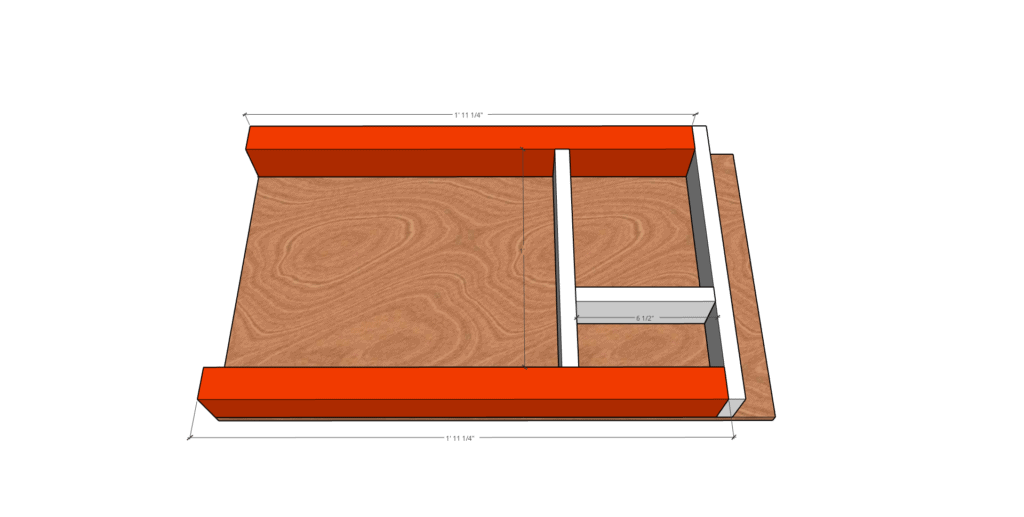
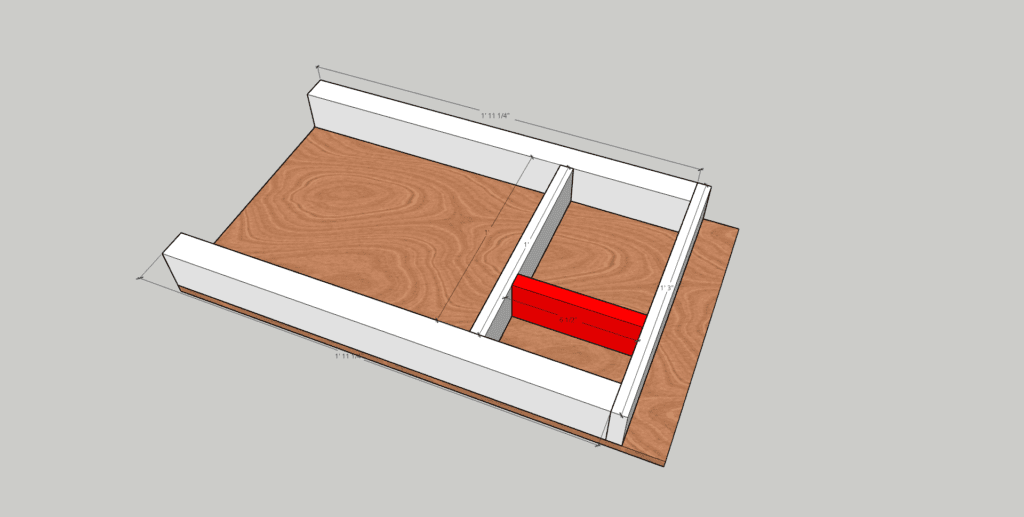
Next, build the vertical part of the shelves using the 1”x3” pieces as shown.
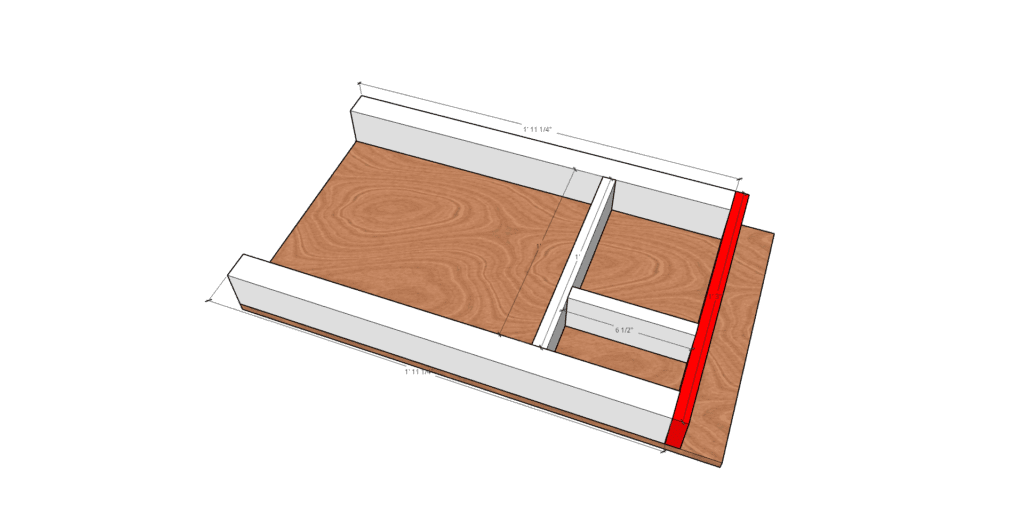
Next up, you will attach the 1″x5″ ‘picture frame’ edging around the entire frame. I recommend that you use wood glue in addition to screws for all connections to give you additional strength.
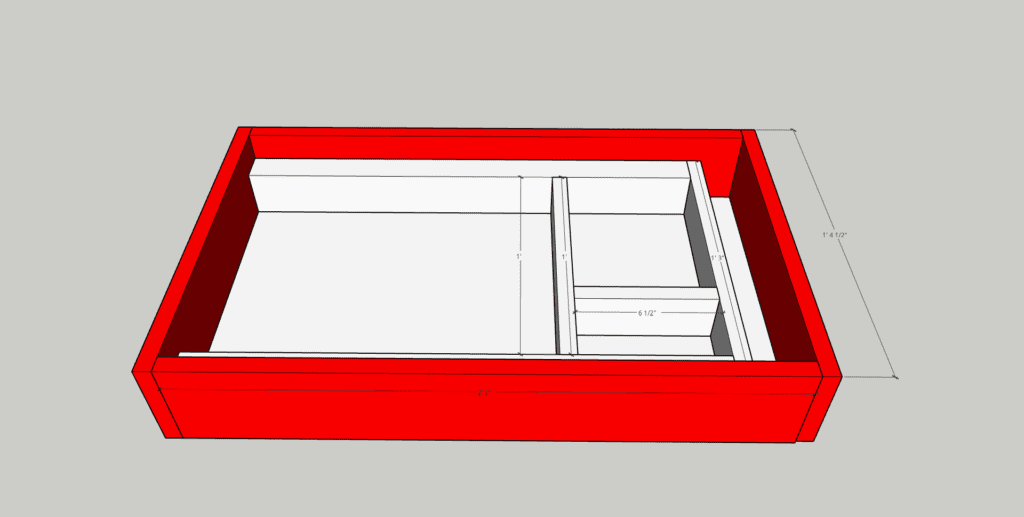
You will build the entire frame except for one piece of 1”x5” at this time. We will install that last piece later.
Step 3: Prepare the Face Frame
Once you have assembled the concealment flag frame, it’s time to work on preparing your face frame of plywood.
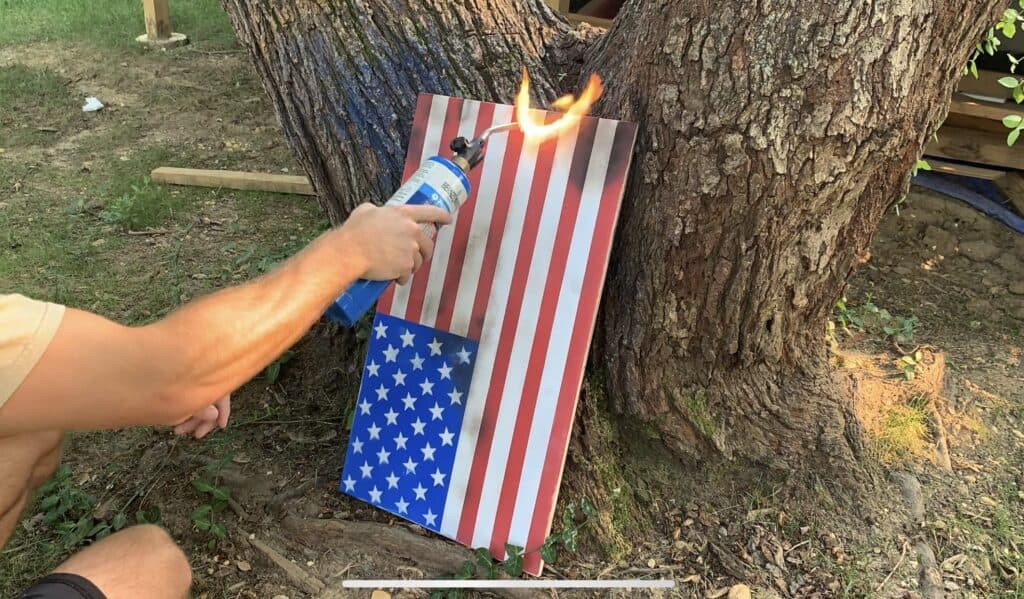
For my face frame, I used tape and a stencil in order to paint the American Flag – but you can paint/decorate your face frame however you would like. I also used a propane torch to give my flag a charred/weathered look.
At this stage, I also spray painted my frame black.
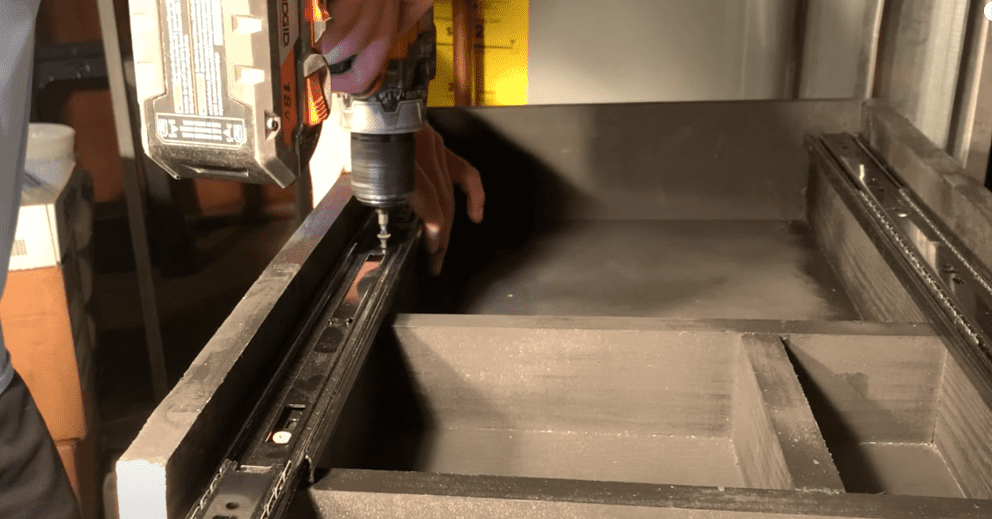
Step 4: Attach Drawer Slides to the Frame
At this point, attach your drawer slides to the frame. The drawer slides will allow you to “open/close” the face frame as needed for proper function of the concealment flag. I used three, 1.5” screws to secure the drawer slides to the frame.
**Tip – do some dry fitting with the face frame and the actual frame to see how everything lines up. Install your drawer slides accordingly.
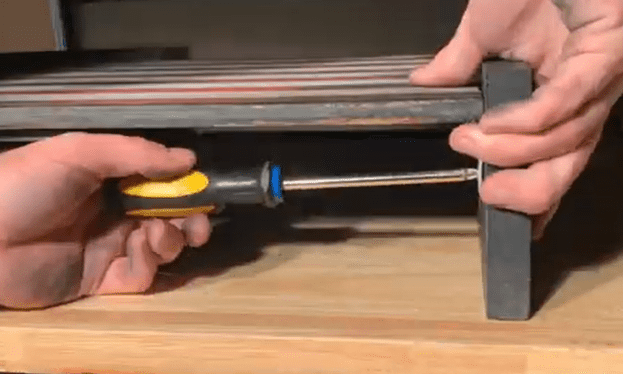
Step 5: Attach the face frame to 1”x5” board using Corner Brackets
At this point, attach the last piece of 1”x5” to the face frame using corner brackets. I used three corner brackets to ensure that this was a sound connection. This will be the “handle” used to open/close your concealment flag. This is easier said than done – but with a little it of patience, you can get it done.
Step 6: Attach the face frame to the Drawer Slides:
At this point, do some dry fitting to see exactly how to position your face frame on the drawer slides. Once you are happy with how everything is lining up, attach the face frame to the drawer slides. You may need to do a bit of sanding to get everything to fit just right – I know that I did.
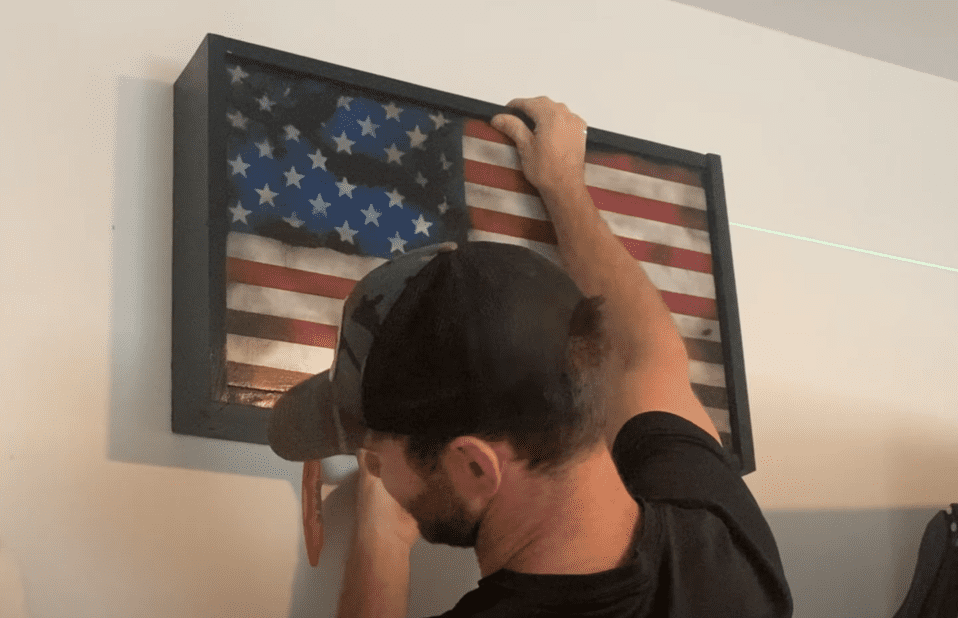
Step 7: Final Touches and Hanging the Concealment Flag
To give my flag a glossy look and to add a bit of protection, I applied a coat of polyurethane to the face frame.
Next I mounted the concealment flag directly to my studs using 1.5” screws. To find my studs, I used a stud buddy. I also used a laser level to make sure that I hung it up perfectly level.
Once the Concealment flag was secured to the wall, I installed my 12”x16” piece of foam. You can cut out the shape of whatever you plan on storing in your concealment flag by marking the outline of the object on the foam and then cutting out the foam with a utility knife.
BONUS: How to install a LOCK on your Concealment Flag
I decided to add a lock to my concealment flag by adding a piece of blocking on the 1”x5” that slides in and out. Then, I drilled through the frame and into the blocking using a 3/8” drill bit. I then cut off a piece of ¼” metal cylinder that would sit flush with the frame once it was inserted through the frame/blocking. Install this metal “dowel” to lock your flag and use a magnet to remove the dowel. Refer to my Youtube video for a more detailed visual description of how to install the locking mechanism.
Thanks for reading! If you liked this project, you may also like:
DIY Fire Table: How to Build a DIY Fire Pit Table (And save hundreds of dollars in the process!) – (atimprovements.com)
DIY Hexagon Shelves: DIY Hexagon Shelves (Honeycomb Shelves) – (atimprovements.com)
DIY Wire Railing: DIY Cable Railing – How to Install Cable Railing Step-by-Step – (atimprovements.com)
DISCLAIMER: This is a reference guide only – Links included in this article might be affiliate links. If you purchase a product or service with the links that I provide I may receive a small commission. There is no additional charge to you! Thank you for supporting ATimprovements so I can continue to provide you with free content each week!