
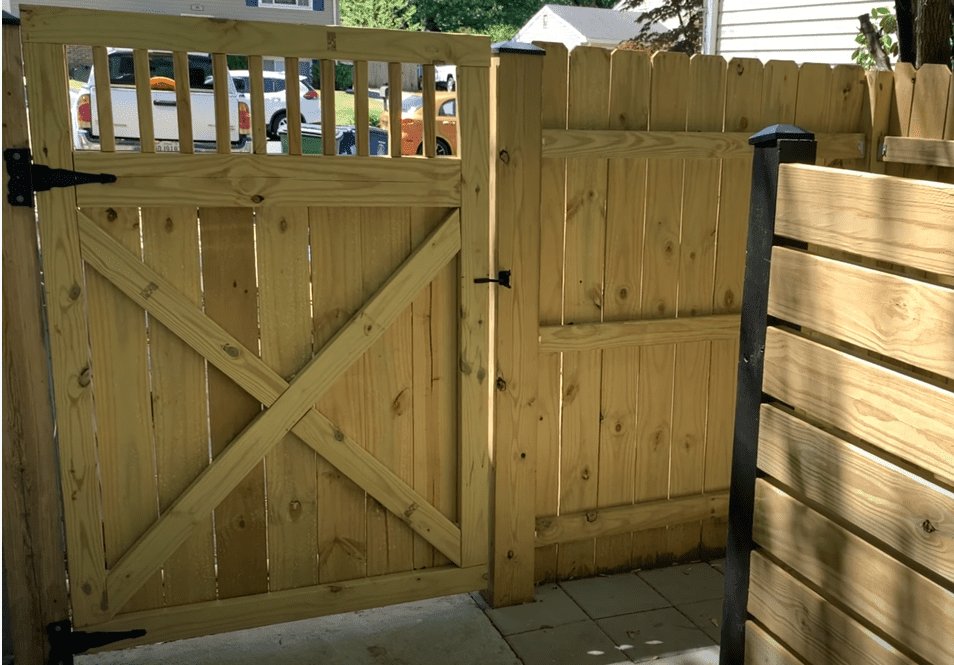
Building a fence gate is a usually the last step in a DIY Fence Project. Unlike fences (which typically all look very similar), fence gates are great way to personalize your Fence Project and make it your own. Building a fence gate can be accomplished rather simply using basic carpentry skills.
To Build a fence gate, start by planning out the gate size based on the existing rough opening. Next, construct the frame of your gate, securing it together with pocket holes and exterior rated screws. Once the frame is constructed, attach gate pickets to the gate frame and customize the gate as desired. Finally, install gate mounting hardware (hinges, latch, etc.) and secure the fence gate in place.
This article will show you how to build a DIY fence gate, step-by-step. If you are more of a visual learner, you can check out my “How to Build a Fence Gate” Youtube Video that is liked at the end of the article.
Let’s get started!
1. Plan your Fence Gate Size and Layout
The first step in a successful DIY fence gate project is to plan your fence gate layout. Before planning your fence gate layout, however, it is helpful to identify the most common fence gate components. Typically, a fence gate will be comprised of the following components:
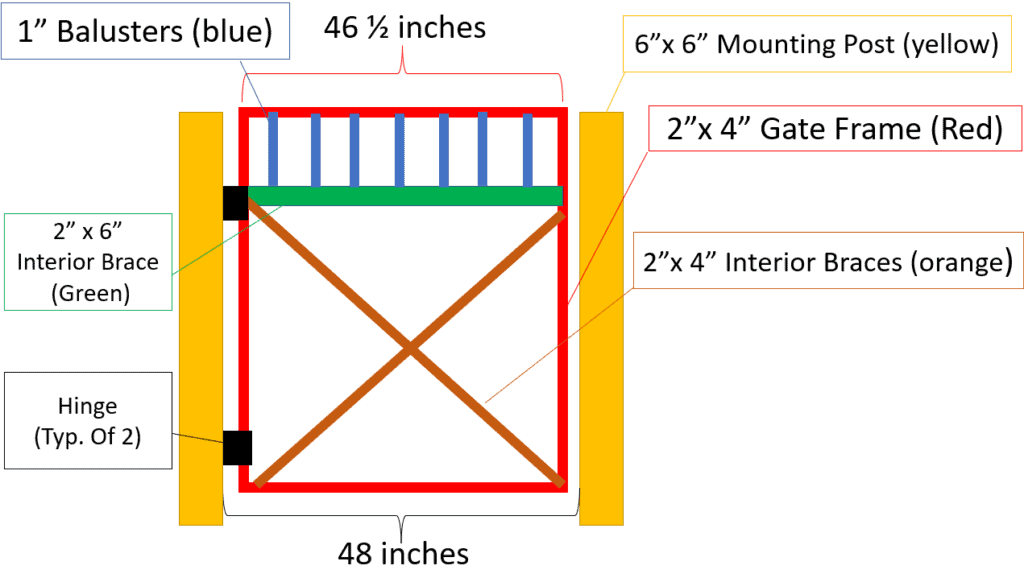
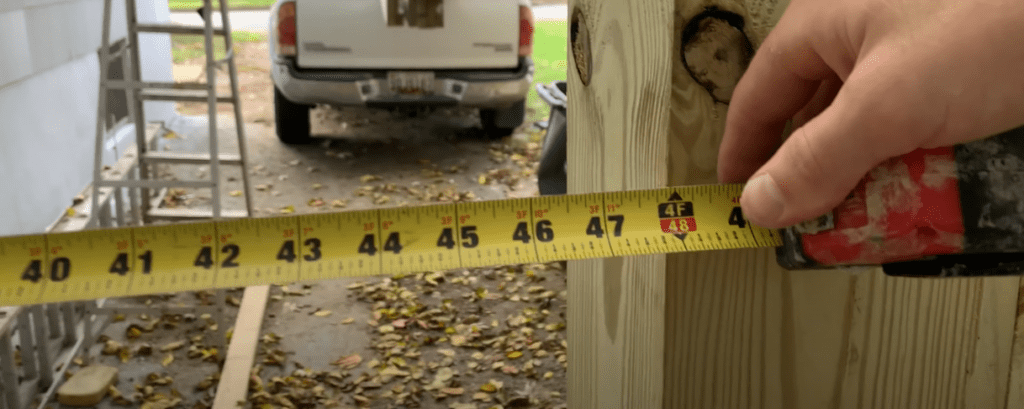
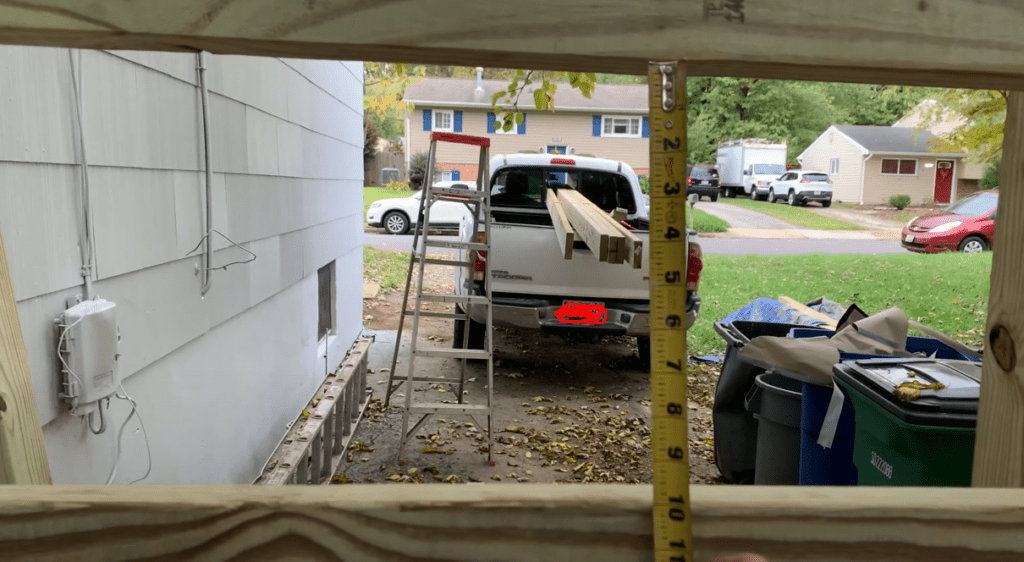
The first step in planning your gate layout, is to determine the “rough opening” between the two fence gate mounting posts (shown in yellow above). For my gate opening, the rough opening width was approximately 48″.
If you have not installed your fence or fence gate mounting posts yet, I recommend that you check out my “how to build a fence” article which outlines every step of the fence building process (including the installation of fence gate posts).
Once you have measured your fence gate rough opening and spent some time planning out your fence gate layout, it’s time to purchase your materials.
2. Purchase Fence Gate Tools and Materials

To build a fence gate, you will need the following tools and materials.
Tools:
- Miter Saw (optional)
- Circular Saw (optional)
- Drill
- Clamps (optional)
- Pocket Hole Jig (Optional)
- Countersink Bit (optional)
- Gate Hardware Kit (hinges, latch, etc.)
- Brad Nailer
Materials (purchased from Home Depot):
- Nails: Grip-Rite 2 in. x 0.113 Plastic Exterior Galvanized Ring Shank Nails
- Screws: DECKMATE #10 x 3-1/2 in. Star Flat-Head Wood Deck Screws
- Pressure Treated 2×4’s: WeatherShield 2 in. x 4 in. x 8 ft. #2 Prime Ground Contact Pressure-Treated Lumber
- Pressure Treated 2×6’s: WeatherShield 2 in. x 6 in. x 8 ft. #2 Prime Ground Contact Pressure-Treated Lumber
- Pressure treated 4×4’s: 4 in. x 4 in. x 8 ft. #2 Ground Contact Pressure-Treated Southern Yellow Pine Timber
- Fence Pickets: 5/8 in. x 5-1/2 in. x 6 ft. Pressure-Treated Pine Dog-Ear Fence Picket
Everyone’s fence gate will be slightly different, so the tools and materials above may need to modified for your specific project. However, the tools and materials above are a good starting point.
Once you have planned your fence gate layout and purchased your materials, you can begin constructing the fence gate frame.
3. Construct the Fence Gate Frame
Constructing the fence gate frame is likely the most important step in the gate constructions process. To determine the gate frame width, take the rough opening (between fence gate mounting posts) and subtract approximately 2″. This will give you approximately 1″ of clearance between your fence gate and the mounting posts on each side.
Your fence gate frame height will depend on personal preference. Typically, you want to have the top of your fence gate even with the top of the adjacent fence. Additionally, you want to leave about 3″-5″ of clearance at the bottom of your gate. However, the final dimensions are up to you.
Once you have determined your fence gate frame dimensions, it’s time to make your measurements lumber and make your lumber cuts on a miter saw.
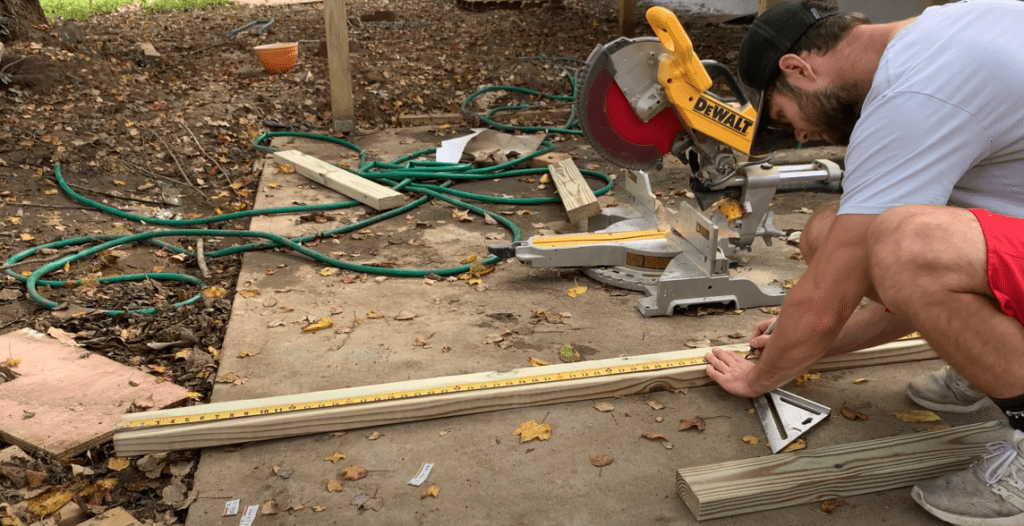
It is recommended that you use a carpenter’s square when making measurements and markings to ensure that you have marked a perfectly straight line.
After making your measurements, make your cuts along the marked line using a miter saw.

You can also use a circular saw to make your fence gate frame cuts, but a miter saw usually makes the process simpler. After cutting both the horizontal and vertical components of your fence gate frame, you should be left with a gate frame that looks like this:
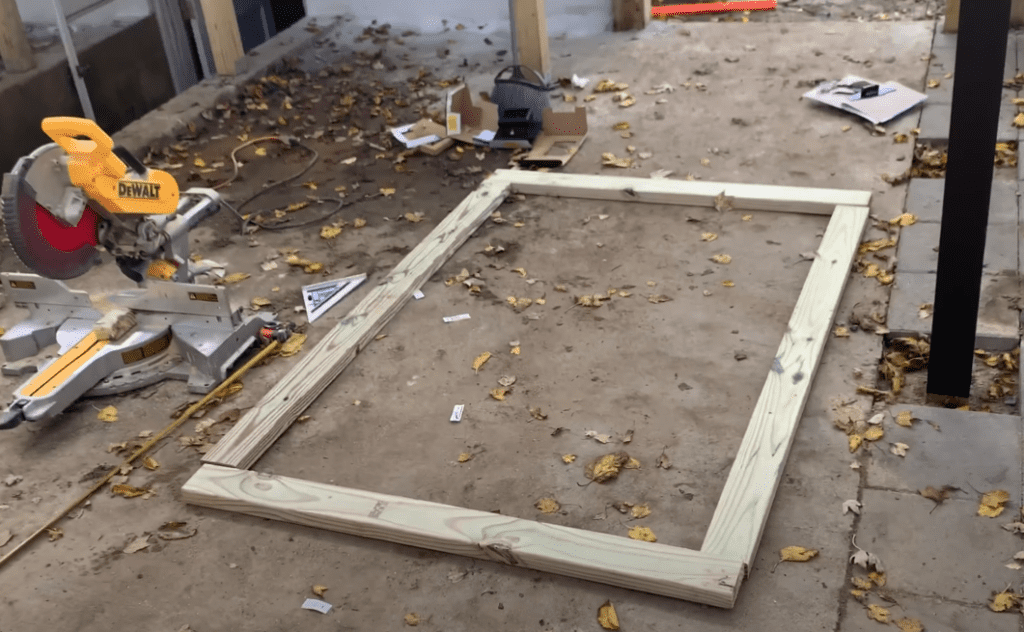
After positioning the unassembled gate frame in place, it’s time to screw the gate frame together. There are many ways you could attach your gate frame together. However, I used a pocket hole jig to pre drill my screw holes.

You could also use a countersink bit (on an angle) to achieve similar results to a pocket hole jig. However, the results will not be quite as consistent. After pre drilling your pocket hole screw holes in each piece of lumber that makes up your fence gate frame, attach the frame together using exterior rated screws.
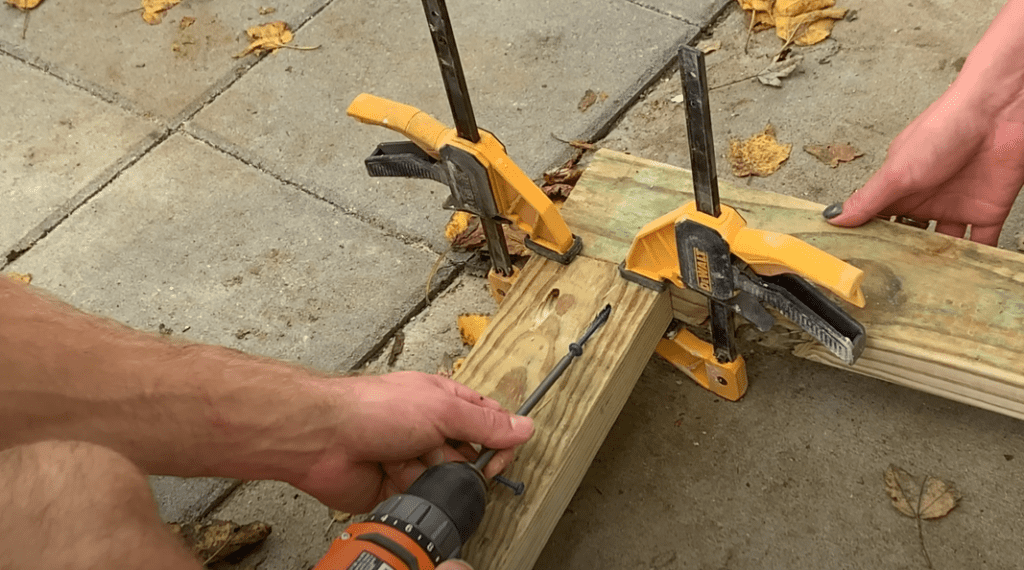
When attaching the fence gate frame together with screws, it is often helpful to use clamps to hold the gate frame together at a right angle. Continue to screw all of the corners of your gate frame together using exterior rated screws and a drill.
4. Install Gate Frame Bracing
After assembling the rectangular gate frame, you want to install additional bracing to increase the overall strength of your gate.
For my Fence gate, I used a piece of 2″x6″ pressure treated lumber as my horizontal brace. I cut the brace to length and positioned it 10″ from the top of my gate, as shown.
Just like with the fence gate frame, I attached the horizontal brace to the gate frame using pre drilled pocket holes and exterior rated screws.
Next, I added diagonal bracing to the bottom of the fence gate. Although these diagonal braces add strength to the fence gate, they are also highly aesthetic.
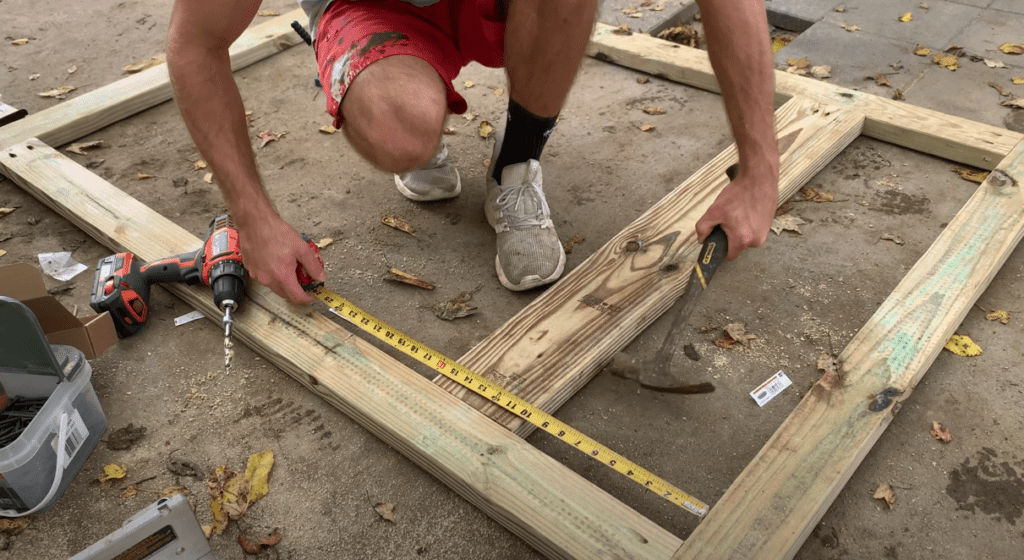
To install the diagonal braces, I placed a 2″x4″ diagonally across the fence gate so that it was lined up perfectly in the corner of the gate. I then scribed a line to mark the angle. For more information on this process, check out my “How to Build a Fence” Youtube video linked here.
After installing the first “full” diagonal brace, I repeated the process for the two “partial” diagonal braces.

Again, I positioned the diagonal brace in place (using a clamp) and then scribed the angle before making my diagonal cut on the miter saw.
After cutting your diagonal braces, attach them to the gate frame by using pre drilled pocket holes and exterior rated screws.
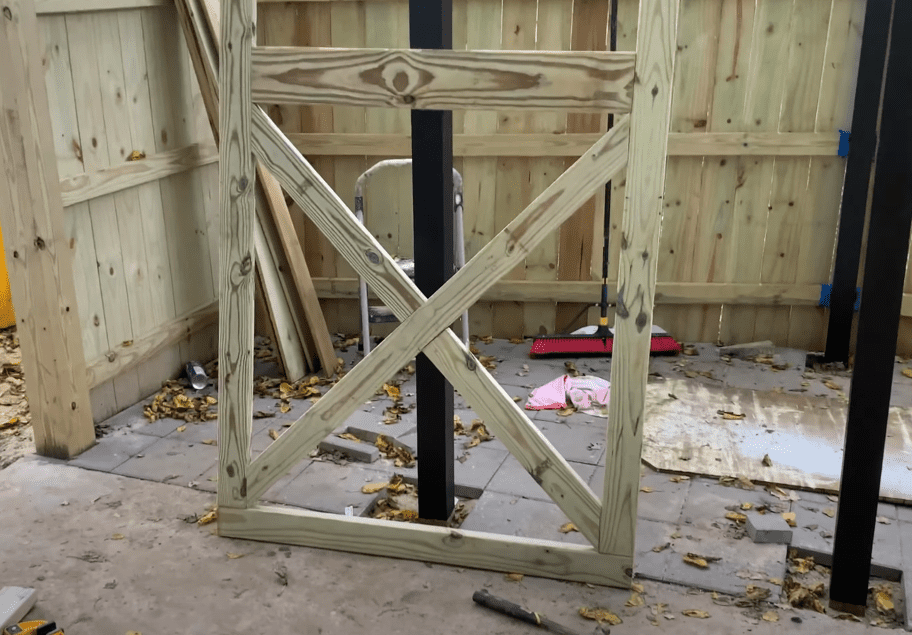
At this point, the entire gate frame (complete with diagonal braces) has been constructed. If you following the instructions above, you should be left with a gate frame that looks like this:
5. Install Gate Frame “Balusters”
At this stage, it is time to install the decorative balusters at the top of your fence gate frame. This feature will allow for you to have a “viewing” opening in your gate without compromising any security.
If you measured your horizonal 2″x6″ gate brace evenly, it should be 10″ from the top of your fence gate frame. Confirm that the 10″ distance is uniform along the entire width of your gate before proceeding.
After confirming the measurement, cut your 2″x2″ pressure treated baluster lumber to size. It is recommended that you cut one baluster first and then dry fit it within the gate frame. If it looks good, use it as a template to mark the rest of your baluster cuts.

After marking your 2″x2″ baluster lumber using the template, make all of the cuts on your miter saw.
After cutting all of your balusters, it is time to attach the balusters to the fence gate. To do this, I recommend that you pre drill all of your screw holes using a bit that is slightly smaller than the exterior screws you plan to use to attach the baluster to the gate frame.

Keep in mind that you will start your pre drilling through the side of the baluster and finish through the bottom of the baluster (45 degree angle).
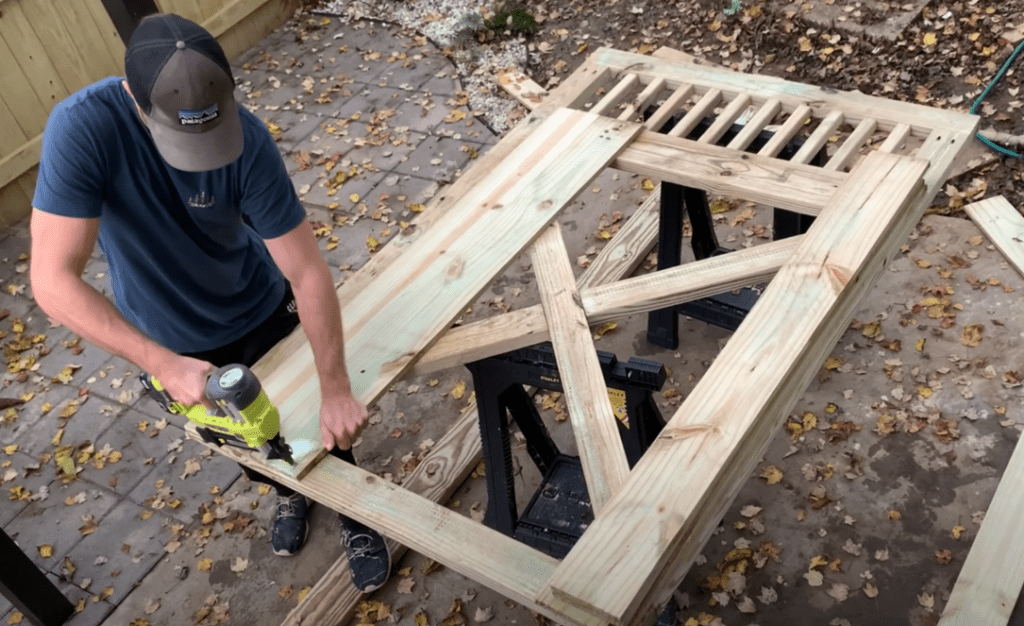
Next, attach your balusters to the gate frame using exterior rated screws as shown below:

PRO TIP: Think about the spacing between your balusters before you attach them to your fence gate. You want to ensure that the baluster spacing is even between each one. I recommend that you use a piece of scrap lumber (cut to size) to serve as a spacer between each baluster (as shown above).
6. Attach Picket “Veneer” to the Font of Your Fence Gate
At this stage, your gate frame is fully constructed. All that is left to do is install the picket “veneer” on the front of your gate frame. For my gate, I used leftover 5/8″ pressure treated fence pickets on the front of my gate.
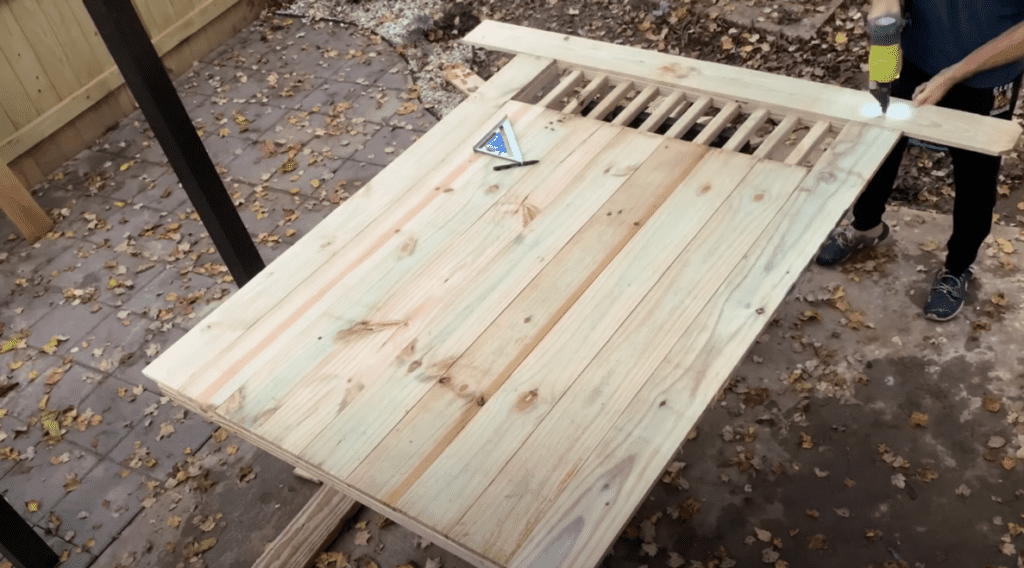
First, I cut the middle pickets to size so that they fit perfectly between the bottom of the the gate and the “viewing window” of my gate. After cutting them to size, I positioned them in place and secured them to the gate frame using plenty of exterior rated brad nails.
I continued this process for the entire front of the fence gate, positioning pickets in place and attaching them to the gate frame with exterior rated brad nails.
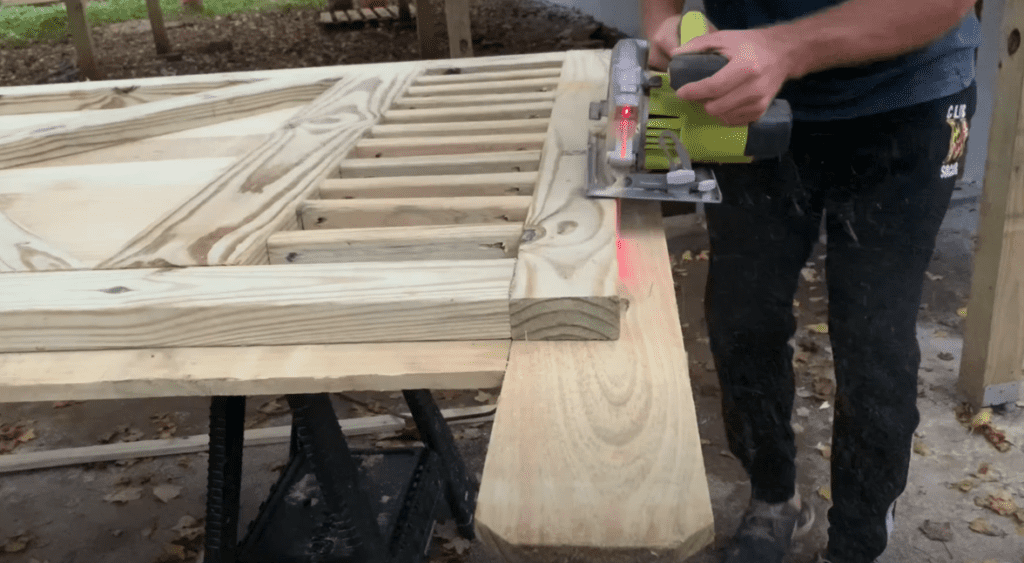
As you can see in the photo above, I left a bit of excess picket on each sides of the fence gate (except the bottom). I then used the gate frame as a guide and cut off any excess picket using a circular saw. I found that this method produced the most precise cuts.
Once you have trimmed off any excess picket length from the sides of your fence gate, your fence gate construction is complete. All that is left is the mounting of gate and the installation of the gate hardware.
7. Mount Gate and Install Gate Hardware
To mount the gate in place, start by establishing the preliminary position of the gate between the two mounting posts.
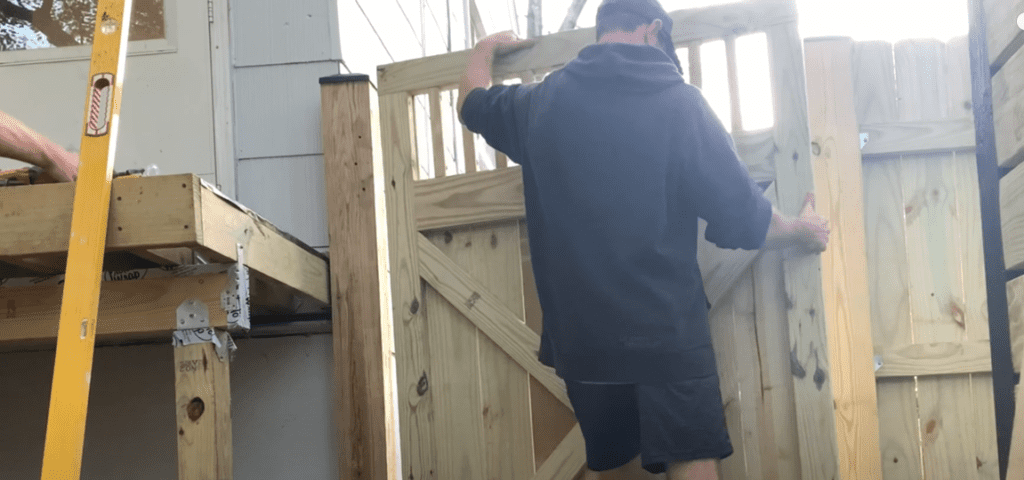
It is highly recommended that you use a piece of spare lumber as a spacer at the bottom of your gate. This will help you to get the correct height for your gate and will make the mounting of the hinges much simpler.

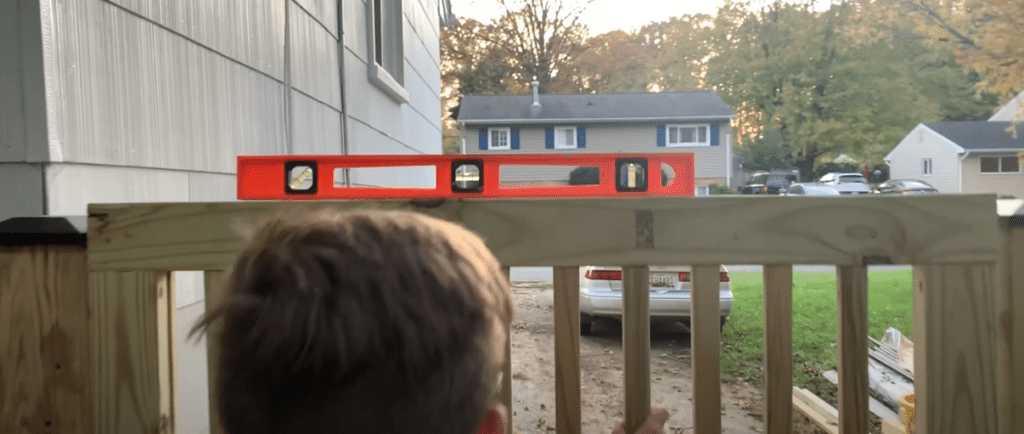
Finally, use shims (if necessary) to ensure that your fence gate is centered between the two mounting posts and that it is perfectly level.
Once your fence gate is appropriately positioned between your mounting posts, it is time to install the mounting hardware (hinges, latch, etc.).
For my fence gate, I installed two, heavy duty hinges at the top and bottom of my fence gate. The first hinge was positioned at the location of the horizontal brace and the second hinge was positioned at the bottom of the fence gate frame.
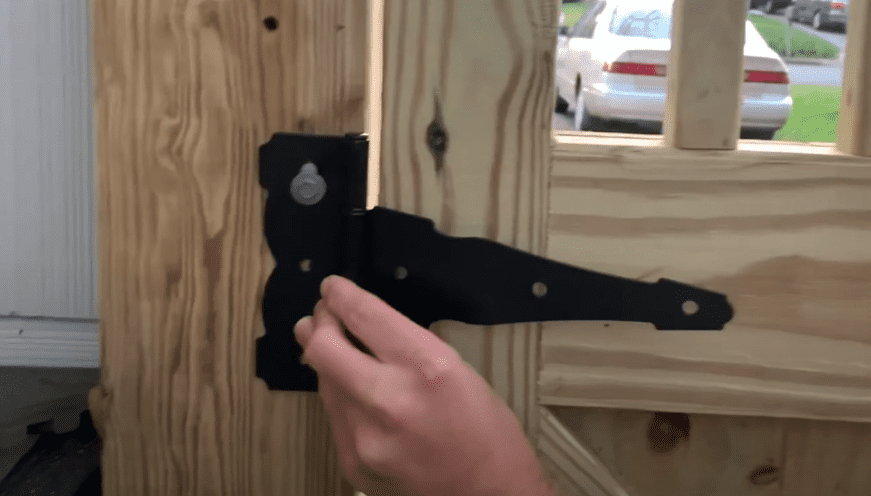
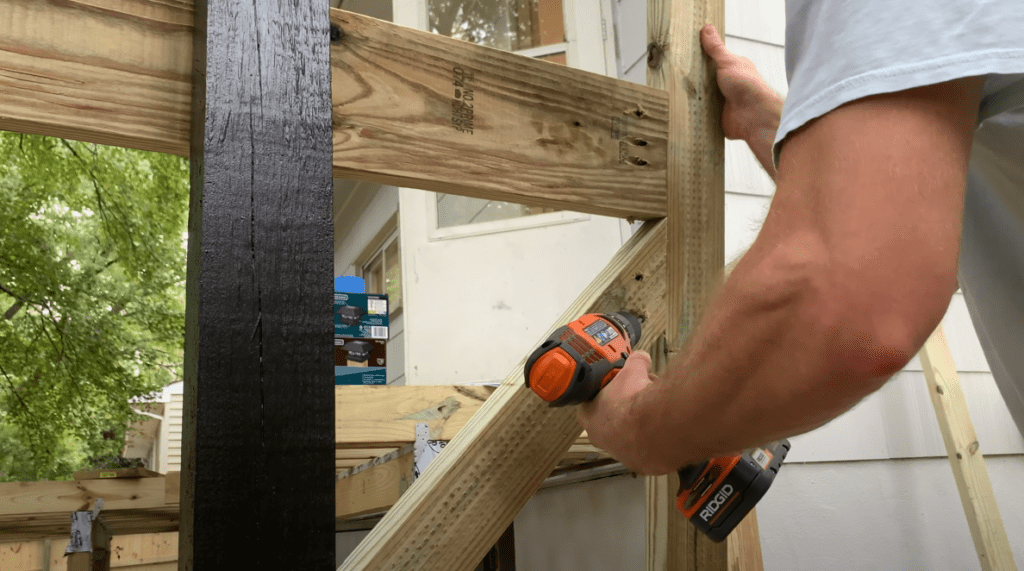
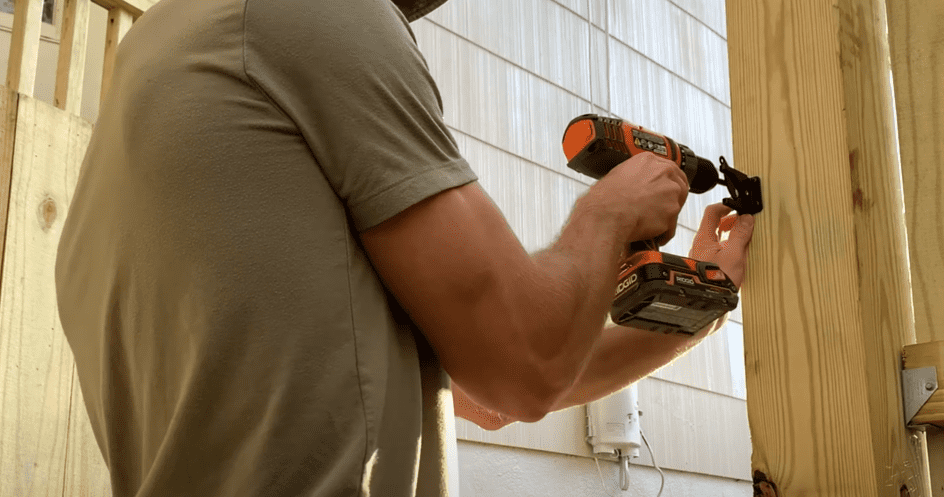
After positioning the hinges in place, use the screws (included with hinges) to attach the hinge to both the mounting post and and the fence gate.
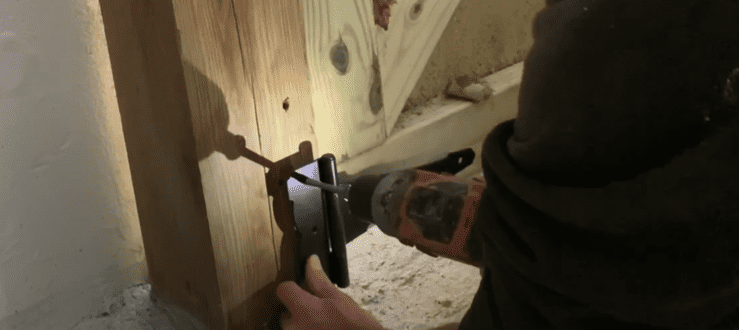
Attach the gate hinges at the top and bottom of your fence gate, installing the screws with a drill. After installing your hinges, give the gate a test to make sure that it opens and closes freely. If there are any issues with the gate opening/closing at this stage, make the required adjustment as needed.
The last step in the DIY fence gate project is to install the gate latch. To do this, install the gate latch at your desired height using the screws included with the hatch. Test to make sure that your gate closes properly.
After installing the gate latch, your DIY fence gate installation is complete. Feel free to add additional gate accessories as desired (handles, lock, etc.)
If you are more of a visual learner, you can watch how I completed every step of the DIY Fence Gate Build Project on Youtube!
Additionally, you can learn how I built the Fence around this gate by checking out my “How to Build a Fence Gate” Youtube Video linked here.
Thanks so much for checking out ATImprovements! If you learned something from this project, you might also like these other DIY Projects:
- How to Build a Fence: How to Build a Fence (DIY Guide) – AT Improvements
- How to Install a DIY deck Wire Railing: DIY Cable Railing – How to Install Cable Railing Step-by-Step – (atimprovements.com)
- How to Build a Concrete Paver Patio: DIY PAVER PATIO – Easy DIY Paver Patio Ideas – (atimprovements.com)
Thanks!
DISCLAIMER: This is a reference guide only. Links included in this article might be affiliate links. If you purchase a product or service with the links that I provide I may receive a small commission. There is no additional charge to you! Thank you for supporting ATimprovements so I can continue to provide you with free content each week!