
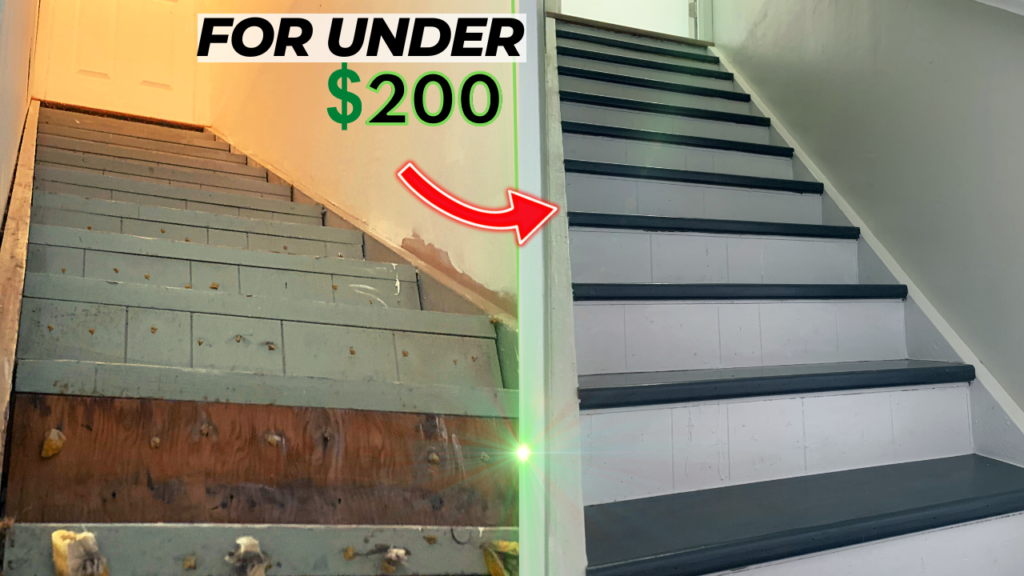
Remodeling a staircase is an easy DIY project that can dramatically transform a space. Whether you are looking to transform a carpeted stair case or are simply looking to change the look of your existing stairs, this guide will give you some budget fridley tips for a successful project.
To remodel stairs, start by removing any carpet, nails, staples, caulk, and construction adhesive from the existing staircase. Next, measure your stair treads and risers and cut new treads and risers to size using plywood. Attach the new risers and treads to your staircase using construction adhesive and brad nails. Use a piece of 1″ x 2″ hardwood lumber and create a rounded stair nosing using a router equipped with a 3/4″ round-over bit. Attach the stair nosing using Construction Adhesive and brad nails. Finally, caulk any gaps and paint/stain the treads and risers as desired.
This article will outline every step of the DIY stair remodel process, step-by-step.
If you are more of a visual learner, I recommend that you watch my “How to Remodel Stairs” Youtube Video linked at the end of this article.
The Anatomy of Staircase
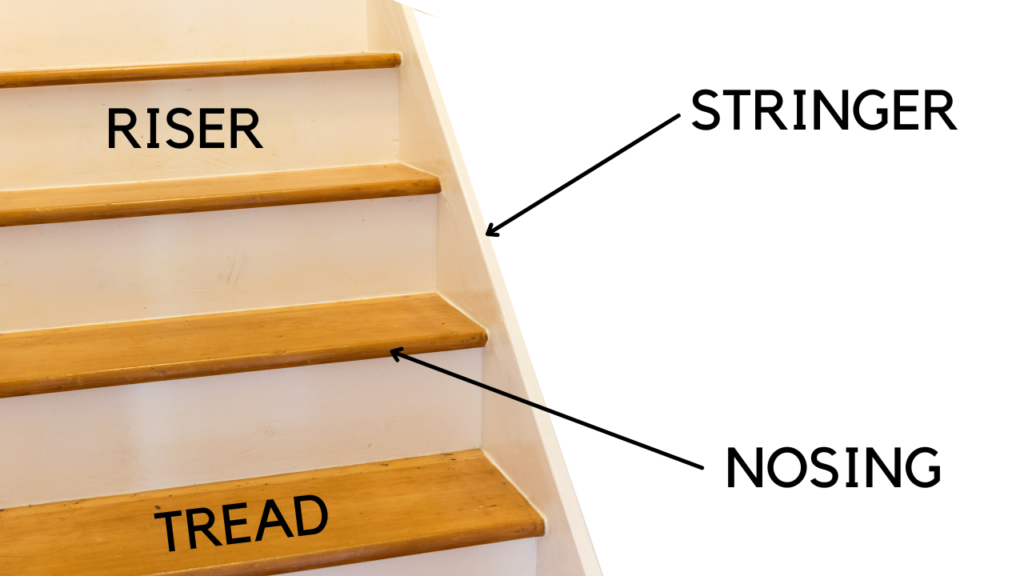
Before proceeding with the stair remodel project, let’s take a few moments to discuss the “anatomy” of stairs – since we will be referring to these terms A LOT within this DIY tutorial. Basically, stairs consist of the following components:
- Treads (the horizontal surface that you walk on)
- Risers (the Vertical Section between stairs)
- Stingers (The “Sides” of your staircase that extend from top to bottom)
- Nosing (The “Cap” of your stair)
Refer to the Image below for a visual representation of Treads, Risers, Stringers, and Nosings:
Now that we have an understanding of the various components that make up a staircase, we can begin to discuss the suggested tools and materials needed to complete your DIY stair remodel project.
Suggested Tools and Materials

To successfully complete a DIY Stair Remodel Project, you will need likely need the following tools and materials:
- PPE (Hearing protection, Eye Protection, Respirator)
- Hammer
- 5-1 painter’s tool or putty knife
- Caulking gun
- caulk or construction adhesive
- Tape Measure
- Level
- Clamps
- Router
- Drill
- Razor Blade
- Circular Saw
- Air Compressor with Brad Nail Gun
With all necessary tools and materials on hand, you can now begin the stair remodel process.
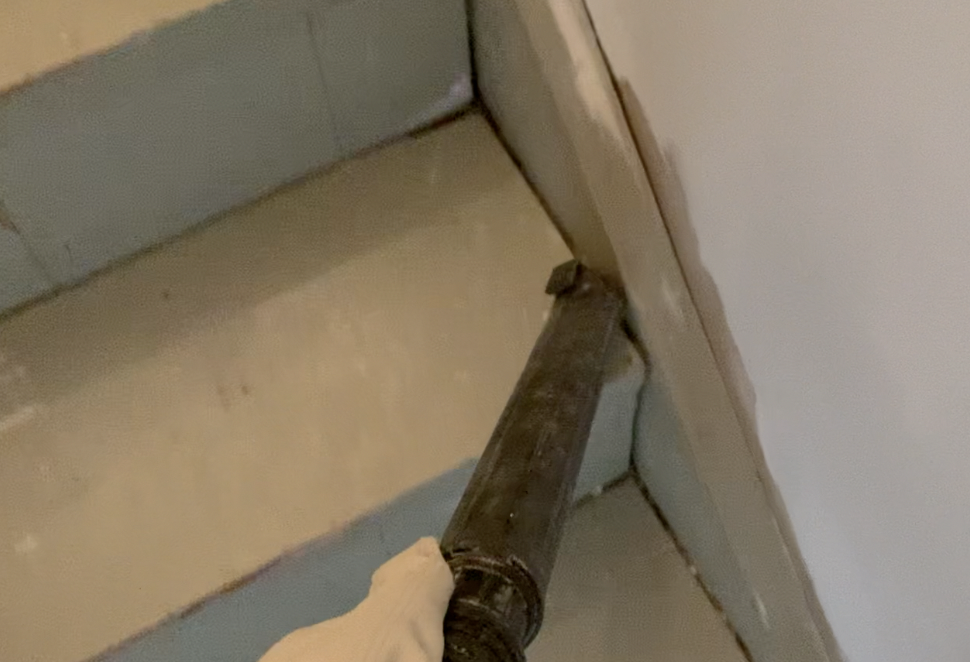
1. Prepare your existing Staircase
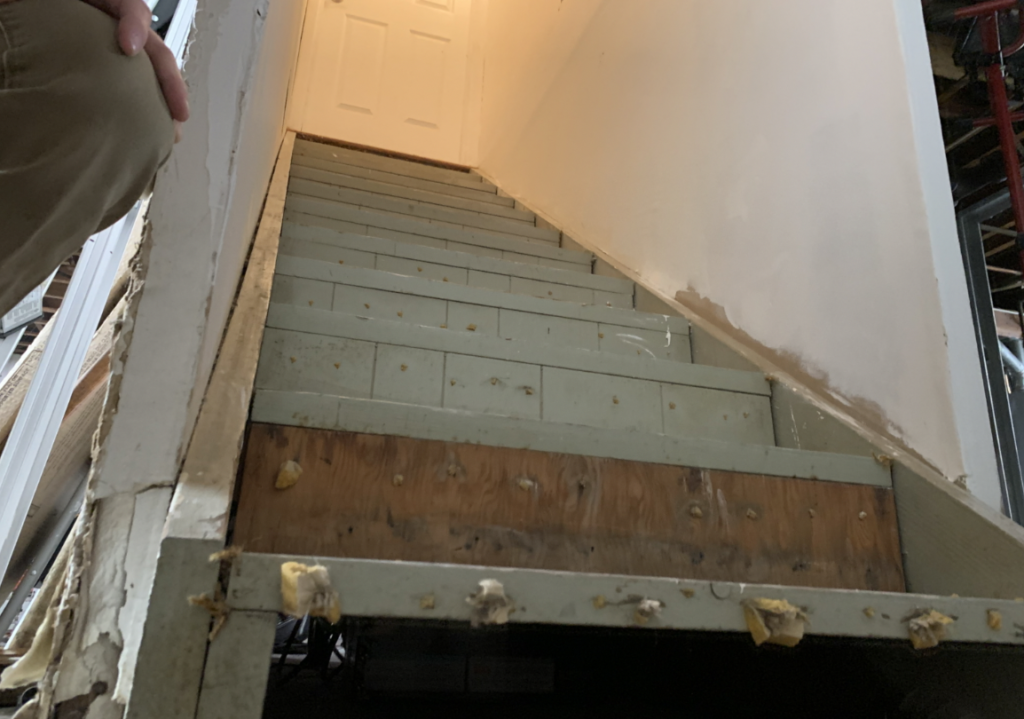
Before you can begin installing your new stair components, you will need to prepare your existing staircase for new work.
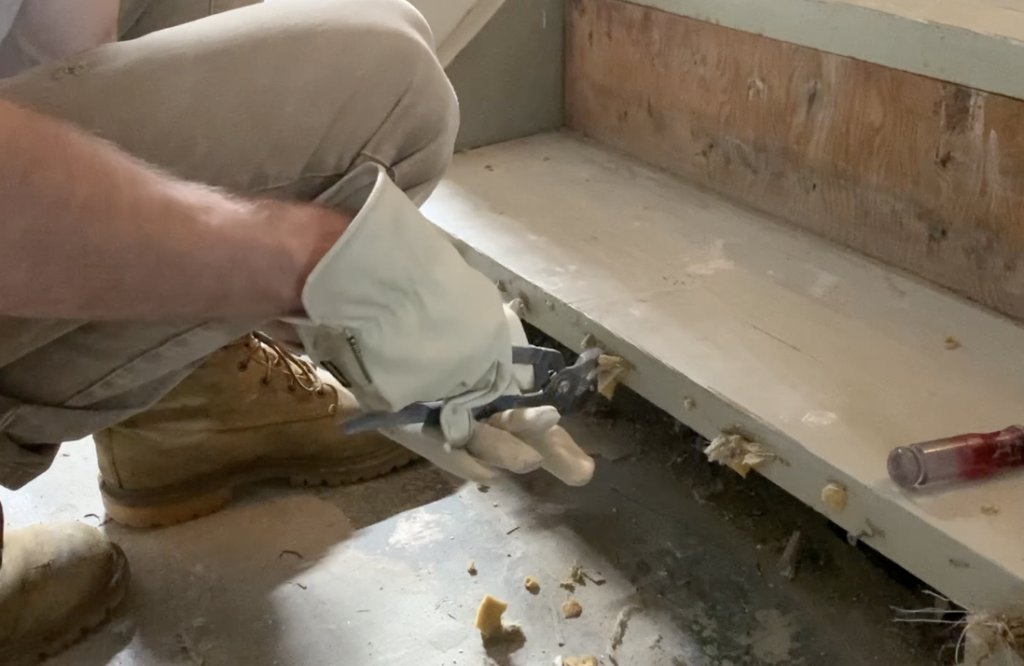
If your existing staircase has old carpet that needs to be replaced, start by removing the carpet from the stairs. Remove any carpet staples, nails, or adhesive that may be on the staircase.
If there are any damaged sections of the existing stair stingers, spend some time repairing those with wood filler.
PRO TIP – It is highly recommended that you wear a respirator, gloves, and safety glasses when performing any demolition work.
At this stage, you must ensure that there are no nails, staples, etc. that will impact the installation of the new stair components. Once your existing staircase has been prepared, and you have a “clean slate” to begin the next steps, give the stairs a quick vacuum to remove any dust and dirt.
2. Measure and Cut your new Stair Treads.
After preparing your existing staircase, you can begin measuring your new stair treads.
Your new stair treads can be made of many various materials. To keep costs low, I recommended that you use one of the following materials:
- 1/4″ Harwood Lumber
- Plywood
- Hardboard
- LVP
For my specific project, I used 1/4″ sanded plywood. Although this material is not nearly as strong and durable as Hardwood or LVP, it is inexpensive. I was OK with using it since I planned on applying many coats of a Polyurethane protective sealant. We will discuss this later in Step 10.
Use a tape measure to determine the depth and width of each stair tread.
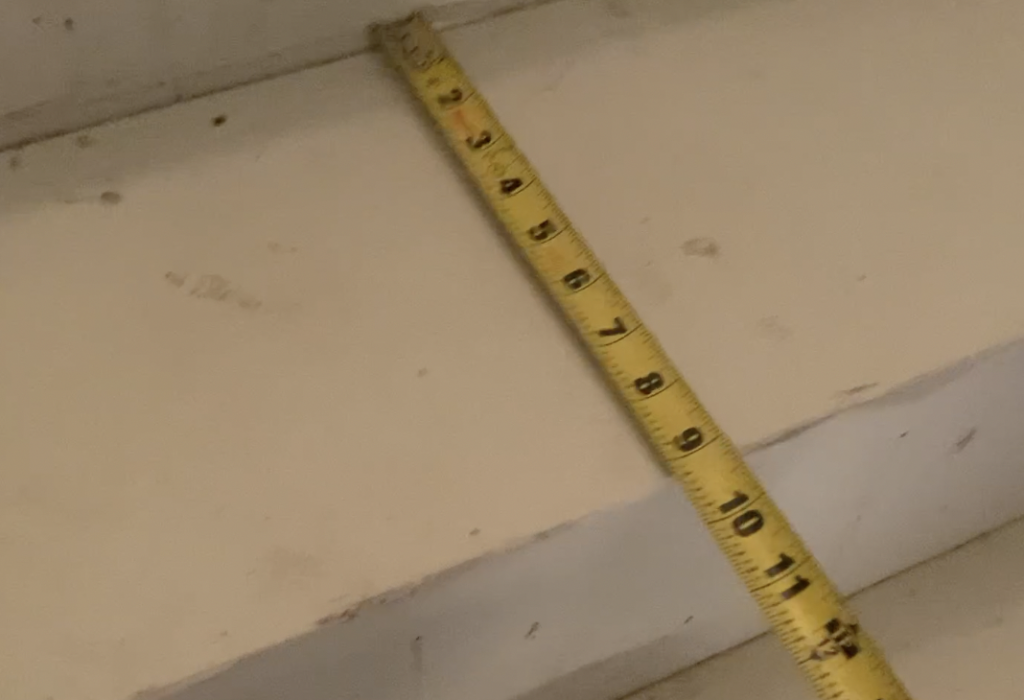
It is highly recommended that you measure each stair tread individually. That way, you will be able to identify any irregularities and cut each custom tread to fit.
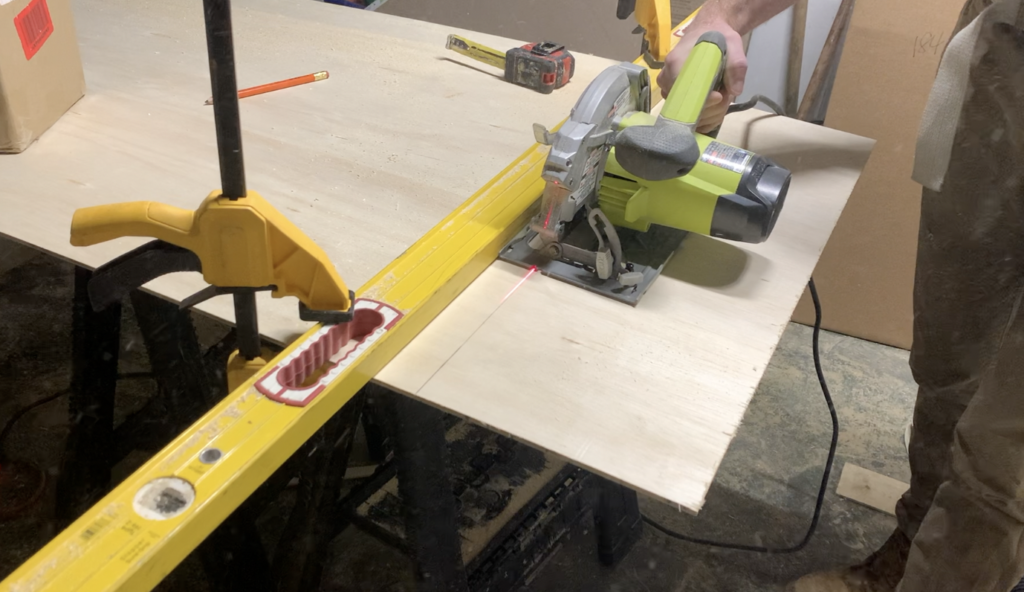
After measuring, Cut each stair tread to size. Using a table saw and miter saw to cut your stair treads will be the easiest and will yield the best results. However, you can also cut your stair treads using a circular saw.
If you decide to use a circular saw to cut your stair treads, it is highly recommended that you use a straight edge as a “Guide” in order to ensure that you are making perfectly straight cuts.
After cutting each of your stair treads, you can begin the stair tread installation process.
3. Install new Stair Treads
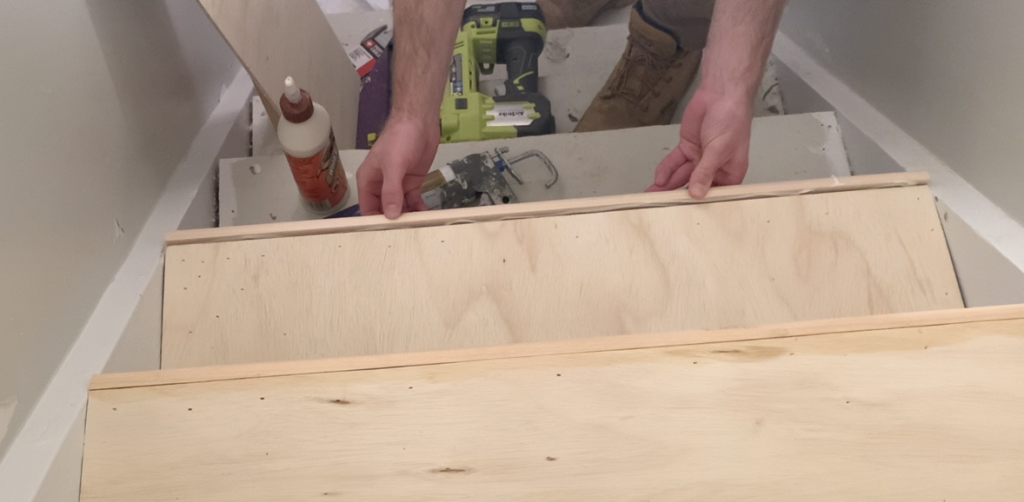
After cutting each stair tread to size, perform a “dry-fit” to ensure that your treads fits perfectly in place. After confirming fit, apply construction adhesive to the existing stair and the bottom of the new stair treads and then position the tread in place.
After correctly positioning the new stair tread in place, attach the tread to the existing staircase using brad nails.
Continue to apply all stair treads in this manner.
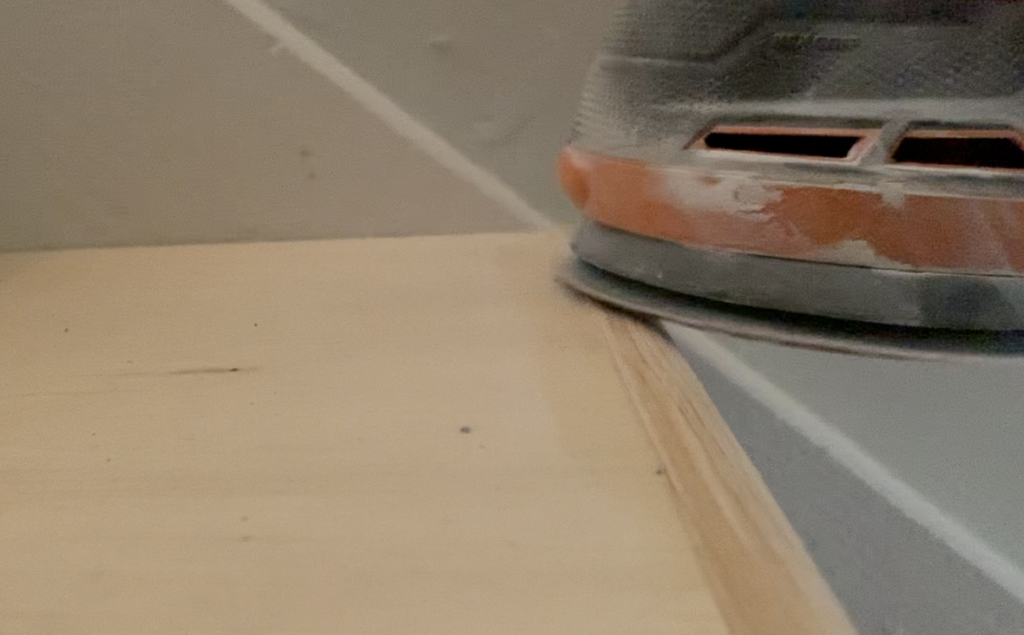
As you install your treads, sand down any imperfection and ensure that the treads do not extend past the existing stair riser. If they do, sand them flush using sandpaper. An orbital sander will make quick work of this.
4. Create your stair Nosing
After installing your stair treads, you can begin making your stair nosings. To do this, take a piece of 1″x2″ hardwood lumber strip and select a round-over router bit that will produce your desired look. For my stair nosing, I used a 3/4″ round-over bit.
Use your router and create a rounded “nosing” effect on both sides of the 1″x2″ hardwood lumber strip.
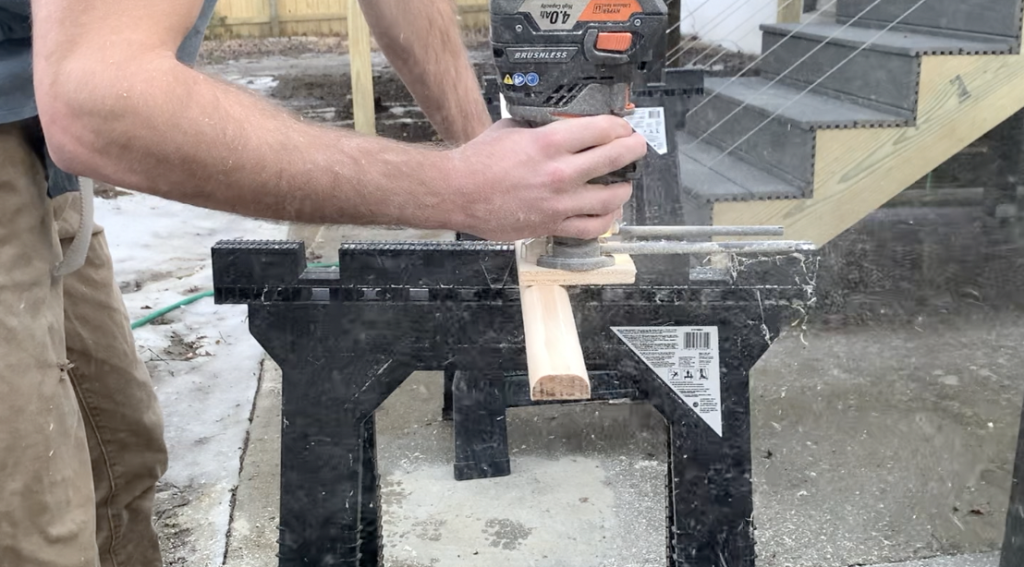
I recommend that you route the entire piece of lumber at one time, and then cut the nosing to size.
Clean up any imperfections from the routing process using sandpaper. Once you are happy with how your stair nosings look, you can proceed to the next step.
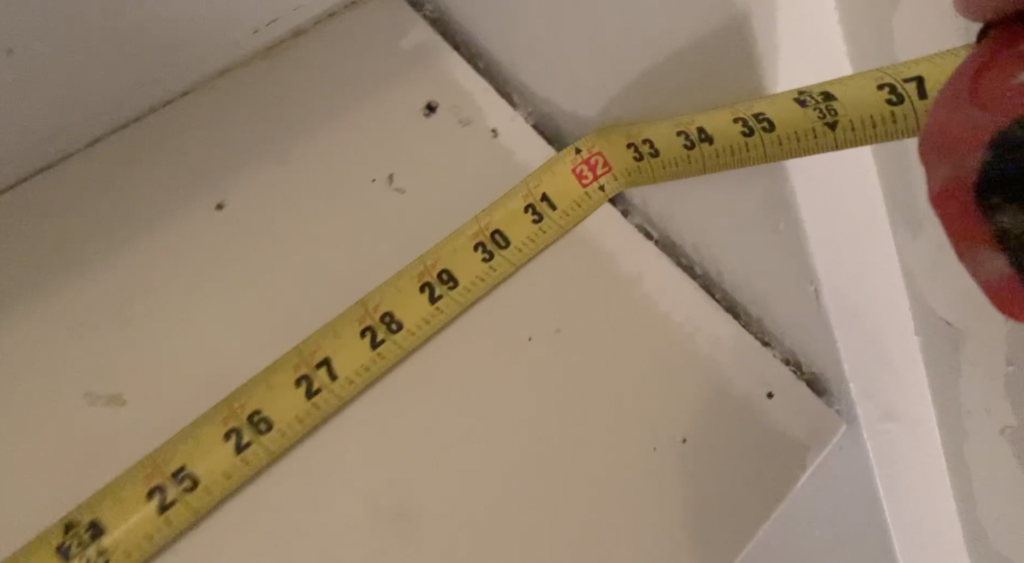
5. Measure and cut your Stair Nosing
Once you routed the 1″x2″ lumber to achieve a rounding nosing look, measure the distance between stringers to determine how long each nosing must be. As for the stair treads, it is recommended that you measure each stair nosing individually. That way, you will be able to identify any irregularities and cut each nosing to fit.
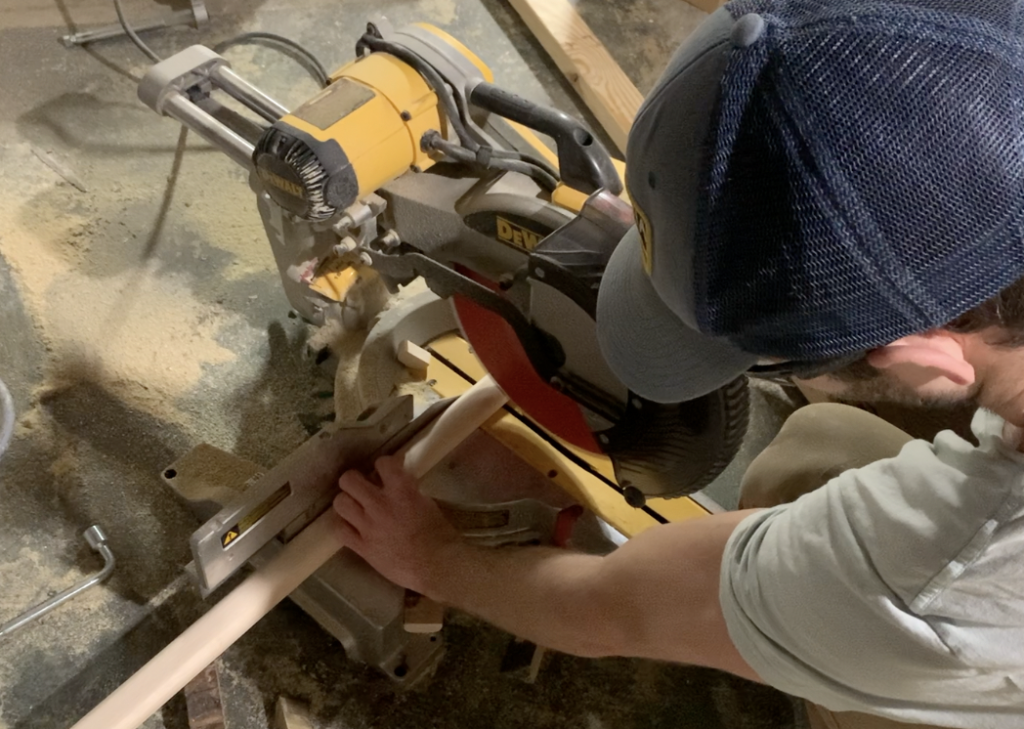
Cut each stair nosing to size and dry-fit each nosing in place to ensure that no modifications are needed to achieve a perfect fit.
After completing the dry-fit process, you can proceed with installing the stair nosing.
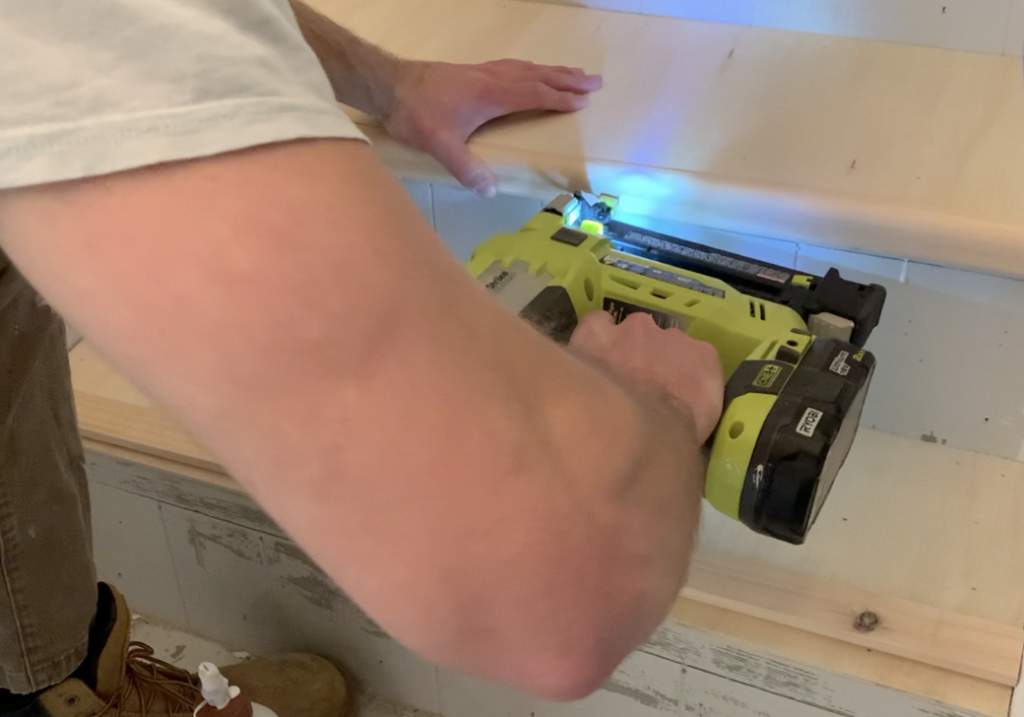
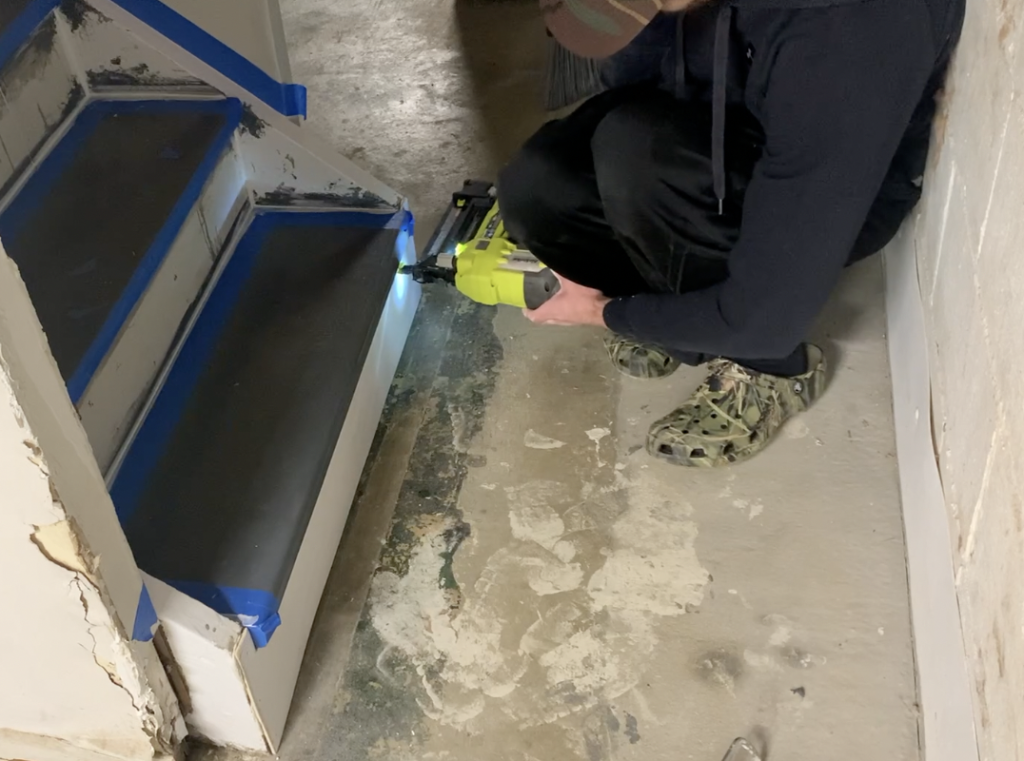
6. Install new Stair Nosing
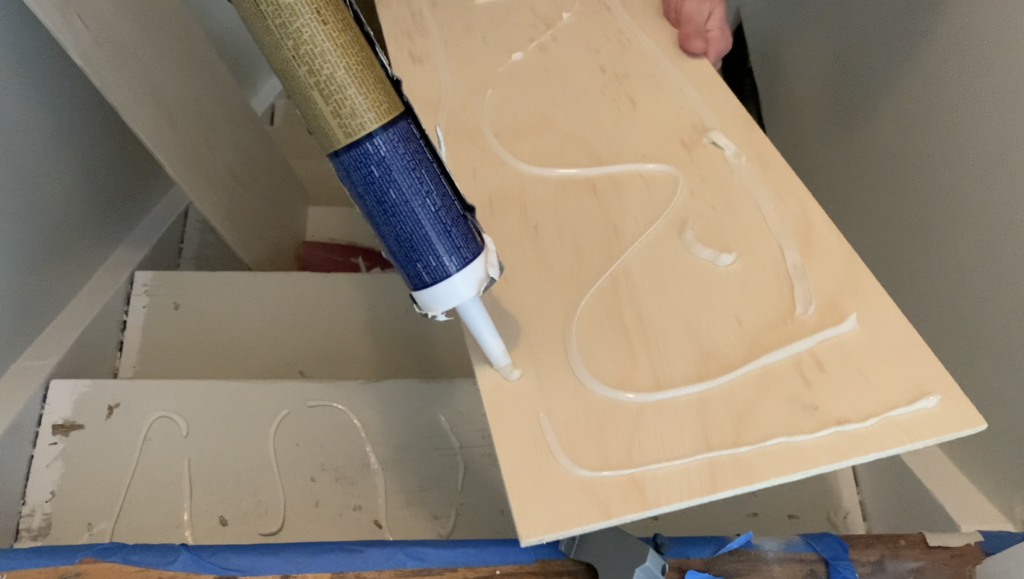
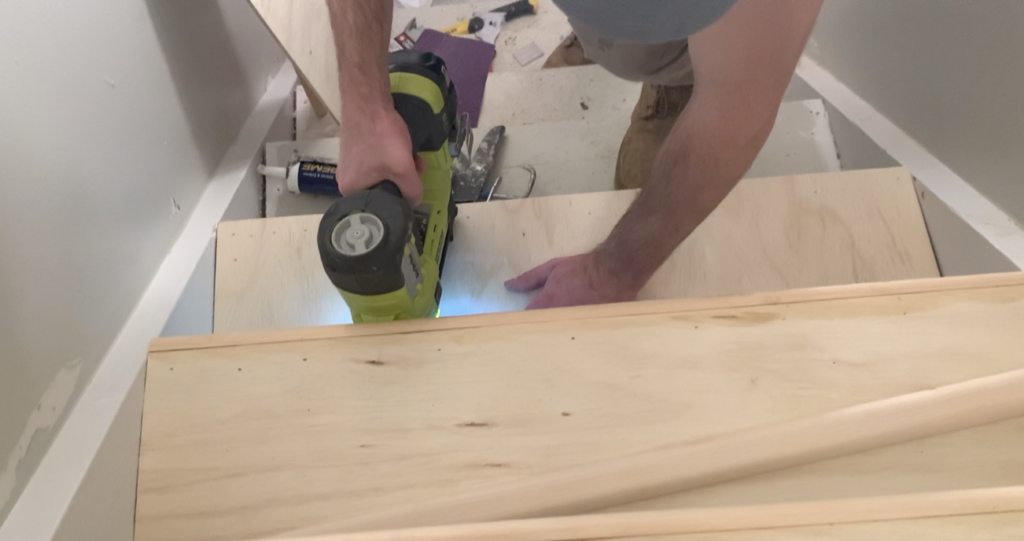
Once each of your stair nosings have been cut to the appropriate length, apply a copious amount of wood glue or construction adhesive to the back of the stair nosing.
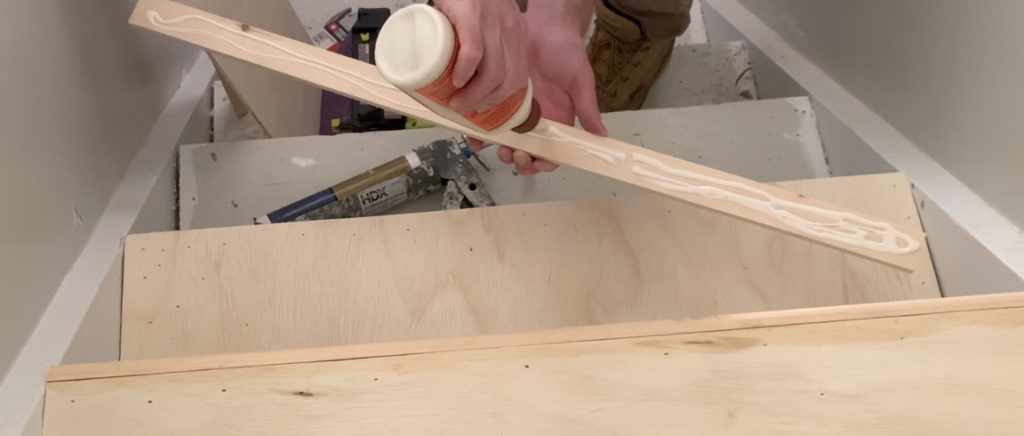
Next, position the stair nosing in place and attach it to the existing stairs with 2″ brad nails.
Ensure that your stair nosing is either perfectly flush with OR slightly above the stair tread. It is very important that the nosing is not installed below the stair tread along the entire length of the stair.
If you need to make any adjustment to make the nosing completely flush with the tread, you want to sand the nosing down, NOT the tread. This is because the stair tread is already very thin and additional sanding may damage the veneer.
Sand down the nosing at every location where it is slightly elevated. Once you have completed your sanding, the stair nosing and stair tread should be perfectly flush.
7. Measure and Cut your new Stair Risers
After installing your stair treads and stair nosing, measure the length and width of the area between the stair tread and nosing – this will be the size you need to cut for your risers. For the risers, I recommend that you use an inexpensive plywood or a veneer material such as Hardboard.
As previously mentioned for the stair treads, using a table saw and miter saw to cut your stair risers will be the easiest and will yield the best results. However, you can also cut your stair riser using a circular saw.
Once you have cut all of your new stair risers, you can begin the installation process.
PRO TIP – Check the condition of your existing stair risers. If they are in good condition, you may be able to get by with simply painting the existing risers. I chose to simply paint my existing risers for my stair remodel project.
8. Install New Stair Risers
After cutting each stair riser to size, perform a “dry-fit” to ensure that your risers fit perfectly in place. After confirming fit, apply construction adhesive to the existing stair riser and the back of the new stair riser and then position the riser in place.
After correctly positioning the new stair riser, attach it to the existing staircase using brad nails.
Continue to apply all stair risers in this manner.
9. Stain or Paint your Stair Treads
At this stage, you will want to stain or paint your stair treads to achieve your desired look.
Pro Tip – You can also paint or stain your stair treads BEFORE you install the stair risers. This may make it easier to stain/paint without worrying about getting stain/paint on your new risers.
For my project, I first used a “weathered oak” liquid stain. However, because of the wood glue used to attach the stair nosing to the stairs, the stain did not fully absorb into the wood – resulting in a splotchy appearance. Therefore, I applied a second coat of gel stain, which helped to even everything out the color and make everything look much more cohesive.
I applied stain to the stair treads using a cloth, but a foam brush can also be used.
After staining or painting your stair treads, be sure to allow the paint/stain sufficient time (based on the timeframes listed by the manufacturer).
10. Protect your Stair Treads by Applying Polyurethane
After giving your stain/paint sufficient time to dry, it is HIGHLY recommended that you apply a few coats of polyurethane to your stair treads. Polyurethane is protective coating that will help to ensure that your stairs look great for years to come. It is highly recommended that you apply a few coats of polyurethane, since stair treads will see a lot of wear and tear.
Apply polyurethane to your stairs using a natural bristle brush. Polyurethane will often appear “milky white” upon application, but will dry clear.
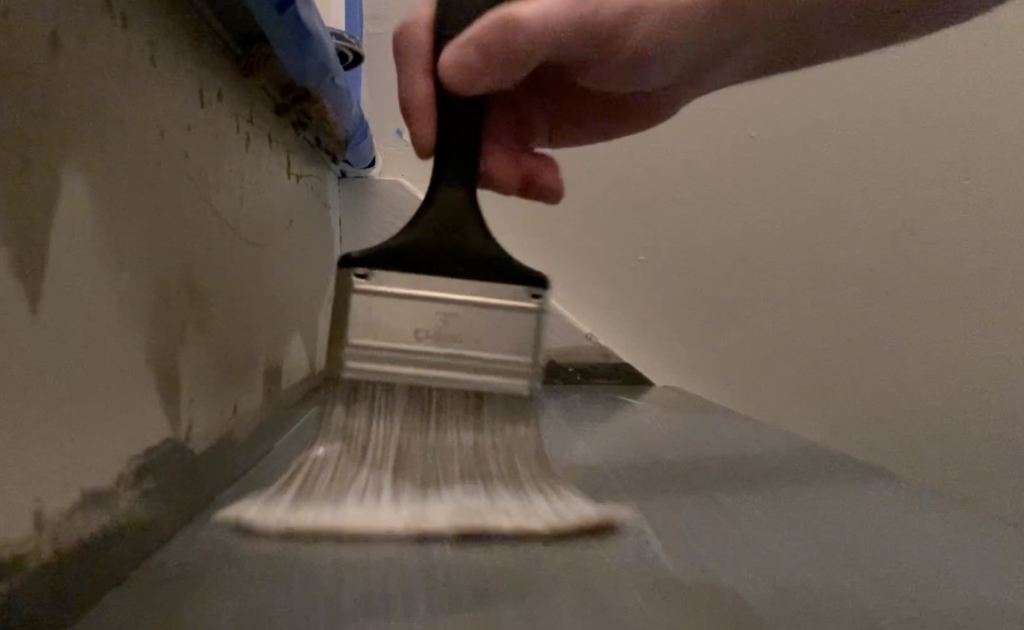
PRO TIP – Ensure that you use a polyurethane that is compatible with the paint/stain that you applied to your stair treads. Polyurethanes can be water-based or oil-based, and each type is suited for specific materials.
Apply polyurethane to each stair tread in accordance with the manufacturer’s recommendations. After applying, allow the polyurethane sufficient time to dry before proceeding to the next step.
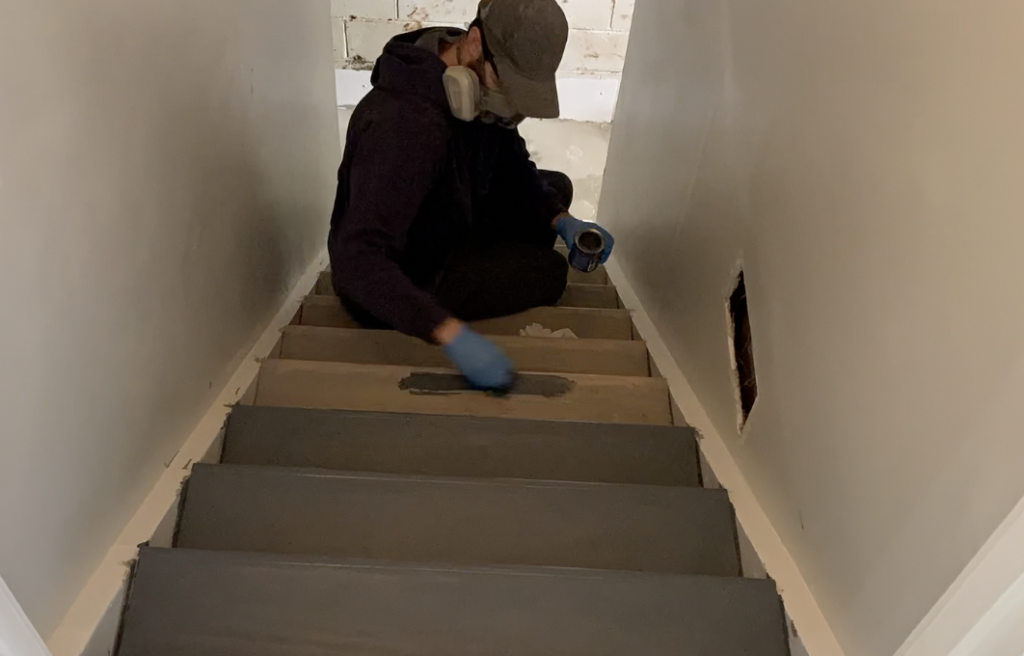
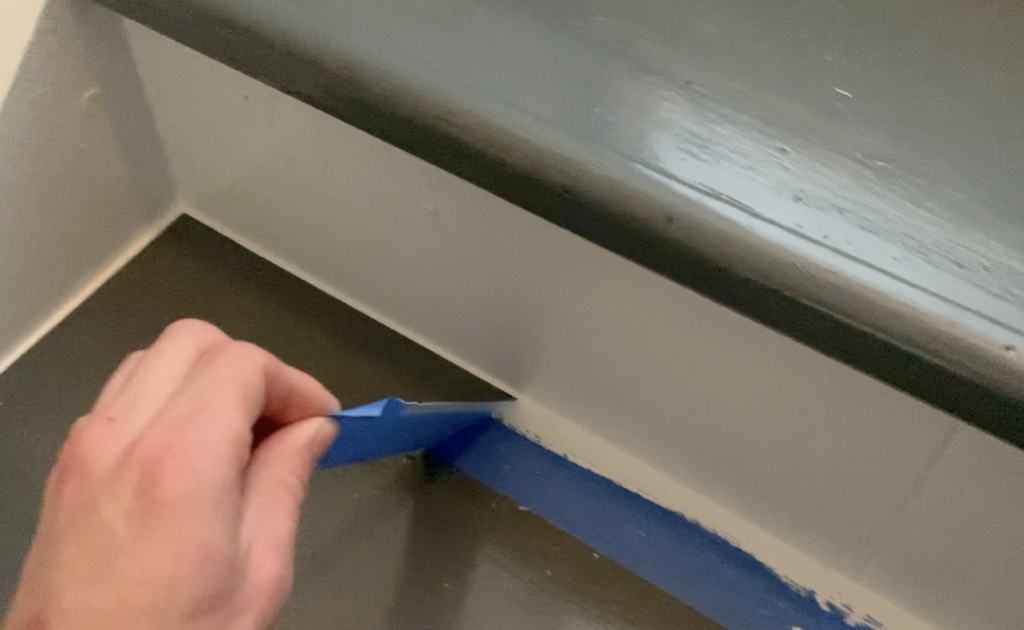
11. Caulk any Gaps
After the polyurethane has fully dried, caulk any gaps between the stair risers, treads, nosings, stringers, etc. If there are any noticeable gaps, fill them with a paintable caulk at this time.
I highly recommend that you use painter’s tape to mask off your caulking lines. This will ensure that you have a clean, crisp caulk line once you remove the tape. Continue to apply caulk to any areas that require it.
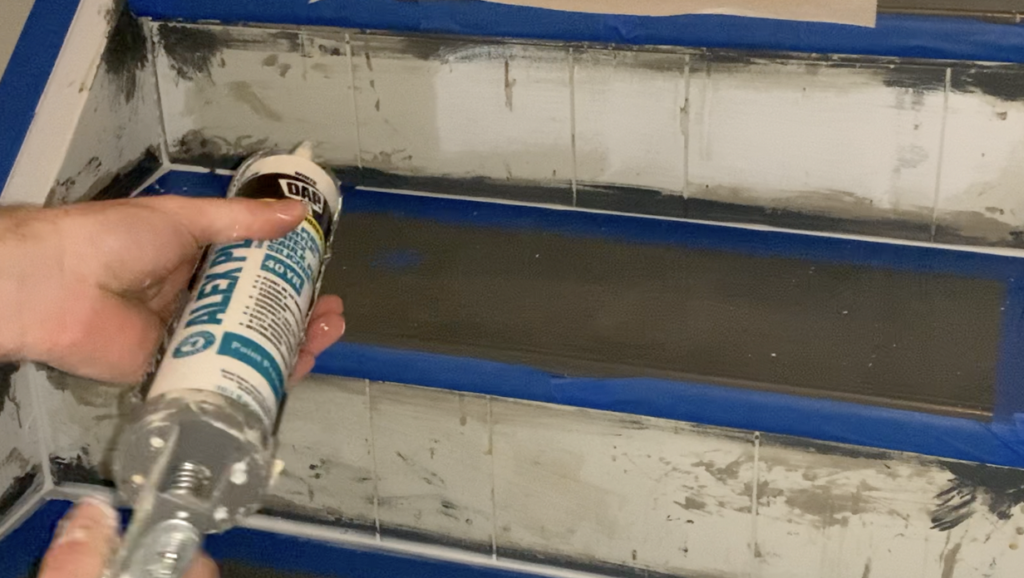
Give you caulk sufficient time to dry before proceeding with the next step of the stair remodel project.
12. Paint your Stair Stringers and Risers
Once the caulk has dried, perform any final painting touch ups of the risers, walls, etc. Basically, you want to ensure that your caulk has been painted to match the risers. Typically, a semi-gloss ultra pure white is used for the painting of stringers and risers. This will usually give you a nice contrast between the risers/stringers and the stained/painted treads.
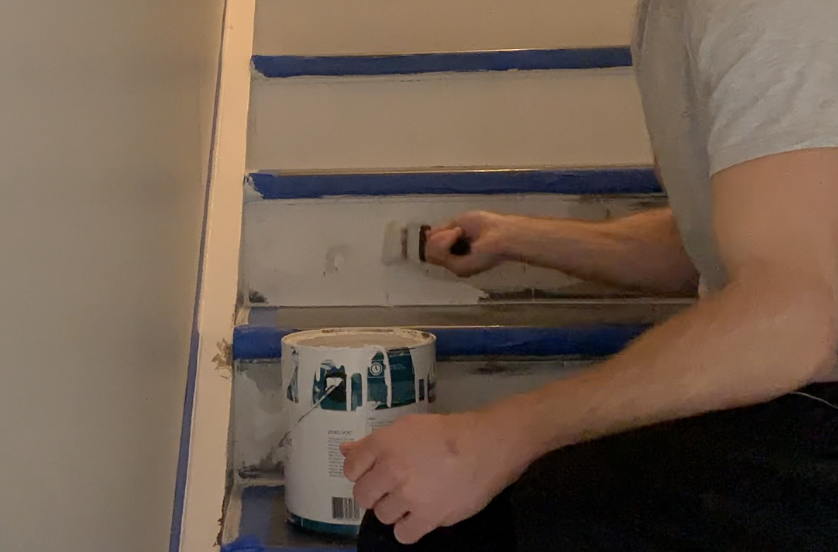
Paint any areas of your staircase that require it. Allow paint to dry.
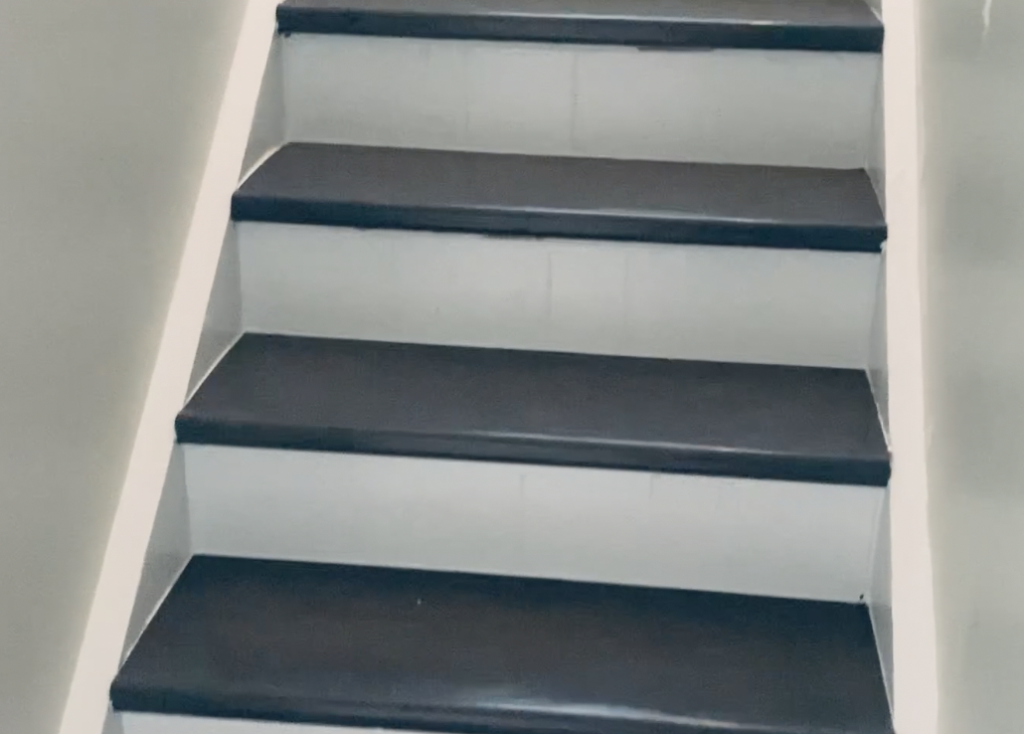
13. Remove Tape
The last step in the stair remodel project is to remove the tape that was used to mask off the caulk and paint. After removing the painter’s tape, you will be left with a completed stair remodel project. Congratulations!
Feel free to check out my DIY Stair Transformation Youtube Video below for more information!
Thanks so much for checking out ATImprovements! If you learned something from this project, you might also like these other DIY Projects:
- How to Build a Fence: How to Build a Fence (DIY Guide) – AT Improvements
- How to Build a Fence Gate: How to Build a Fence Gate (7 Steps with Pictures & Video) – AT Improvements
- How to Install a DIY deck Wire Railing: DIY Cable Railing – How to Install Cable Railing Step-by-Step – (atimprovements.com)
- How to Build a Concrete Paver Patio: DIY PAVER PATIO – Easy DIY Paver Patio Ideas – (atimprovements.com)
Thanks!
DISCLAIMER: This is a reference guide only. Links included in this article might be affiliate links. If you purchase a product or service with the links that I provide, I may receive a small commission. There is no additional charge to you! Thank you for supporting ATimprovements so I can continue to provide you with free content each week!