
Seeing cracks in your home’s cinder block foundation walls can be alarming. Further, if these cracks are left un-repaired, they can worsen over time. Although some types of cinder block foundation cracks can compromise the structural integrity of your home (for example, long horizontal cracks), other cracks are harmless and only serve as an eyesore (for example, small vertical cracks).
Major cracks typically require an analysis by a structural engineer and the repairs can be quite costly. If you suspect that the cracks on your cinder block foundation are major, it is highly recommended that you consult with a foundation repair specialist and a structural engineer.
For minor, cosmetic cracks, however, the repairs can be quite simple and fast. In fact, the average homeowner can tackle small cosmetic cracks in a cinder block wall in just a few minutes.
What Causes cracks in foundation walls?
Minor Foundation Cracks are normal and are typically a result of your home settling over time. A minor crack is anything cosmetic (e.g. hairline cracks) that does not pose a structural compromise to your home.
Large horizontal cracks in the foundation can be caused by many factors such as:
- Poorly constructed foundation walls that failed over time
- Hydrostatic pressure “pushing in” on the homes foundation
- Earthquakes or substantial differential settlement of the soil beneath and around the home’s foundation.
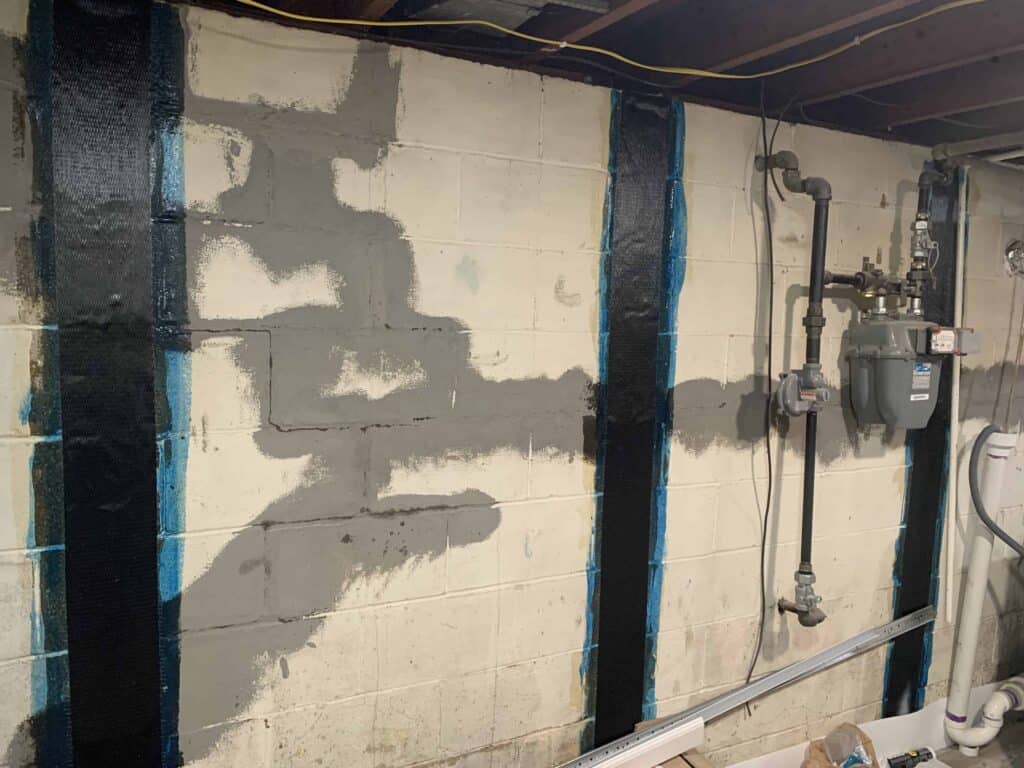
Large horizontal cracks are generally serious and typically require a professional repair based on a structural engineering report.

One of the most common repairs for large, horizontal foundation cracks is the installation of carbon fiber straps. Carbon fiber repairs are costly ($1,500-$7,000) but are very effective for reinforcing the home’s foundation to prevent further damage.
If you find yourself with a non-structural, cosmetic crack, you can repair it VERY easily by following the steps below:
Identify the Cracks in the Cinder Block Foundation Walls and Confirm that they are Minor
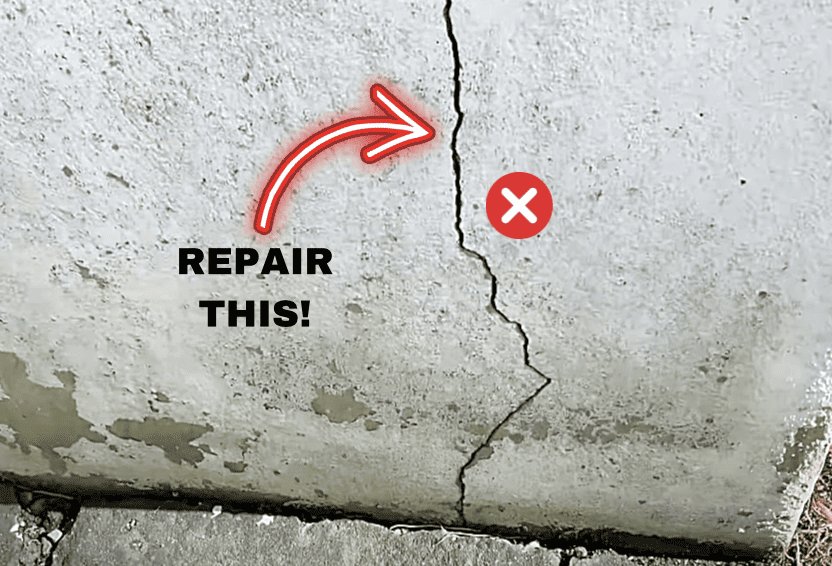
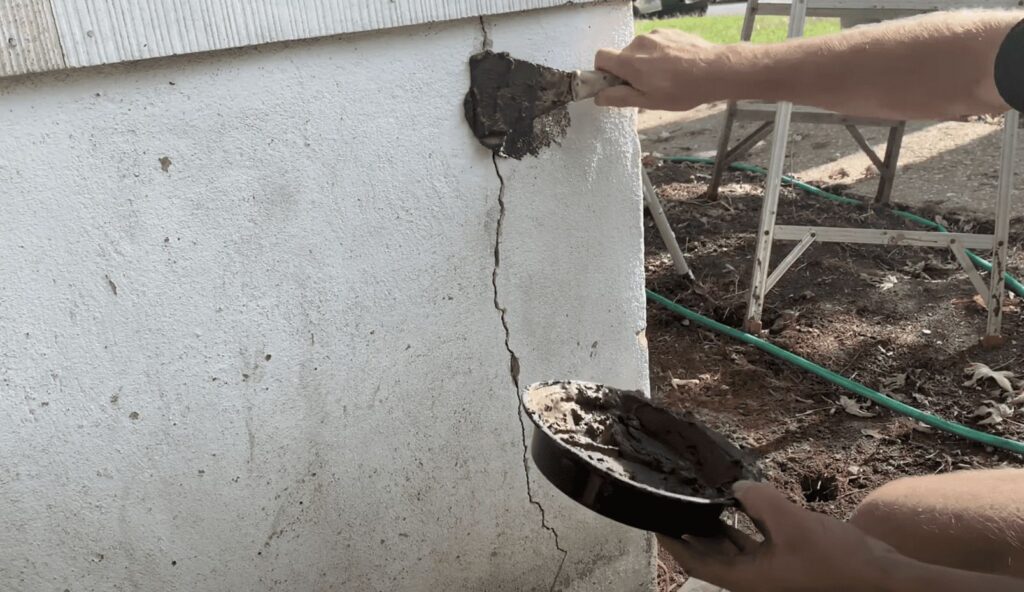
The first step in repairing cinder block foundation cracks is to identify all of the cracks and confirm that they are vertical, minor, and cosmetic.
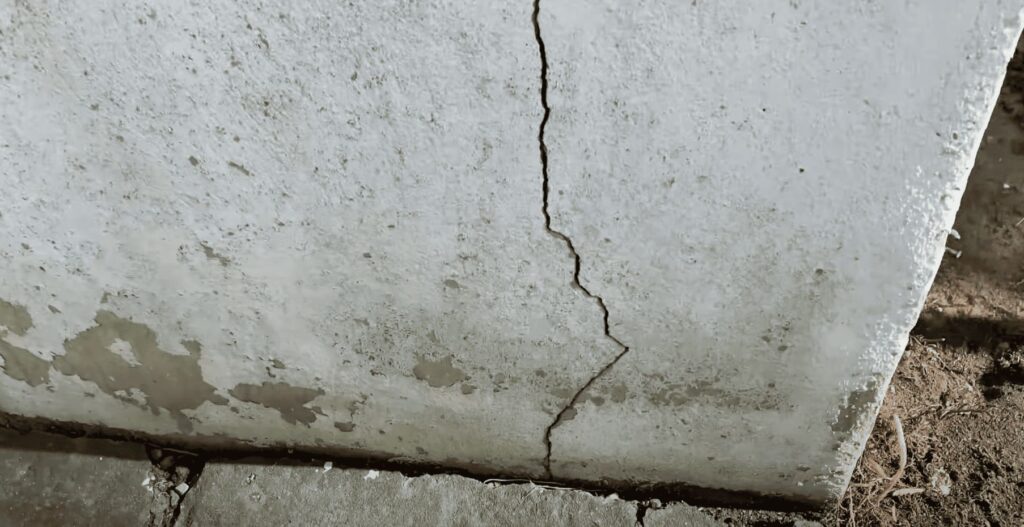
If your foundation cracks look similar to the photo above, you can move on to the next step.
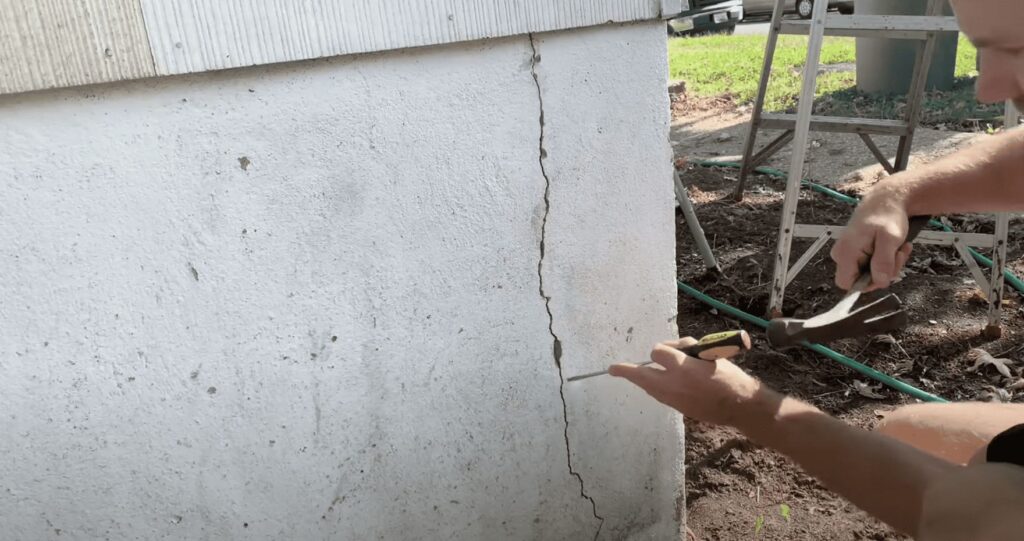
Prepare the Surface of the Cinderblock Wall for the Repair
Before you can repair the crack, you will need to clean out the crack – removing any dirt or debris. Additionally, use a chisel and hammer to chip away any loose cinder block.
Prepare the Hydraulic Cement so That it Can be Applied to the Crack
To repair the cracks in the cinder block foundation, we will be using hydraulic cement. Hydraulic Cement is the best for this application since hydraulic cement, by nature, is crack/shrink resistant and waterproof.

Add water to the hydraulic cement mix in accordance with the manufacturer’s recommendations and then you can begin to apply the mix to the crack.
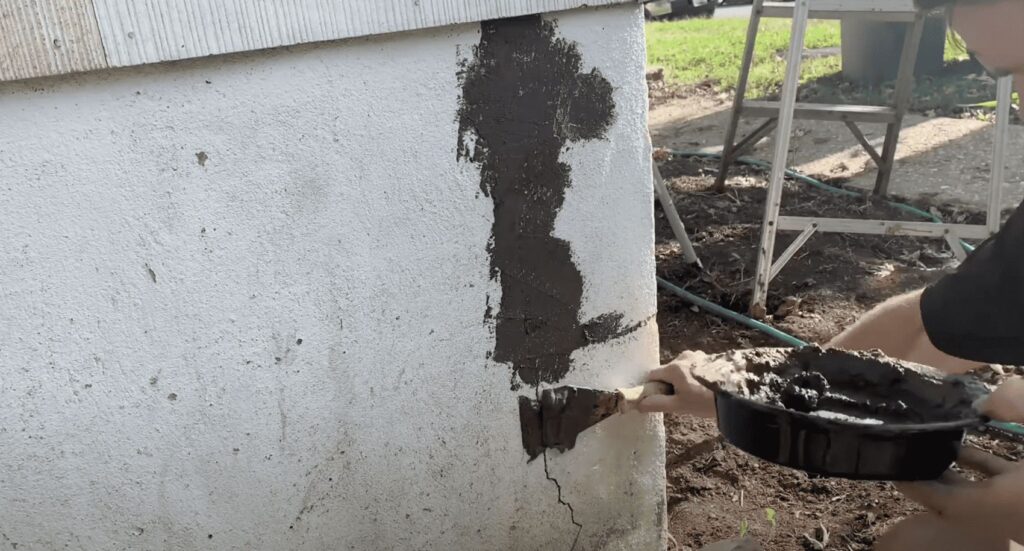
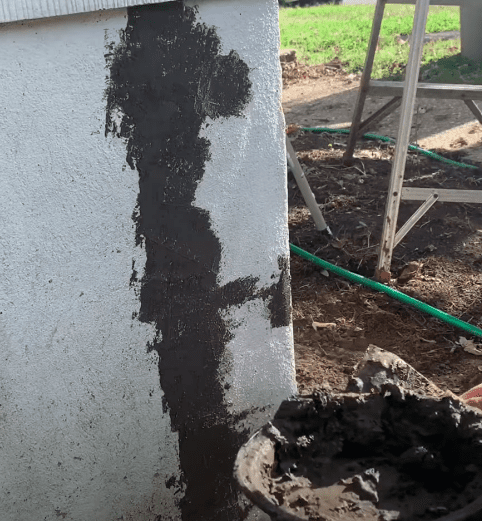
Repair the Cinder Block Foundation Wall Crack by Applying Hydraulic Cement.
Continue to apply hydraulic cement to the cinder block foundation crack using a concrete trowel. Fill the entire crack with hydraulic cement and “feather” out the edge so that it is flush with the surrounding cinder block wall.
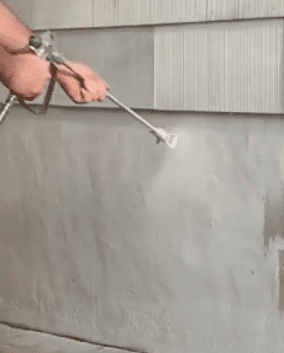
Allow the Hydraulic Cement to Dry and then Paint the Repair to Match the Surrounding Cinder Block Wall
After repairing the crack with hydraulic cement and allowing it to dry, simply paint the repair so that it matches the rest of the cinder block foundation. I used a paint sprayer to paint my crack repair, but a paint brush or roller will also work well.
For a step-by-step video guide showing every step in the cinder block foundation wall repair process, you can watch my YouTube video below which has already helped over 100,000 people complete a similar repair.

With the crack repaired and the foundation painted, you have successfully repaired your cosmetic foundation crack. Again, please consult a professional/structural engineer about any foundation cracks.
Thanks so much for checking out ATImprovements! If you learned something from this project, you might also like these other DIY Projects:
- How to Install Rigid Foam Insulation in a Basement: https://atimprovements.com/how-to-install-rigid-foam-insulation/
- How to Frame Basement Walls: https://atimprovements.com/how-to-frame-a-basement-wall/
- How to Frame Around HVAC Ducts or Pipes in a Basement: https://atimprovements.com/how-to-frame-around-ductwork/
- How to Install Luxury Vinyl Plank in a Basement: https://atimprovements.com/lvp-flooring-installation/