
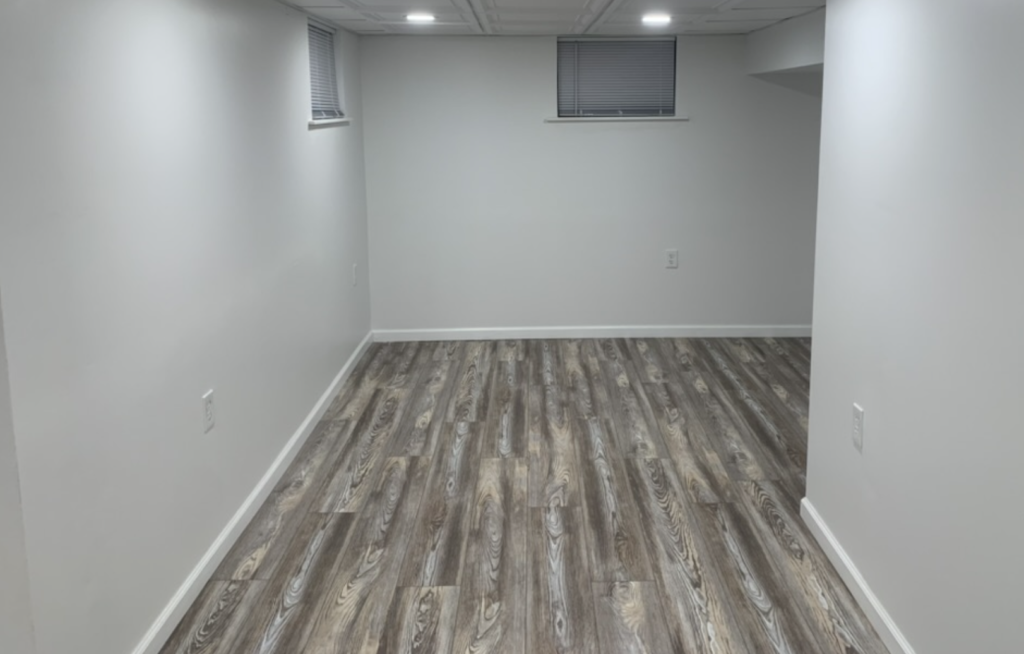
Luxury Vinyl Plank (LVP) is a great flooring option since it is durable, waterproof, and easy to install. Additionally, LVP flooring comes in a variety of colors and styles that make it easy to coordinate with existing room colors and furniture.
To install Luxury Vinyl Plank (LVP) flooring, start by installing 1/4″ spacers at the base of the walls. Next, install the first piece of LVP in the back left corner of the room and position it in place so that it contacts the 1/4″ spacer. Install the next piece of LVP so that the “tongue” of the second piece interlocks with the “groove” of the first piece. Cut the Luxury Vinyl Planks to size as needed by scoring it with a utility knife and snapping along the cut line. Intricate cuts can be made using a jig saw. Continue to install LVP row after row until you get to the final row. Use a pull bar as needed to ensure that the last row of LVP is interlocking properly with the previous row.
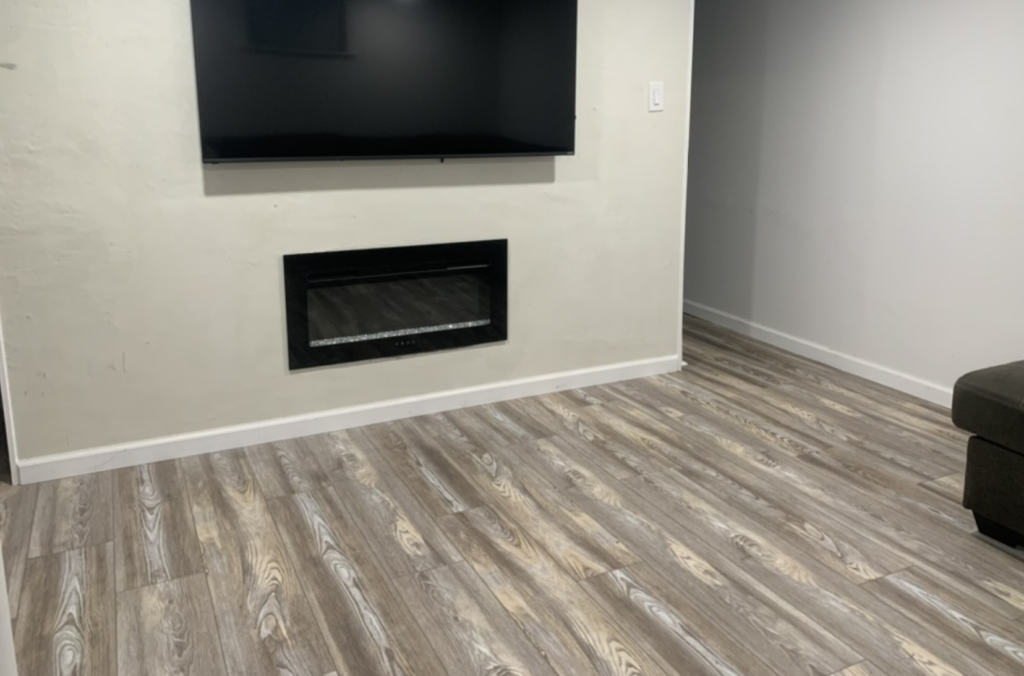
This article will show you how to install LVP flooring, step-by-step. Specifically, this article will focus on how to install LVP flooring over a concrete floor in a basement.
Tools and Materials Needed to Install Luxury Vinyl Plank Flooring

To install Luxury Vinyl Plank Flooring, you will need the following tools and materials:
- LVP installation kit (includes pull bar, rubber mallet, spacers, etc.)
- Luxury Vinyl Plank Flooring
- Utility Knife
- Carpenters Square
- Jigsaw
Luxury Vinyl Plank (LVP) Flooring Basics
Luxury vinyl plank flooring has become increasing popular due to its durability, waterproof properties, and ease of installation. Additionally, there are countless LVP styles and colors that resemble tiles, hardwood, etc.
Luxury Vinyl Plank flooring is a “floating” style of floor, meaning that is is not anchored to the subfloor or walls. Instead, it should “float” on top of the subfloor so that it can expand or contract freely.
Another benefit of LVP flooring is the ease of install. LVP is typically manufactured with a “Tongue” and “Groove” interlocking system that allows for the planks to be secured together. Refer to the image below:

Overall, Luxury Vinyl Plank flooring is an outstanding floor option for any room in your home.
Prepare the Room for Luxury Vinyl Plank Installation
Before you can install Luxury Vinyl Plank flooring, you need to prepare your installation area. Depending on the room you are installing the LVP in, this preparation might look like the following:
- Removing carpet, tack strips, etc. from the room
- Replacing any rotted subfloor
- Removing any staples, nails, or screws that are protruding out of the subfloor
- Ensuring that there are no moisture issues (if you are installing LVP in a basement)
- Ensuring that the substrate is free of any dirt, debris, or impurities.
Basically, you want to ensure that you are working with a “clean slate” when you begin your LVP Installation. Additionally, be sure to follow the manufacturers instructions on suitable substrates for LVP installation.
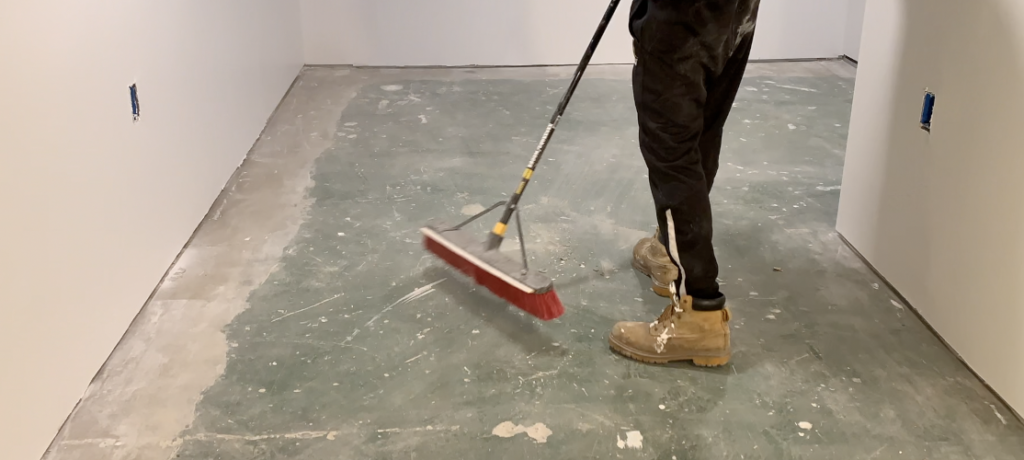
For my specific LVP installation, I simply vacuumed up any debris and debris that was on the basement concrete subfloor and then mopped the floor slab with a disinfecting cleaner.
Correct Uneven Floors
A common mistake that many DIY LVP installers make is that they install LVP on top of an uneven floor. Most manufacturers have a maximum allowable “flatness” variance of 3/16″ over a 10′ radius. If you install LVP flooring over an uneven substrate, your floor may “click” when walked on or it may not interlock properly.
Be sure to correct any uneven floors with a “self-leveling” product before installing your LVP Flooring.
Remove Baseboards (If installing LVP in an existing room)
If you are installing LVP in a room that previously had carpet (or another flooring material) installed, you will want to remove the the baseboards prior to installing LVP. The baseboards can be reinstalled on top of the LVP once it is installed (if desired).
Underlayment
Some LVP comes with an underlayment attached to the bottom of the plank. Other LVP products require the installation of a separate underlayment prior to installation. Check with the manufacturer’s underlayment recommendations prior to installation of the LVP.
Plan out your LVP Layout
Like most flooring projects, a successful LVP installation starts with planning. When planning out your LVP layout, here are a few things that you want to keep in mind:
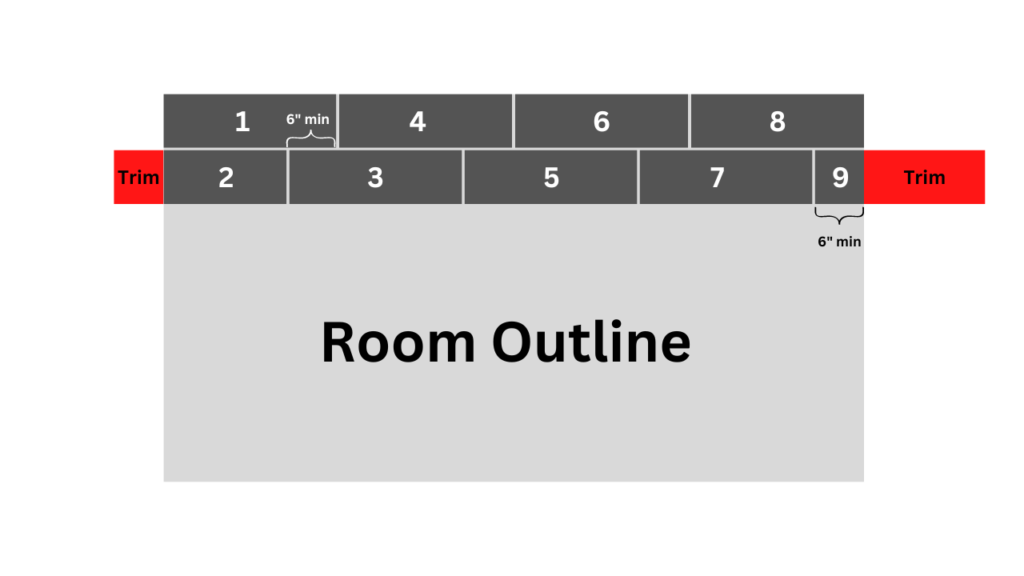
- A minimum “stagger” of 6″ should be maintained between the short joints of each LVP Plank (Refer to the Figure Below)
- Avoid small slivers of LVP along the walls. If you determine that you will have a small piece left at a wall, cut down the plank on the opposite wall so that the gap will be split.
- Try to position your flooring to minimize the amounts of cuts needed around obstructions.
Sketching out your room with graph paper or generating a 3D image of the room using a free software like SketchUp may help you considerably when laying out your LVP.
After spending some time planning out your LVP layout, you can move on to the next step.
Allow LVP Flooring to Acclimate to the Installation Area for 48 Hours
Although “acclimation” is typically not required for residential installations, it is good practice to store the LVP in the installation area for approximately 48 hours before installation. This will allow the material to acclimate to the temperature and conditions of the room.
Additionally, be sure to follow the manufacturer’s instructions regarding the optimal temperature range for LVP installation. Typically, you will want to install LVP between a temperature range of 50-100 degrees Fahrenheit.
Position 1/4″ Spacers around the Room
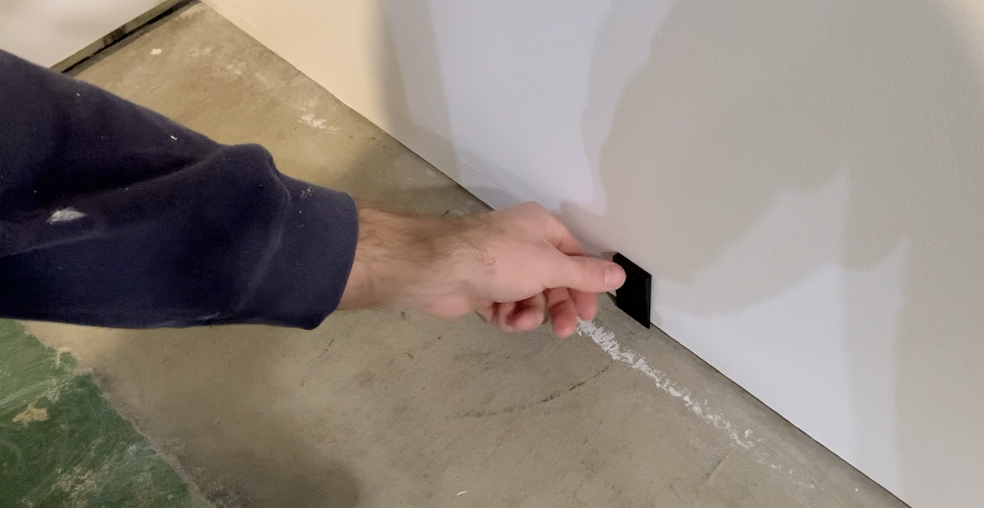
Most LVP manufacturers require a 1/4″ expansion gap between the LVP flooring and the walls. Since LVP is a “floating floor”, this expansion gap will allow to the floor to freely expand or contract as the summer/winter temperatures fluctuate.
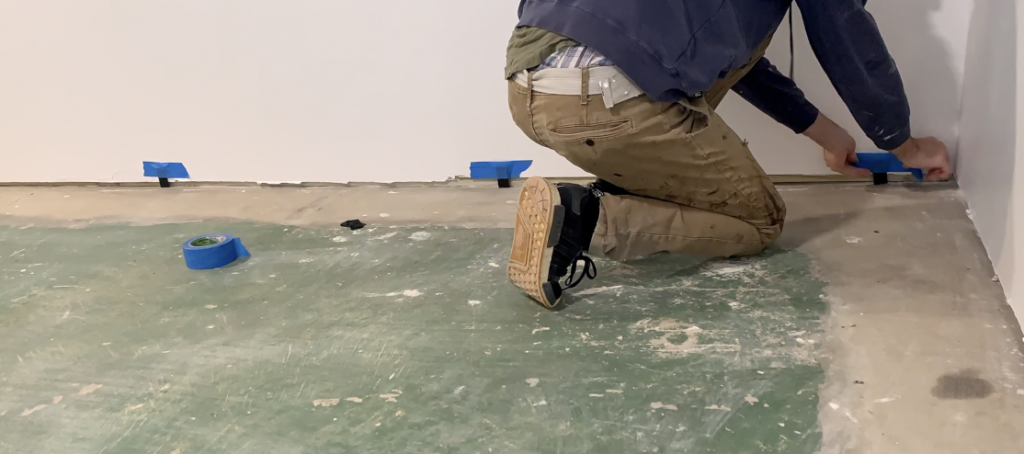
To maintain 1/4″ expansion gap at the walls, it is recommended that you tape a 1/4″ shim to the wall every few feet.
You can purchase a “LVP Installation Kit” off Amazon that includes the 1/4″ spacers as well as the other tools (rubber mallet, pull bar, etc.) that you will need for subsequent steps.
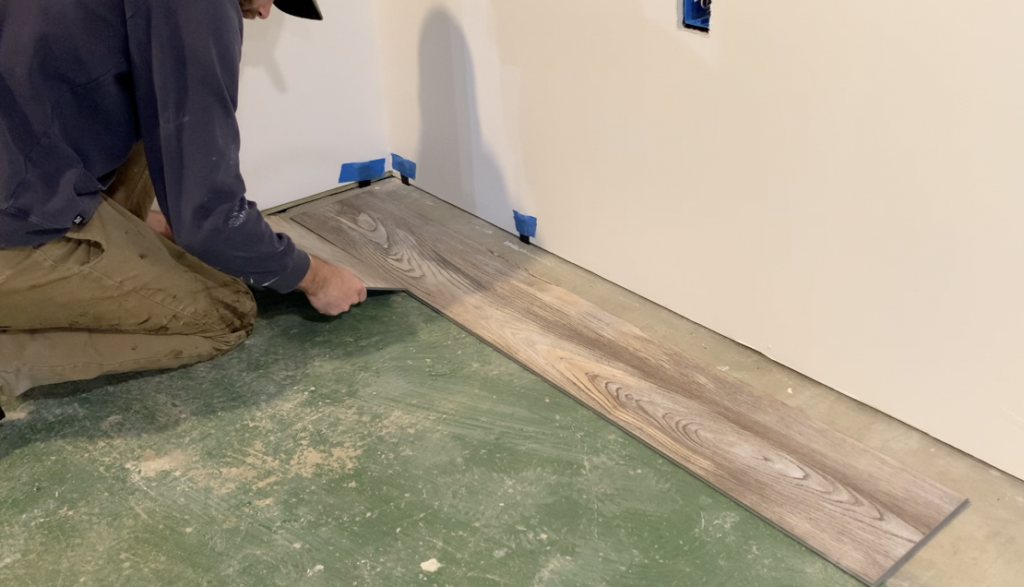
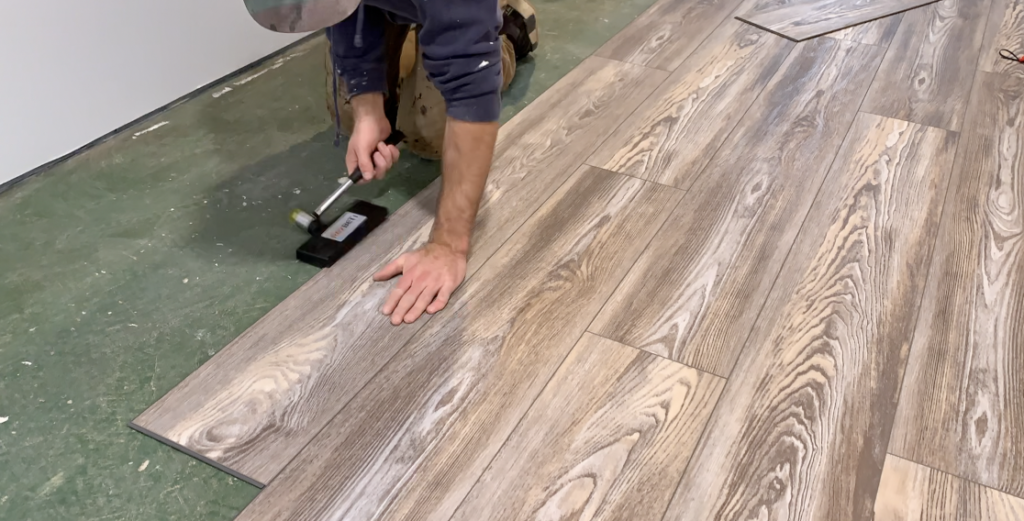
Install the First Row of LVP

Installing the first Row of LVP correctly is imperative for the overall success of your LVP project – since the first row will set the precedent for the rest of the planks.
For tongue and and groove LVP, install the first plank against the spacer at the starting wall. The starting wall should be in the “back left” corner of the room. In other words, the LVP installation will move from left to right beginning in the left corner with the “tongue side” of the long edge facing the wall. Then install the first piece of the second row – refer to the image below:
Follow the staggering guide below for a visual representation of the 6″ stagger that should be maintained between the short joints.
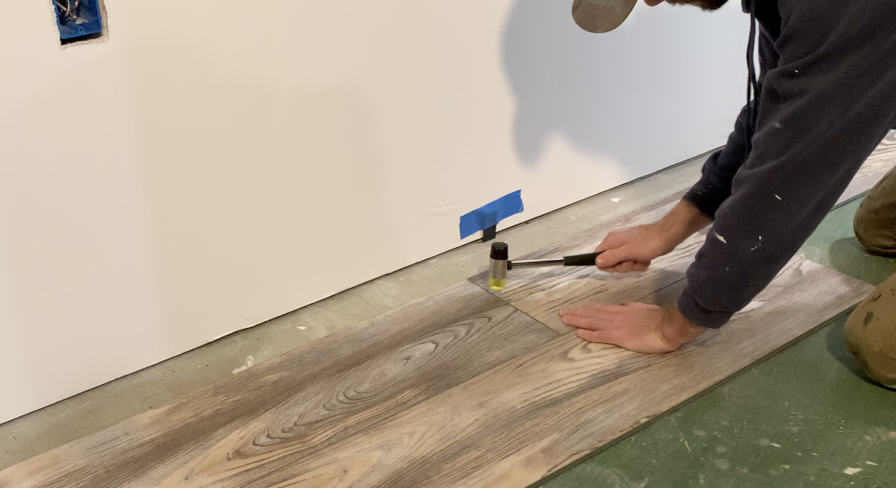
Insert the tongue of the second board into the groove of the first board along the long side of each piece of LVP.
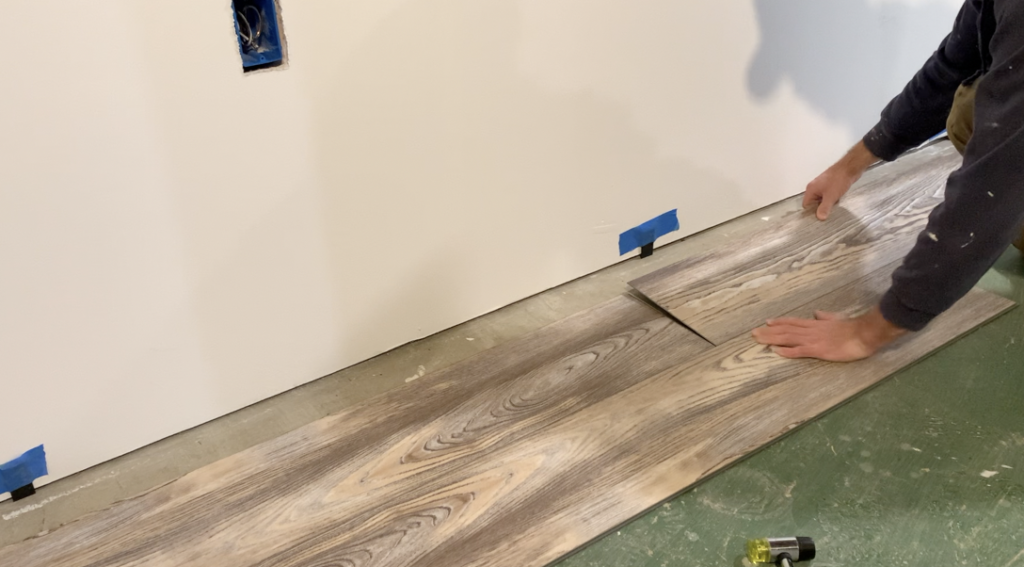
After interlocking the long side of the the LVP planks, slide the piece of LVP so that the short joint is positioned correctly. Then, use a rubber mallet to force the tongue into the groove of the adjacent board – resulting in a a proper interlock.
Establish proper LVP Staggering
As noted during the “Plan out your LVP Layout” section, you will want to ensure that a 6″ (minimum) end joint stagger is maintained between rows. Refer to the figures above.
Typically, you will be able to cut one LVP plank at one side of the room and use the leftover part to start the next row.
Additionally, keep in mind that most LVP planks only have a few different “patterns”. For the best results, do not install the same pattern of board next to each other.
Cut and Trim Luxury Vinyl Planks to Size (as needed)
When you get to the end of a row, you will likely need to trim the LVP to size so that it fits properly. To trim LVP you have the a few options:
- Score the face of the LVP using a utility knife and a Carpenter’s square as a guide and snap the LVP along the scored line. This is typically, the fastest and cleanest way to cut LVP.
- Use a circular saw to cut the LVP. This is typically the best cutting method when you are cutting LVP length-wise.
- A miter saw can be used to cut LVP, but this creates more waste and cleanup.
- A jigsaw is the best method for making intricate cuts in LVP (e.g. around doors, etc.)
Below are few images showing the various methods for cutting LVP.
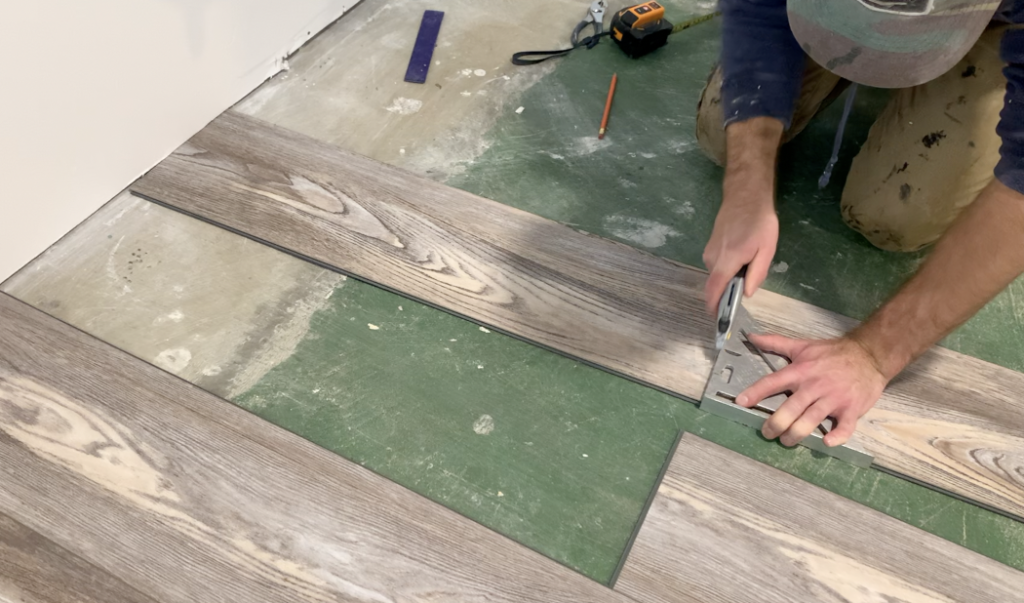
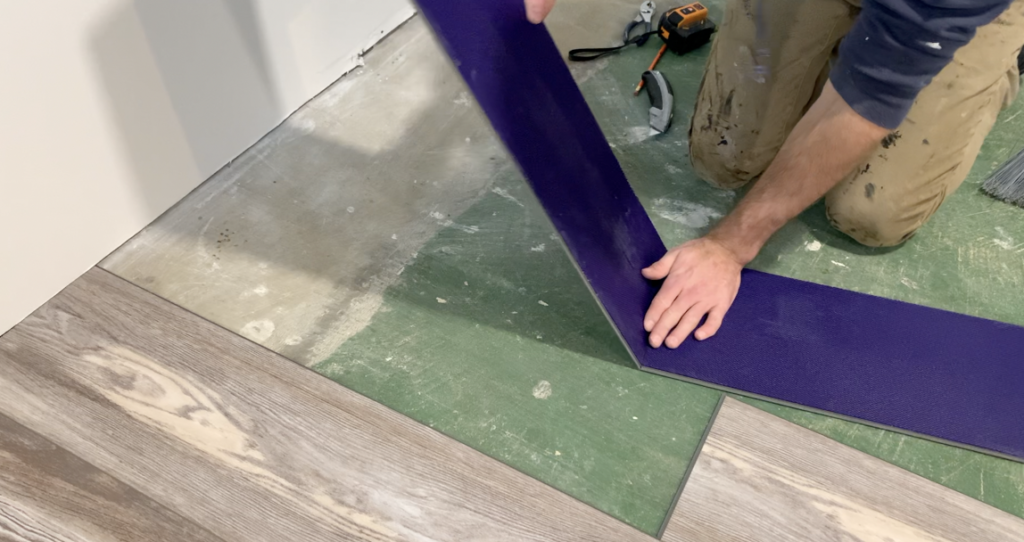
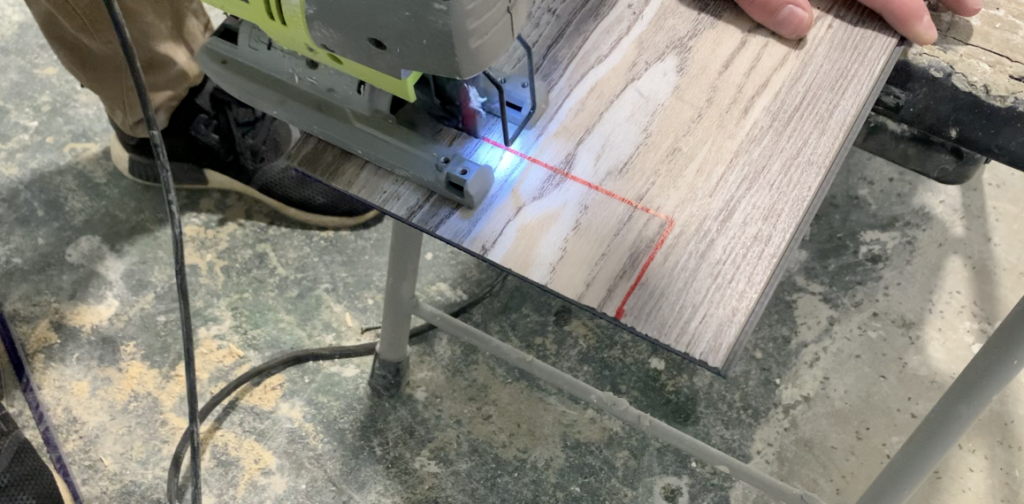
All of the methods above are suitable ways to cut LVP. The type of cutting method you use will depend on the type of cut you need to make.
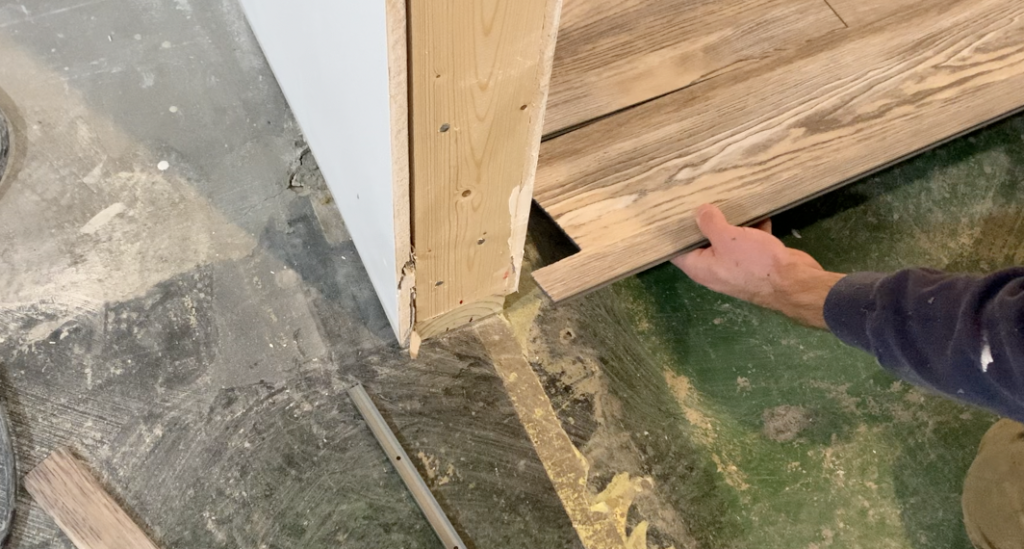
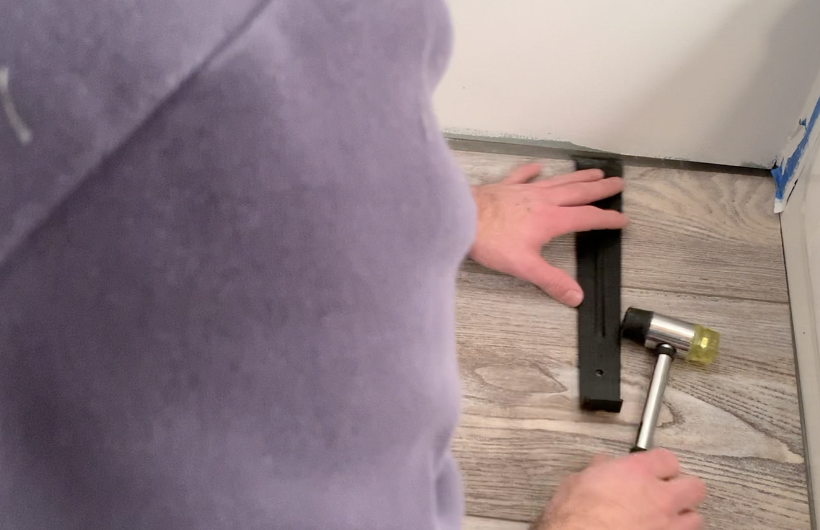
Continue LVP Installation Throughout the Room
Continue to install LVP one row after the other until the project is complete. Always tap the long joint of the LVP tight using a tapping block BEFORE you tap the short joint down with a rubber mallet. Ensure that you are maintaining the proper stagger (minimum of 6″) for each row and ensure that a 1/4″ expansion gap is maintained at all walls.
When installing the final row of LVP, you may need to “rip” the plank down length-wise. To do this, I recommend the use of a circular saw. After positioning the final row in place, use a pull bar to pull the last row into the previous row to ensure a proper interlocked connection.
Install LVP Transitions (if needed)
If you are only installing LVP in one room, the use of LVP “transitions” is likely not needed. However, if you are transitioning from one room to another, you will likely need to install a transition strip.
Most LVP manufacturers make various transition pieces for nearly any LVP flooring transition. Examples would be LVP to carpet transitions, LVP to LVP Transitions, LVP to tile Transitions, etc.
To install a Transition Piece, start by measuring the transition length and cutting the “track” and “transition moulding” to the correct size. Typically, a miter saw is the best way to make these cuts.

Next, position the “track” piece in place and anchor it to the subfloor using screws and construction adhesive.
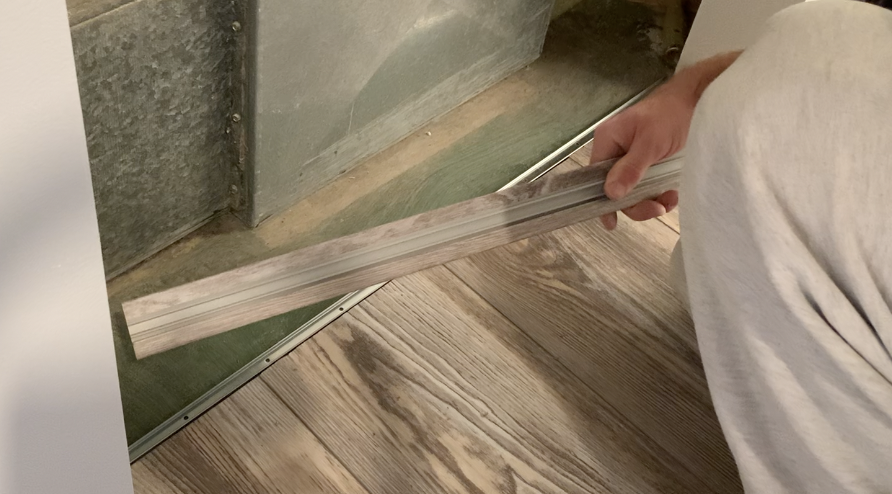
Next, press the “transition molding” into the track until it contacts the floor on both sides of the transition. The molding should should fit snug within the track.
Install (or Reinstall) Baseboards
At this stage, the Luxury Vinyl Plank (LVP) installation is nearly complete. All that is left to do is install baseboard around the edge of the room to hide the 1/4″ expansions gap.
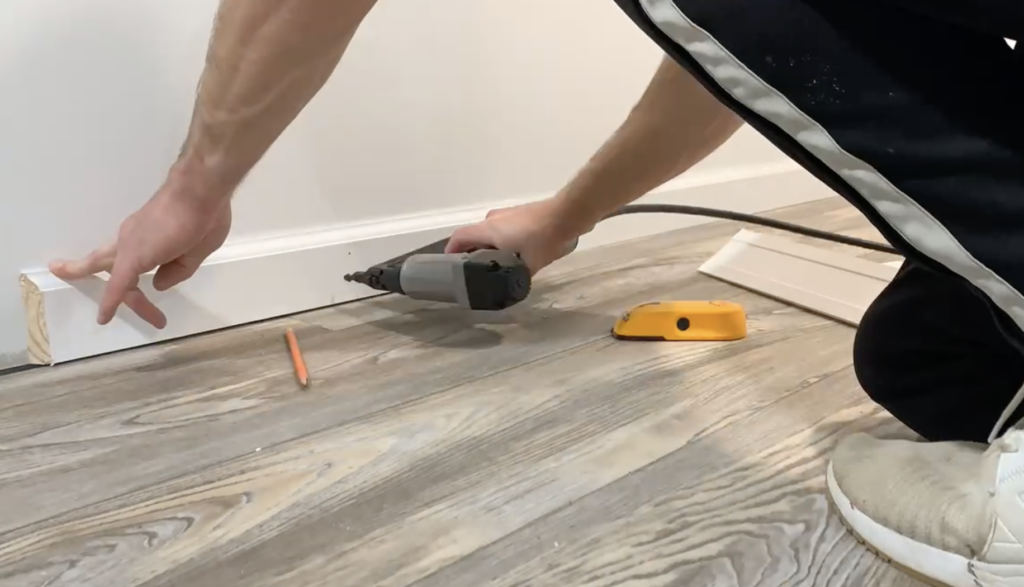
Ensure that you do not trap or pin down the LVP flooring with brad nails during the baseboard installation process.
Congratulations! Your LVP flooring installation is now complete!
Thanks so much for checking out ATImprovements! If you learned something from this project, you might also like these other DIY Projects:
- How to Build a Fence: How to Build a Fence (DIY Guide) – AT Improvements
- How to Build a Fence Gate: How to Build a Fence Gate (7 Steps with Pictures & Video) – AT Improvements
- How to Install a DIY deck Wire Railing: DIY Cable Railing – How to Install Cable Railing Step-by-Step – (atimprovements.com)
- How to Build a Concrete Paver Patio: DIY PAVER PATIO – Easy DIY Paver Patio Ideas – (atimprovements.com)
Thanks!
DISCLAIMER: This is a reference guide only. Consult local code requirements. Links included in this article might be affiliate links. If you purchase a product or service with the links that I provide, I may receive a small commission. There is no additional charge to you! Thank you for supporting ATimprovements so I can continue to provide you with free content each week!