
Learning how to frame a basement wall is typically one of the first steps in finishing a basement. Framing walls in a basement is an easy DIY project for the average homeowner. However, there are a few extra steps required when framing a basement wall as opposed to other walls in your home.
To frame a basement wall, start be laying out your 2″x4″ top plate, bottom plate, and studs on the basement floor slab. Ensure that the bottom plate is made of pressure treated lumber. Secure the bottom plate, top plate, and studs together using 3″ nails. Space wall studs 16″ on center. Once the basement wall has been constructed, lift it into place and confirm that it is level and plumb. Finally, attach the bottom plate to the basement slab using Masonry screws and attach the top plate to the floor joists above. Shim as necessary.
This article will show you how to frame a basement wall, step-by-step. By using this guide, you will be well on your way to finishing your basement. Additionally, if you are more of a visual learner, you can watch my “How to Frame Basement Walls” YouTube Video linked at the end of this article.
Tools and Materials Needed to Frame a Basement Wall

To successfully frame a basement wall, you will need the following tools and materials:
- Safety Equipment (Glasses, gloves, boots, ear protection, etc.)
- Tape Measure
- 6’ Level (for use as a straight edge)
- Utility Knife
- Air Compressor
- Framing Nailer
- Roofing Nailer
- Masonry Drill
With all necessary tools and materials on hand, let’s discuss some framing basics.
The Anatomy of a Wall
Walls are made up of a horizontal bottom plate (rests on the floor), a horizontal top plate (the top of your wall), and vertical studs placed in between. See below.
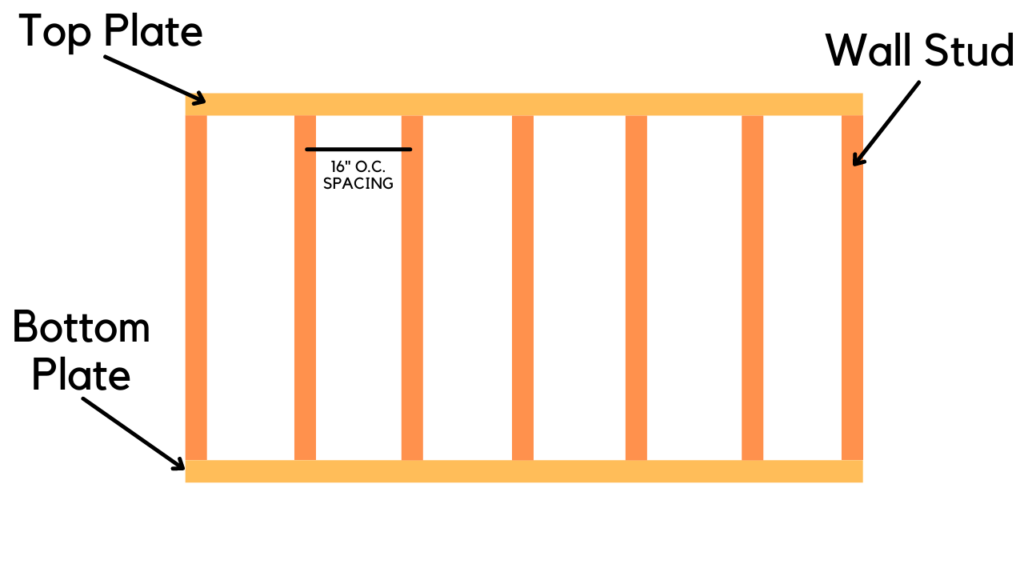
Most walls are famed with 2″x4″ kiln-dried lumber, but walls can also be framed with 2″x6″ lumber, etc.
Wall Stud Spacing
Walls studs are spaced based on the “on center” convention. Let me explain.
The vast majority of walls are framed 16″ on center (O.C.), meaning that the center of each wall stud is spaced 16″ from the center of the adjacent stud. Some walls are framed 24″ O.C., but 16″ O.C is by far the most common.
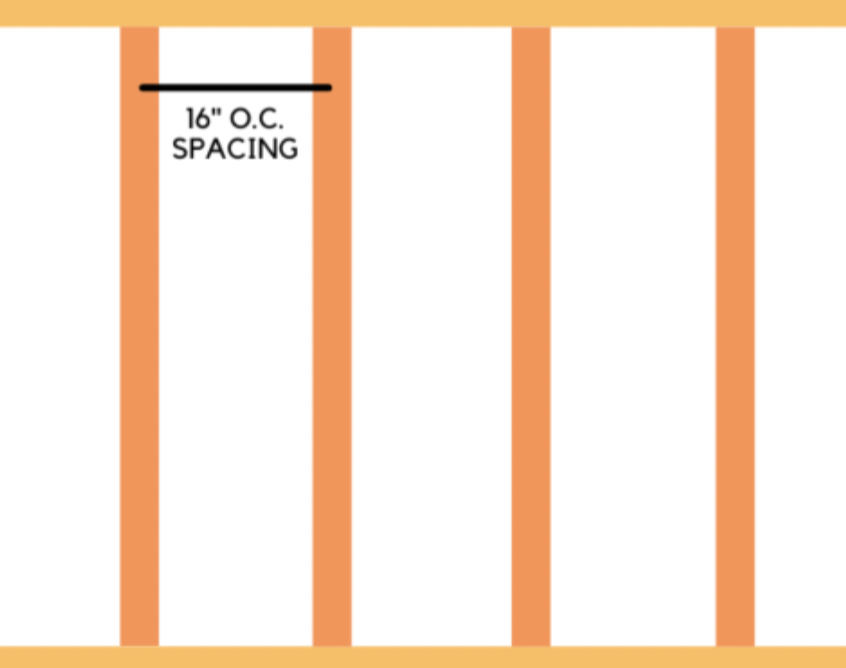
Maintaining 16″ O.C. spacing is critical when framing your walls since many other construction materials are designed to be installed on (or in between) walls framed 16″ O.C. For example, most insulation is sized to fit between studs spaced 16″ O.C.
Typically, it is easiest to mark the 16″ O.C. spacing on both the top plate and bottom plate at the same time. Then, you can simply position the studs on the top/bottom plate markings.
Board Crowning
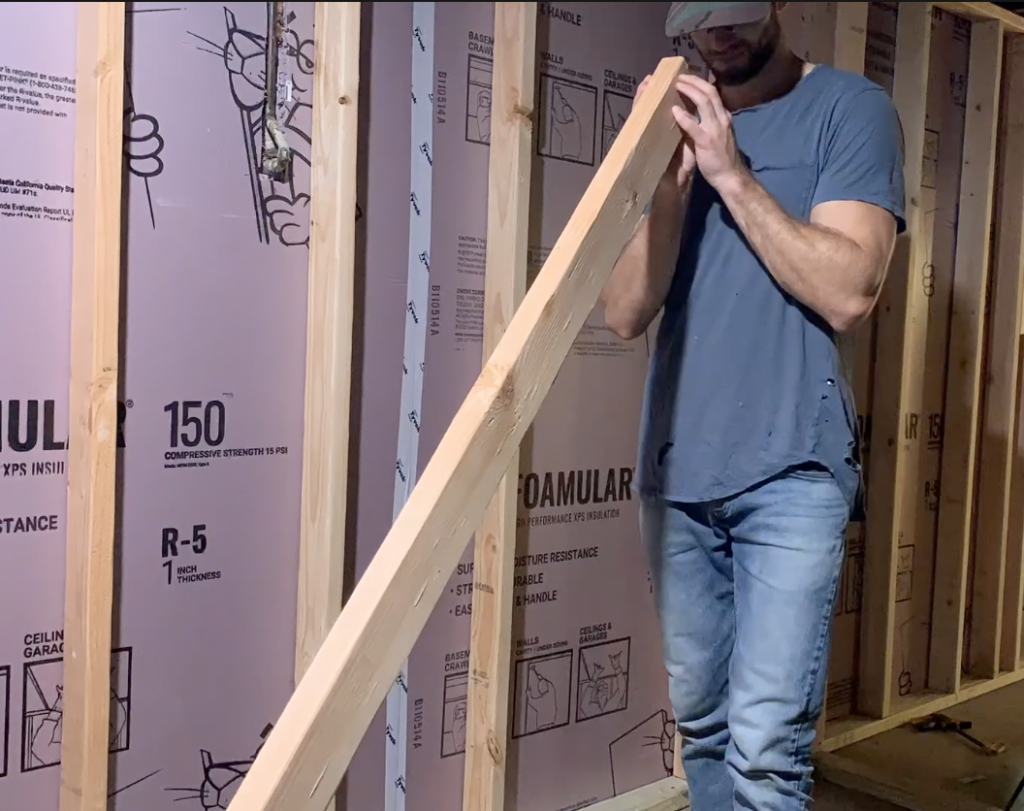
When framing a wall, you want to ensure that the “crown” of each board faces the same direction. The boards “crown” is simply the upward arching curvature you see when looking down its narrowest dimensional edge. To check the crown, sight down the long end of the board. If you see a concave “valley”, than you are looking at the opposite side of the crown. If you see a slight “hump” you have the crown side of the lumber.
Pressure Treated VS Untreated Kiln-Dried Lumber

When framing a home, untreated kiln-dried lumber is usually the best material choice. When framing in a basement, however, you always want to use pressure treated lumber as your bottom plate. Because basement slabs are prone to seeing moisture, using a pressure treated bottom plate is best practice for maximizing the durability of your basement walls.
How to Frame a Basement Wall
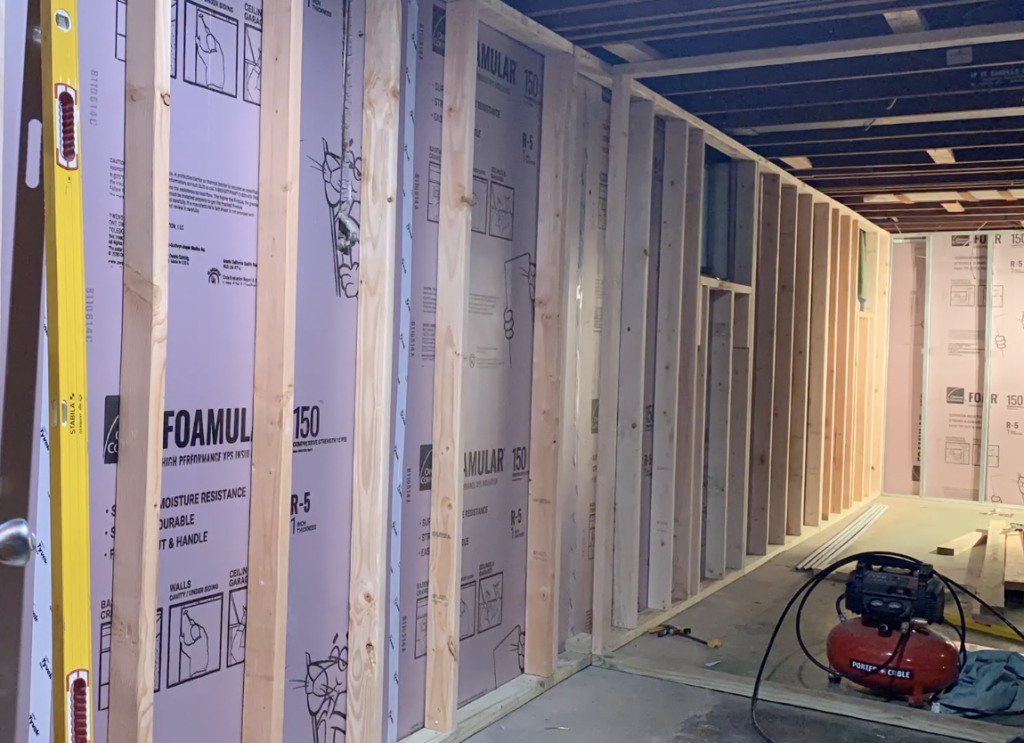
Before framing your basement walls, you will want to consider insulating your foundation (if this is not done so already). For basements, I recommend Rigid Foam Board Insulation. To learn how to install rigid foam insulation in your basement, check out my guide linked here. Once your insulation is in place, you can begin framing your basement wall by following these steps.
1. Layout the wall

To frame a basement wall, start by laying out the top plate, bottom plate (pressure treated), and the studs on the basement floor. Be sure that the crown of each board is facing the same direction. Next, Position a wall stud at each end of the bottom and top plate then mark the location of the studs in between. Again, position the studs 16″ O.C. – meaning that the spacing between the center of any two studs should not exceed 16″. After positioning the bottom plate, top plate, and all studs in place, you can begin nailing the boards together.
2. Nail the Top Plate, Bottom Plate, and Studs together
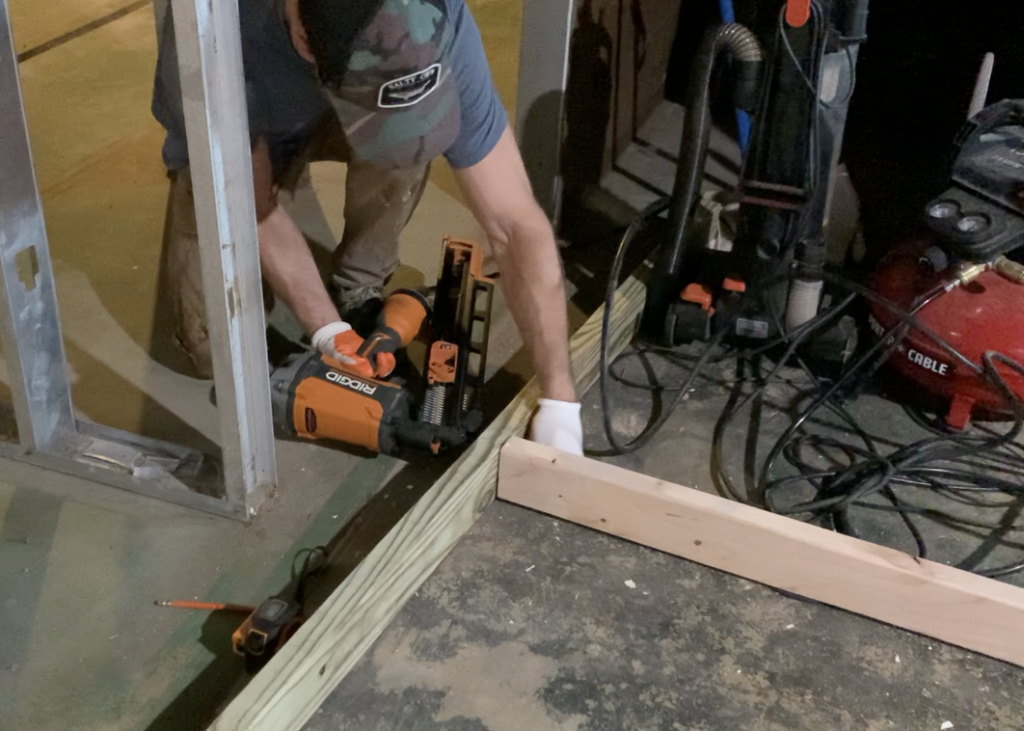
After laying out your wall horizontally on the floor, begin fastening the the top plate, bottom plate, and studs together using a framing nailer. I recommend the Rigid pneumatic framing nailer, but any framing nailer will do.
Ensure that the studs are flush with the top and bottom plates and then attach them together with nails.
You also have the option to install you middle studs after the wall is in place, but this is more time consuming.

3. Lift the wall into place.
Once the bottom plate, top plate, and studs have all been fastened together with nails, lift the wall into place. If you are working with 8′ or 10′ walls, you can likely lift the walls into place on your own. If you are framing your basement walls with 16′ lumber, you may want to have someone help you lift the wall into place.
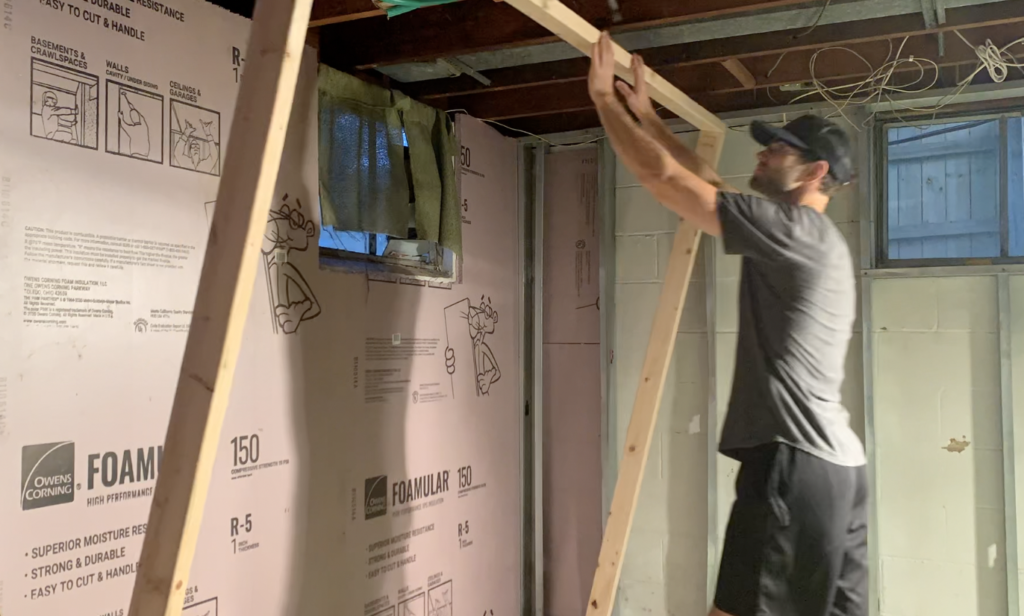
After lifting the wall in place, preliminarily confirm that it is level and plumb by using a 6′ level.
4. Attach the bottom plate to the concrete basement slab
After lifting the wall into place, you want to ensure that the wall is completely straight and positioned properly on the floor slab. To do this, I recommend that you run a chalk line along the basement floor slab to ensure that you have a uniform line across the entire basement.
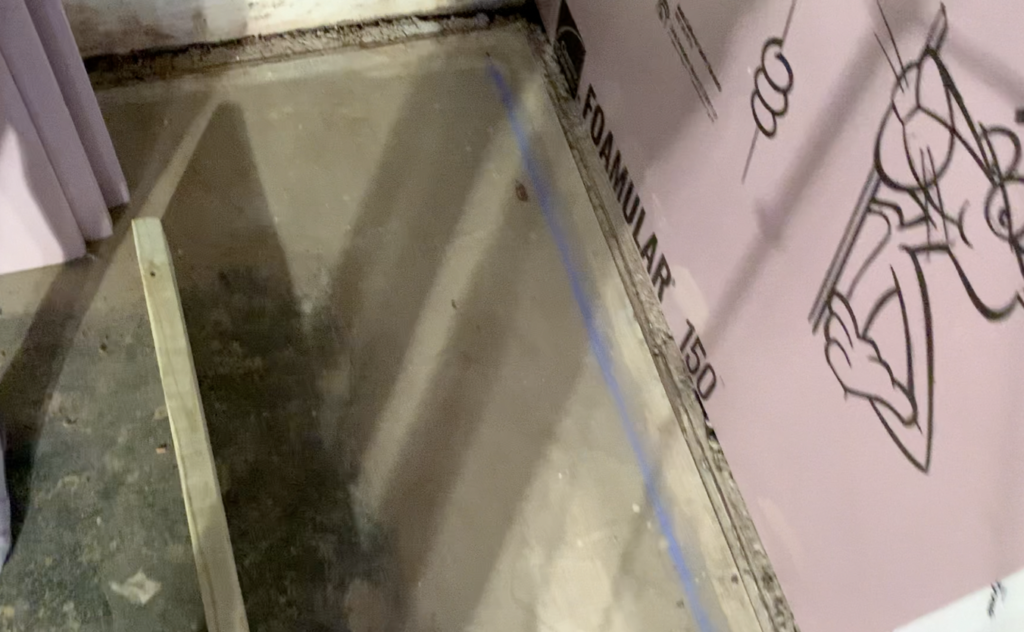
After snapping your chalk line, position the bottom plate so that it is directly in line with the chalk line. Once positioned properly, you can attach the bottom plate to the slab.
To attach the bottom plate to the concrete slab, pre-drill into the concrete slab with a carbide tipped masonry bit.
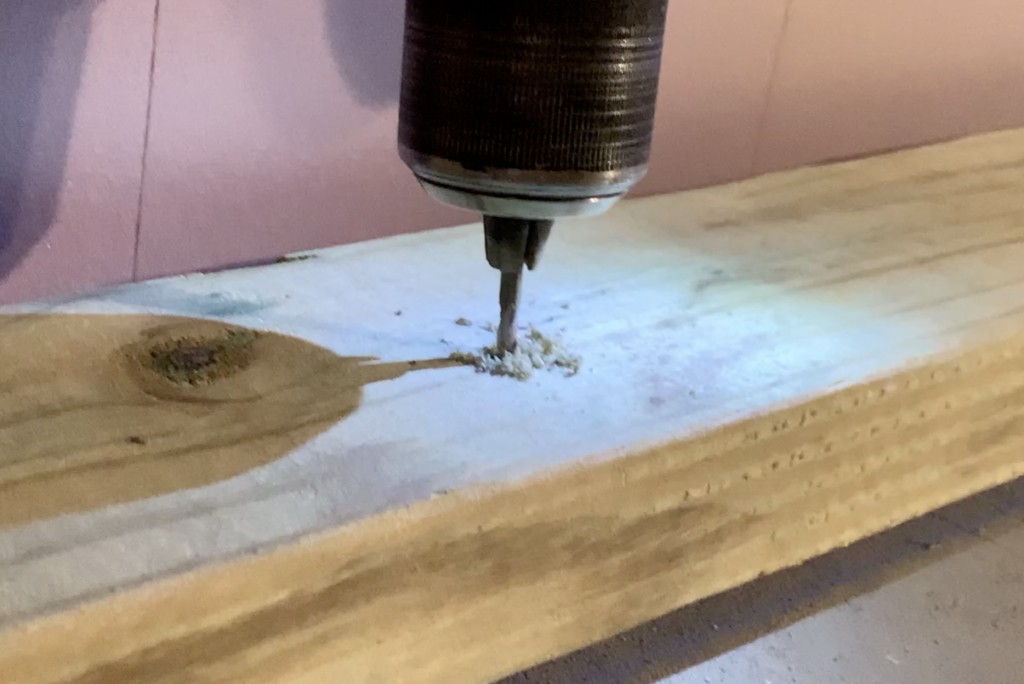
After pre-drilling into the slab to the appropriate depth, attach the bottom plate to the slab using a masonry screw. I recommend Tapcon Screws. Ensure that you use a Tapcon screw that is the appropriate size (based on your pre-drilled holes) and length (to ensure that the screw extends sufficiently into the slab).
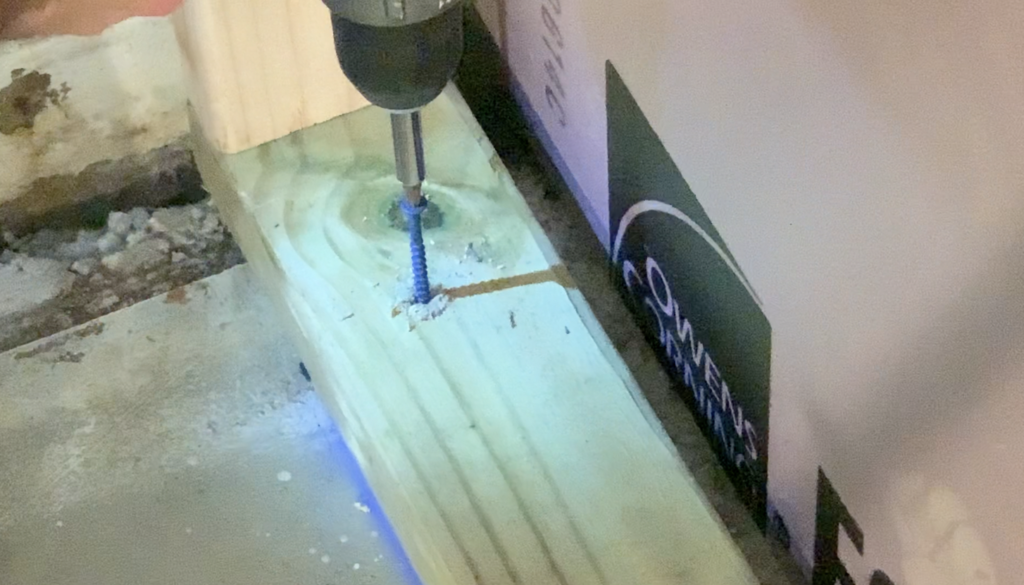
Repeat this process as necessary to fully secure the bottom plate to the concrete slab.
You also have the option to attach the bottom plate to the slab using a Ramset Powder actuated nailer (which does nor require pre-drilling) or by simply using construction adhesive (not recommended).
5. Check that the wall is level and plumb
After lifting the wall into place, ensure that it is perfectly level and plumb using a 6′ level.
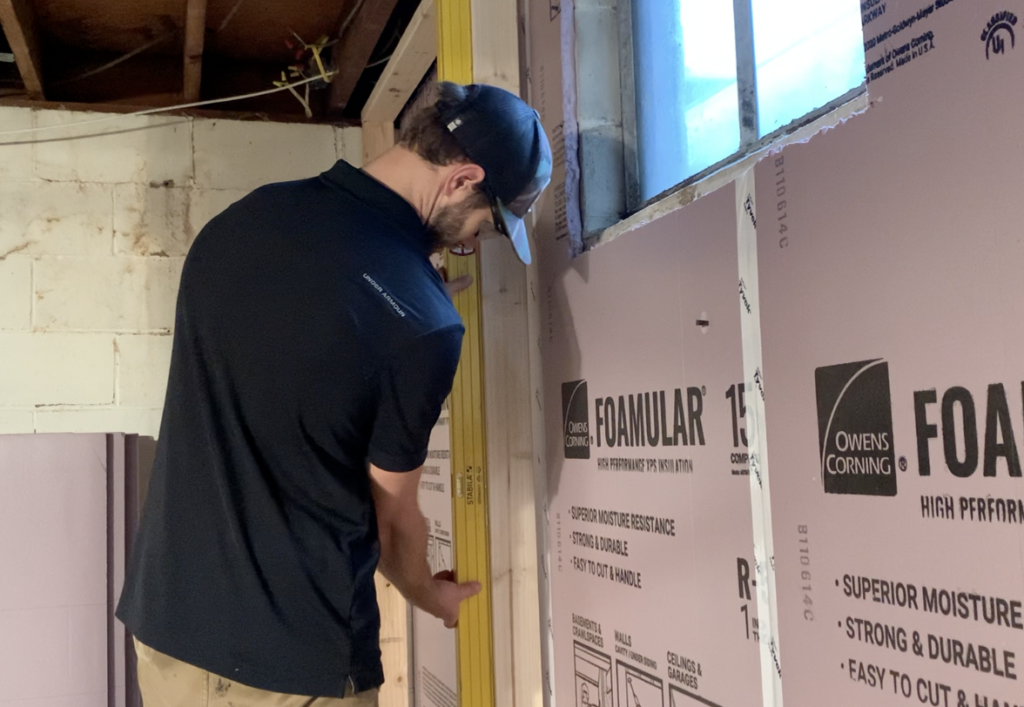
Make any adjustments as needed to make sure the wall is perfectly plumb.
PRO TIP – Check that the wall is level in multiple locations.
6. Attach the top plate of the wall to the floor Joists above
Once you have confirmed that your basement wall is perfectly level, attach the top plate to the floor joists above using your framing nailer. You may need to use shims to fill any gap between the top plate and the floor joists above.

Next Steps
Repeat the steps above for all of the remaining walls in your basement. It is often advisable to attach adjacent walls to each other using nails in order to prevent the walls from differential shifting in the future – potentially resulting in drywall cracks.
Once you have Finished Framing your basement walls in accordance with the steps above, you are ready to proceed with the next steps in the basement finishing process. Typically, the next steps will be:
- Installing fiberglass insulation between studs (if a greater R value is desired)
- Installing Gypsum Bard (Drywall)
- Painting Walls
If you are looking for additional information on how to complete the steps above (or how to finish a basement from start to finish), check out my DIY Youtube Channel Linked Here.
Additionally, Check out my “How to Frame Basement Walls” YouTube Video below:
If you still need to install rigid foam insulation in your basement, check out my DIY Rigid Foam Board Insulation Guide linked here.
Thanks so much for checking out ATImprovements! If you learned something from this project, you might also like these other DIY Projects:
- How to Build a Fence: How to Build a Fence (DIY Guide) – AT Improvements
- How to Build a Fence Gate: How to Build a Fence Gate (7 Steps with Pictures & Video) – AT Improvements
- How to Install a DIY deck Wire Railing: DIY Cable Railing – How to Install Cable Railing Step-by-Step – (atimprovements.com)
- How to Build a Concrete Paver Patio: DIY PAVER PATIO – Easy DIY Paver Patio Ideas – (atimprovements.com)
Thanks!
DISCLAIMER: This is a reference guide only. Links included in this article might be affiliate links. If you purchase a product or service with the links that I provide, I may receive a small commission. There is no additional charge to you! Thank you for supporting ATimprovements so I can continue to provide you with free content each week!