
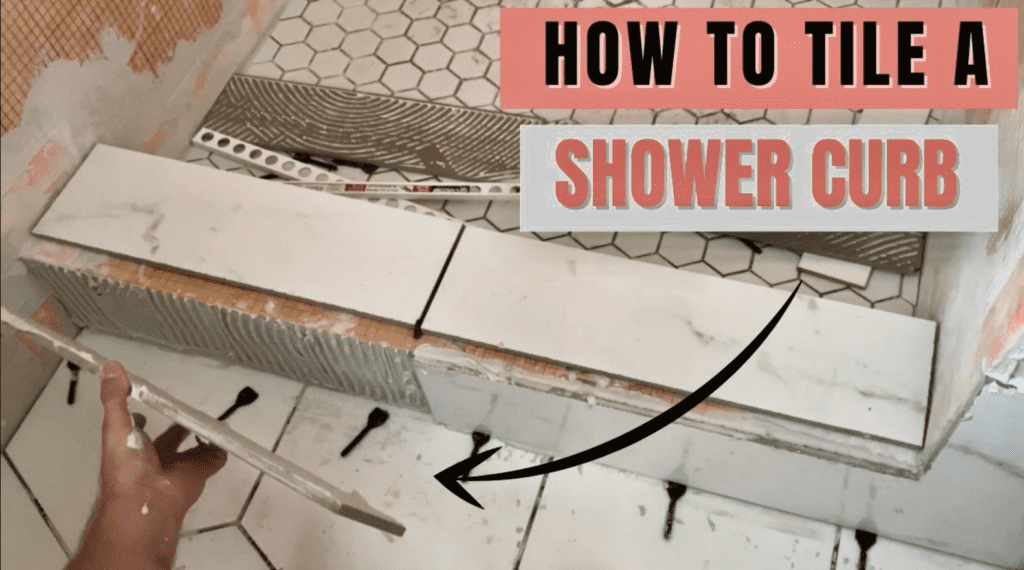
Tiling a shower curb is a relatively easy DIY project that can be accomplished by the average homeowner. However, there are a few tips and tricks that should be followed carefully during a shower curb tile installation.
To Tile a Shower Curb, start by applying thinset mortar to the shower curb using a trowel. Apply tile to the shower curb and firmly embed the tile into the shower curb by applying firm, even pressure. Ensure that that the tile on the top of the shower curb slopes back into the shower pan. Allow thinset mortar to dry for approximately 24 hours and apply grout to the shower curb using a grout float. Lastly, fill all expansion joints with a high quality silicone.
This article will outline every step of the Shower Curb Tile Installation process, step by step. If you are more of a visual learner, you can check out my “How to Tile a Shower Curb” Youtube video linked at the end of this article.
1. Prepare your Shower Curb for Tiling
Before you can begin tiling your shower curb, you need to ensure that your shower curb substrate is properly prepared. For this shower curb tile installation, I utilized a pre-fabricated Schluter Kerdi Shower Curb as shown below:
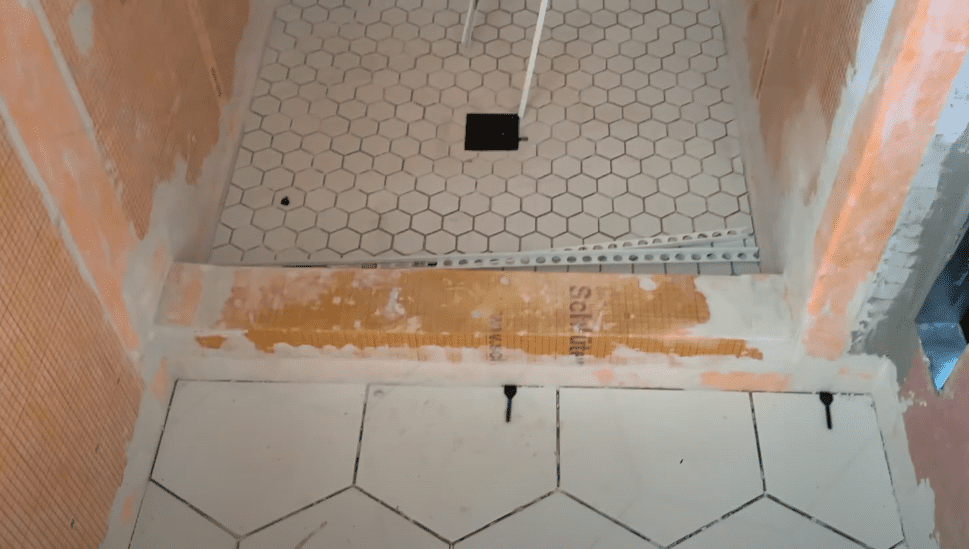
The Schulter Kerdi Shower Curb makes the shower curb installation process very simple since the curb is already waterproof. For more information on how to install the Schluter Kerdi Shower Curb, check out my article linked here.
Additionally, I used the Schluter Kerdi Shower Kit for my entire shower installation. Because of the simplicity of the Schluter Kerdi Shower Kit System, it has become my favorite shower waterproofing system. The ease of installation combined with the DIY-friendly instructions make it a great option for your next shower installation. To learn how to install the Schluter Kerdi Shower Kit, feel free to check out my article linked here or check out my Schluter Kerdi Shower Kit Installation Youtube Video below:
In addition to preparing the shower curb substrate, I recommend that you complete your shower pan tile installation and the main floor tile installation prior to tiling your shower curb. For more information on How to Tile a Shower Pan or How to Install Hexagon Floor Tile, check out my blog articles linked above.
Once your Shower Curb substrate has been fully prepared and your shower pan and main floor have been tiled, you can begin preparing your shower curb for tiling.
2. Dry-Fit Your Shower Curb Tiles
As with most tiling projects, the planning and Dry-Fit stage is typically the most important step for success.
Because there are so many different tile patterns and tile sizes, there is no “best” way to layout tile. However, there are a few things you should keep in mind when establishing your Shower Curb tile layout:
- Try and maximize the amount of full tiles in your layout. This will make the installation process simpler and reduce the amount of tile waste.
- Stagger your grout lines. Having grout lines that are tastefully staggered gives tile installations a more cohesive look.
- Avoid having small “slivers” of tiles on one side of the shower curb and full tiles on the other. When measuring for your tiles (be sure to account for the tile spacers!) determine if you will be left with a small “sliver” of tile. If so, consider cutting the full tile on the other side so that there is a larger tile on the opposite wall.
For my Shower Curb Tile installation, I chose to use 12″x24″ marble look porcelain tile.
Once you have spent some time thinking about your tile layout, it is time to start dry-fitting the tiles in the shower pan.
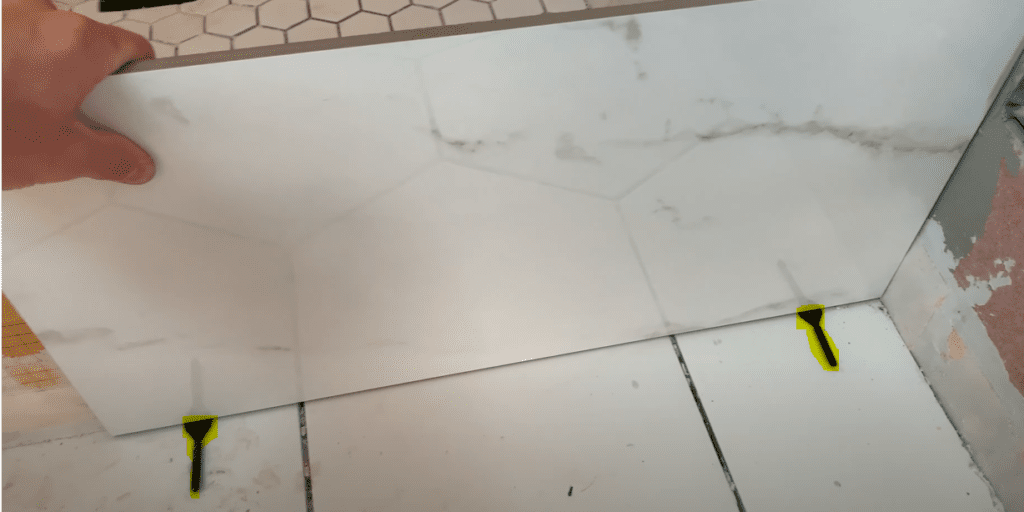
For my Shower Curb Tile dry-fit, I started on the front of the shower curb and set one of my tiles in place. I used spacers between the shower curb tile and the floor tile to ensure that I had a 1/8″ expansion gap as shown below. The expansion gap will be filled with Silicone as the final step in the Shower Curb Tile Installation Process.
After positioning the first shower curb tile in place, use a marker to mark the tile along the top of the shower curb. This will establish your cut line so that your tile will be even with the top of the shower curb.

One you have marked your cut line, cut your tiles using a wet-saw, dry cutter, or an angle grinder. For shower curb tile installations, I recommend a wet-saw.
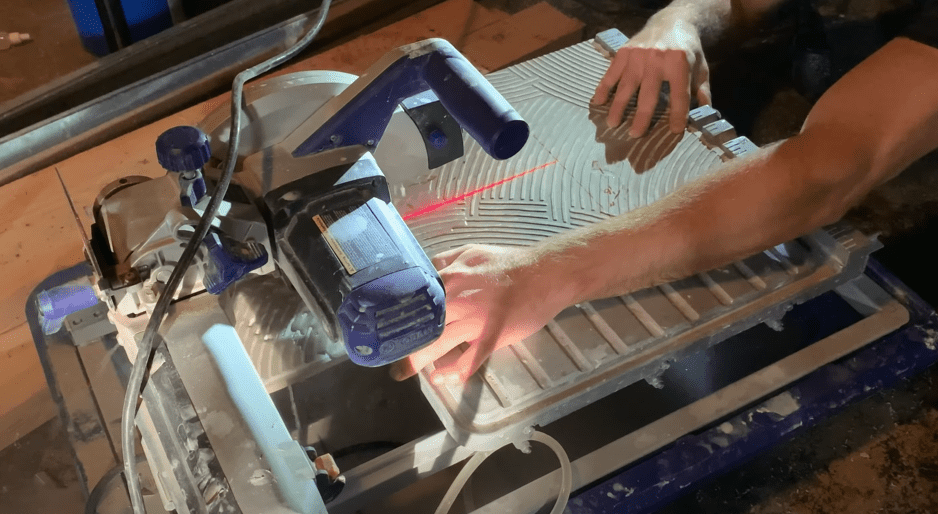
Continue to mark, cut, and dry fit all of the tiles on the front face of your shower curb. Remember to place spacers between your tiles and in the expansion gap maintained between the shower curb tile and the floor tile.
After completing the dry-fit for the front face of the shower curb, repeat this process for the backside of the shower curb. After dry-fitting the tiles on the inside and outside of the shower curb, it is time to dry-fit the tiles that are going to be installed on the top of the shower curb.
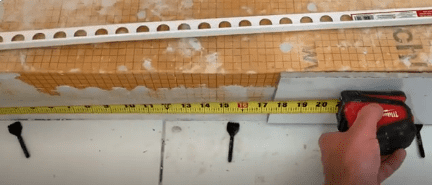
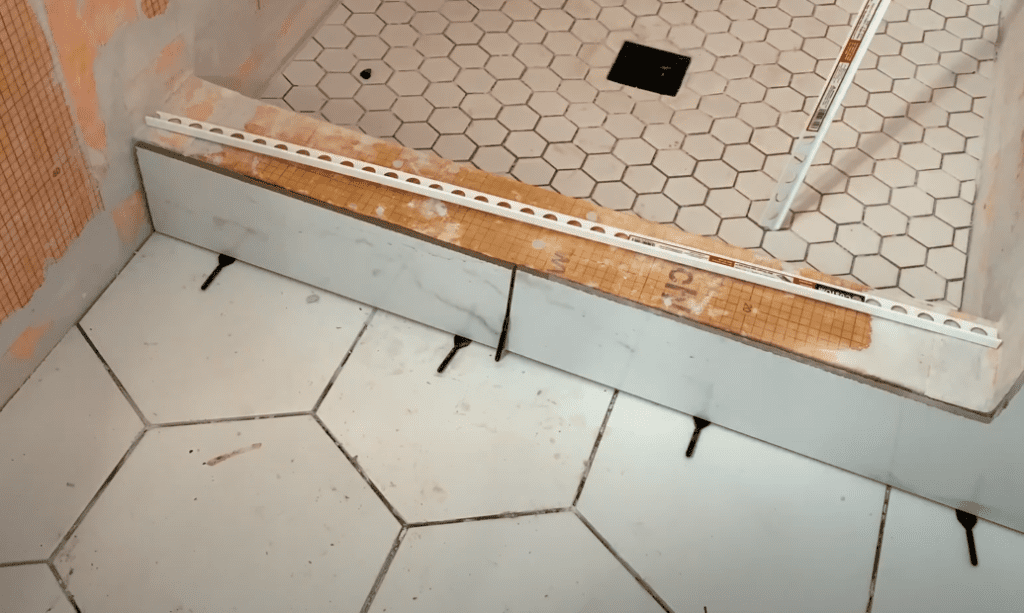
When dry-fitting the shower curb top tile, it is important to consider if you will be installing any kind of tile profile or tile edging. For my shower curb tile installation, I used a piece of white tile profile that extended the entire length of the curb. See below:

In order to help you to measure and cut the tiles for the top of the shower curb, refer to the figure below:
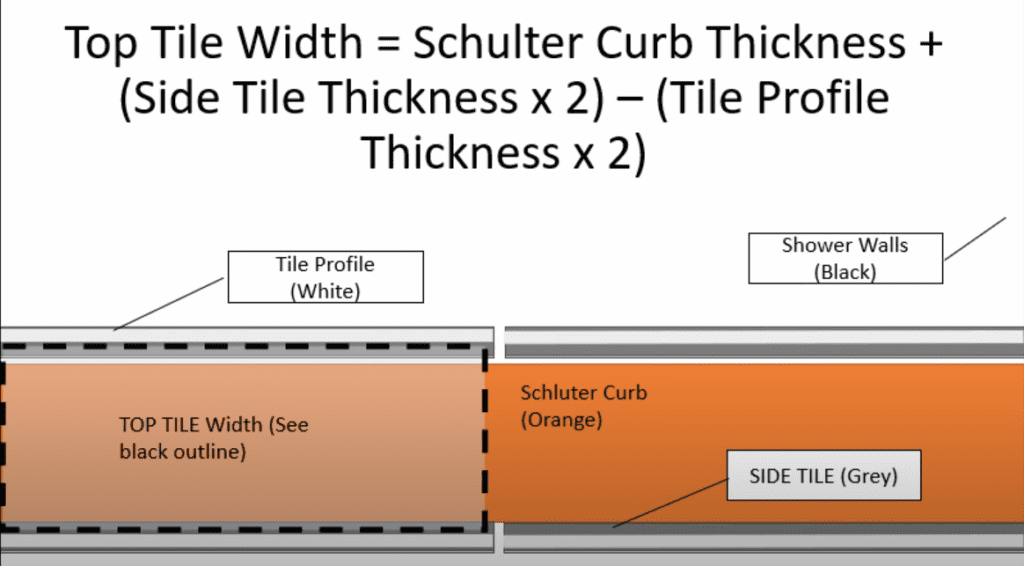
As you can see from the figure above, the width of your top tile is equal to the Shower Curb width, plus the side tile thickness (x2), minus the tile profile thickeness (x2).
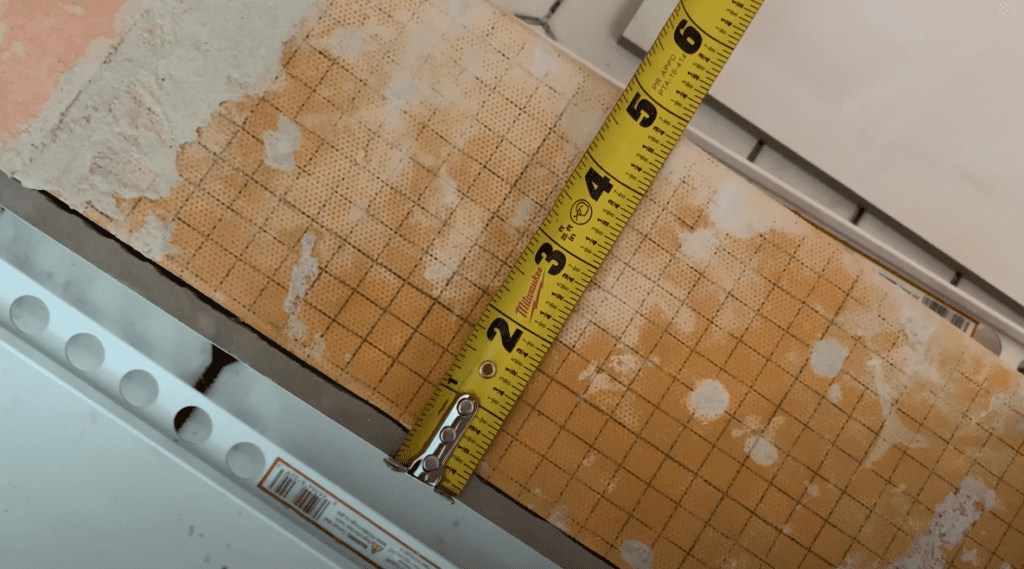
After measuring your shower curb top tile width, cut to size using a wet saw.
In order to cut your tile profiles, I recommend that you use a miter saw equipped with a metal blade.
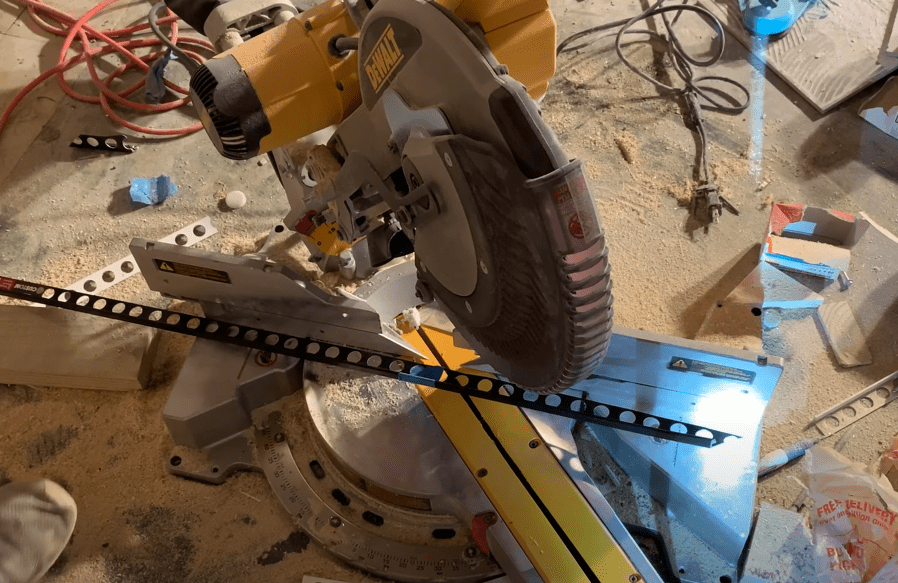
Pro Tip: Be Sure to use eye and ear protection whenever you are using a miter saw or wet saw.
Once you have completed the dry-fit for your shower curb tiles and shower curb profiles, you can begin mixing up thinset mortar and applying the tiles to the shower curb.
3. Mix Up Thinset Mortar for your Shower Curb Tile
At this stage, it is time to select and mix up the thinset mortar that will be used to bond your tile to the shower curb.
If you are using the Schluter Kerdi Shower Curb, it is recommended that you use one of the following Schluter Thinset Mortar types in order to maintain the Schluter Warranty:
You also have the option to use any unmodified thinset mortar, but this will void the Schluter Warranty. After selecting your thinset mortar, mix it up according to the manufacturer’s instructions using a drill and a paddle mixer.
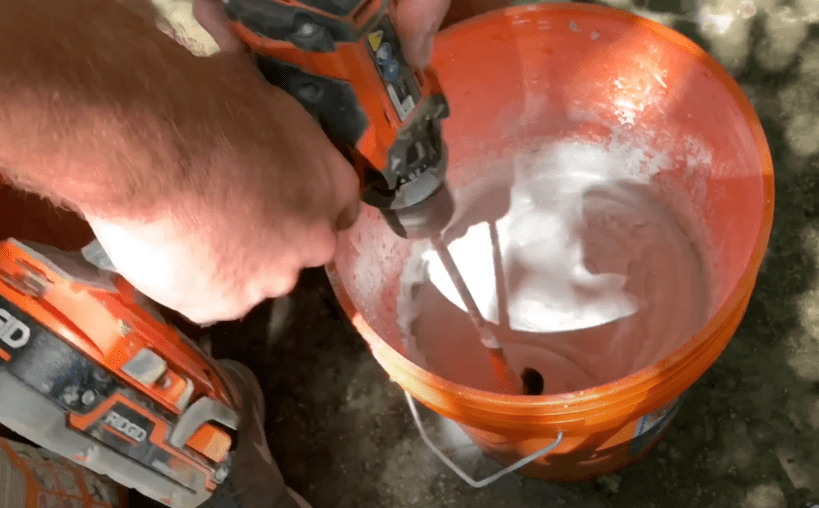
Once the thinset has been mixed up, apply the mortar to the shower Curb using a trowel. The trowel size needed will depend on the type of tile you are using for your shower curb tile installation. However, a 1/4″ x 3/16″ V-notch trowel is typically adequate.
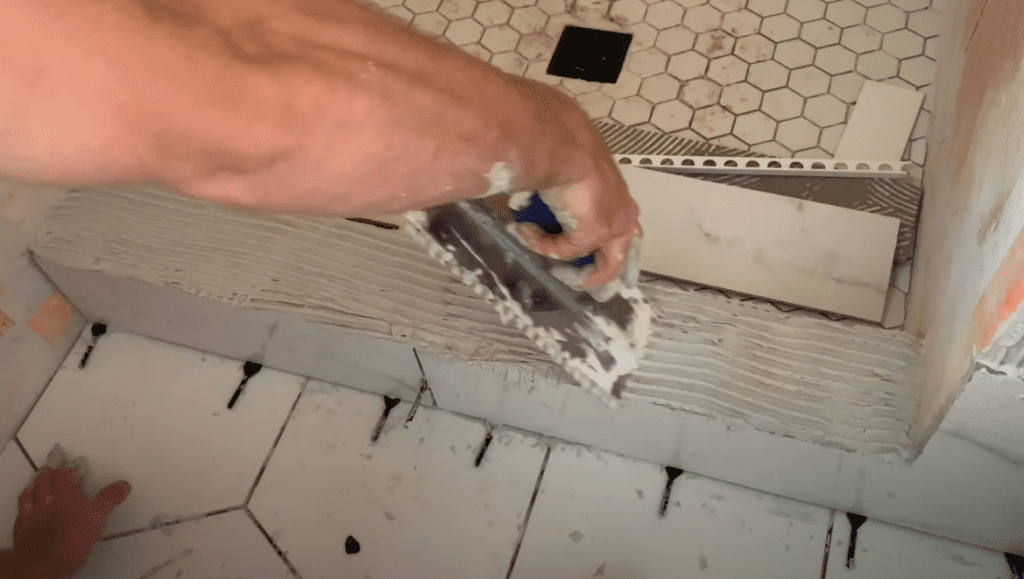
4. Apply Thinset Mortar to the Shower Curb
It is recommended that you begin applying thinset mortar to the front face of the shower curb using the flat side of a trowel to ensure good coverage of the shower curb.
Next, comb notches into the thinset mortar using the notched side of the trowel. Apply thinset mortar to the shower curb using “directional troweling” – meaning that all trowel lines run in the same direction.
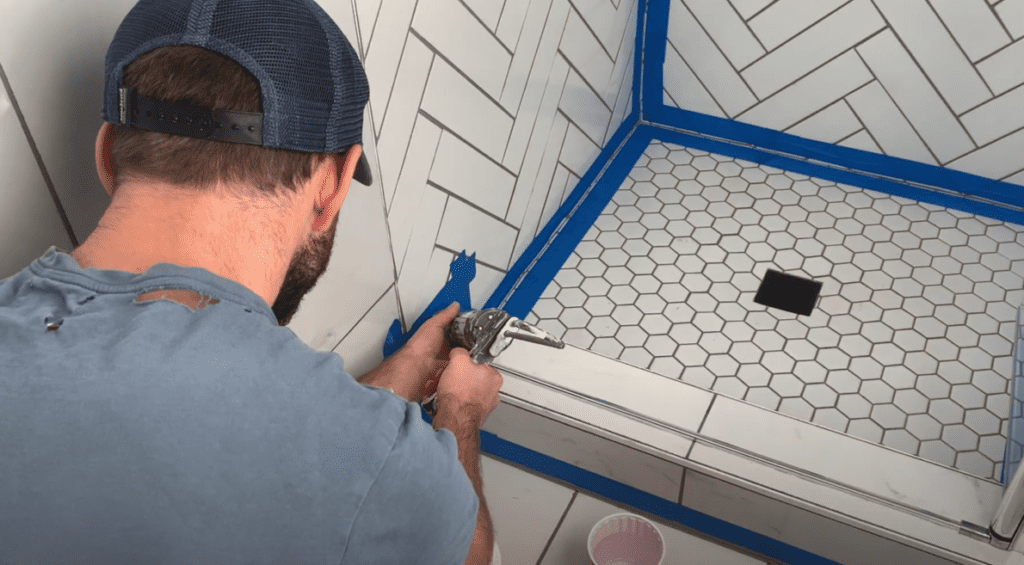
After applying sufficient thinset mortar to the front face of the shower curb, begin installing your tiles. Again, use spacers (as you did during the dry-fit stage) and firmly embed the tiles into the thinset mortar using firm, even pressure.
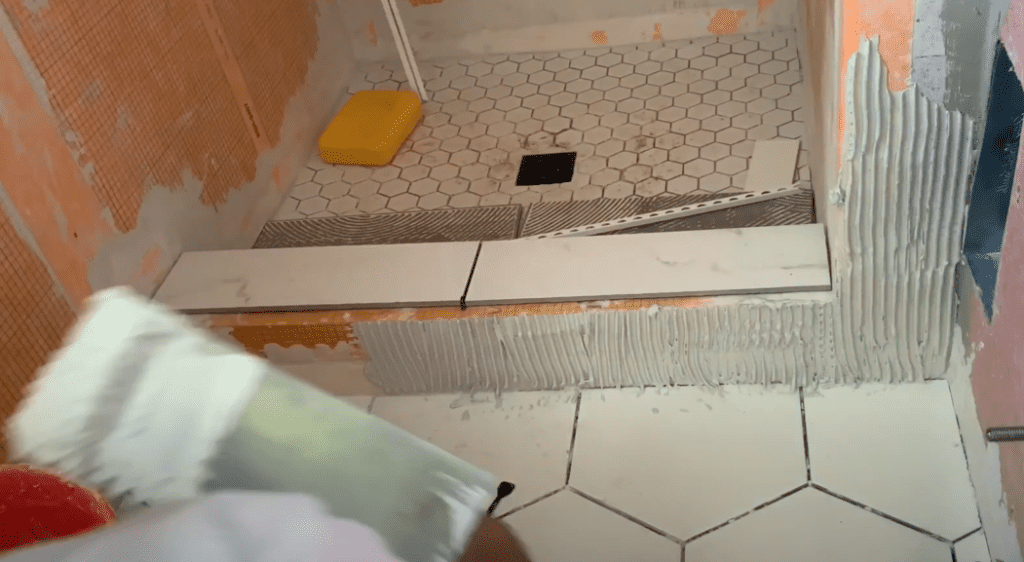
After Installing the shower curb tiles on the front face of the shower curb, begin to apply thinset mortar on the top and inside of the shower curb as shown below:
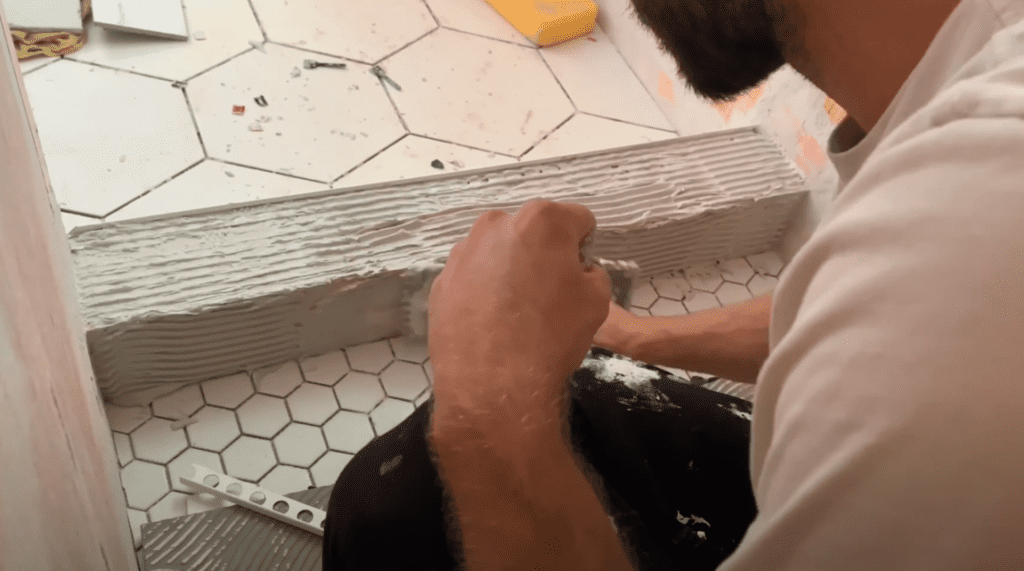
Once thinset mortar has been installed on both the top and inside of the shower curb, begin to install the rest of the shower curb tiles.
It is recommended that the inside face of the shower curb be tiled next and that the top of the shower curb be tiled last.
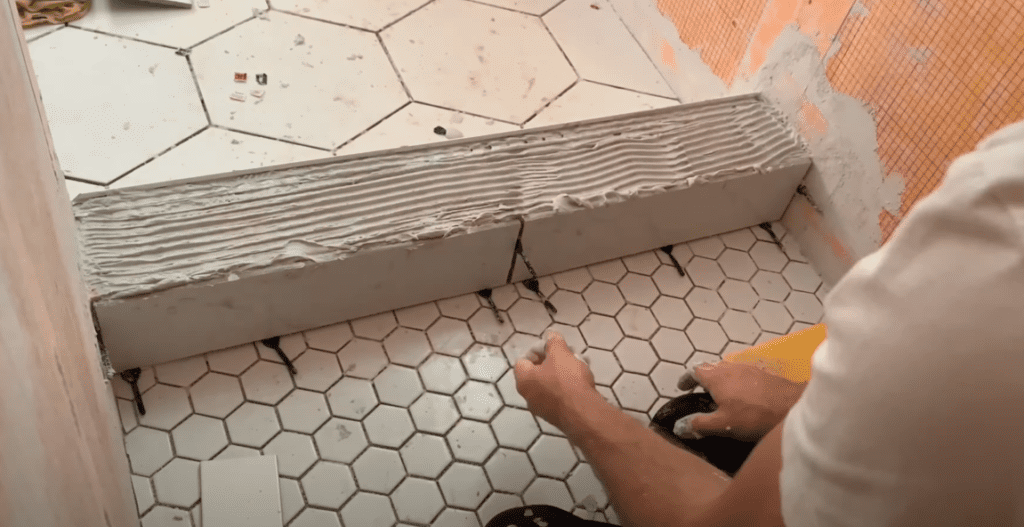
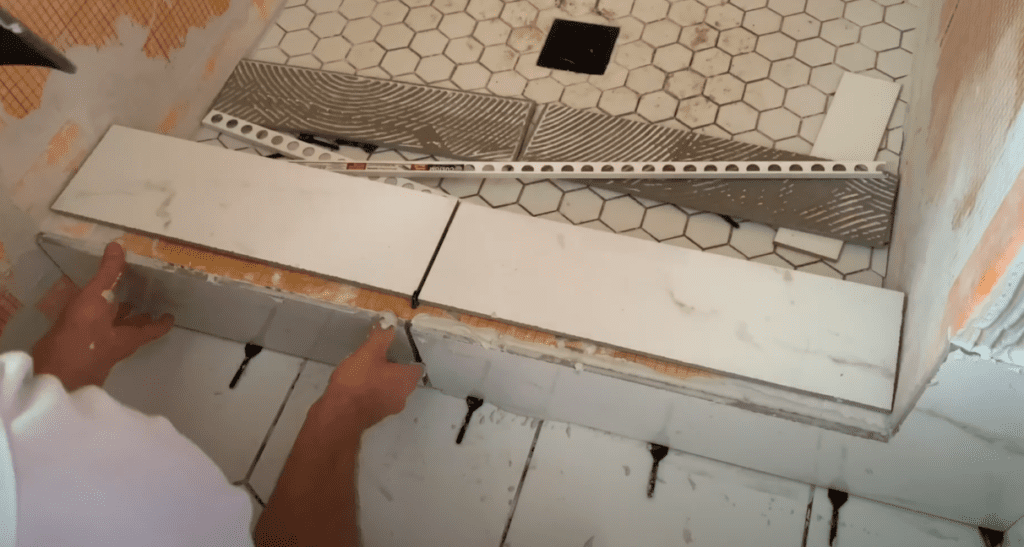
Once the shower curb tiles are installed on both the inside and outside face of the shower curb, it is now time to install the tile profiles (if applicable). Position the tile profiles on both sides of the top of the shower curb and use a trowel to firmly embed the profiles in thinset mortar.

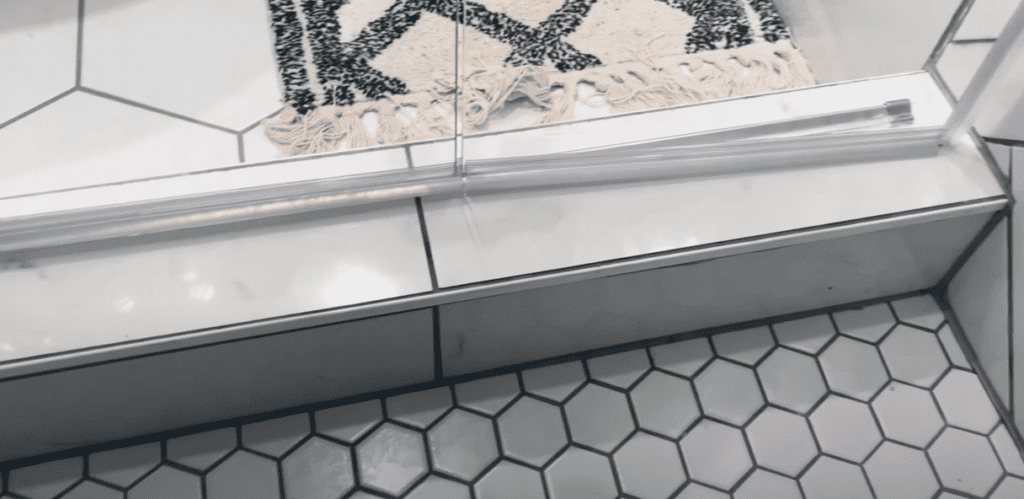
Finally, install shower curb tiles on the top of the shower curb. Again, be sure to use spacers to maintain your expansion gap and your spacing between tiles.
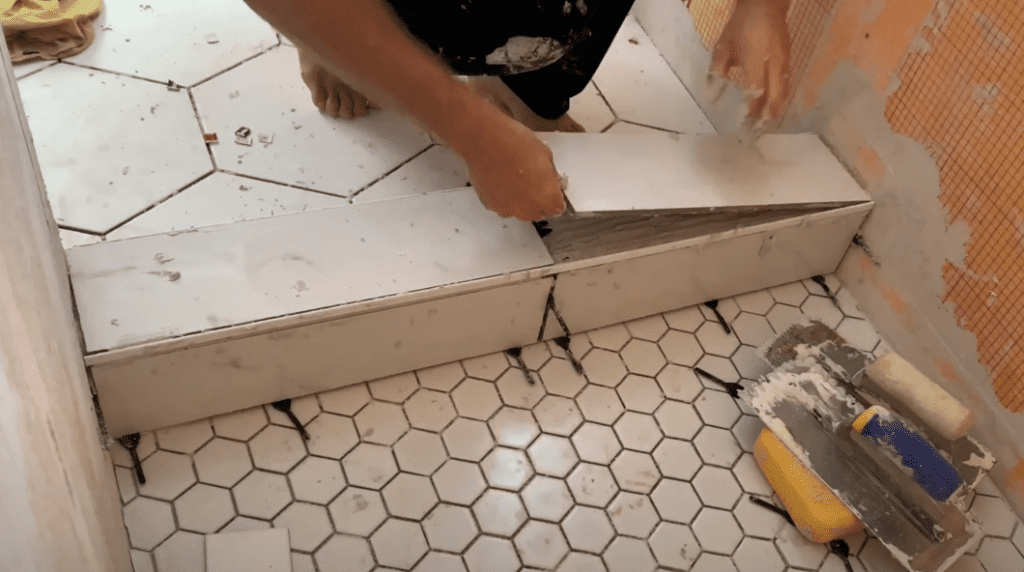
Once of all the tiles have been installed on the shower curb, visually inspect your work to ensure that you are happy with how everything is looking in terms of placement and spacing.
5. Slope your Shower Curb Tile
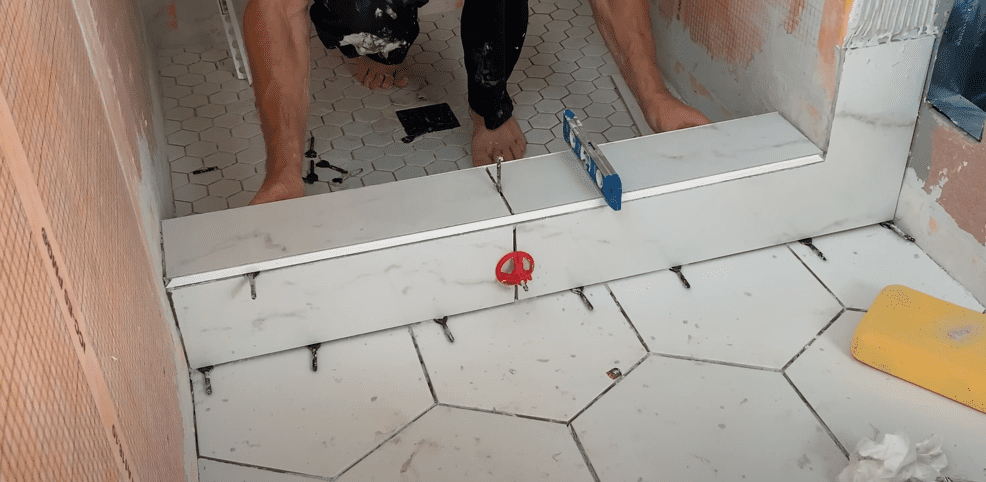
Once you have placed all of your shower curb tiles, you must ensure that the tile on top of your shower curb slopes back into your shower. Water will inevitably find its way on top of your shower curb. When it does, you want to ensure that the water drains back into the shower pan and not into your bathroom.
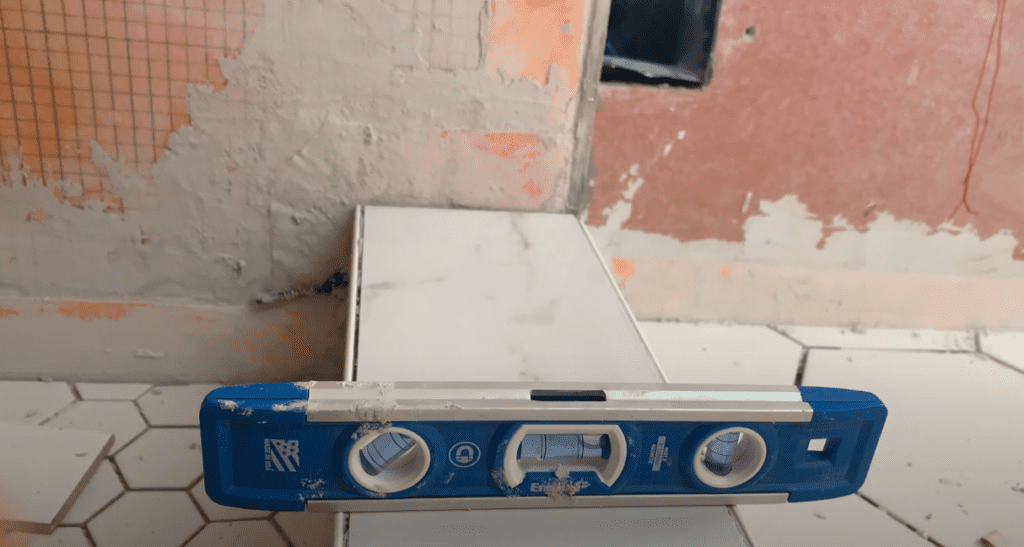
Use a level to check the slope of the top of your shower curb. Add thinset mortar (as needed) until the the tile on the top of your shower curb is sufficiently sloped back into the shower pan.
Once you are happy with the slope one top of your shower curb, you will want to install your tile leveling system (if applicable).
Tile leveling systems (see red piece of plastic on the image above) are used to make sure that all tiles are uniform across the surface. Basically, tile leveling systems are used to ensure that you don’t have any high spots or “lippage” on your shower curb.
For most shower curb tile installations, I recommend a 2-in-1 tile spacer and leveling system such as the Spin Doctor Leveling System. This system helps to ensure that you have uniform spacing between each tile and greatly reduces the chance of any tile lippage.
Once you are comfortable with your shower curb tile slope and how everything is lining up, you can begin cleaning up any excess thinset mortar.
6. Clean up and remove any Excess Thinset Mortar
Once all of your shower curb tiles have been set, it is is extremely important that you clean up and remove any excess thinset mortar before it dries.
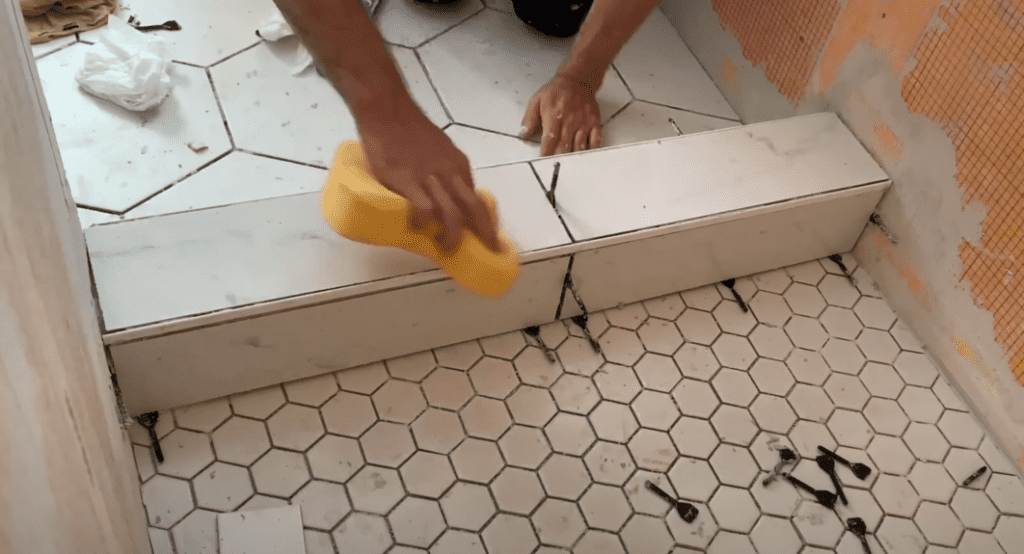
It is recommended that you use a wet sponge to remove any of the excess thinset mortar from the face of the tiles. Additionally, be sure to remove thinset mortar from the grout lines.
Pro Tip: It is extremely important that you remove any excess thinset mortar while it is still wet. If you allow the thinset mortar to dry, it will me much more difficult to remove.
If any thinset mortar does dry on the face your tiles, your best bet is to scrape it off the face of the tiles using a 5 in 1 painter’s tool)
Scraping any dried thinset that has hardened between the grout lines is usually best accomplished by using a grout scraping tool.
Once you have cleaned up any excess thinset mortar, allow your shower curb tile to dry for 24-48 hours.
7. Grout the Shower Curb

At this stage, you are ready to grout the shower curb tiles. Before you grout, be sure that you have thoroughly cleaned the faces of your tile. Additionally, it is recommended that you vacuum the whole tile area, especially in between the grout lines.
There are many different types, styles, and colors of grout – so be sure to select grout that is well-suited for your application. Sanded grout is best for grout lines greater than 1/8 inch and unsanded grout is better for grout lines 1/8 inch and smaller. Keep in mind that sanded and unsanded grout is porous in nature. Therefore, you will need to seal the grout to make it waterproof.
For Shower Curb tile installation, epoxy grout is usually the best option due to it’s superior durability and moisture resistance. If you choose to go with epoxy grout, I recommend that you watch my epoxy grout installation video below:
Once you have selected your grout, mix it up based on the manufacturers recommendations. Apply the grout using a grout float, forcing it into all of the grout lines.
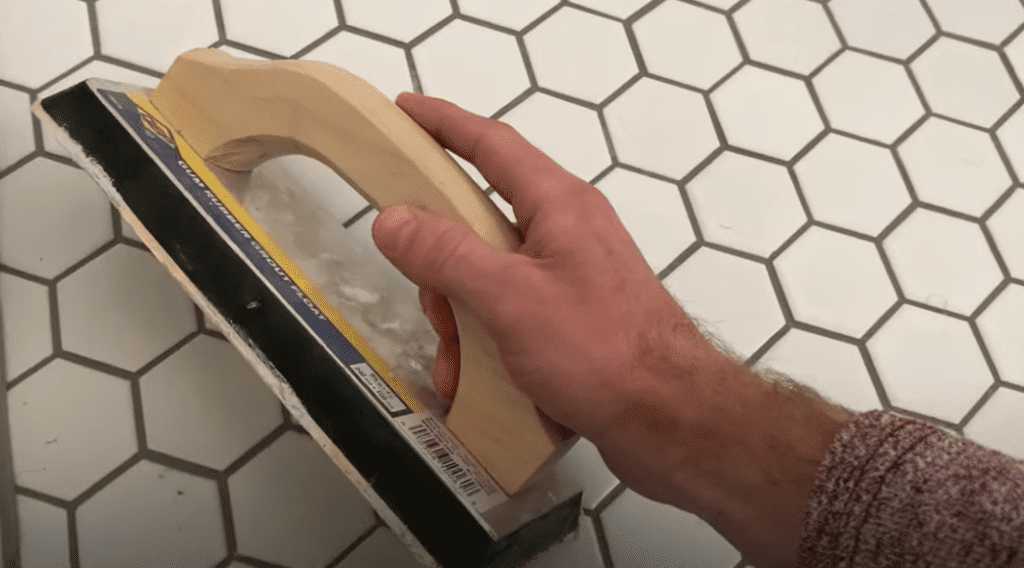
After you have filled all tile joints with grout, remove any excess grout using your grout float held at a 90 degree angle. Lastly, use sponges and a grout haze remover (optional) to clean all of the grout from your shower curb.
At this point, all that is left to do is give your grout time to cure based on the manufacturer’s recommendations. Once the grout is dry, its time to seal the expansion joints with silicone.
8. Apply Caulk to the Shower Curb Expansion Joints
After giving your grout sufficient time to dry, apply silicone to the expansion joints between the shower curb tile and shower pan tile.
I recommend that you use Mapesil T caulk since it is a high quality silicone sealant and it is unlikely to stain or discolor. For more information and tips for applying caulk to the expansion joints of your shower curb, check out my Youtube Video below:
9. Clean up and Next Steps
After applying a high quality silicone to the expansion joints, give your shower curb sufficient time to dry (approximately 24 hours). At this stage, you should be left with a completed shower curb tile installation that looks like this:
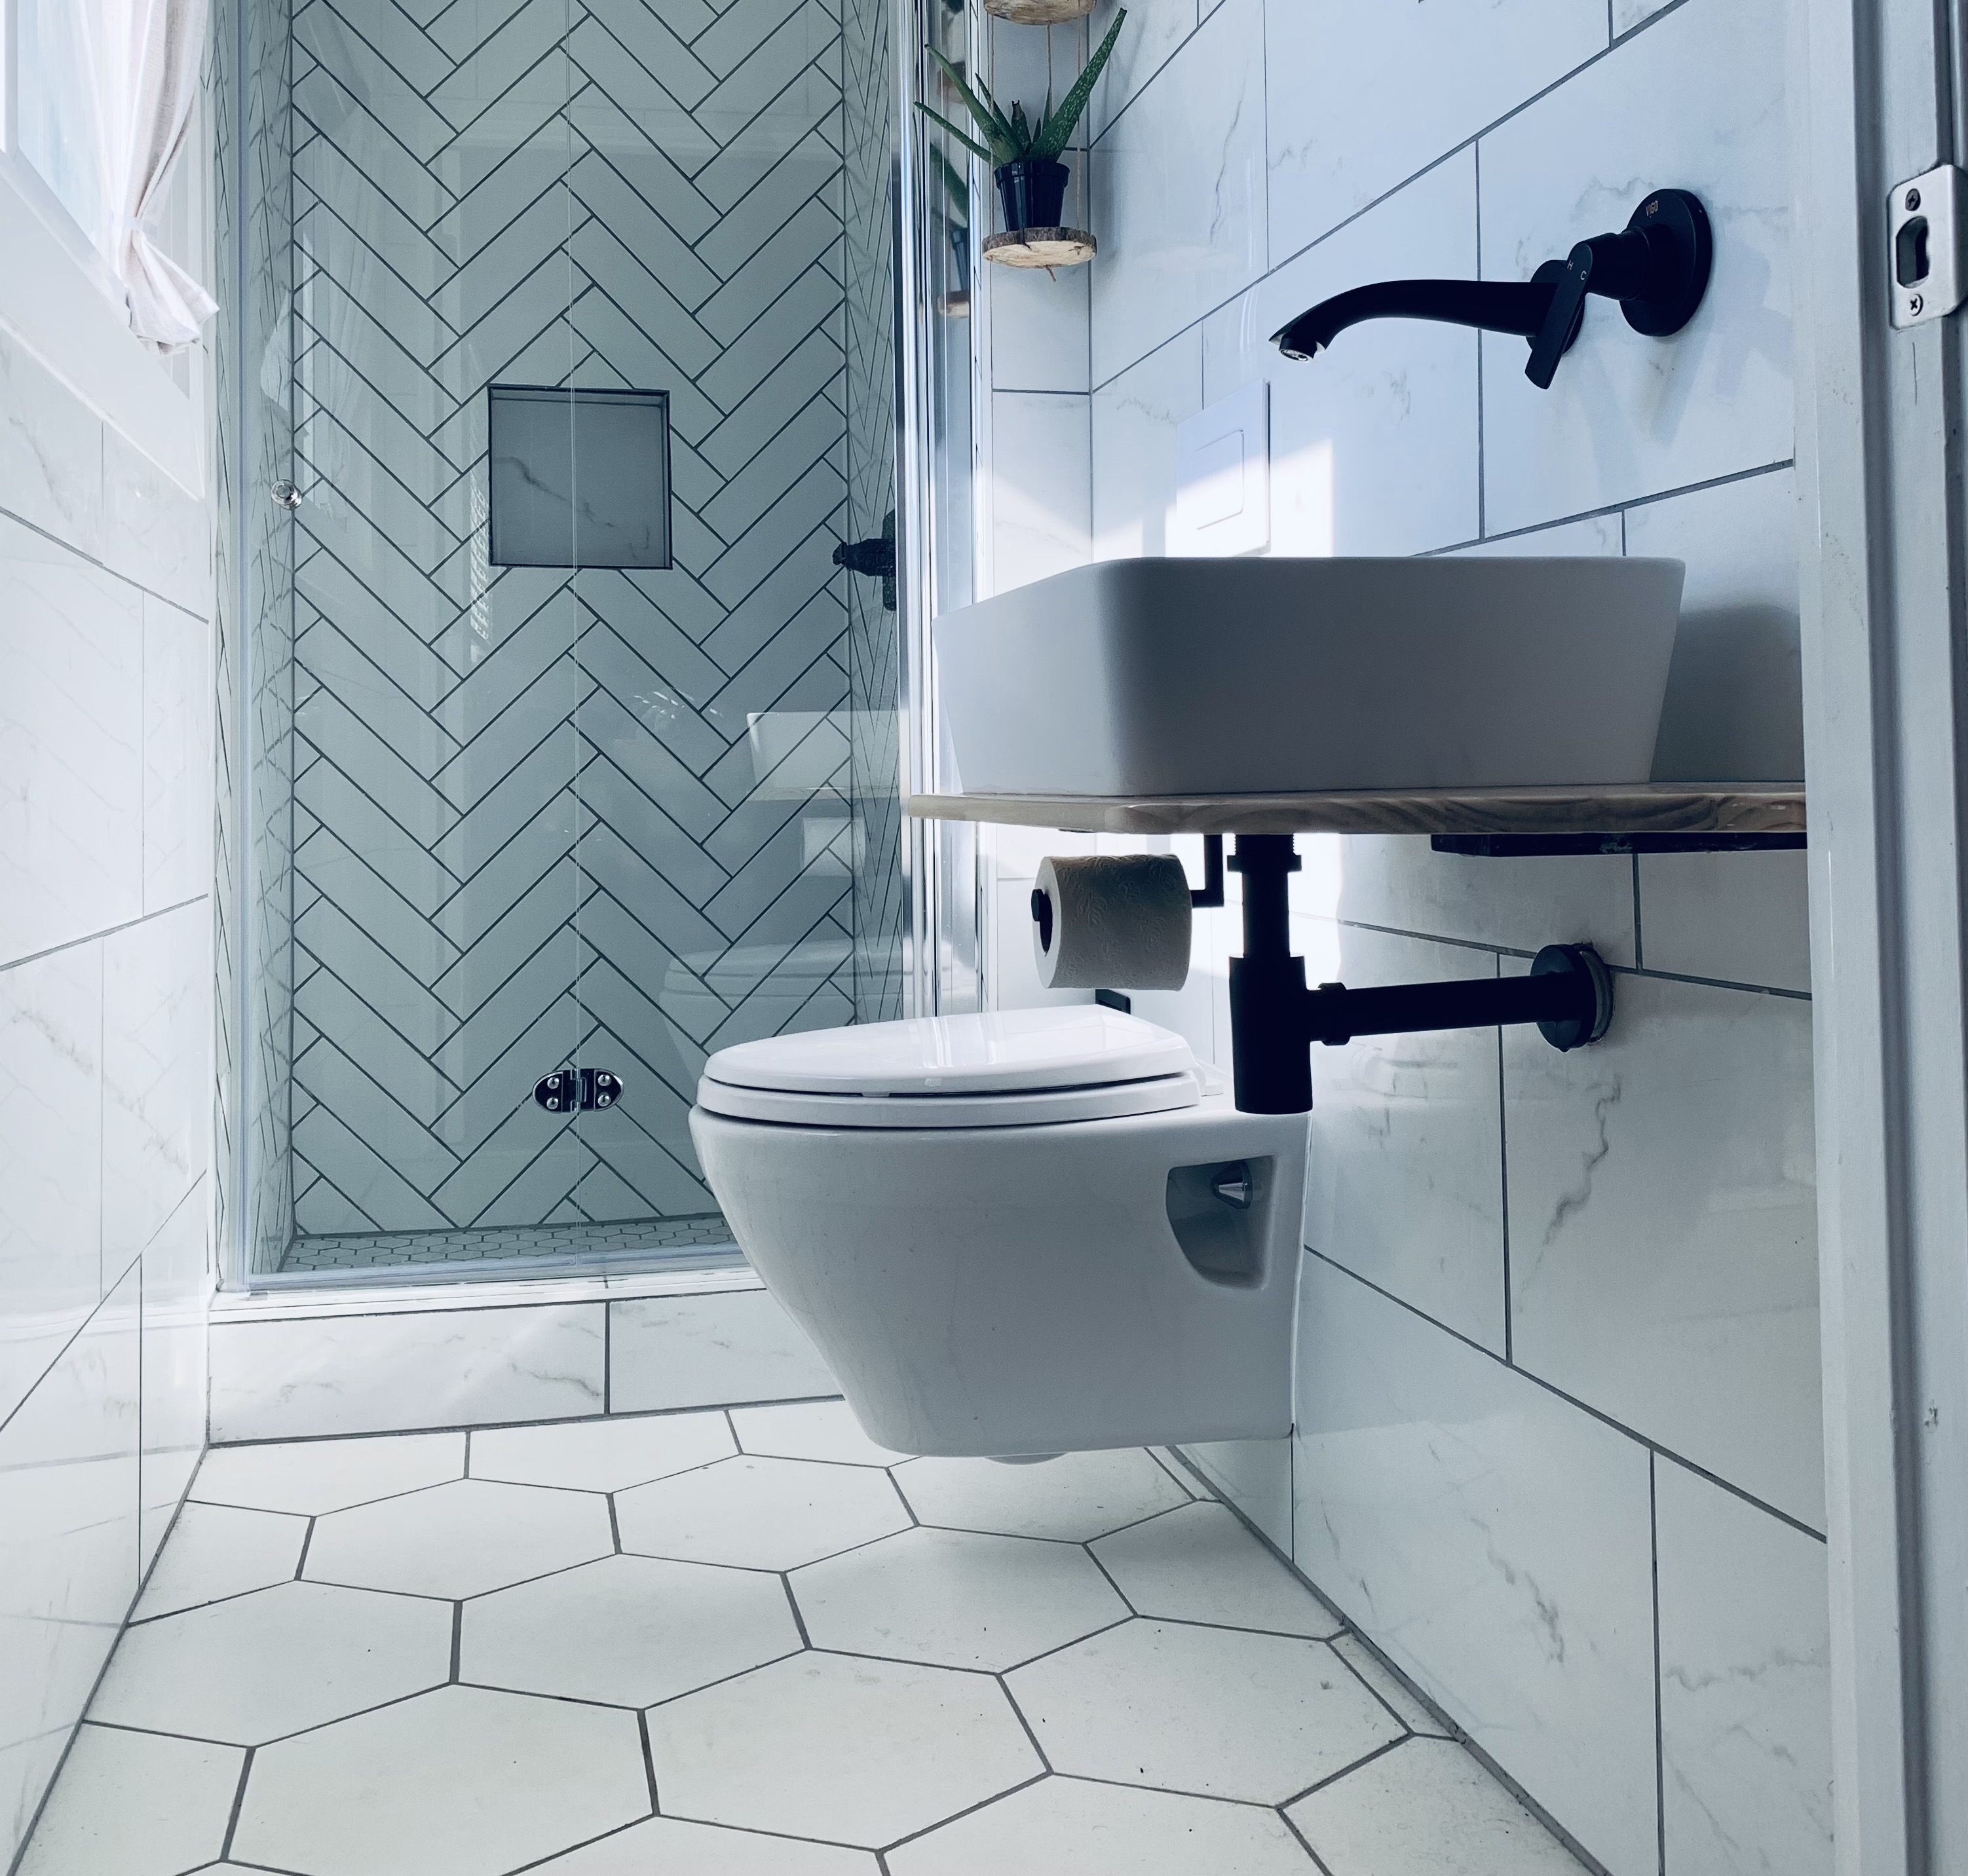
Installing Shower Curb Tile is a DIY project that can add a lot of value to your bathroom. By following the steps presented in this article, you will easily be able to complete your own Shower Curb Tile Installation.
For more information on How to Tile a Shower Curb, check out my Shower Curb Installation Youtube Video below:
Thanks so much for checking out ATImprovements! If you learned something from this project, you might also like these other DIY Projects:
How to tile a Shower Pan: How to Tile a Shower Pan (Kerdi Shower Pan Tile Installation) – AT Improvements
How to Install the Schluter Kerdi Shower System: Schluter Kerdi Shower Kit Installation (Everything you Need to Know) – AT Improvements
To see the full bathroom transformation time lapse, click here!
Thanks!
DISCLAIMER: This is a reference guide only. Links included in this article might be affiliate links. If you purchase a product or service with the links that I provide I may receive a small commission. There is no additional charge to you! Thank you for supporting ATimprovements so I can continue to provide you with free content each week