
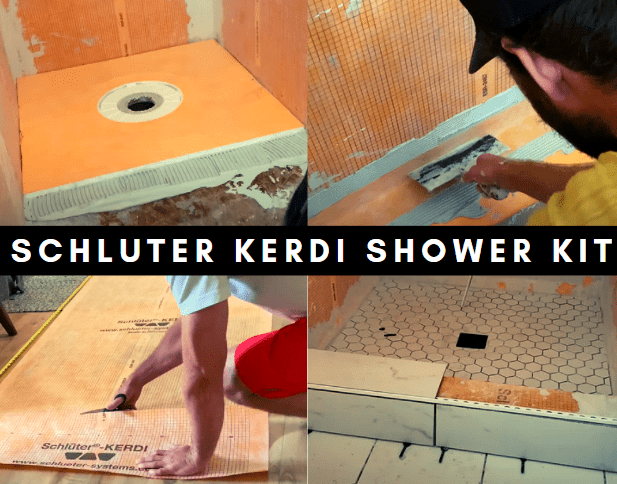
Because of the simplicity of the Schluter Kerdi Shower Kit System, it has become a popular shower waterproofing system for many homeowners. The ease of installation combined with the DIY-friendly instructions make it a great option for your next shower installation.
The steps to installing the Schluter Kerdi Shower Kit are as follows:
- Install Kerdi Membrane
- Install Kerdi Shower Pan
- Install Kerdi Shower Drain
- Install Kerdi Shower Curb
- Waterproof all intersections and joints With Kerdi Band and Kerdi Kereck
- Complete Water Test
Each of these steps is outlined in detail within this article and is supplemented with a complete Schluter Kerdi Shower Kit Installation Youtube video (included at the end of the article).
If you are ready to complete your Schluter Kerdi Shower Kit Installation, read on!
1. Install Kerdi Membrane
Before installing Kerdi Membrane, let’s take a moment to understand what Kerdi Membrane is.

Schluter Kerdi membrane is a flexible, sheet applied waterproofing and vapor-retarder membrane that is typically applied to shower walls, bathtub surrounds, and other tile applications where moisture will be present. Kerdi Membrane is designed for direct tile application.
Schluter Kerdi Membrane is manufactured with a polyethylene center with non-woven polypropylene on both sides which allow the membrane to be anchored to the wall with thinset. Kerdi membrane is 8 Mils in thickness and comes in rolls that are 3′-3″ in width.
For more information on the Kerdi Membrane, check out the Schulter Systems website linked here.
How to Install Kerdi Membrane:
Before Kerdi membrane can be installed, you need to have a properly prepared substrate. Typically, cement board is the best substrate for Kerdi Membrane installation on walls.
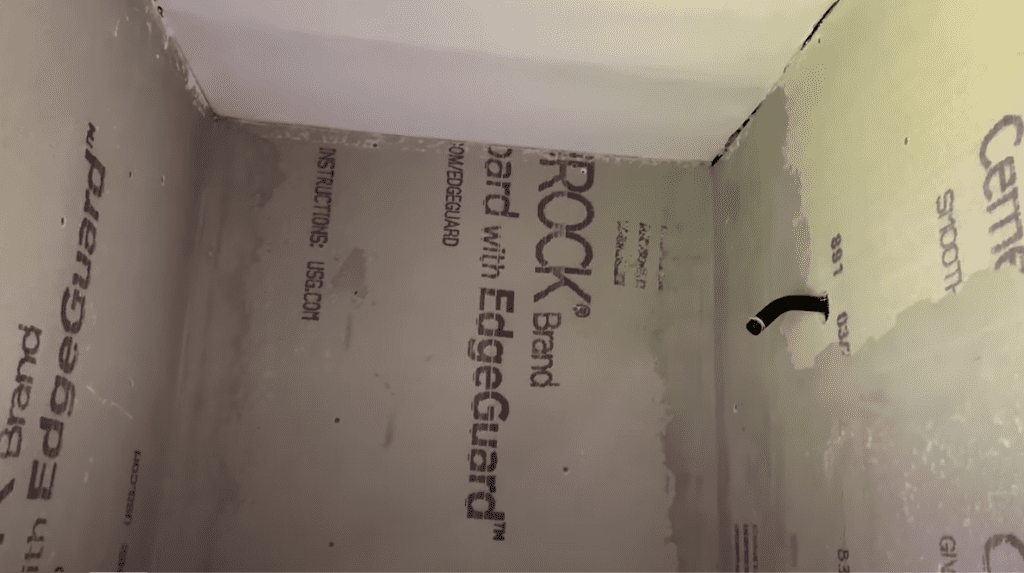
For more information about how to install cement board on walls, check out my “How to Install Cement Board on Walls” blog linked here. You can also watch my cement board Installation youtube Video below:
Once your substrate is installed, ensure that it is clean and free of any dust or debris that may impact the Kerdi Membrane installation.
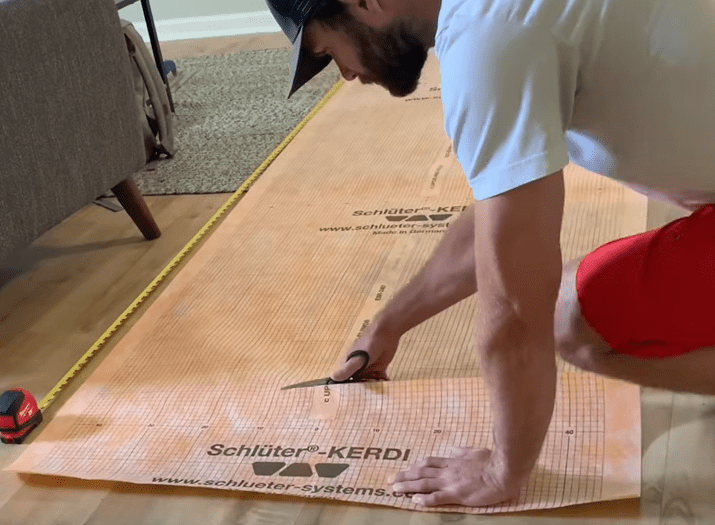
Next, cut the Kerdi Membrane to size using scissors or a utility knife. Typically, Kerdi Membrane will extend from the subfloor all the way to the ceiling. For showers or bathtub surrounds, Kerdi Membrane should extend to the height of the showerhead at a minimum.
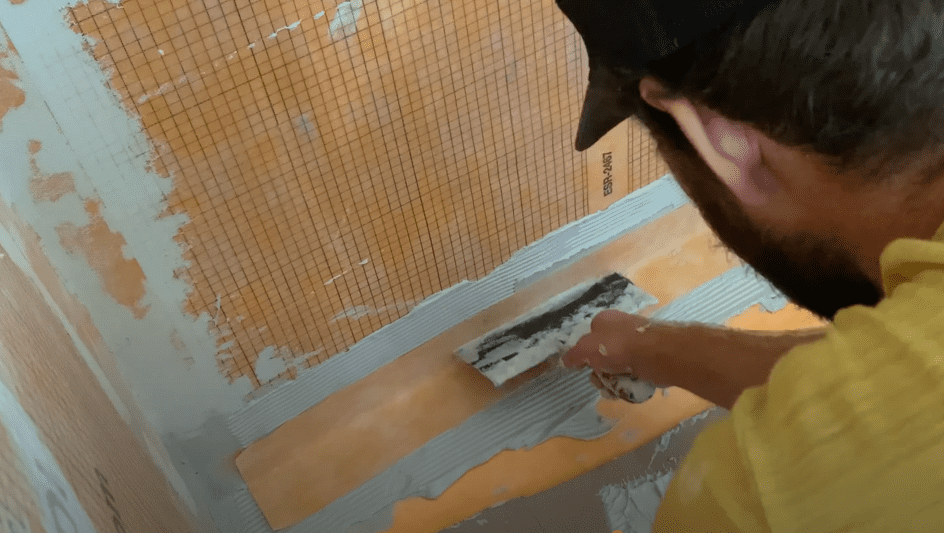
Once the Kerdi Membrane is cut to size, apply thinset mortar to the walls/substrate using a 1/4” x 3/16” V-notch trowel. Apply thinset mortar to the substrate using “directional troweling” – meaning that all trowel marks run in the same direction.
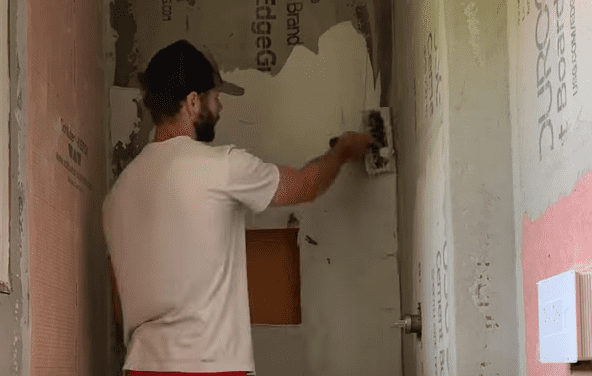
In order to maintain the Schluter Warranty, it is recommended that you use one of the following Schluter Thinset Mortar types:
You also have the option to apply the Kerdi Membrane with any unmodified thinset mortar, but this will void the Schluter Warranty.
Once a sufficient amount of thinset mortar has been applied to the substrate, press the Kerdi Membrane into the mortar, fully embedding the membrane into the thinset.
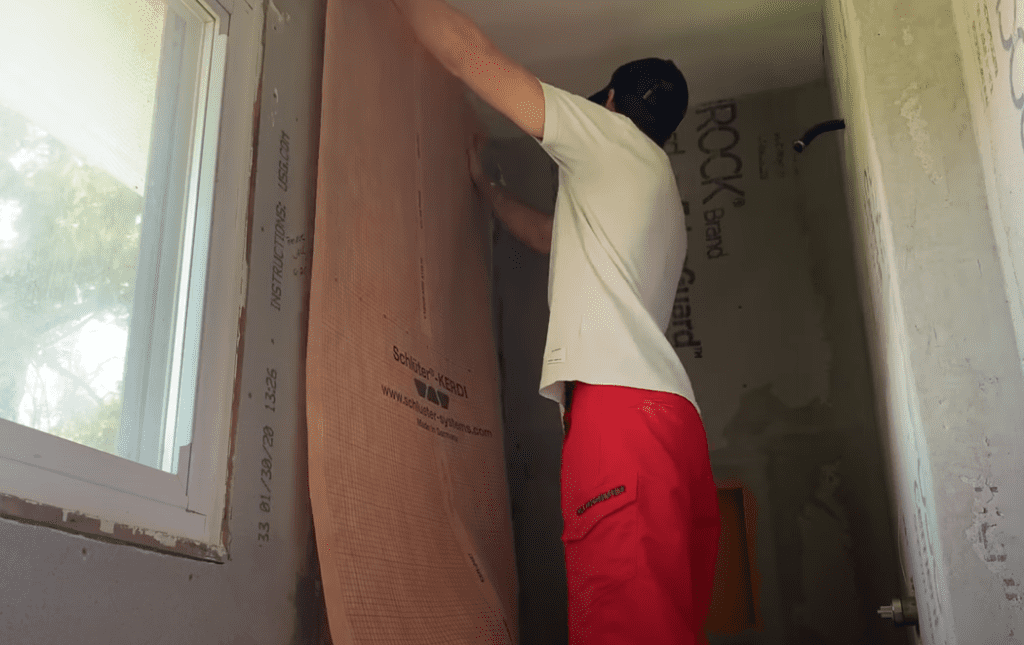
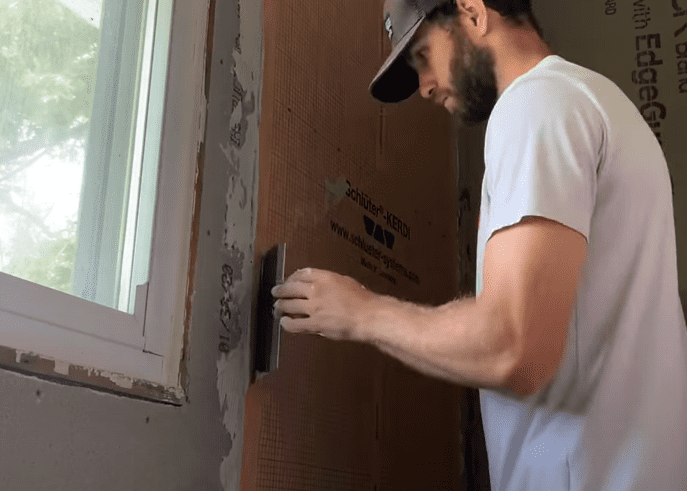
Use the flat side of a trowel to apply even pressure to the entire Kerdi membrane, ensuring that the membrane is fully pressed into the bond coat.
Remove any excess mortar or air bubbles from beneath the Kerdi Membrane by “sweeping” them to the side with the flat side of the trowel.
Continue to apply Kerdi Membrane in this manner for all walls that require waterproofing. Once the Kerdi Membrane has been installed, you can move on and install the Kerdi Shower Pan.
If you would like more detailed instructions on how to install the Kerdi Membrane, check out This Article.
2. Install Kerdi Shower Pan
After installing the Kerdi Membrane, you can begin to install the Kerdi Shower Pan by following theses steps:
Ensure that the subfloor is clean, level, and fully supported prior to beginning your installation
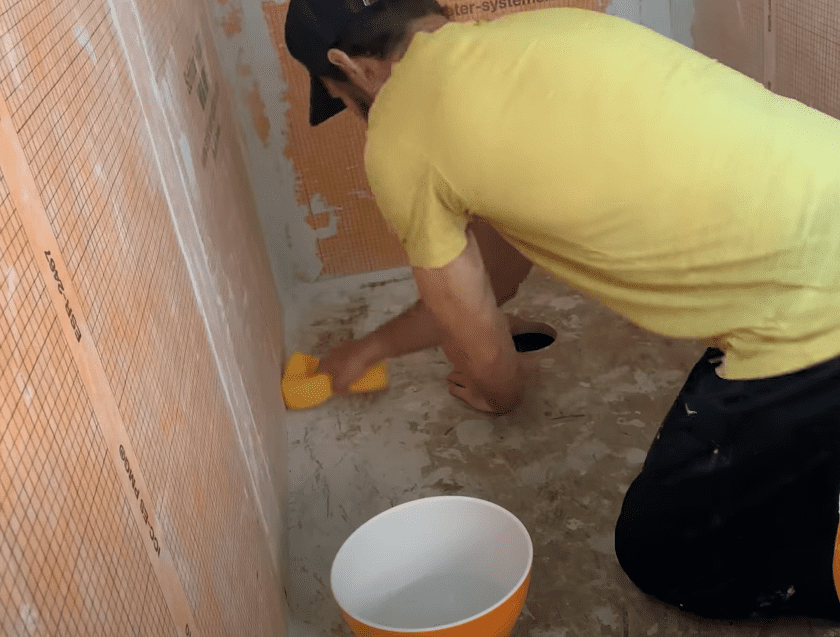
Before you begin installing your Kerdi Shower Pan, check to make sure that the subfloor is level and well supported. It is recommended that you use a damp sponge to remove any dust or debris that may interfere with thinset bonding.
Perform a dry fit of the Kerdi Shower Pan
Ensure that your Kerdi shower pan fits appropriately within the installation area by positioning it in place. At this stage, you may find that you need to adjust your wall framing around the shower pan. Alternatively, you may need to trim the Kerdi Shower Pan so that it can fit within the installation area.
To cut or trim a Kerdi Shower Pan, use a straight edge to mark the cut line on the shower pan. Next, score the Kerdi shower pan along the cut line using a utility knife. After scoring the entire length of the Kerdi Shower Pan, apply even pressure to snap the Kerdi Shower Pan along the cut line.
Cutting the Schluter Kerdi Shower Pan is a similar process to cutting drywall: Mark, Score, and Snap.
When trimming a Schluter Kerdi Shower Pan, be sure to cut opposite sides as evenly as possible. For example, if you need to trim 6” off of the Kerdi Shower Pan, cut 3” off both sides. This will ensure that you have a more uniform slope to the center drain.
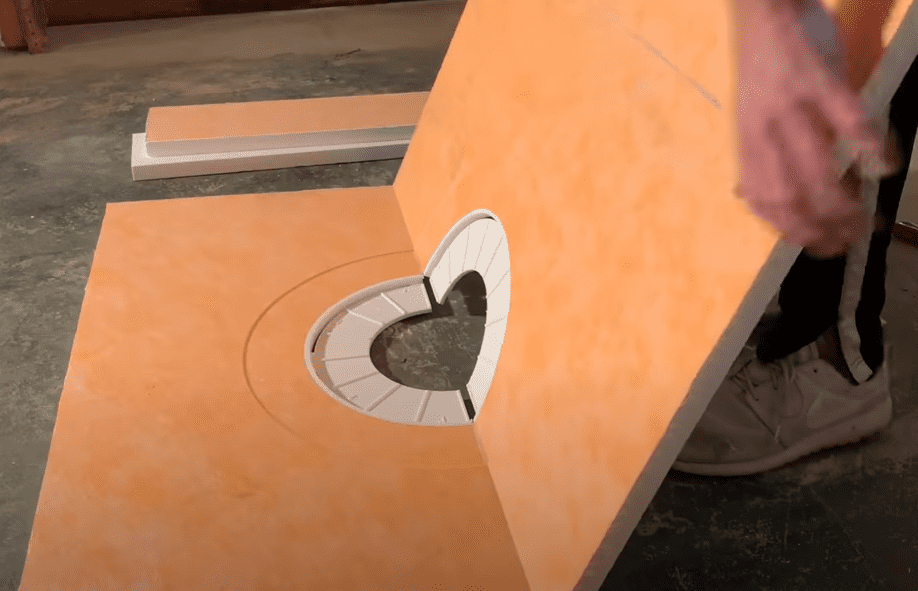
Cut out the Shower Drain Penetration in the Subfloor
Once you have performed a dry fit of the shower pan, mark the location of the drain hole. Next, cut out the shower drain penetration using the template included with the Schluter Kerdi Shower Kit. It is recommended that this penetration be cut using a drill and hole saw bit, but a jig saw, reciprocating saw, or router can also be used. Clean up any rough edges and remove any dust or debris from the installation area. Limit penetration to 5” diameter maximum to ensure adequate support for the shower pan and (future) tile.
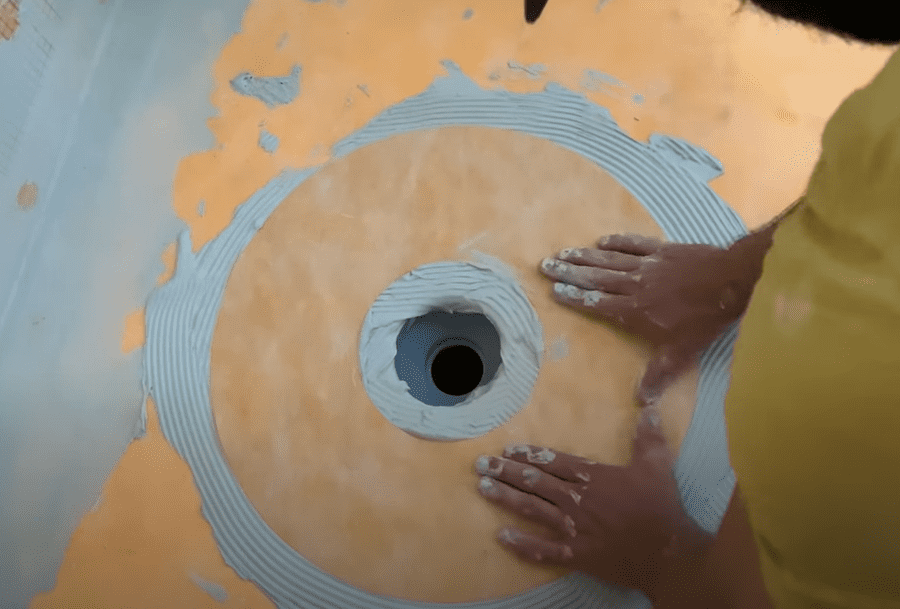
Apply Thinset Mortar to the Subfloor
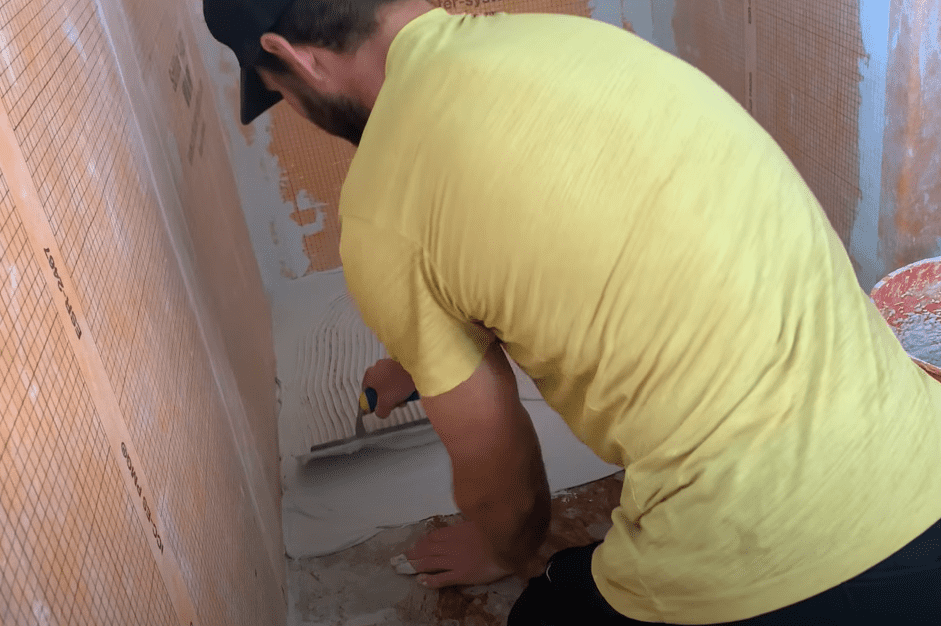
At this stage, apply Schluter Thinset Mortar (or an unmodified thinset mortar) to the application area using a 1/4″ x 3/8″ Square notch or U-notch trowel. Begin spreading thinset over the entire installation area using the flat side of the trowel. This will ensure good thinset coverage on the subfloor. Next, comb additional mortar (as needed) using the notched side of the trowel. Apply thinset mortar to the substrate using “directional troweling” – meaning that all trowel lines run in the same direction.
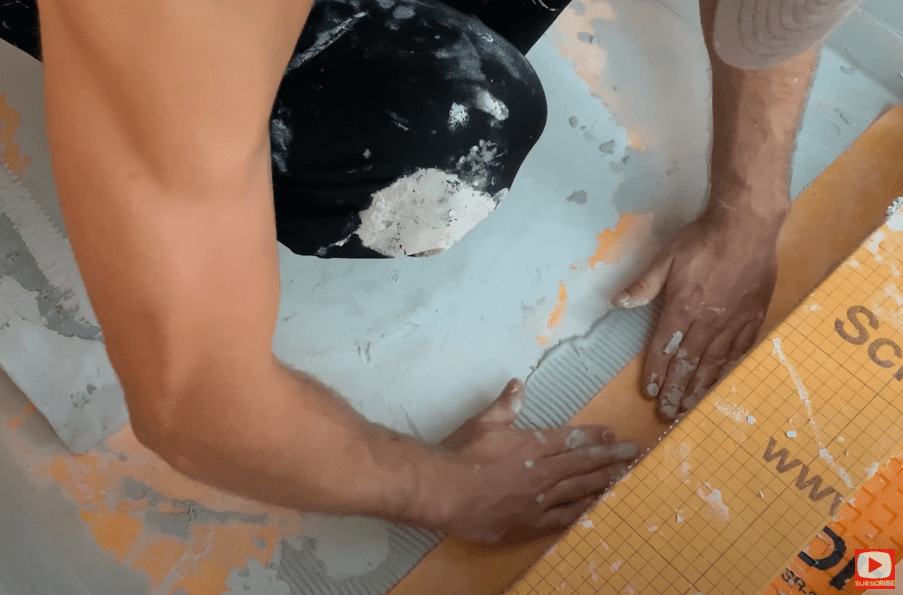
Place Kerdi Shower Pan into position and embed into thinset mortar

Once the thinset has been applied to the subfloor, place the Kerdi Shower Pan into place and firmly embed the Kerdi Shower Pan into the mortar using firm, even pressure. After the Schluter Kerdi Shower Pan has been embedded into the mortar, clean up any excess thinset that is outside of the Kerdi Shower Pan area
It is recommended that you install the Kerdi Shower Drain at the same time you install the kerdi shower pan. However, if you plan to install the drain later, ensure that you clean up any thinset around the drain penetration to ensure that it does not interfere with the drain installation in the future.
If you would like more detailed instructions on how to install the Kerdi Shower Pan, check out This Article.
3. Install Kerdi Shower Drain
Once the Kerdi Shower Pan is installed, you can begin your installation of the Kerdi Shower Drain. To Install the Kerdi Shower Drain, follow these steps:
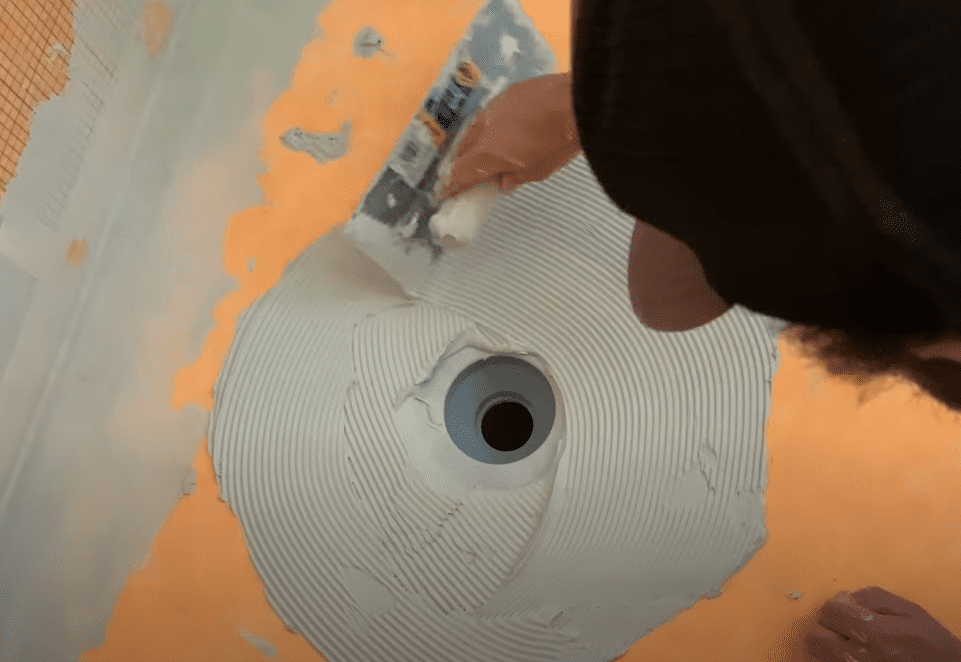
Apply Thinset Mortar to the recessed portion of the Kerdi Shower Pan
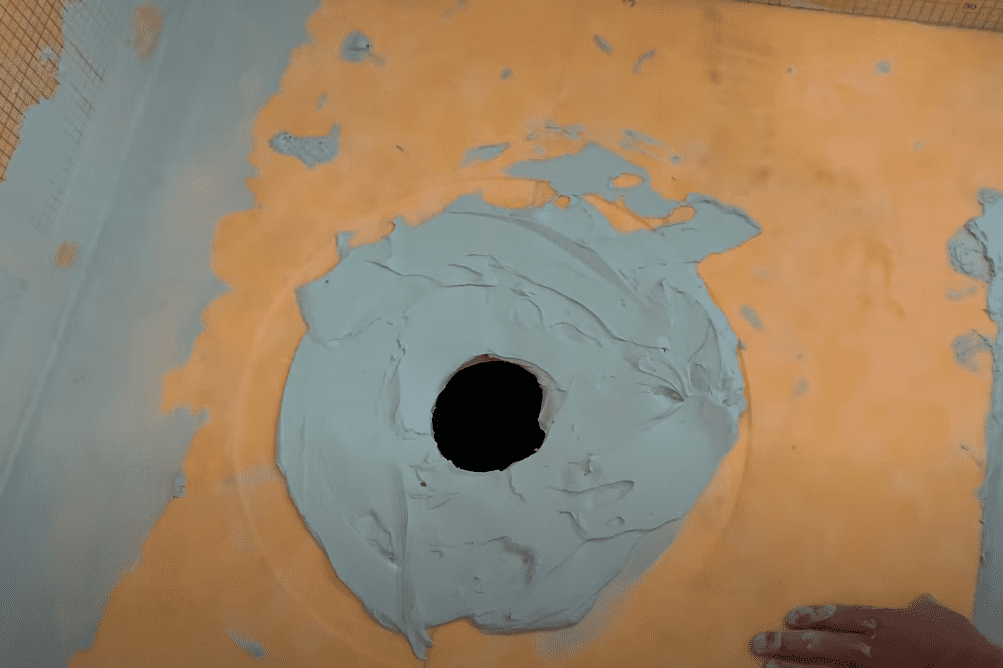
To install the Kerdi Shower Drain, start by applying thinset mortar to the ‘step’ in the Kerdi Shower Pan and the areas surrounding the hole in the subfloor. As mentioned previously, it is recommended that you use one of the following Schluter Thinset Mortar types:
Apply thinset mortar to the shower pan using the flat side of a trowel.
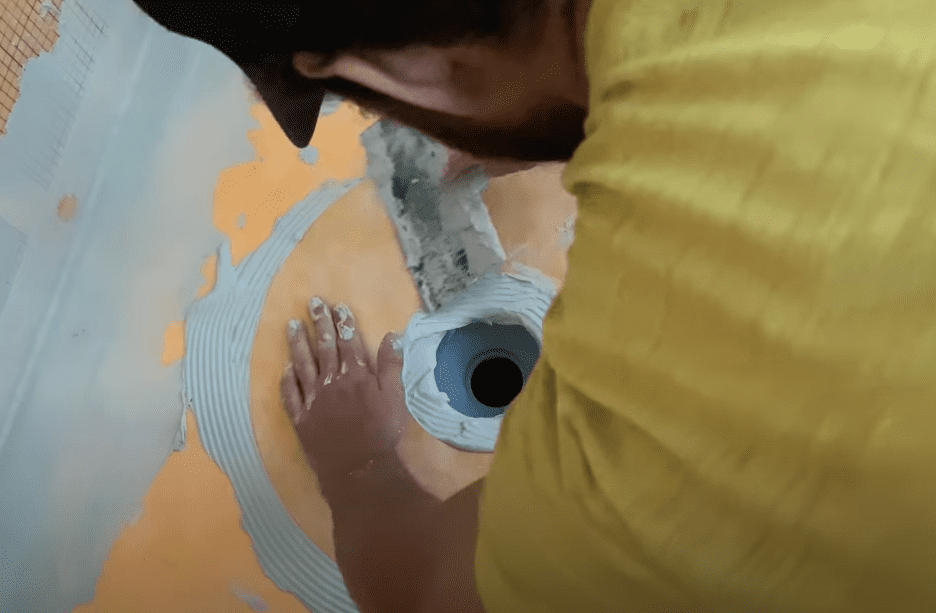
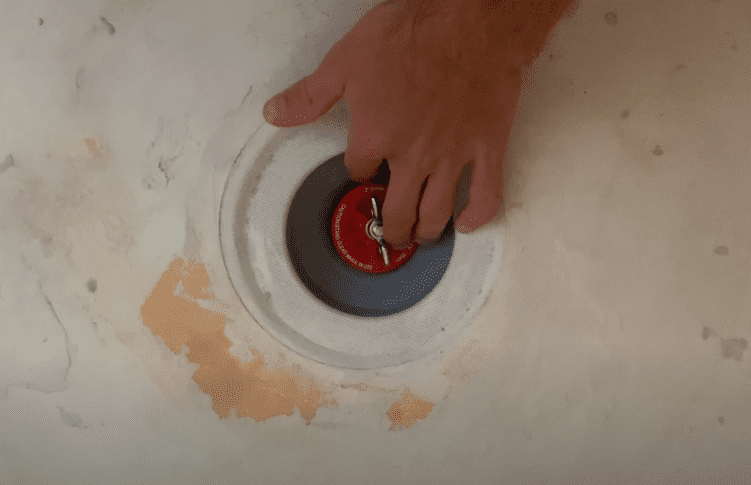
Position the Kerdi Shower Drain in place and Embed within Thinset Mortar
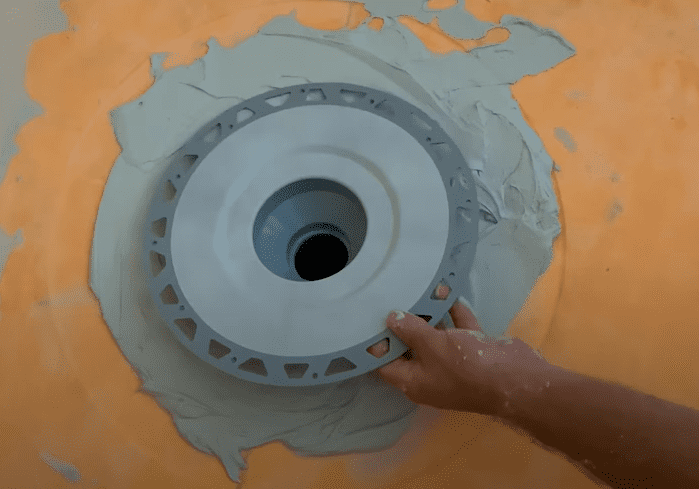
Next, position the Kerdi Shower Drain bonding flange in place and center it within the recessed area of the Kerdi Shower Pan. At this stage, embed the Kerdi Shower Drain bonding flange within the thinset mortar by applying firm, even pressure with your hands.
Ensure that the Kerdi Shower Pan is Level and Remove Excess Thinset
Use a level to ensure that your Kerdi Shower Drain is perfectly level. Additionally, confirm that the drain is centered appropriately.
Next, spread thinset mortar around the Kerdi Shower Drain bonding flange, removing any excess.

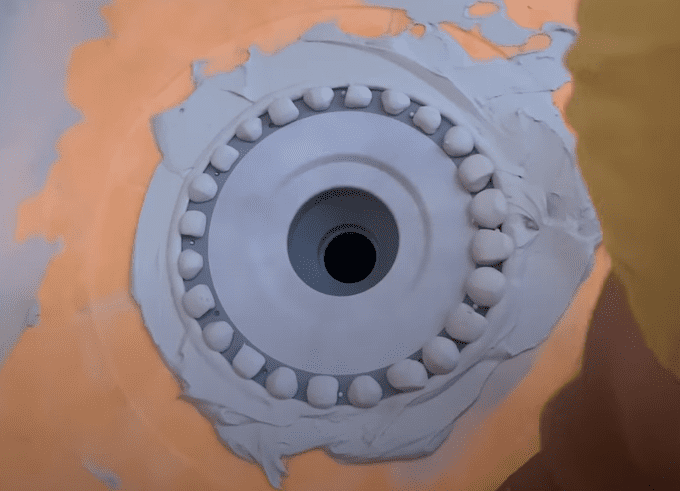
Comb Notches into Thinset Mortar and Apply Kerdi Waterproofing Collar
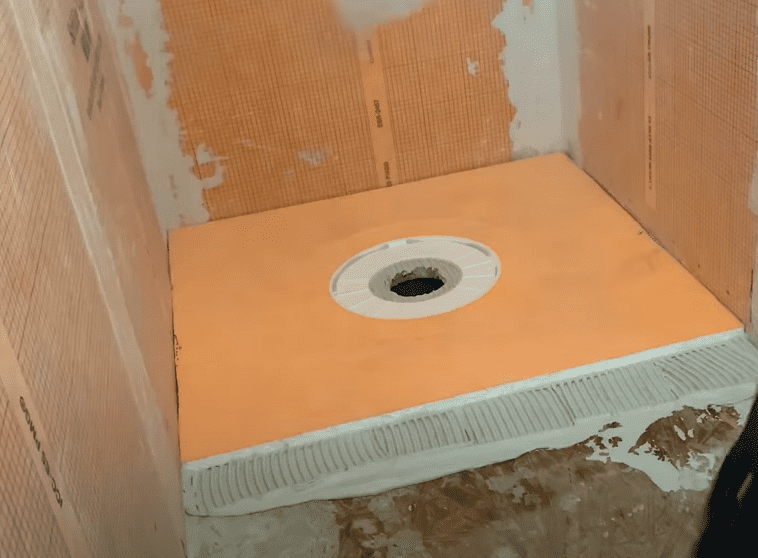
At this stage, comb notches into the thinset mortar using a 1/4″ x 3/16″ V-Notch Trowel. Next, place the Kerdi Waterproofing Collar (included with the Schluter Kerdi Shower Kit) into the thinset mortar. Be sure that the Kerdi Waterproofing Collar is centered around the Kerdi Shower Drain.
Embed the Kerdi Waterproofing Collar into the thinset mortar by applying firm, even pressure with your hands.
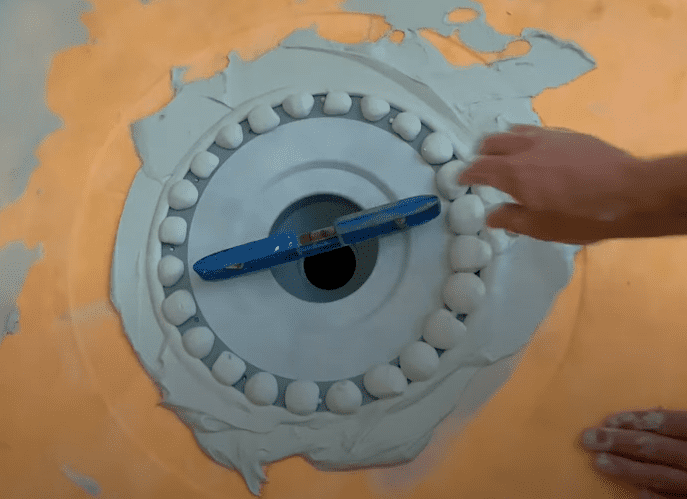
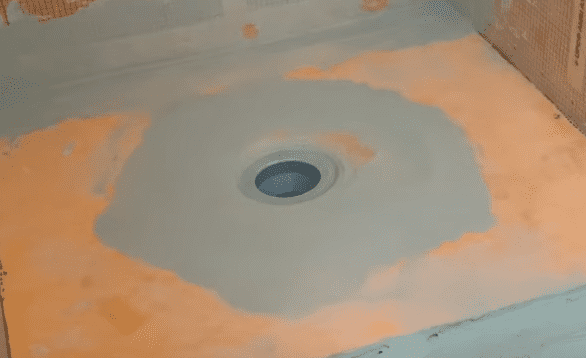
Smooth out Thinset Mortar around the Kerdi Waterproofing Collar
Finally, smooth out the thinset mortar around the entire Kerdi Waterproofing Collar using that flat side of a trowel. Ensure that any excess thinset is removed from under the Kerdi Waterproofing Collar. At this stage, allow the thinset mortar to fully harden.
Once the Kerdi Drain has been installed, you can move on and install the Kerdi Shower Curb.
If you would like more detailed instructions on how to install the Kerdi Shower Drain, check out This Article.
4. Install Kerdi Shower Curb
Once the Kerdi Shower Pan and Kerdi Shower Drain have been installed, you can install the Kedi Shower Curb by following these steps:
Perform a Dry Fit of the Kerdi Shower Curb
Ensure that your Kerdi Shower Curb fits appropriately within the installation area by positioning it in place. At this stage, you may find that you need to trim the Kerdi Shower Curb so that it can fit within the installation area. To cut or trim a Kerdi Shower Curb, use a straight edge to mark the cut line on the curb. Next, score the Kerdi Shower Curb along the cut line using a utility knife. After scoring the entire length of the Kerdi Shower curb, continue to cut deeper into the curb until you have cut all the way through.
You can also cut the Kerdi Shower Curb using a hacksaw.
Apply Thinset Mortar to the Subfloor and Walls
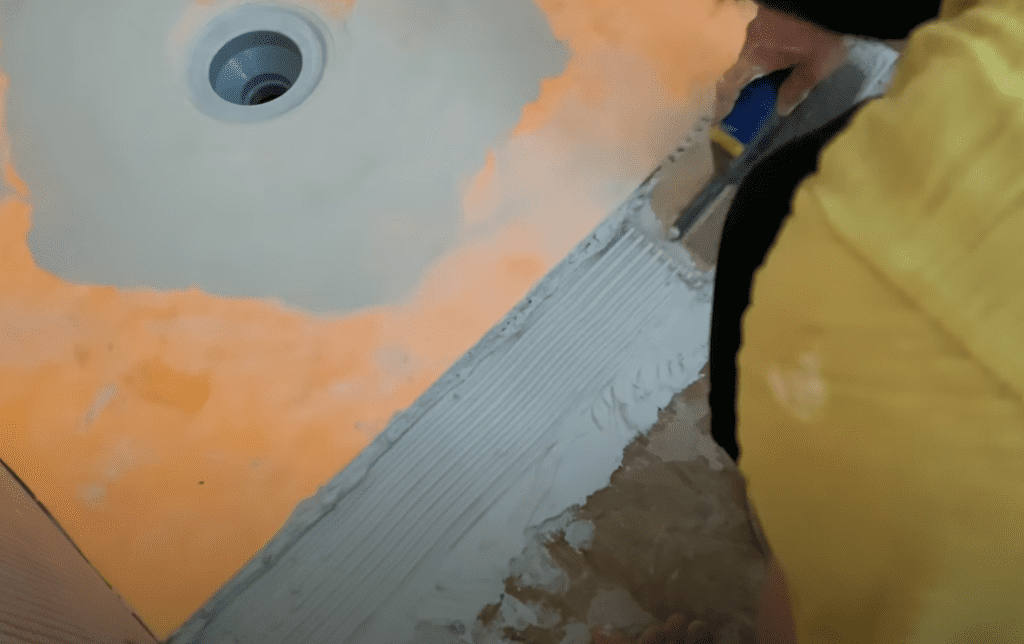
At this stage, apply Schluter Thinset Mortar (or an unmodified thinset mortar) to the application area using a 1/4″ x 3/8″ Square notch or U-notch trowel. Begin spreading thinset over the entire installation area using the flat side of the trowel. This will ensure good thinset coverage on the subfloor. Next, comb additional mortar (as needed) using the notched side of the trowel. Apply thinset mortar to the substrate using “directional troweling” – meaning that all trowel lines run in the same direction.
Be sure to apply thinset mortar at the ends of the curb (where the curb intersects the walls) as well.
Place Kerdi Shower Curb into position and embed into thinset mortar
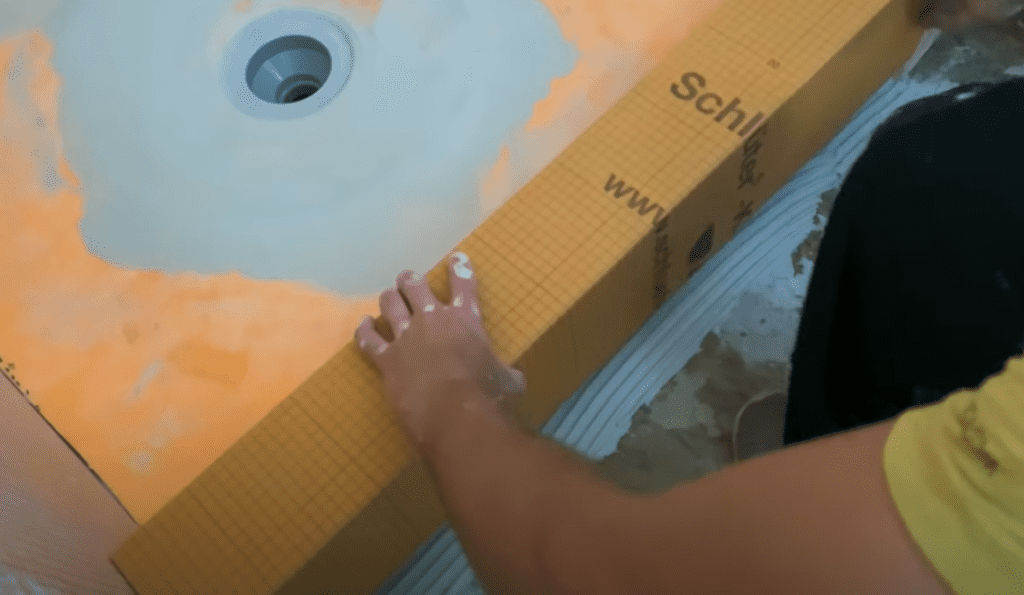
Once the thinset has been applied to the subfloor and wall (where needed), place the Kerdi Shower Curb into place and firmly embed the Kerdi Shower Curb into the mortar using firm, even pressure. After the Schluter Kerdi Shower Curb has been embedded into the mortar, clean up any excess thinset.
If you would like more detailed instructions on how to install the Kerdi Shower Curb, check out This Article.
5. Waterproof all intersections and joints With Kerdi Band and Kerdi Kereck

Kerdi Band Installation 
Kerdi Kereck Installation

Kerdi Band and Kerdi Kereck installation is typically the last step in the Schluter Kerdi Shower Kit System Installation Process. Kerdi Band is installed along the Kerdi Membrane seams and Kerdi Kereck is installed on the inside and outside corners. After installing Kerdi Band and Kerdi Kereck along the joints and corners, your Schluter Shower System will be 100% Waterproof.
Prepare Area for Kerdi Band and Kerdi Kereck Installation
As previously noted, waterproofing the Schluter Kerdi Shower intersections with Kerdi Band and Kerdi Kereck is the last step in the Schluter Kerdi Shower Kit Installation Process.
Therefore, before you can complete your Kerdi Shower System waterproofing with Kerdi Band and Kerdi Kereck, you will have need to have already installed your Kerdi Membrane, Kerdi Shower Pan, Kerdi Shower Drain, Kerdi Shower Curb, etc.
Apply Thinset Mortar to the Application Area
To apply Kerdi Band and Kerdi Kereck to the seams and joints in your Schluter Kerdi Shower System, start by applying thinset mortar to the application area.
As stated before, it is recommended that you use one of the following Schluter Thinsets:
Although it is highly recommended that Schluter Systems thinset be used for Kerdi Band and Kerdi Kereck installations in order to maintain the Schluter warranty, an unmodified thinset mortar can also be used.
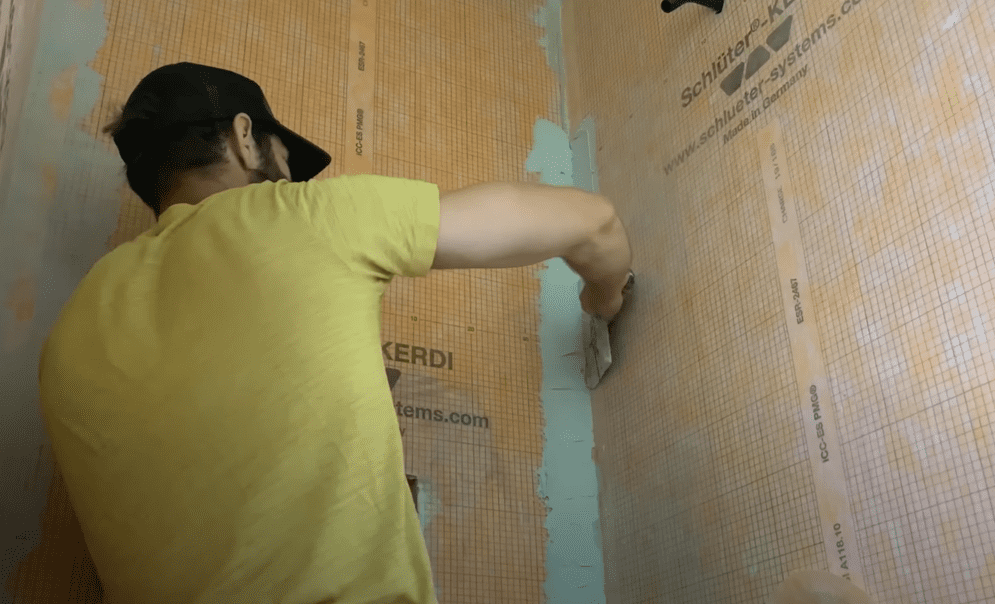
Apply thinset mortar to the application area using a using a 1/4” x 3/16” V-notch trowel.
Embed Kerdi Band and Kerdi Kereck into the Thinset Mortar

Once thinset has been applied to the application area, embed the Kerdi Band or Kerdi Kereck into the thinset mortar. Ensure that there is a good bond by applying firm, even pressure with a trowel or putty knife.
Use a trowel or putty knife to remove any excess mortar that is trapped behind the Kerdi Band or Kerdi Kereck.

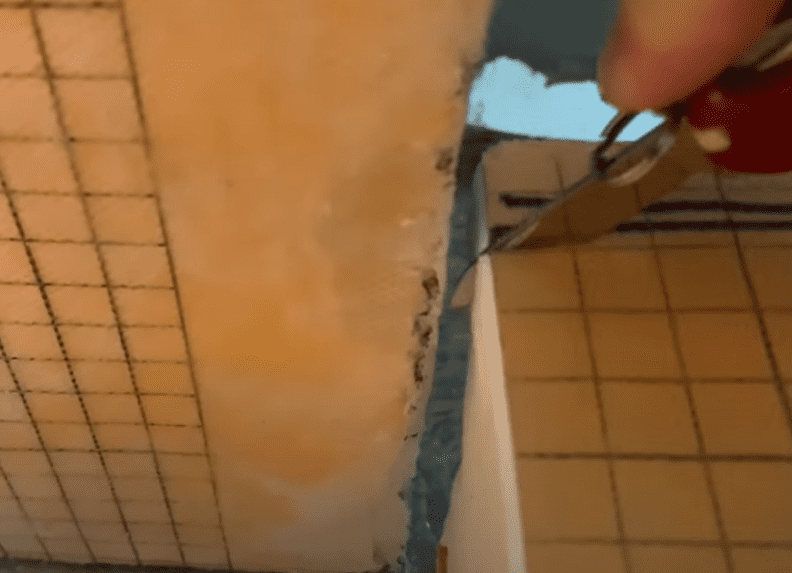
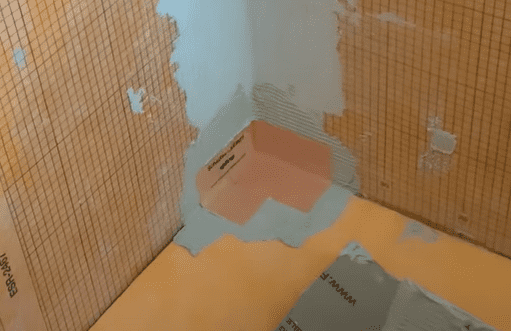
If you are applying Kerdi Band in a corner, fold the Kerdi Band in half along the crease. Then, place the folded Kerdi Band into the corner and press it into place using a putty knife. Use a putty knife or trowel to remove and excess thinset and to ensure that there is no excessive build up of mortar.
Be sure that Kerdi Band overlaps all seams by a minimum of 2″
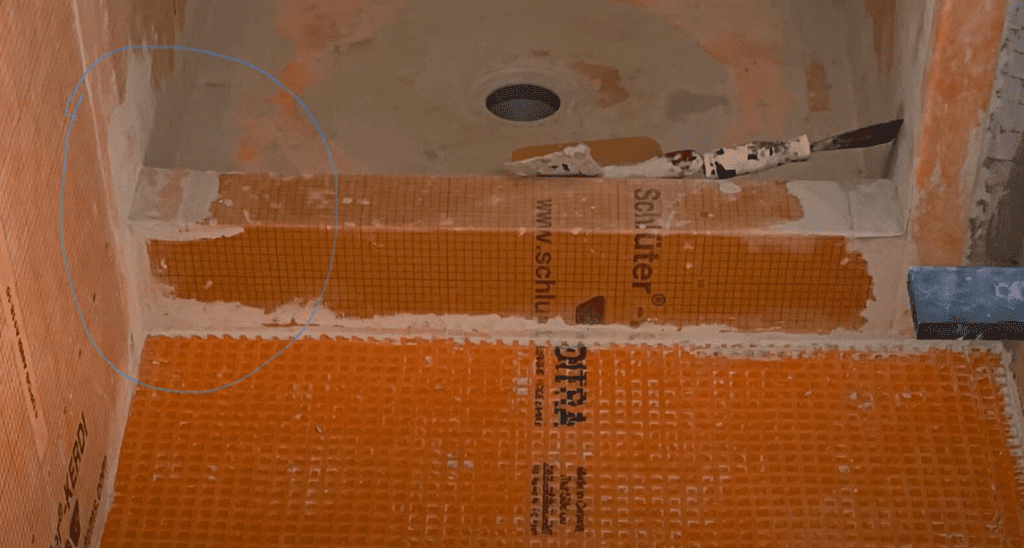
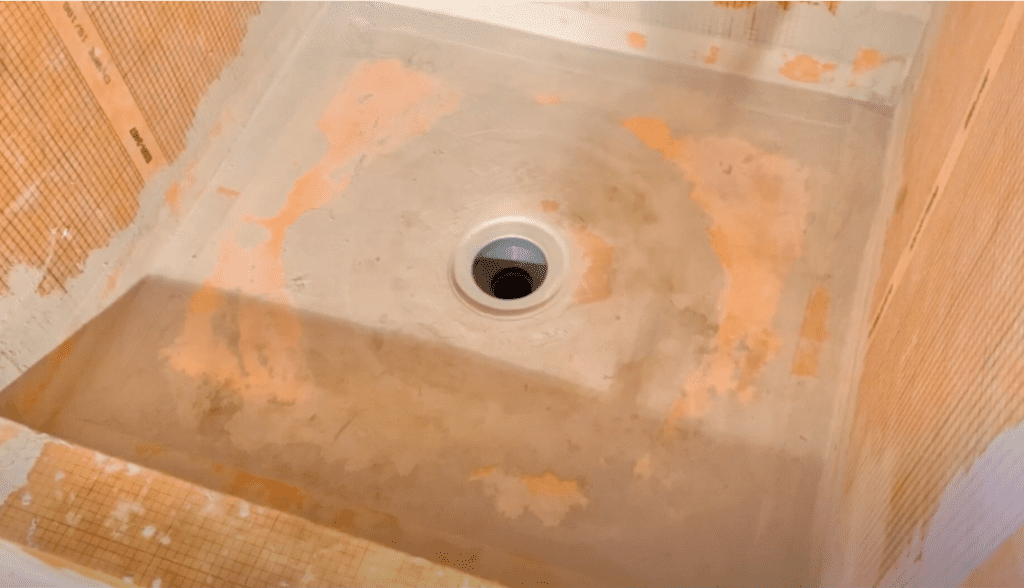
Continue to apply Kerdi Band and Kerdi Kereck to all seams, corners, and intersections to ensure that you have a completely waterproof application. Once all of the Kerdi Band and Kerdi Kereck has been installed, allow the thinset mortar to dry for 24-48 hours. Once the thinset mortar has dried, your Schluter Kerdi Shower Kit should look like this:
Clean up and prepare for Water Test
Be sure that you remove any excess thinset from the Schluter Kerdi Shower Kit before it dries – it is much easier to clean up when the thinset is still wet. Once the thinset has fully dried (usually after 48 hours), it is highly recommended that you perform a Water Test to make sure that there are no leaks in your shower. To learn how to perform a water test for the Schluter Kerdi Shower Kit System, keep reading.
If you would like more detailed instructions on how to install the Kerdi Band and Kerdi Kereck, check out This Article.
6. Complete Water Test
After you have completed your Schluter Kerdi Shower Kit installation, it is highly recommended that you perform a water test (also known as a shower leak test) to ensure that there are no leaks. To complete a water test, follow these steps:
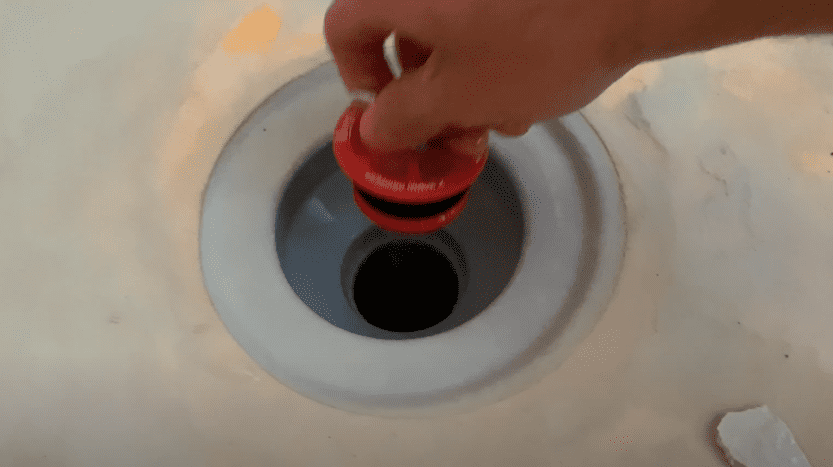
Insert Plug Into the Shower Drain
The first step in the Kerdi Shower Water Test is to plug the shower drain. Use a test plug appropriately sized for your shower drain pipe (usually 2 inch) and place it in the drain pipe. Tighten the plug by rotating the wing-nut clockwise. With the drain pipe completely sealed, you can move on to the next step and begin filling up the shower pan.
Pro Tip: Ensure that you wait at least 24 hours after installing the Kerdi Shower Kit BEFORE performing a water test. This is to allow the thinset mortar to fully cure.
Completely Fill Kerdi Shower Pan with Water
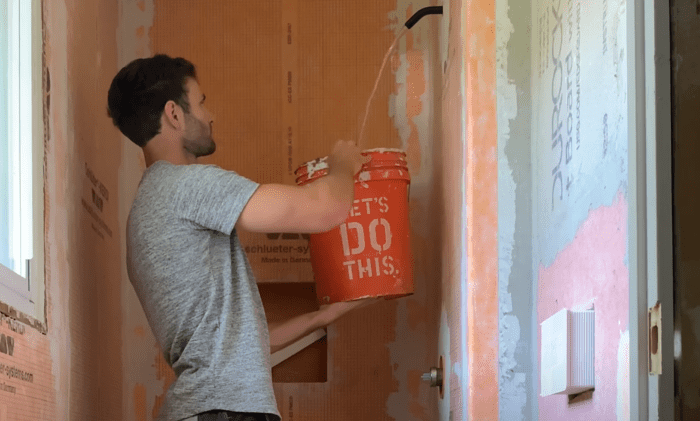
Once your shower drain is plugged, completely fill the Kerdi Shower Pan with clean water. The amount of water needed will depend on the size of your shower. At a minimum, add enough water so that the membrane to drain connection and floor to wall transitions are fully submerged.
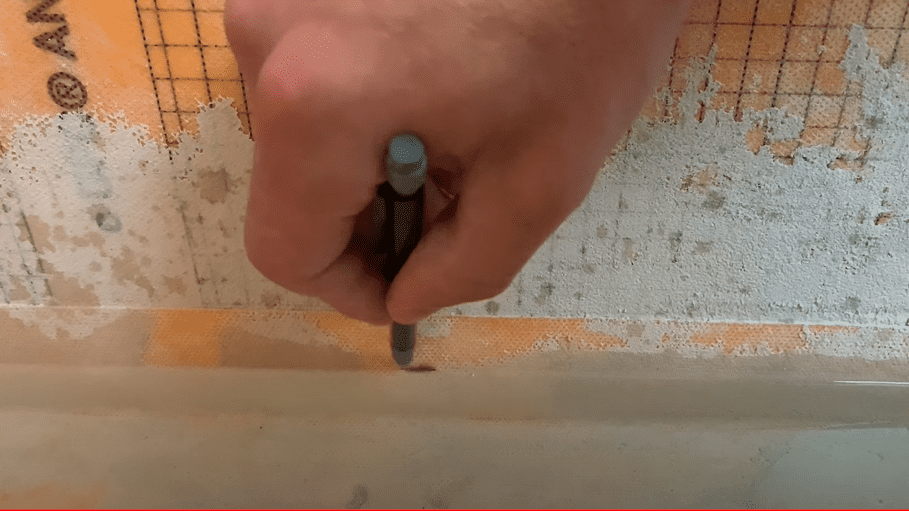
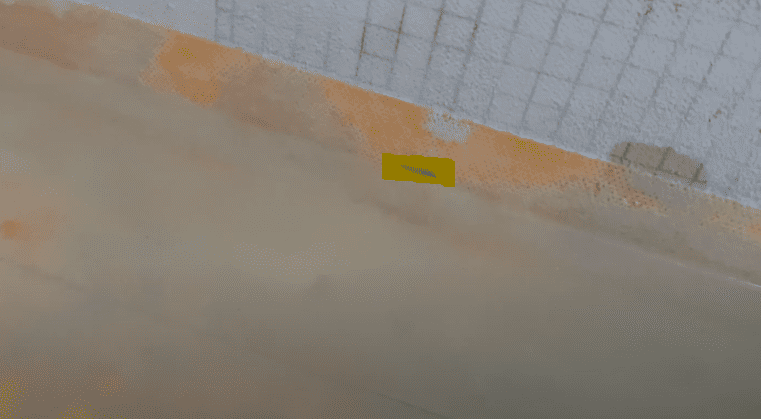
Mark the Water Surface Elevation with a Pencil

Once the Kerdi Shower Pan is completely filled with water, mark the water surface elevation with a pencil. This reference mark will be used as the “baseline” measurement of water in the Kerdi Shower Pan.
Wait 24 hours and Check the Water Surface Elevation
Leave water in the Kerdi Shower Pan for a minimum of 24 hours. After 24 hours have passed, check the water surface elevation in the Kerdi Shower Pan. If the water surface elevation is still even with the pencil mark, your water test was a success. It is also recommended that you visually inspect for any leaks from underneath the shower pan (if possible).
If you find that your water level dropped significantly, you may have a leak. Drain the water, identify the source of the leak, and repair. Repeat water test to confirm a successful repair.
Pro Tip: Do not let the water sit in the Kerdi Shower Pan for more than 48 hours. Evaporation may interfere with accurate results.
Drain Water from Shower Pan
After you have successfully completed your Kerdi Shower Water Test, it is time to remove the standing water from the shower pan. To remove water from the Kerdi Shower Pan, remove the test plug from the shower drain by turning the wing-nut counterclockwise. Allow water to drain. Once all of the water has been drained from the Kerdi Shower Pan, allow the pan to fully dry before proceeding with your tile installation. Your Kerdi Shower Water Test is now complete.
If you are more of a visual learner, you can see exactly how I performed my Kerdi Shower Water Test by skipping to 9:22 of my Schluter Kerdi Shower Kit Installation video linked here.
A summary video showing EVERY SINGLE STEP of the Schluter Kerdi Shower Kit Installation Process can be seen here:
Next Steps
Congratulations! You have now successfully completed your Schluter Kerdi Shower Kit Installation. If you have completed the installation as outlined in this article, you will be left with a fully waterproof shower that will last for years to come.
Once the Schluter Kerdi Shower Kit Installation is complete, you can begin to tile your shower. For detailed videos that explain every step of the Schluter Kerdi Shower Kit tile process, check out my Youtube Channel or feel free to watch the videos below:
If you want to see how the Final Bathroom Transformation turned out, Check out the time lapse video below:
Thanks so much for checking out ATImprovements! If you learned something from this project, you might also like these other DIY Projects:
How to Install Hexagon Floor Tiles: How to Install Hexagon Floor Tile – AT Improvements
Schluter Ditra VS Cement Board (Which is better?): Schluter Ditra VS Cement Board (Which is better?) – AT Improvements
Thanks!
DISCLAIMER: This is a reference guide only. Links included in this article might be affiliate links. If you purchase a product or service with the links that I provide I may receive a small commission. There is no additional charge to you! Thank you for supporting ATimprovements so I can continue to provide you with free content each week!