
After you have completed your Schluter Kerdi Shower Kit installation, it is highly recommended that you perform a water test (also known as a shower leak test) to ensure that there are no leaks.
To perform a water test, use a test plug to seal the drain. Next, add water so that the shower pan is completely submerged. Mark the water surface elevation within the shower pan and let the water sit in the Shower Pan overnight. After 24 hours, check the water level in the shower pan. If the water level did not drop, your water test was successful. Drain remaining water from the shower pan and prepare for tiling.
This article will explain everything you need to know for a successful Kerdi Shower Pan Water Test.
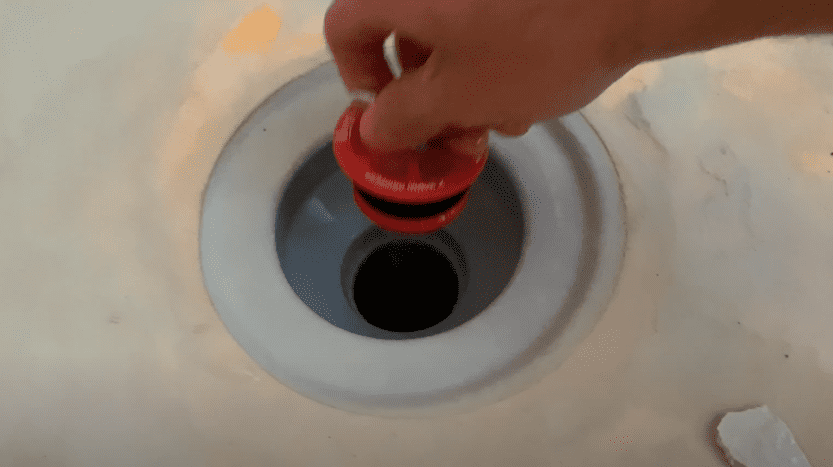
1. Insert Plug Into the Shower Drain
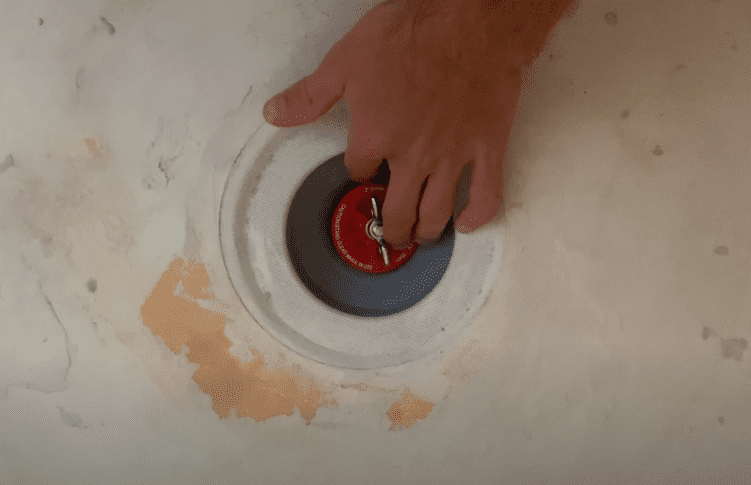
The first step in the Kerdi Shower Water Test is to plug the shower drain. Use a test plug appropriately sized for your shower drain pipe (usually 2 inch) and place it in the drain pipe. Tighten the plug by rotating the wing-nut clockwise. With the drain pipe completely sealed, you can move on to step two and begin filling up the shower pan.
Pro Tip: Ensure that you wait at least 24 hours after installing the Kerdi Shower Kit BEFORE performing a water test. This is to allow the thinset mortar to fully cure.
2. Completely Fill Shower Pan with Water
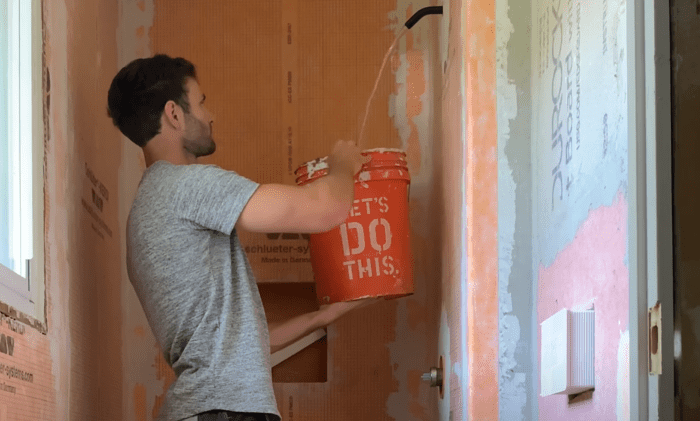
Once your shower drain is plugged, completely fill the Kerdi Shower Pan with clean water. The amount of water needed will depend on the size of your shower. At a minimum, add enough water so that the membrane to drain connection and floor to wall transitions are fully submerged.
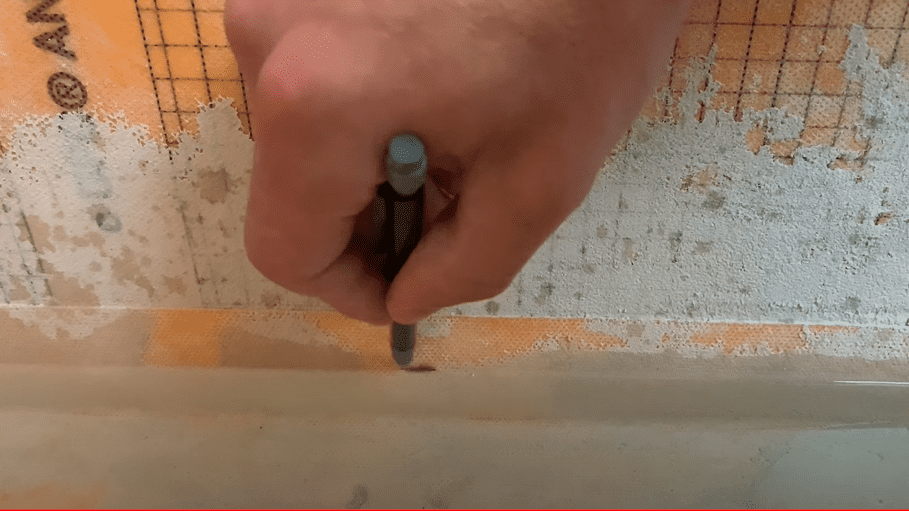
3. Mark the Water Surface Elevation with a Pencil

Once the Kerdi Shower Pan is completely filled with water, mark the water surface elevation with a pencil. This reference mark will be used as the “baseline” measurement of water in the Kerdi Shower Pan.
4. Wait 24 hours and Check the Water Surface Elevation
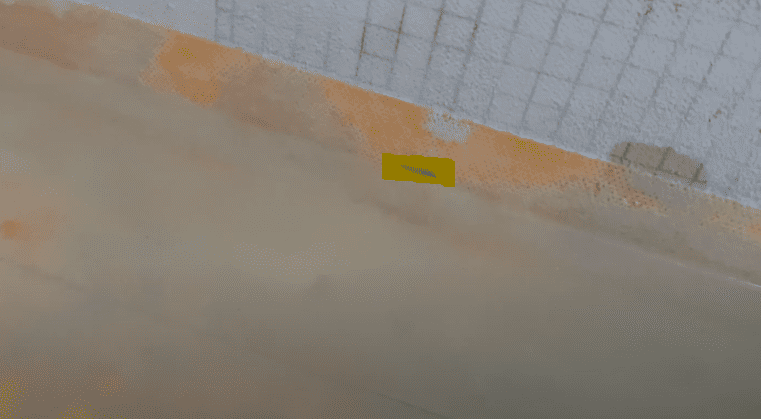
Leave water in the Kerdi Shower Pan for a minimum of 24 hours. After 24 hours have passed, check the water surface elevation in the Kerdi Shower Pan. If the water surface elevation is still even with the pencil mark, your water test was a success. It is also recommended that you visually inspect for any leaks from underneath the shower pan (if possible).
If you find that your water level dropped significantly, you may have a leak. Drain the water, identify the source of the leak, and repair. Repeat water test to confirm a successful repair.
Pro Tip: Do not let the water sit in the Kerdi Shower Pan for more than 48 hours. Evaporation may interfere with accurate results.
5. Drain Water from Shower Pan
After you have successfully completed your Kerdi Shower Water Test, it is time to remove the standing water from the shower pan. To remove water from the Kerdi Shower Pan, remove the test plug from the shower drain by turning the wing-nut counterclockwise. Allow water to drain. Once all of the water has been drained from the Kerdi Shower Pan, allow the pan to fully dry before proceeding with your tile installation. Your Kerdi Shower Water Test is now complete.
If you are more of a visual learner, you can see exactly how I performed my Kerdi Shower Water Test by skipping to 9:22 of my Schluter Kerdi Shower Kit Installation video below:
After successfully completing your Kerdi Membrae Shower Kit Installation and your water test, you can begin to tile your shower.
If you are looking to Tile your Schluter Kerdi Shower Kit on your own, I recommend that you check out my tiling videos below:
Thanks so much for checking out ATImprovements! If you learned something from this project, you might also like these other DIY Projects:
How to Install Kerdi Shower Pan: How to Install Kerdi Shower Pan (Kerdi Shower Tray Installation) – AT Improvements
How to Install Kerdi Membrane: Kerdi Membrane Installation (Step-by-Step Installation Guide) – AT Improvements
How to Install a Kerdi Shower Curb: Kerdi Shower Curb Installation – AT Improvements
How to Install a Kerdi Shower Drain: Kerdi Shower Drain Installation – AT Improvements
How to Install Hexagon Floor Tiles: How to Install Hexagon Floor Tile – AT Improvements
Schluter Ditra VS Cement Board (Which is better?): Schluter Ditra VS Cement Board (Which is better?) – AT Improvements
To see the full bathroom transformation time lapse, click here!
Thanks!
DISCLAIMER: This is a reference guide only. Links included in this article might be affiliate links. If you purchase a product or service with the links that I provide I may receive a small commission. There is no additional charge to you! Thank you for supporting ATimprovements so I can continue to provide you with free content each week!