

Kerdi Band Installation 
Kerdi Kereck Installation


Kerdi Band and Kerdi Kereck Installation is typically the last step in the Schluter Kerdi Shower Kit System Installation Process. Kerdi Band is installed along the Kerdi Membrane seams and Kerdi Kereck is installed on the inside and outside corners. After installing Kerdi Band and Kerdi Kereck along the joints and corners, your Schluter Shower System will be 100% Waterproof. Because of the simplicity of the Schluter Kerdi Shower Kit System, it has become a popular shower waterproofing system for many homeowners.
To install Kerdi Band, cut an appropriately sized strip using a utility knife or scissors. Next, apply Schluter ALL-SET mortar (or an unmodified thinset mortar) to the Kerdi Band application area using a trowel. Press the Kerdi Band along the seam in the Kerdi Mebrane, and ensure that it is fully embedded in the thinset mortar. Check to make sure the Kerdi Band is centered along the seam. If you are installing Kerdi Band in a corner, fold the Kerdi Band along the crease so that it forms a 90 degree angle before embedding in thinset.
Although installing Kerdi Kereck is similar to installed Kerdi Band, there are a few differences.
To install Kerdi Kereck, apply Schluter ALL-SET mortar (or an unmodified thinset mortar) to the application area using a trowel. Press the Kerdi Kereck into the inside or outside corner, firmly embedding it into the thinset.
This article will outline every step of the Kerdi Band and Kerdi Kereck installation process to ensure that your entire shower system is completely waterproof.
If you are more of a visual learner, you can learn how to install the entire Schluter Kerdi Shower Kit System (including Kerdi Band and Kerdi Kereck) by watching my Youtube Video below:
1. Prepare the Area for Kerdi Band and Kerdi Kereck Installation.
Typically, waterproofing the Schluter Kerdi Shower intersections with Kerdi Band and Kerdi Kereck is the last step in the Schluter Kerdi Shower Kit Installation Process. Generally, the Schluter Kerdi Shower Kit is installed in the following sequence:
- Step 1: Install Kerdi Membrane
- Step 2: Install Kerdi Shower Pan
- Step 3: Install Kerdi Shower Curb
- Step 4: Waterproof all intersections and joints with Kerdi Band and Kerdi Kereck
Therefore, before you can complete your Kerdi Shower System waterproofing with Kerdi Band and Kerdi Kereck, you will have need to have already installed your Kerdi Membrane, Kerdi Shower Pan, Kerdi Shower Curb, etc.
2. Apply Thinset Mortar to the Application Area
To apply Kerdi Band and Kerdi Kereck to the seams and joints in your Schluter Kerdi Shower System, start by applying thinset mortar to the application area.
It is recommended that any of Schulter’s thinset mortar products be used when installing Kerdi Band or Kerdi Kereck. These include:
Although it is highly recommended that Schluter Systems thinset be used for Kerdi Band and Kerdi Kereck installations in order to maintain the Schluter warranty, an unmodified thinset mortar can also be used.
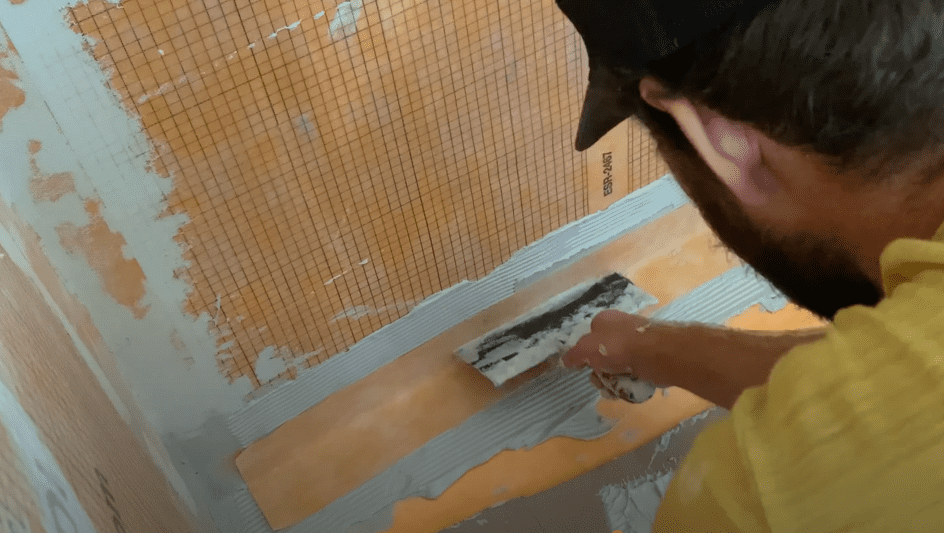
Apply thinset mortar to the application area using a using a 1/4” x 3/16” V-notch trowel.
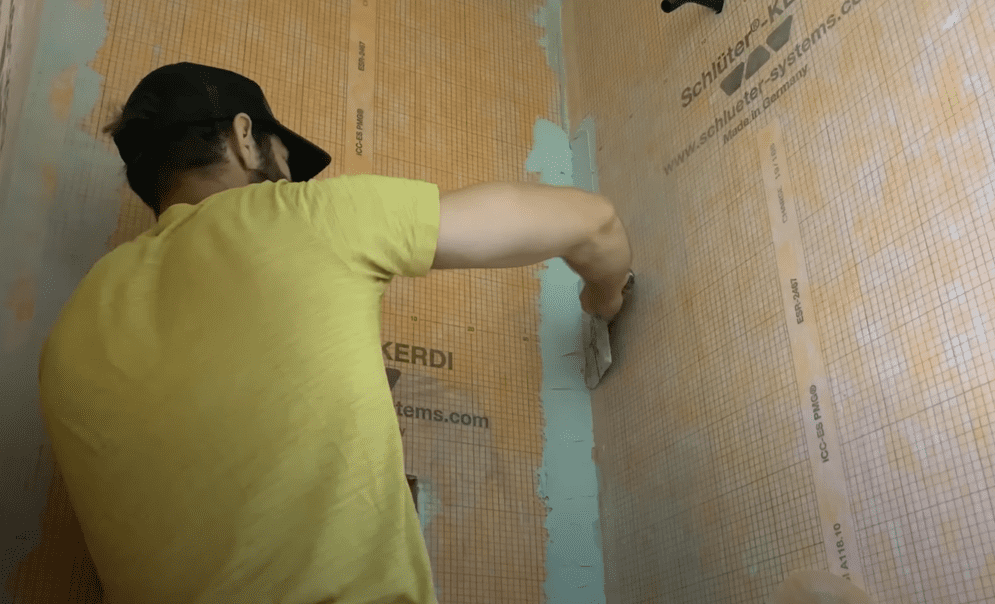
3. Embed Kerdi Band and Kerdi Kereck into the Thinset Mortar
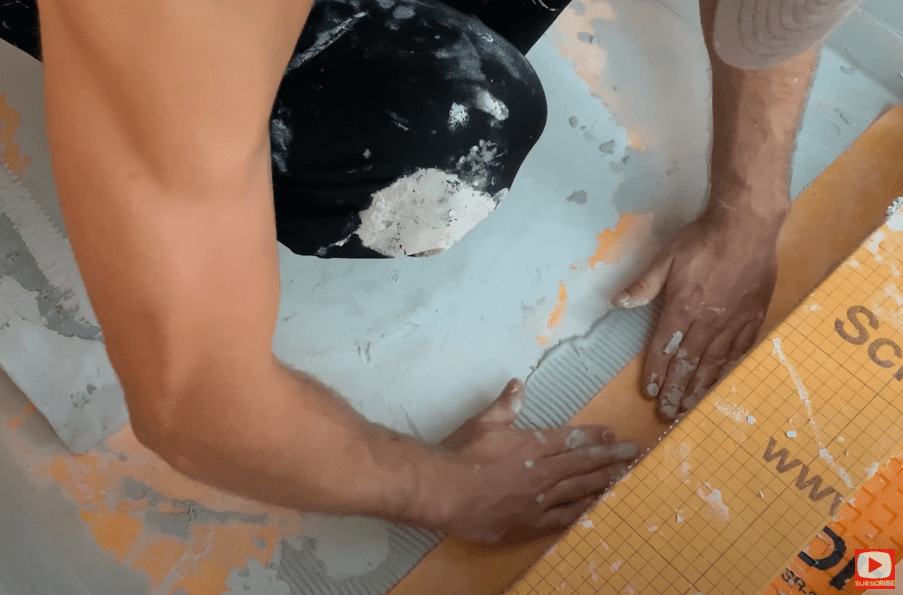
Once thinset has been applied to the application area, embed the Kerdi Band or Kerdi Kereck into the thinset mortar. Ensure that there is a good bond by applying firm, even pressure with a trowel or putty knife.
Use a trowel or putty knife to remove any excess mortar that is trapped behind the Kerdi Band or Kerdi Kereck.

If you are applying Kerdi Band in a corner, fold the Kerdi Band in half along the crease. Then, place the folded Kerdi Band into the corner and press it into place using a putty knife. Use a putty knife or trowel to remove and excess thinset and to ensure that there is no excessive build up of mortar.
Be sure that Kerdi Band overlaps all seams by a minimum of 2″
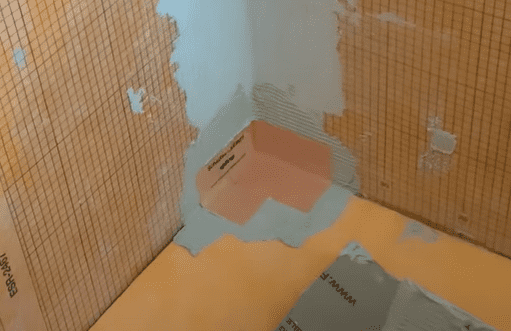
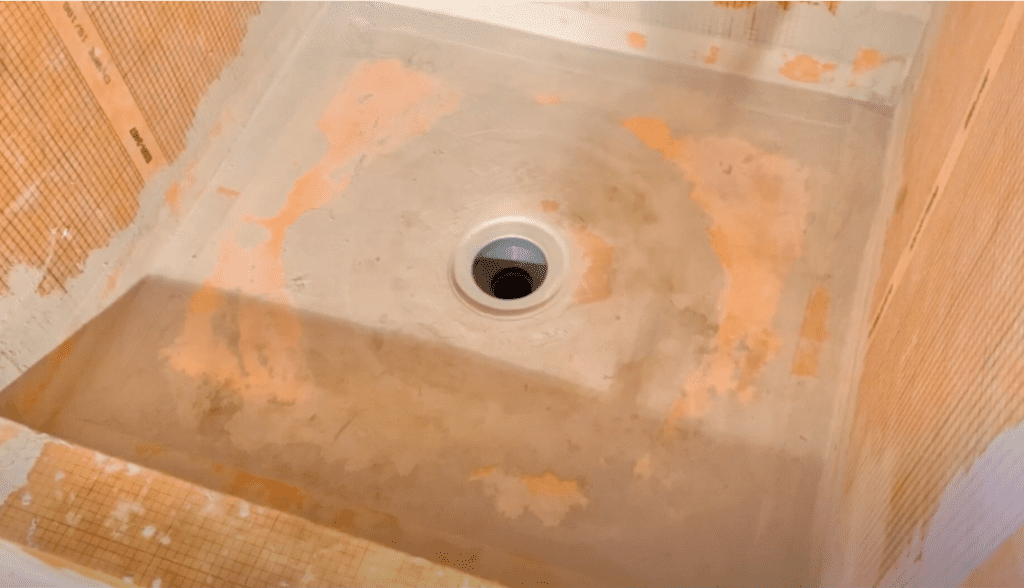
Continue to apply Kerdi Band and Kerdi Kereck to all seams, corners, and intersections to ensure that you have a completely waterproof application. Once all of the Kerdi Band and Kerdi Kereck has been installed, allow the thinset mortar to dry for 24-48 hours. Once the thinset mortar has dried, your Schluter Kerdi Shower Kit should look like this:
4. Clean up and prepare for Tiling
Be sure that you remove any excess thinset from the Schluter Kerdi Shower Kit before it dries – it is much easier to clean up when the thinset is still wet. Once the thinset has fully dried (usually after 48 hours), it is highly recommended that you perform a Water Test to make sure that there are no leaks in your shower. To learn how to perform a water test for the Schluter Kerdi Shower Kit System, check out my “Schluter Kerdi Water Test” article.
Once your Schluter Kerdi Shower System passes the water test, you are now ready to begin tiling your shower. If you are looking to Tile your Schluter Kerdi Shower Kit on your own, I recommend that you check out my tiling videos below:
Thanks so much for checking out ATImprovements! If you learned something from this project, you might also like these other DIY Projects:
How to Install Kerdi Shower Pan: How to Install Kerdi Shower Pan (Kerdi Shower Tray Installation) – AT Improvements
How to Install Kerdi Membrane: Kerdi Membrane Installation (Step-by-Step Installation Guide) – AT Improvements
How to Install a Kerdi Shower Curb: Kerdi Shower Curb Installation – AT Improvements
How to Install a Kerdi Shower Drain: Kerdi Shower Drain Installation – AT Improvements
How to Install Hexagon Floor Tiles: How to Install Hexagon Floor Tile – AT Improvements
Schluter Ditra VS Cement Board (Which is better?): Schluter Ditra VS Cement Board (Which is better?) – AT Improvements
To see the full bathroom transformation time lapse, click here!
Thanks!
DISCLAIMER: This is a reference guide only. Links included in this article might be affiliate links. If you purchase a product or service with the links that I provide I may receive a small commission. There is no additional charge to you! Thank you for supporting ATimprovements so I can continue to provide you with free content each week!