
Although mounting a railing or post in concrete can seem a bit intimidating, it is a relatively easy DIY project – as long as you have the right tools and materials.
To install a railing or post in concrete, start by marking the post location and the bolt locations on the concrete. Next, use a carbide tipped drill bit and a rotary hammer to drill into the concrete at the marked bolt locations. After drilling, remove any concrete dust from the drilled hole using a vacuum and then position the railing post in place. Next, insert concrete expansion anchor bolts through the post holes and into the concrete. Level the post using shims (if necessary) and then tighten the expansion anchors to secure the post in place.
Installing and anchoring a post for a railing, deck, etc. in concrete is a project that the average homeowner can tackle. This article will outline everything you need to know so that you can successfully anchor a railing post (or similar) in concrete.
Tools Needed to Install a Railing or Post in Concrete
In order to successfully anchor a post in concrete, you will need the following tools and materials:
- Carbide Tipped Drill Bit
- Hammer Drill
- Concrete Expansion Anchors
- Socket Wrench (or similar)
- Shims
- Level
1. Mark the Post Location
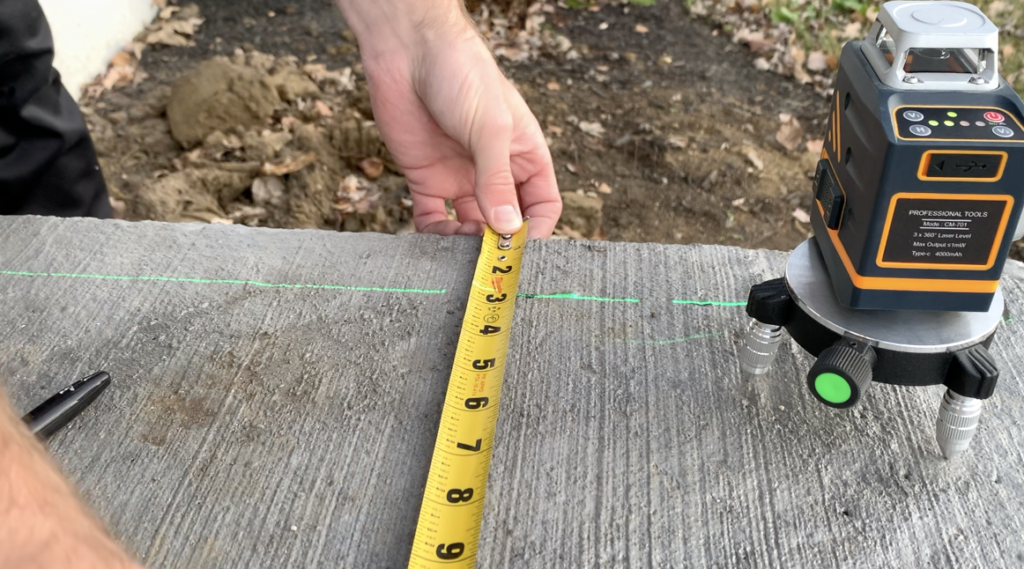
Before you can actually anchor your railing post in concrete, you will need to mark the actual post location. To do this, use a laser level or chalk line to mark a straight line. Use this line as a guide to mark the actual location for your post(s). If you are installing multiple posts in a line (which is typical for many railing or post projects), marking the location and spacing of the posts ahead of time is very important.
2. Mark the Anchor Bolt Location
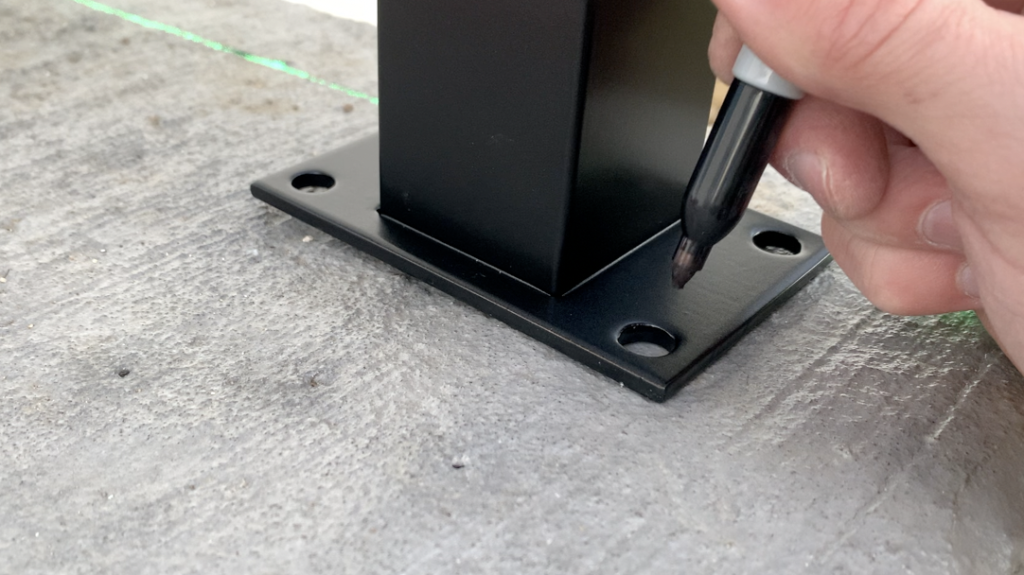
After marking the post location(s), position the post in place on the concrete. After getting the post oriented correctly, mark the actual locations for the concrete anchor bolts. Typically, there will be four bolt locations per post. Mark each bolt location on the concrete using a pencil or marker and then remove the post.
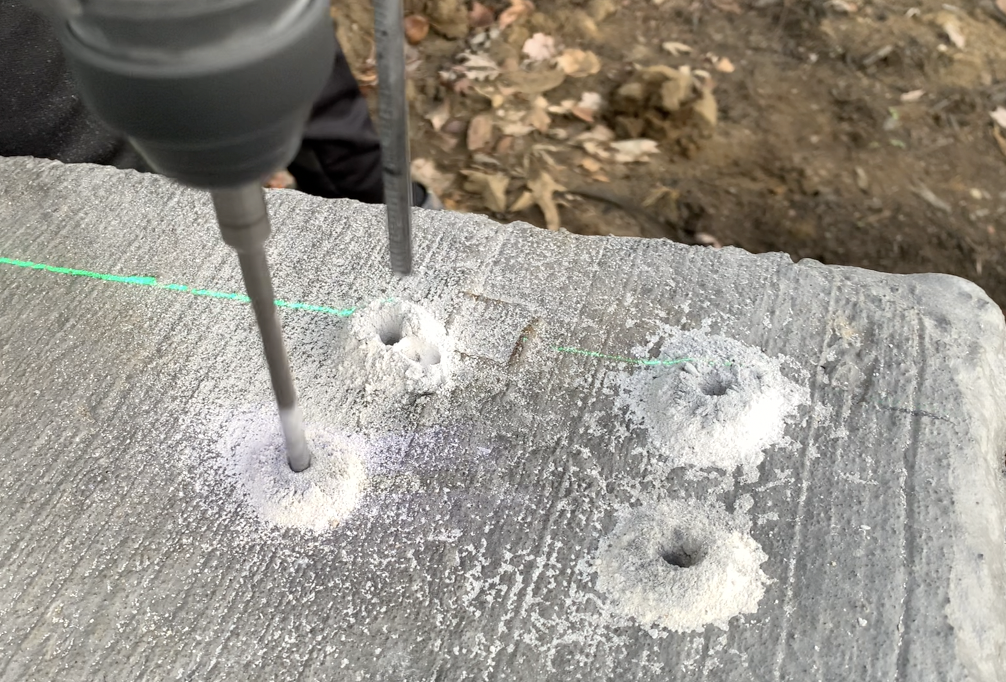
3. Drill the anchor bolt holes in the concrete
After marking the locations of the anchor bolts on the concrete surface, grab your carbide tipped drill bit, your hammer drill, and your concrete expansion anchor bolts and prepare to drill your holes in the concrete.

When purchasing your carbide tipped drill bit and your expansion anchors, you will want to do a bit of planning. Typically, you will want to purchase your expansion anchor bolts first and then purchase your carbide tipped drill bit based on the size of the anchor bolt selected.
For example, if you purchase ¼” concrete expansion anchor bolts you will want to purchase a ¼” carbide tipped masonry drill bit. That way, your anchor bolt will fit snugly in the concrete hole once it is drilled. Spend some time selecting the right size, length, and diameter of your concrete expansion bolts and carbide drill bit based on your railing post installation application.
Before drilling into the concrete, I recommend that you mark the drill depth on your carbide tipped drill bit using painter’s tape. You want the drill depth to be approximately ½” deeper than the length of the concrete expansion anchor bolt you are using.
PRO TIP: Some hammer drills have an adjustable “depth stop” on the drill that allow you to select the drilling depth. My drill has this feature, so I simply set the depth stop to ½” longer than the length of my concrete expansion anchors.

After drilling all four holes into the concrete, remove the concrete dust from the holes using compressed air or a vacuum.
After setting the drill depth, apply firm even pressure and drill into the concrete. Ensure that the hammer drill is held level (to avoid drilling at an angle) and that the “hammer” function is engaged.
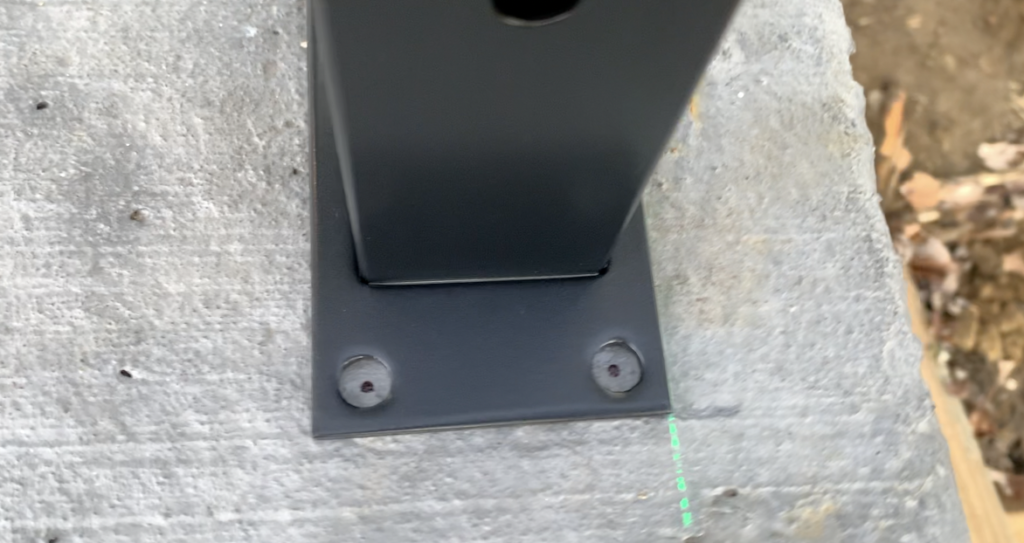
4. Install Anchor Bolts
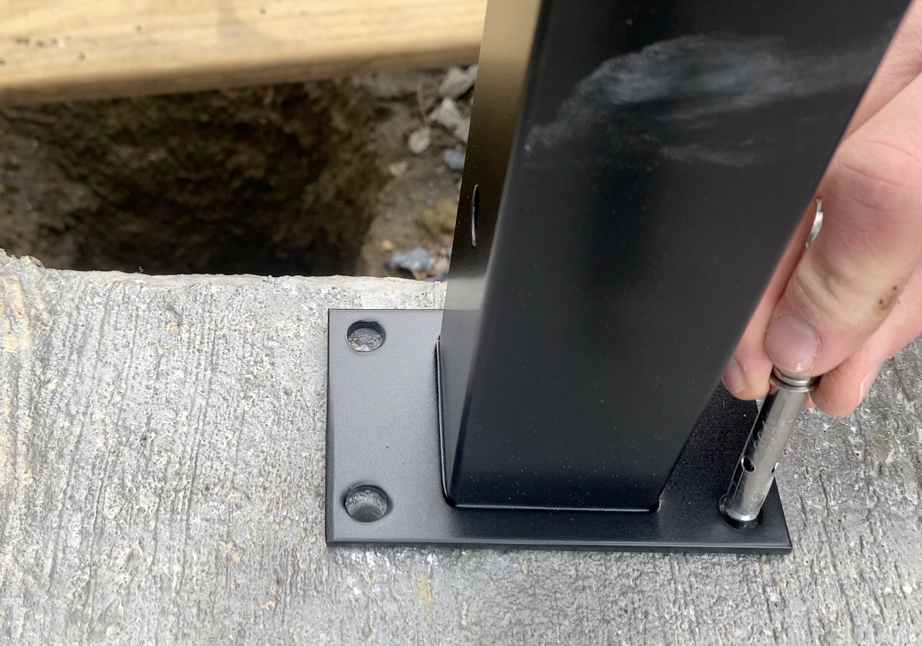
After drilling the holes in the concrete, re-position the post in place and then insert the concrete expansion anchors through the railing post and into each pre-drilled hole. If needed, use a hammer to force the concrete expansion anchor down into the hole.
After placing each expansion anchor into place (and ensuring that they are as deep as possible) you can proceed to the next step.
5. Level the post
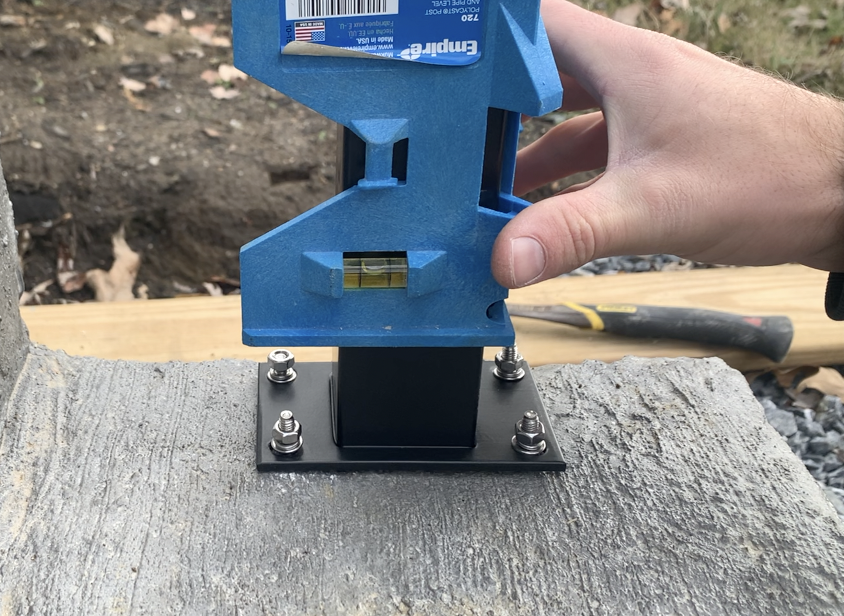
If you are working on a level concrete surface, your posts should be relatively level once positioned in place. However, you may find that plastic shims are needed in some cases to get the posts perfectly level.
Use plastic shims and a post level to ensure that each post is plumb. After getting the shims installed so that the post is level, you can begin to tighten the concrete expansion anchors.
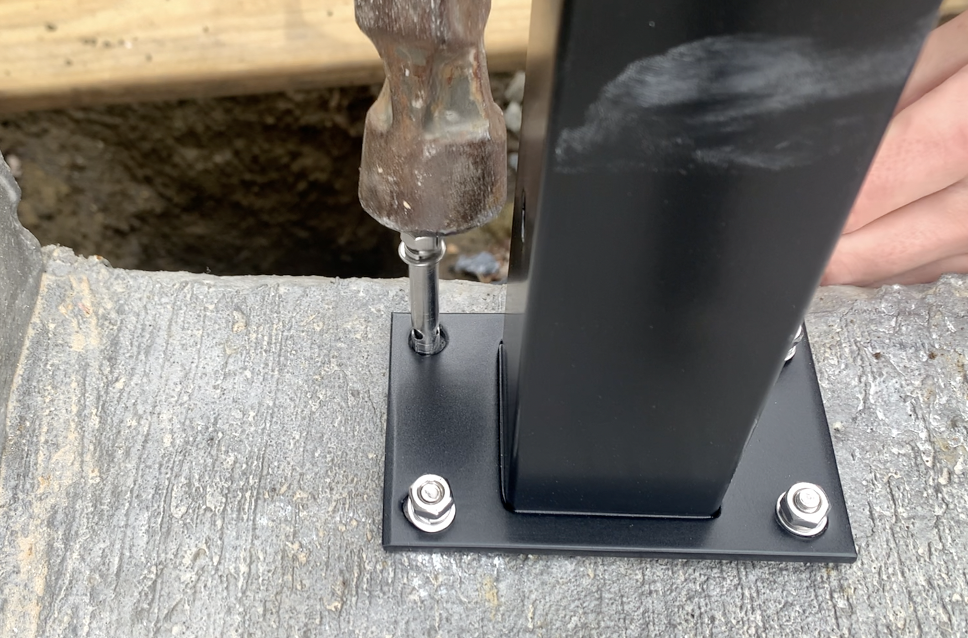
6. Tighten the Concrete Expansion Anchors
After leveling the posts with shims (if needed), begin to tighten the concrete expansion anchors. Typically, a socket wrench is the best tool for this. Slowly tighten each nut to cause the concrete anchor to expand at the bottom of the drilled hole. This expansion is what causes the bolt to successfully anchor within the concrete.
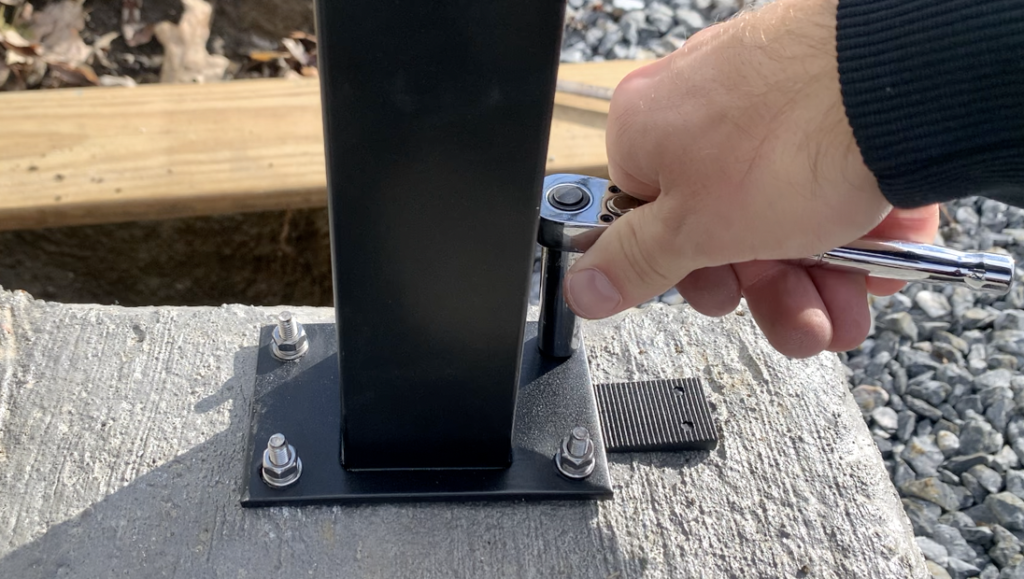
PRO TIP: Ensure that the post remains level as you tighten the concrete expansion anchor bolts. Uniformly tighten each bolt as you go. In other words, alternate bolts as you tighten them. Do not fully tighten one bolt before gradually tightening the others.
After tightening each nut sufficiently, give the post a test to ensure that it is level and fully secure.
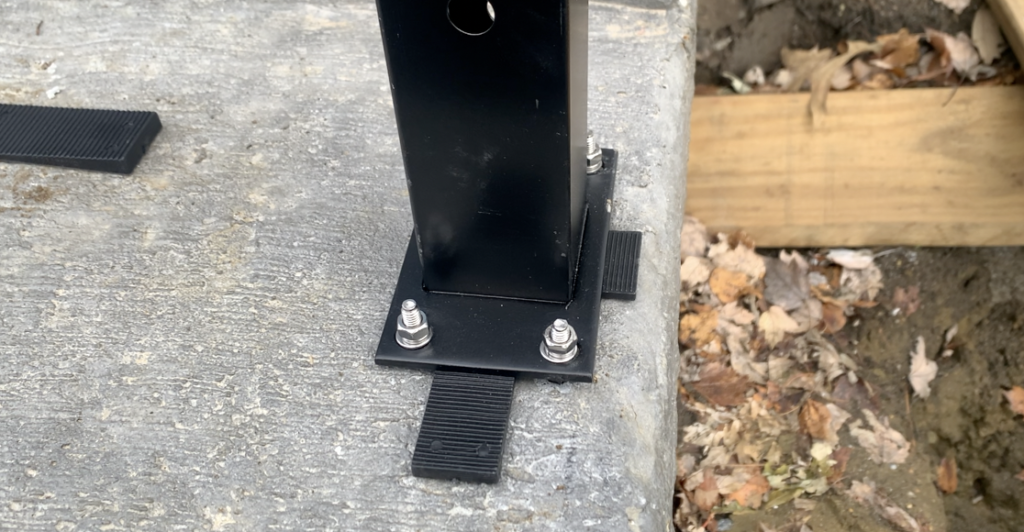
7. Cut Off Any Excess Shim
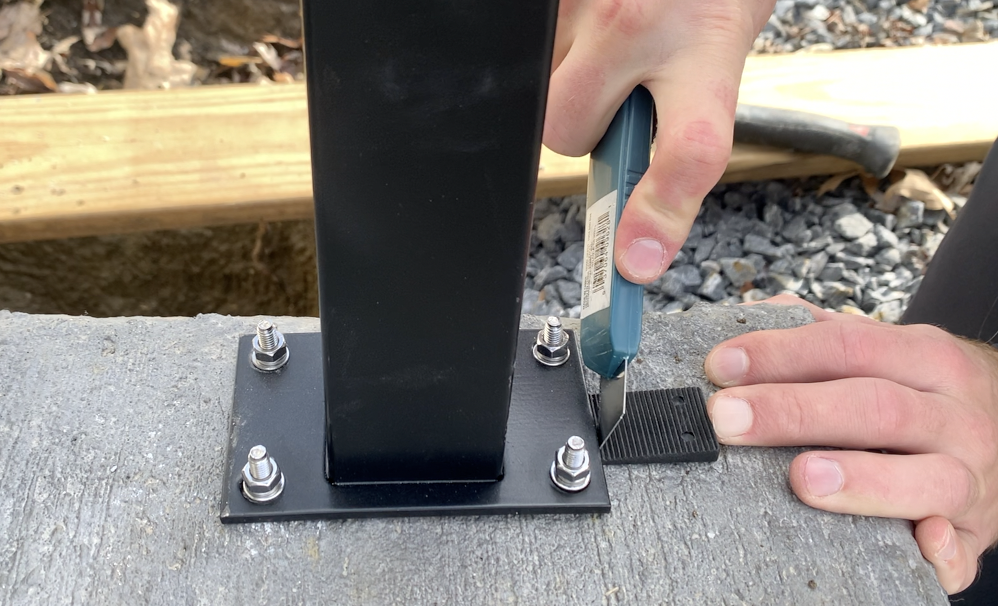
At this stage, cut off any of the excess shim (if applicable) using a utility knife. The goal is to cut the shim so that it is flush with the sides of the railing post.
8. Trim Off Any Excess Anchor Bolt (if needed)
If you feel that your concrete anchor bolt threading is too high (or if it is impeding the installation of bolt/decorative cap) you may want to trim off the excess. To do this, use a reciprocating saw with a metal blade to trim off any of the excess bolt length.
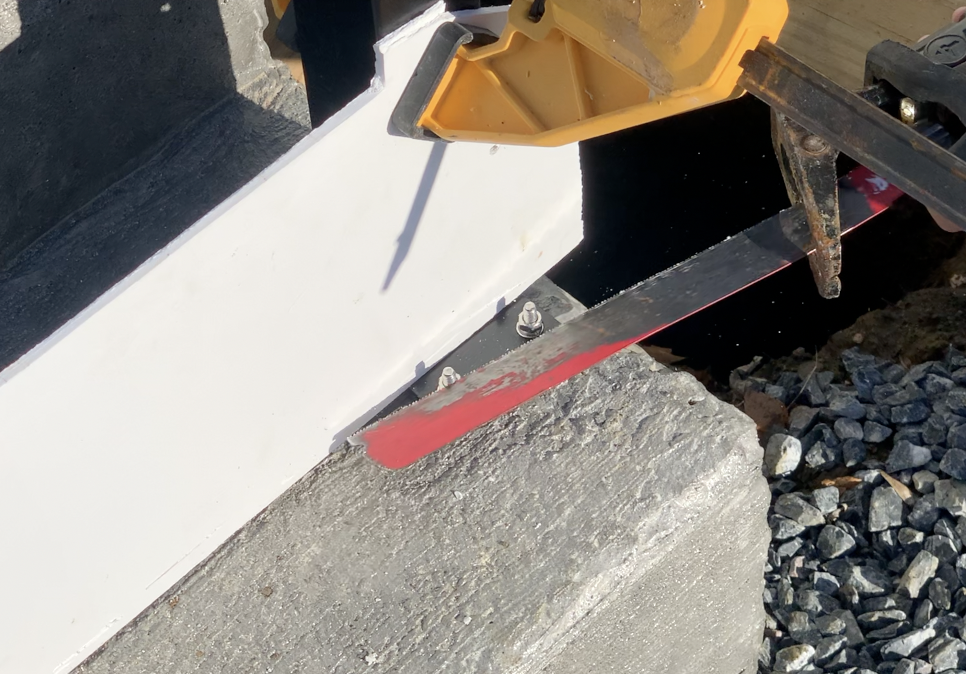
PRO TIP: Be sure to protect the railing post while you are using a reciprocating saw near it. You don’t want to accidentally cut or scratch the post during the trimming process.
9. Install Decorative Post Cap (if needed)
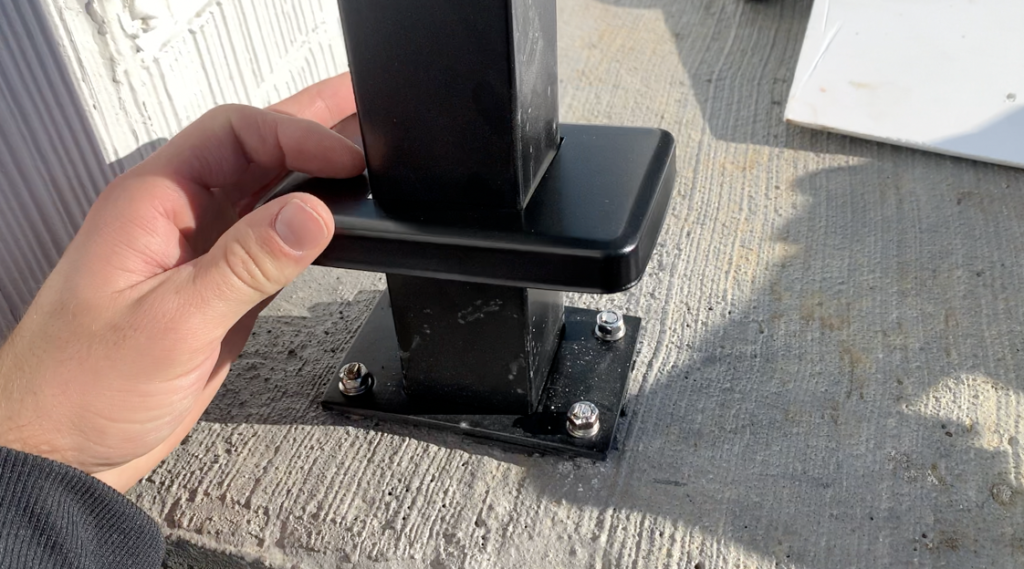
After anchoring the post and trimming off the excess shim, you have successfully anchored a railing post in concrete. If the railing post you are installing comes with a decorative cap, place it on the post at this time.
Repeat this process for all of the posts required for your project.
Thanks so much for checking out ATImprovements! If you learned something from this project, you might also like these other DIY Projects:
- How to Apply Epoxy to a Shed Subfloor: https://atimprovements.com/epoxy-on-wood-floor/
- How to Add Electricity to a Shed: https://atimprovements.com/how-to-run-electricity-to-a-shed/
- How to Build a Concrete Slab Shed Foundation: https://atimprovements.com/how-to-build-a-shed-base-concrete-slab-step-by-step-diy-guide/
- How to Frame a 10’x10′ Shed Base: https://atimprovements.com/how-to-build-a-shed-floor-base-diy-step-by-step-guide/
- How to Frame Shed Walls:https://atimprovements.com/how-to-frame-a-shed-how-to-frame-walls-for-a-10×10-modern-shed-step-by-step-with-pictures/
- How in Install a Shed Window: https://atimprovements.com/shed-window-installation-how-to-install-a-window-in-a-shed-diy/
- How to Install a Roll Up Door in a Shed or Garage:https://atimprovements.com/roll-up-door-installation/
Thanks!
DISCLAIMER: This is a reference guide only. Consult local code requirements. Links included in this article might be affiliate links. If you purchase a product or service with the links that I provide, I may receive a small commission. There is no additional charge to you! Thank you for supporting ATimprovements so I can continue to provide you with free content each week!