If you are looking for an easy way to add some personality to a room, look no further than a DIY Hanging Planter Holder. Although you can buy a hanging planter shelf for around $20, you can also make a hanging planter shelf with twine or yarn as a DIY project for less than $5! To make your own DIY hanging planter holder, you will need to:
- Step 1: Cut your planter holder shelf pieces from a log
- Step 2: Drill holes in your hanging planter shelf pieces
- Step 3: Install your hanging hook
- Step 4: Use yarn or twine to tie everything together and hang up your DIY Hanging Planter holder
This article will show you how to make a super simple DIY Hanging Planter Holder, step-by-step. Additionally, if you are more of a visual learner, you can check out my tutorial video below:
Now let’s get into each step and build a DIY hanging planter holder!
Step 1: Cut your planter holder shelf pieces from a log
There is really no need to overcomplicate this. Find a log roughly 4”-6” in diameter and cut small “wafers” / shelves that are roughly ½” thick. I recommend that you cut the “wafers”/ shelves with a miter saw, but you can also cut them with a chainsaw – which is what I did.

I decided to have three hanging planter shelves for my DIY hanging planter holder, so I cut three wafers. With your hanging planter shelves cut, it’s time to move on to Step 2.
Step 2: Drill holes in your hanging planter shelf pieces
For your DIY Hanging Planter holder, you will need to drill three holes in each of your hanging planter shelves. First, determine what type of yarn or twine you will use to hang up your planter. Next, find a drill bit that is SLIGHTLY larger than the diameter of your yarn or twine. Finally, drill three holes in each of your hanging planter shelves.
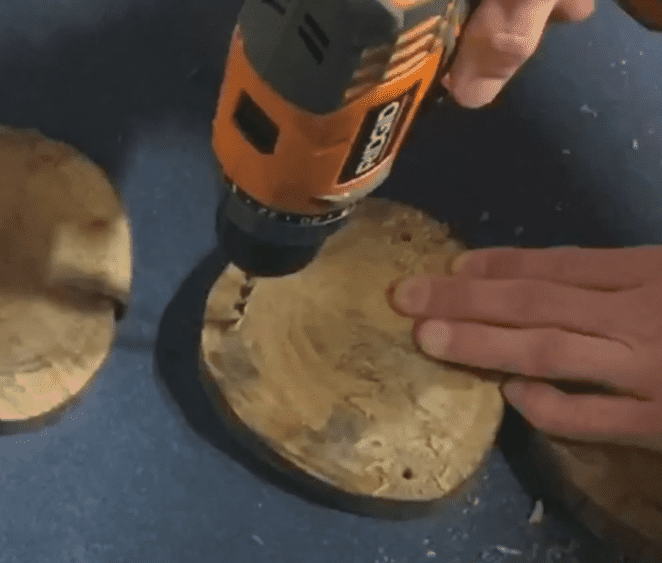
I recommend that you stack each of your shelves on top of each other so that your holes are evenly spaced for each shelf.
Step 3: Install your hanging hook
After your hanging planter shelves are prepared, you will need to hang up your hanging planter hook. I used a VersaHook to hang up my planter.
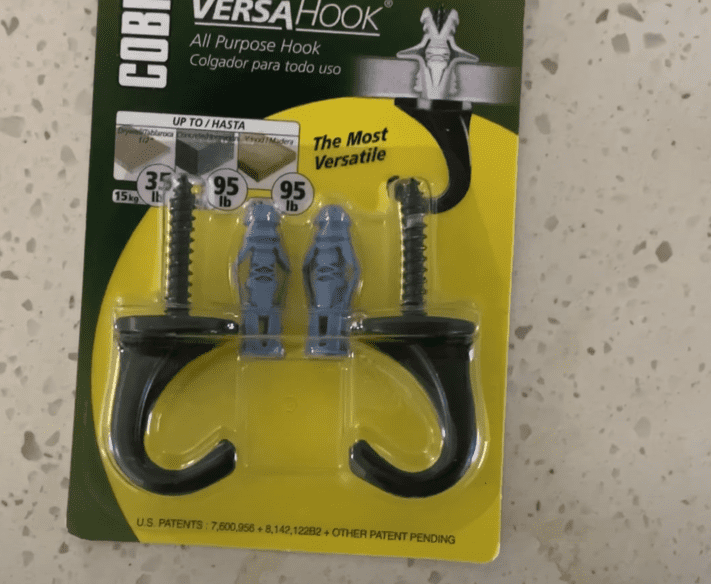
Determine the location where you want to hang up your planter and then screw the hook into the ceiling. I recommend that you try to install your hanging hook into a rafter. However, if you don’t have a rafter in the vicinity of where you want to hang you planter, you can use one of the drywall anchors that comes with the VersaHook.

Now, let’s move on to Step 4 and tie everything together.
Step 4: Use yarn or twine to tie everything together and hang up your DIY Hanging Planter holder
Next, you simply need to use yarn or twine to tie your DIY hanging planter shelf together. First, I recommend that you cut three pieces of yarn or twine to a length of approximately 6 feet. Next, tie the three strands together at the end to create a hanging loop as shown below.
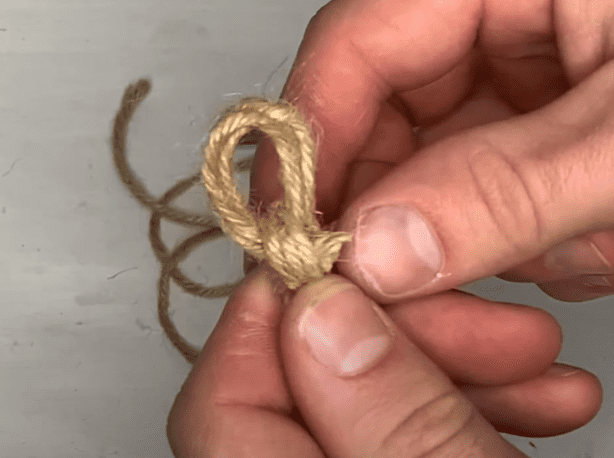
Once you have the three strands tied together in a loop, I recommend that you hang the yarn or twine up on the hook. Next, feed the strands of yarn/twine through the holes that you drilled in your hanging planter shelves.
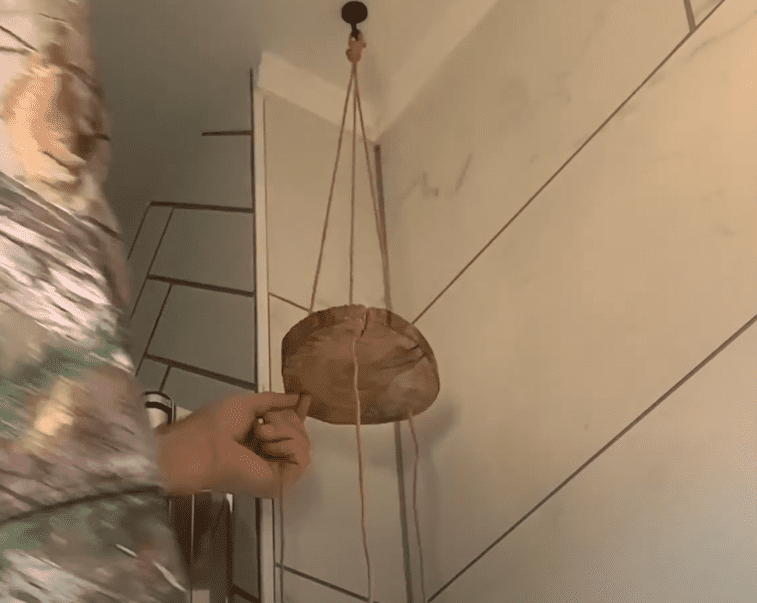
Determine what height you want your planter shelf to be and then tie knots underneath the Hanging Planter Shelves. Do this on all three strands of twine/yarn and adjust as necessary to make sure the planter shelf is level. Repeat this step for all of your planter shelves.
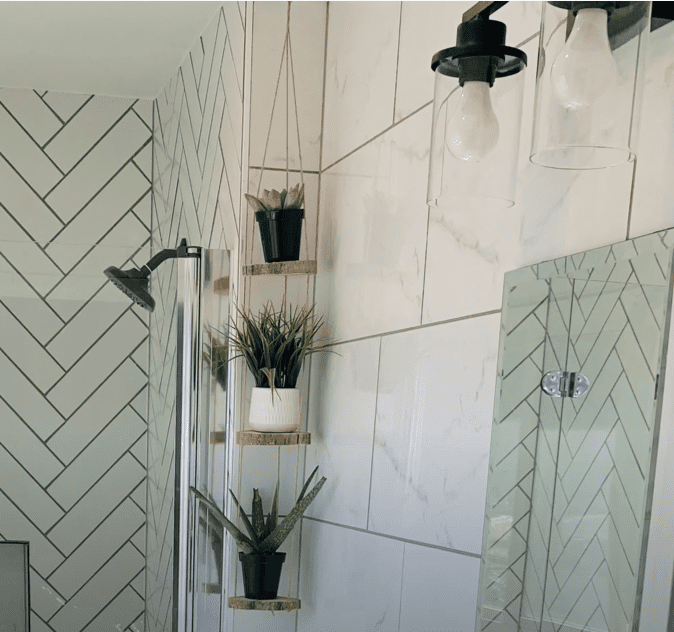
At this point, you have made your own DIY Hanging Planter Holder. Place your plants on each of your DIY hanging planter shelves and your project it complete!
If you enjoyed this project, you might also like these:
How to Build a Fire Pit: How to Build a DIY Fire Pit Table (And save hundreds of dollars in the process!) – (atimprovements.com)
How to Install a DIY wire / Cable Railing: DIY Cable Railing – How to Install Cable Railing Step-by-Step – (atimprovements.com)
How to Build Hexagon Shelves: DIY Hexagon Shelves (Honeycomb Shelves) – (atimprovements.com)
How to Patch a Hole in Concrete Foundation: How to Patch a Hole in Concrete Foundation – (atimprovements.com)
How to extend a Concrete Patio: Extend Concrete Patio – How to extend an existing concrete slab – (atimprovements.com)
DISCLAIMER: This is a reference guide only. Links included in this article might be affiliate links. If you purchase a product or service with the links that I provide I may receive a small commission. There is no additional charge to you! Thank you for supporting ATimprovements so I can continue to provide you with free content each week!
