
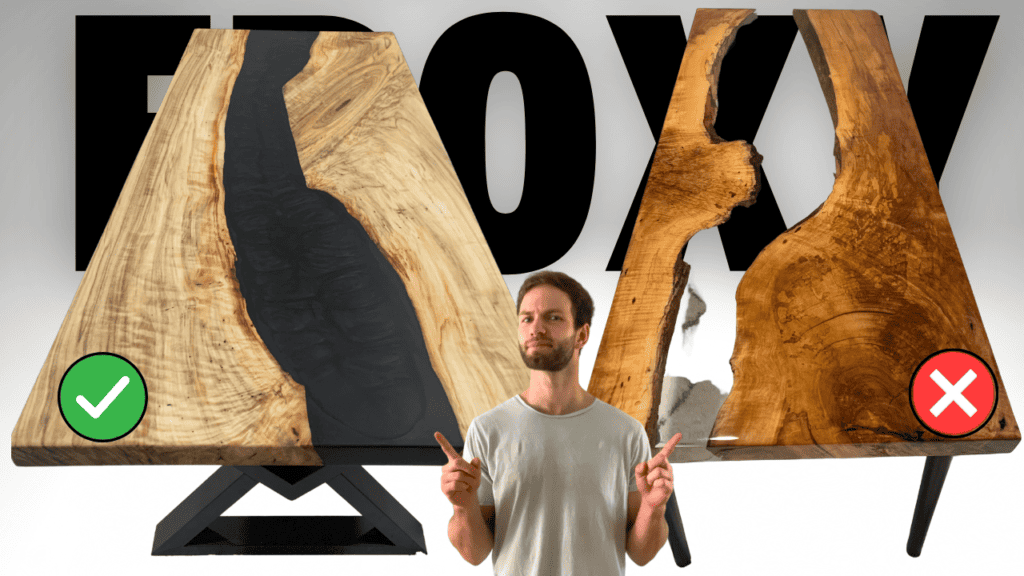
Epoxy river tables have become increasingly popular over the last few years due to their unique appearance and attractive design. Additionally, epoxy river tables make for a great woodworking project among DIY’ers and beginner woodworkers since they are not exceptionally difficult to build. Although the process of making epoxy river tables involves quite a few steps, the final result is well worth the effort.
To build an epoxy river table, start by planning out your table layout and purchasing your live edge slabs. Next, cut your live edge slabs to the shape of your table and remove and loose bark, dust, etc. using a wire brush or chisel. Construct a table “form” using melamine and place your live edge slabs within the form with a gap of around 8” in the middle which will be filled with epoxy. Mix the epoxy resin and hardener in accordance with the manufacturer’s instructions and pour it into the form in between the two slabs. Remove any air bubbles from the epoxy using a heat gun or torch. After allowing the epoxy to cure, remove the table from the melamine form and begin the finishing process. Plane and sand the table as needed to make it flat and smooth and apply finish/stain. Finally, screw the table legs into the bottom of the epoxy river table.
Overall, building an epoxy river table is a beginner friendly DIY project that many can tackle. By following the steps in this article you will be able to replace your old, boring coffee table with a beautiful statement piece that is sure to get a lot of compliments.
To build an Epoxy River Table, you will need the following tools and materials:
- Live Edge Slabs (I recommend looking on Craigslist for local mill/lumber yards)
- Drill and Wire Brush (to remove bark)
- Melamine (to build the river table form)
- Tyvek Tape (prevents the epoxy for adhering to the form)
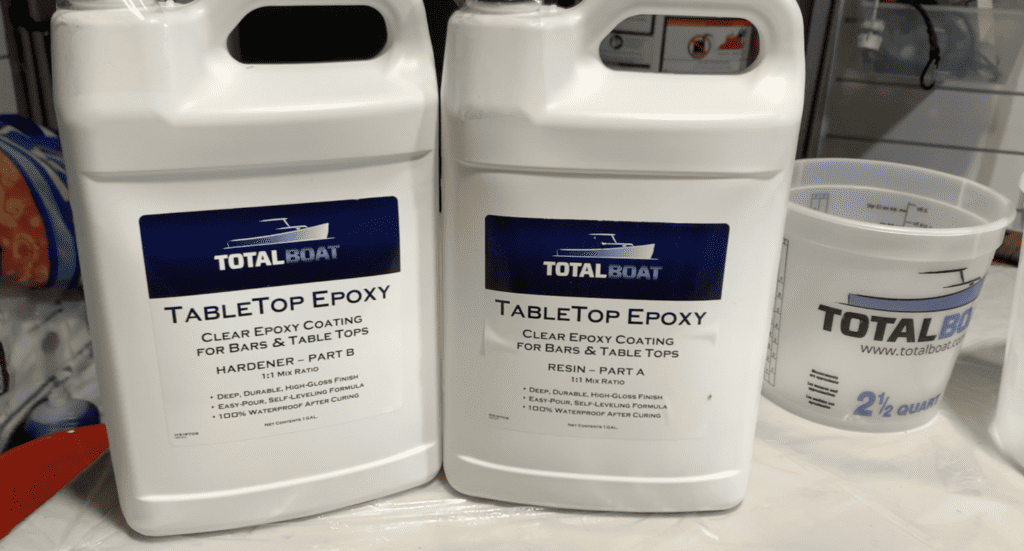
- Epoxy (I recommend TotalBoat Epoxy – Use Code Andrew20 for 10% off)
- Router and roundover bit (optional – gives edges a rounded look)
- Orbital Sander
- Sanding Pads (various grits)
- Table Finish (Tabletop Epoxy or Rubio Monocoat)
- Threaded bolt inserts for table legs (optional)
- Table legs (option 1)(option 2) (although you can build your own, I used these)
Once you have all of the tools and materials needed to build an epoxy river table, you can begin the construction process.
Plan Out Your Epoxy River Table Project
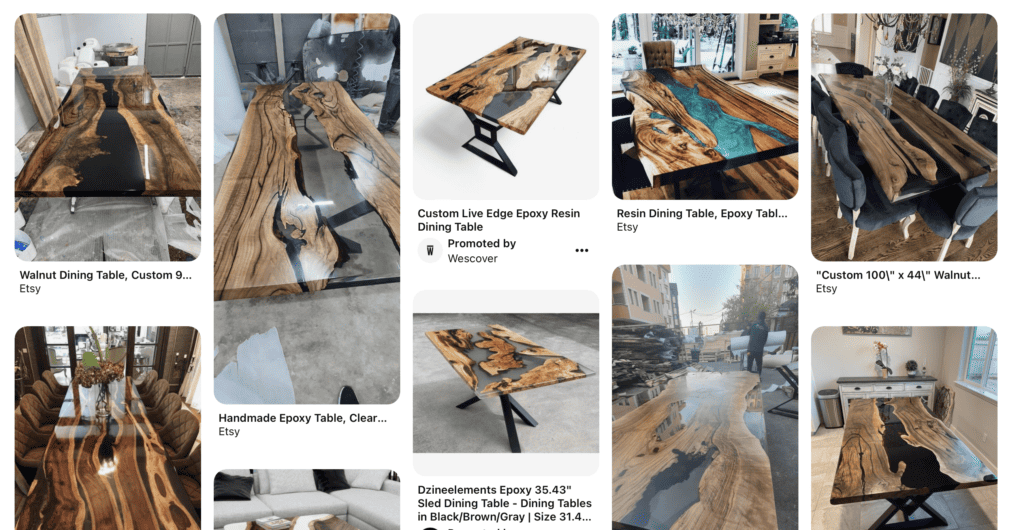
Like any project, the first step in an epoxy river table project is to plan out the table size, layout, style, etc. I highly recommend that you spend some time on Pinterest looking at various epoxy river table designs so that you can get a good idea of what you will want for your epoxy river table.
Once you have a good idea of the style of river table you want, determine how large you want the epoxy river table to be. After determining the size, layout, and style for your epoxy river table, it’s time to purchase the live edge lumber.
Purchase your Live Edge Lumber
Most epoxy river tables are rectangular in shape with live edge slabs along each of the long edges. Additionally, there is typically a 4”-10” space or “river” in between the two live edge pieces of lumber. With that in mind, I recommend that you spend some time researching local live edge slab mills or lumber yards in your area so that you can source your live edge lumber. A simple “Live Edge Slabs (my City)” search on Google should yield plenty of results for local live edge slab suppliers. However, I also recommend using Craigslist to find smaller, “mom and pop” lumber yards that will be able to sell you live edge slabs for a fraction of the cost. I purchased my live edge slabs from a guy I found on craigslist and was able to get a great deal.
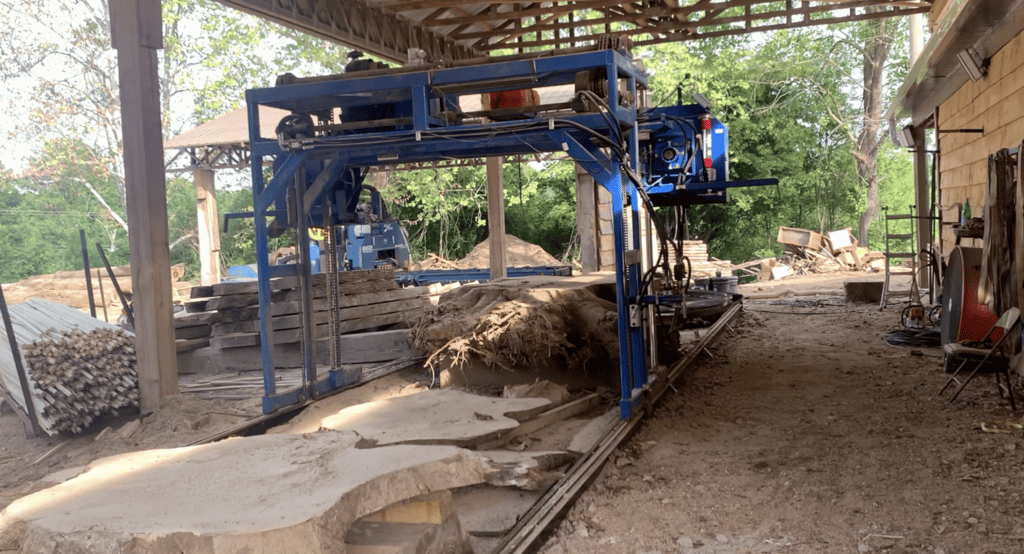
The type/species of live edge lumber you use will depend on the look you are going for. Hardwoods like oak and cherry make a great river table but softwoods like cottonwood can also be used. It simply depends on the look of river table you are going for and your budget (e.g. hardwood slabs will be more expensive than softwood).
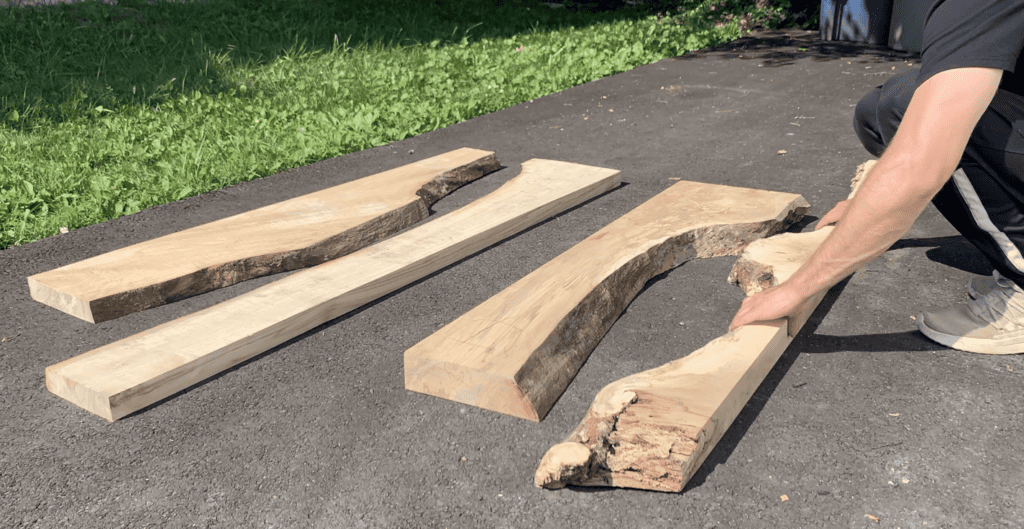
Remove bark, dust, etc. from the live edge lumber
After purchasing your live edge slabs, you will often need to remove bark, dust, burls, soft sections, etc. You want to ensure that all bark, “soft” areas, and rotten sections are removed since they will impact the ability of the epoxy to firmly bond to the slab.
To remove bark, I recommend that you use a drill with a wire brush attachment. An angle grinder with a wire brush wheel will also work. Use the wire brush to remove any loos bark and rotten areas from the slabs. Be sure to use a respirator when you perform this step since a lot of dust will be created.
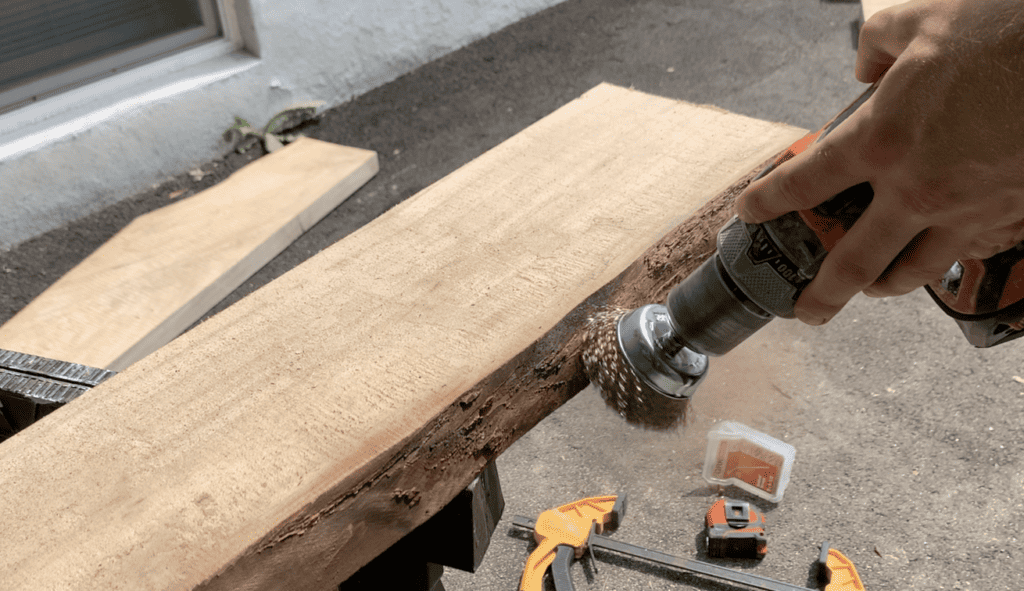
After cleaning up your live edge slabs and removing all bark and soft spots, you can begin to cut your live edge lumber to size.
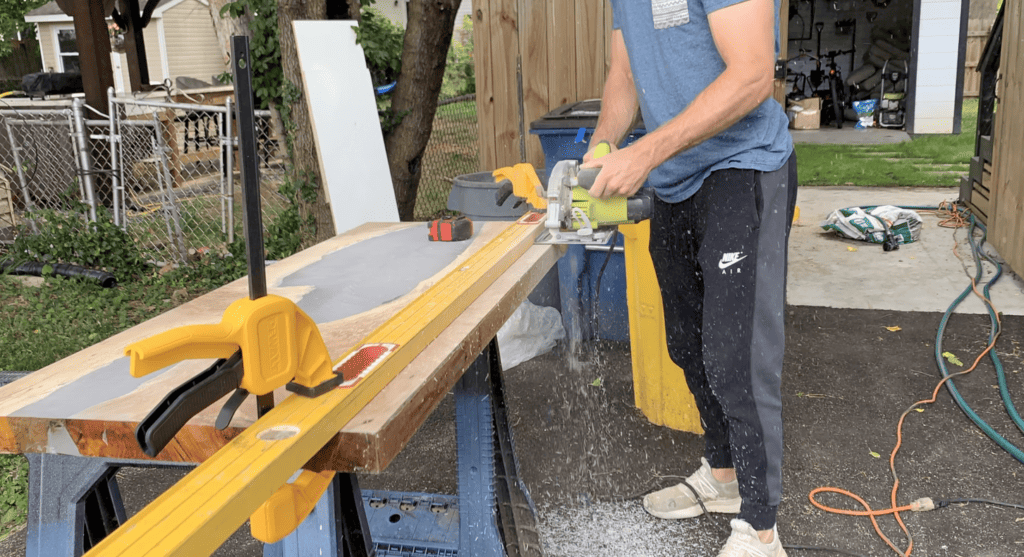
Cut your live Edge Lumber to Size
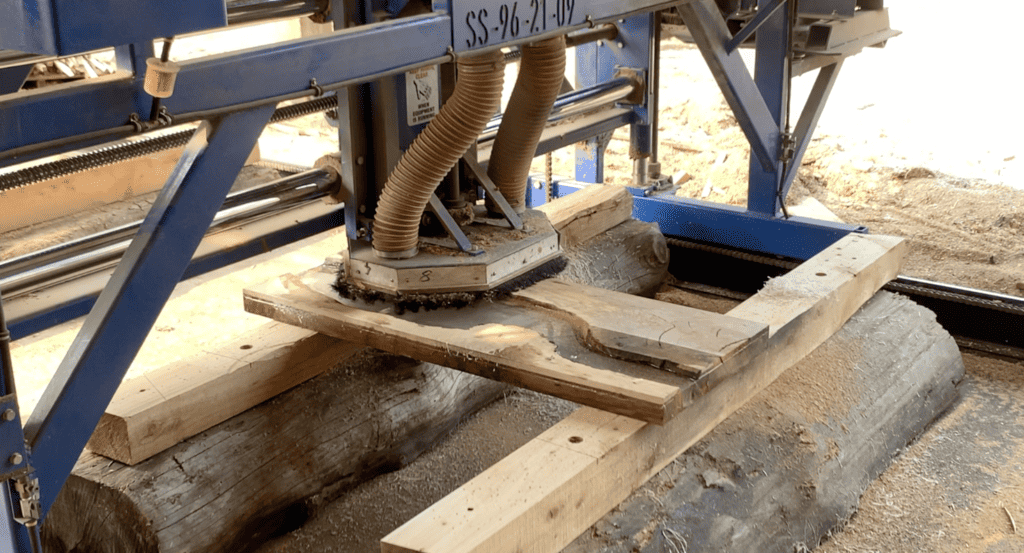
After purchasing your live edge slabs, you will need to cut/trim them to size base on your desired table layout. Typically, you will want one long straight edge for the long side of the table. I recommend that you use a circular saw or a track saw to cut the slabs so that you have one long, straight edge.
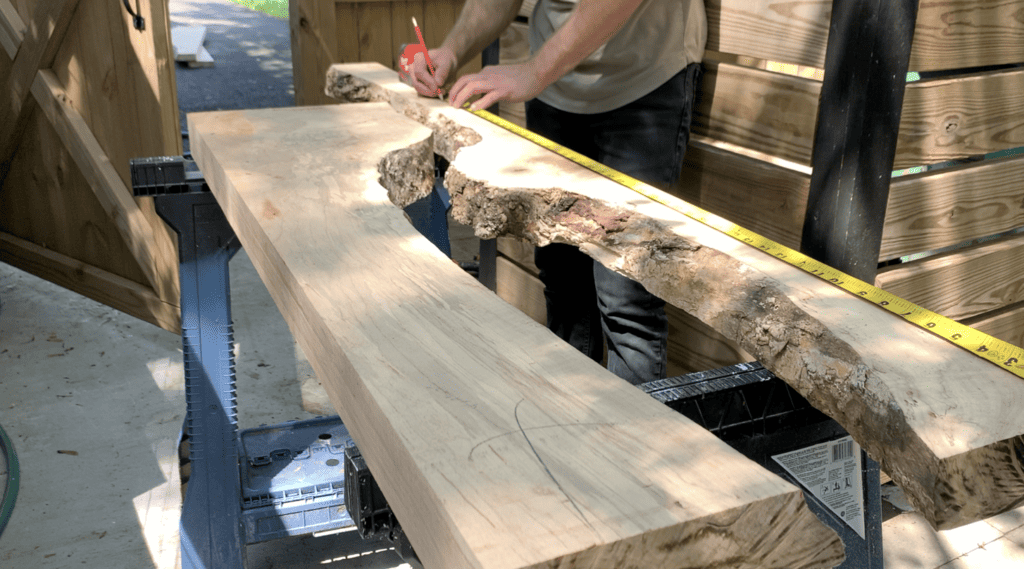
Next, use a framing square (if desired) to cut the slab at a 90 degree right angle at your desired length. By cutting the slabs in this manner, you will have slabs that will fit perfectly within a rectangular form – which will be constructed in the next step.
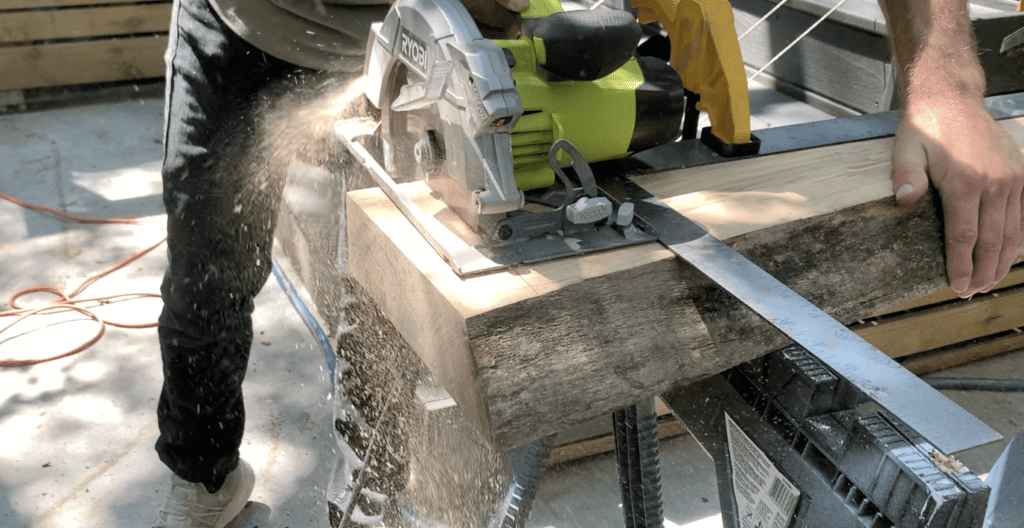
Build the Melamine Table Form
Once you have cut your live edge slabs to the desired length and width, it’s time to build the “form” box for the epoxy. The “form” box for the epoxy river table is typically constructed using a 4’x8’ sheet of melamine. To build the form, first cut the melamine sheet to the desired size (length x width). Typically, cutting the melamine sheet to the required size is best accomplished by using a table saw or track saw. However, you can use a circular saw with a guide as well (This is what I did). After cutting the base of the melamine form to the required size, you will need to “rip” down the walls of the melamine form. Typically, epoxy tables will be 1.5”-2”, in depth – so you will want to rip the sides of the melamine form to approximately 3”.
After cutting the base and the sides of the melamine form, attach the sides of the melamine form to the base of the form using screws. I find that pre-drilling the holes and using cabinet screws works best to hold the form together and to prevent splitting or de-laminating of the melamine.
After assembling the melamine form, you almost ready to begin mixing epoxy.
Prepare For the Epoxy Pour
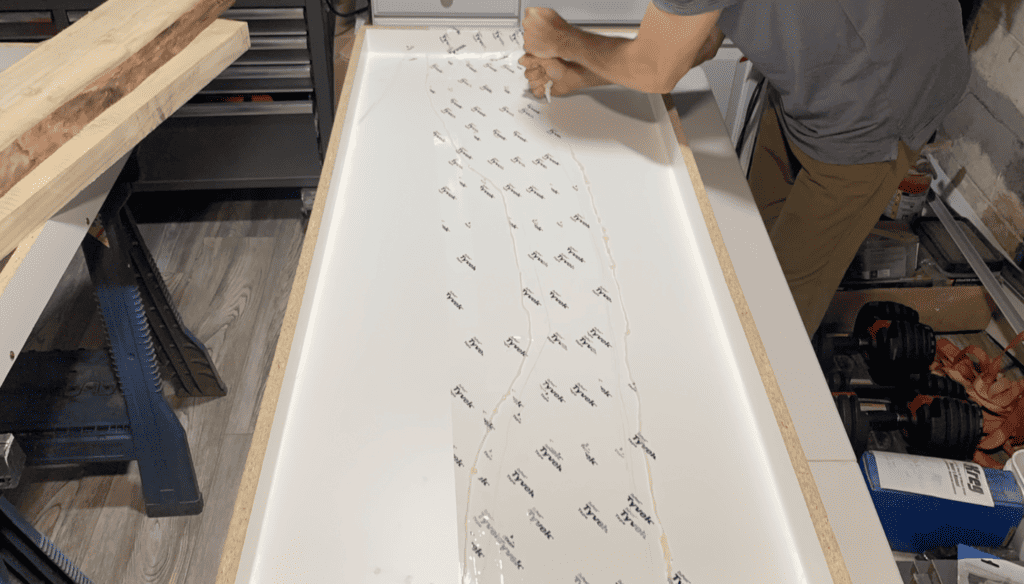
At this stage, place your live edge slabs within the melamine form to confirm that everything fits appropriately. Make any adjustments as needed. After placing the lumber within the forms, I recommend that you mark the outline of the wood with a pencil and then remove the form. If desired, you can place Tyvek tape over the center of the form to prevent the epoxy from sticking to the melamine. However, melamine by itself is typically epoxy resistant.
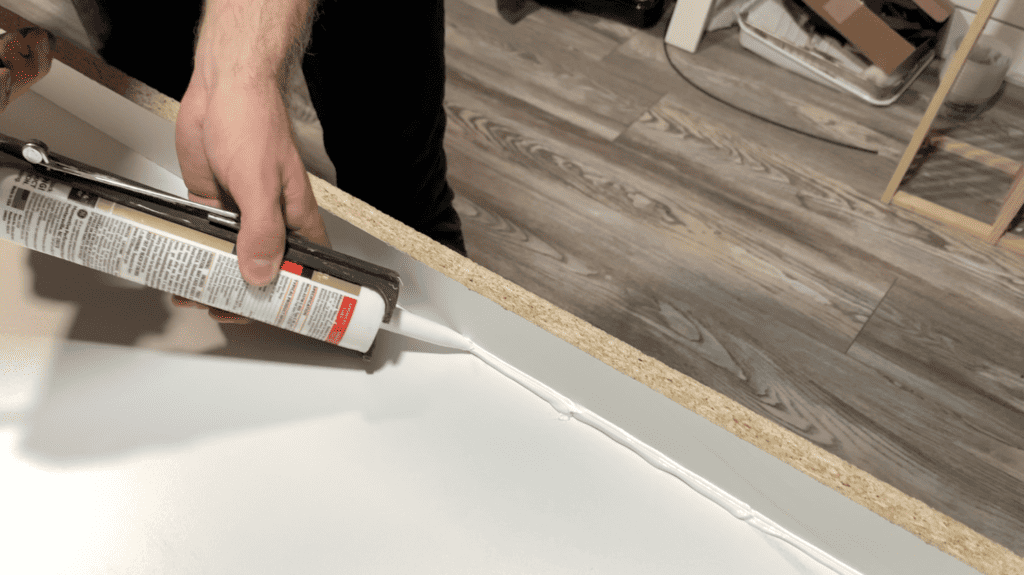
Next, it is recommended that you caulk all of the seams in the table form to prevent epoxy from leaking during the pouring process
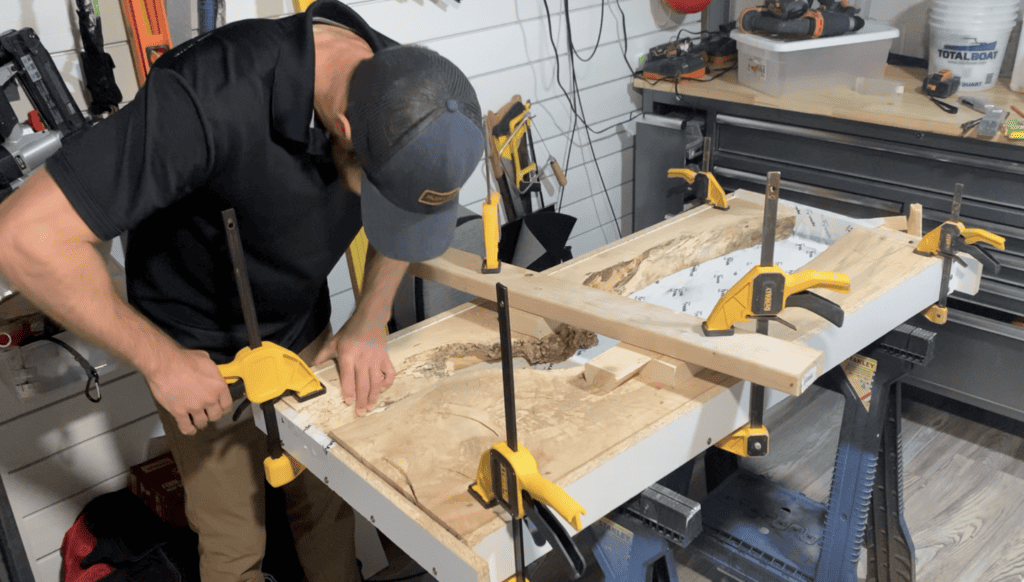
Reinstall the live edge slabs within the form and use bar clamps to hold the epoxy in place. This will prevent the slabs from “floating up” when you pour the epoxy in the next step.
Once your lived edge slabs are positioned in place within the form and secured with bar clamps, you can begin to mix your epoxy.
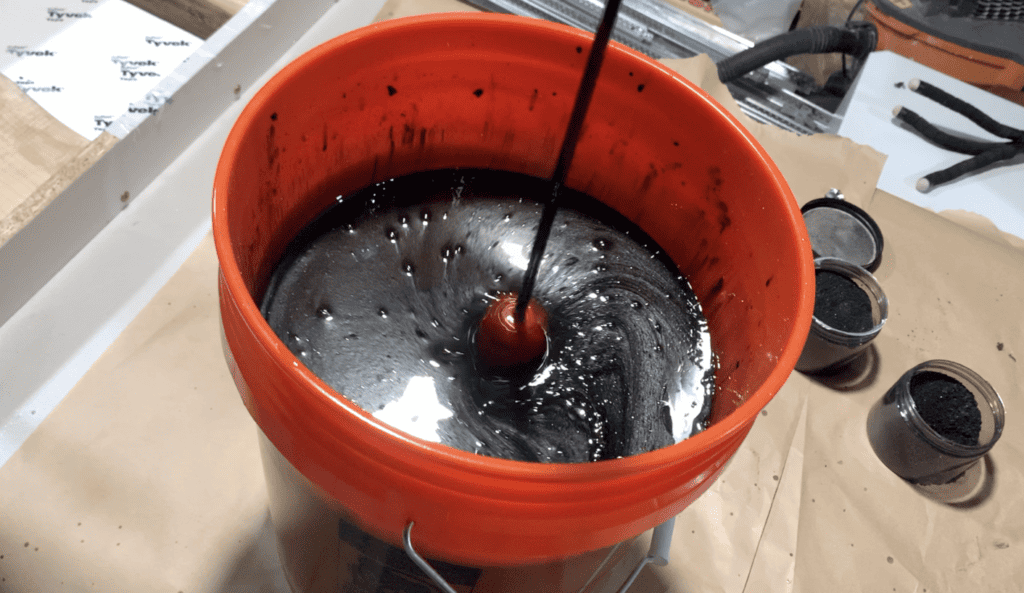
Mix the Epoxy
At this point of the project, it is time to mix and apply the epoxy to the river table. However, there are a few key things to keep in mind before purchasing and mixing your epoxy.
- Confirm that you have enough epoxy for your project
- Before pouring your epoxy, I highly recommend that you use a epoxy volume calculator to ensure that you have purchased enough epoxy for your project. There is nothing worse than not having enough epoxy to complete your project.
- Depth of pour
- Depending on how thick you want your epoxy to river table to be, you may need to pour the epoxy in several layers. Some epoxies can only be poured ½” while others (like TotalBoat Thickset Fathom which is what I am using for my table) can be poured up to 2” thick in one pour. The type of epoxy you select and the thickness of your epoxy table will dictate the epoxy application procedure.
- Mix Ratio

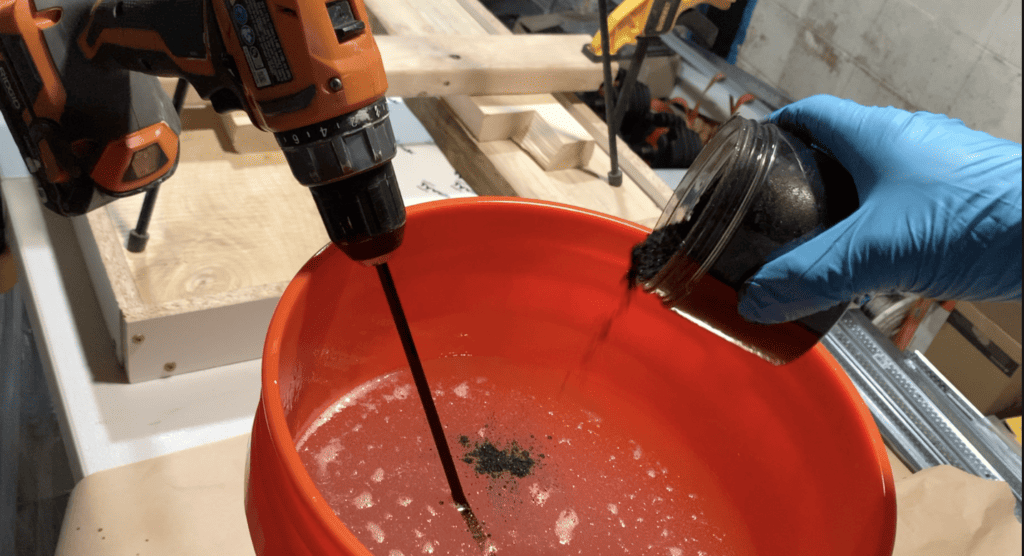
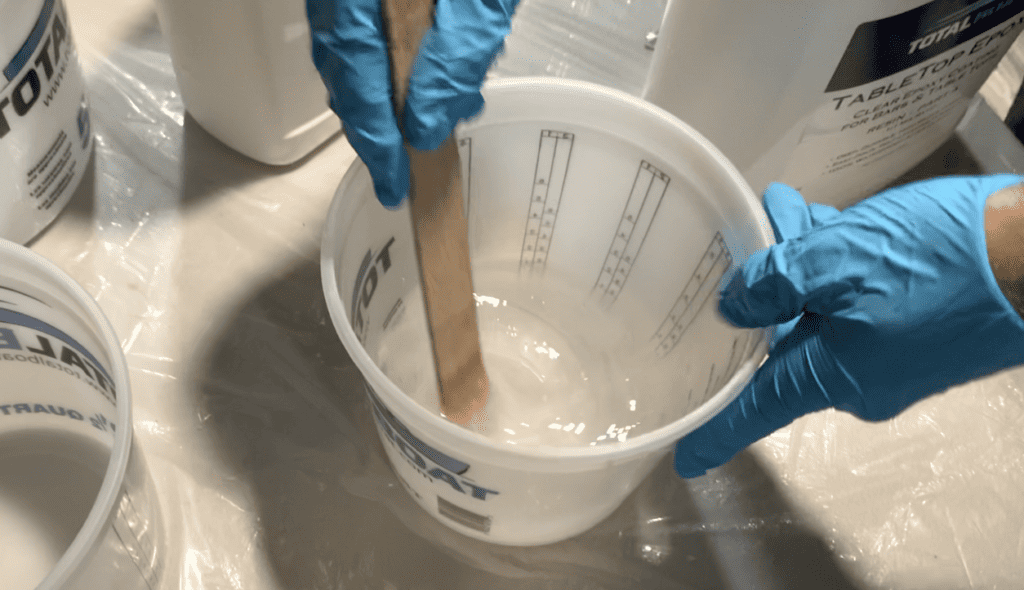
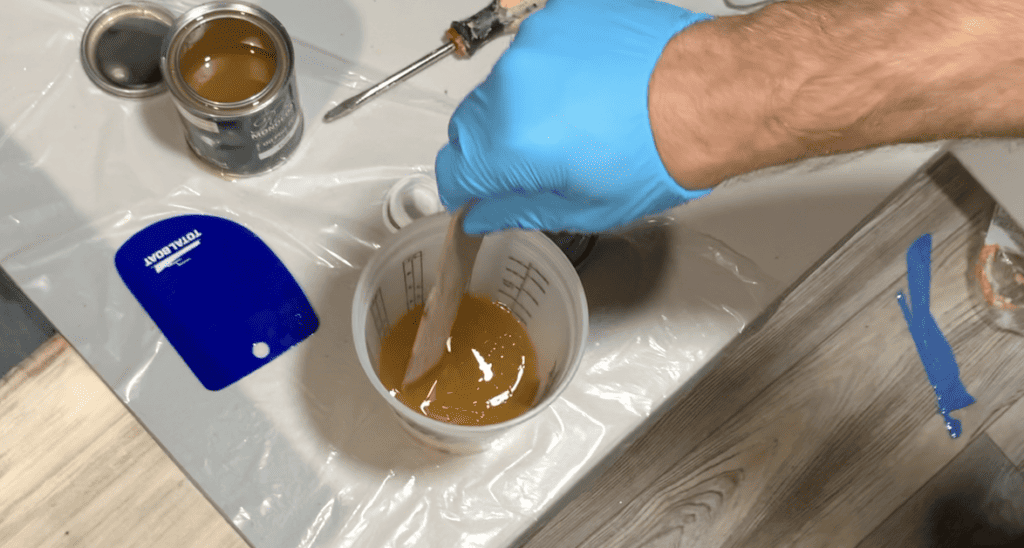
Spend some time reading the manufacturers mixing and application instructions for the epoxy you are using. Some epoxies have a 1:1 Resin to Hardener ration while others have a 2:1 Resin to Hardener Mix Ratio. Additionally, be sure to have graduated mixing containers (if needed) to ensure that you are mixing the correct ratio of resin to hardener. Finally, be sure that you are mixing the epoxy for the duration specified by the manufacturer. If the resin and hardener is not mixed correctly, you may experience issues during the epoxy curing process. I recommend using a drill with a mixer attached to accomplish the epoxy mixing, but a mixing stick is also suitable for smaller mixing volumes. If you are adding Mica powder to color the epoxy, use approximately 3-4 ounces per gallon of epoxy.
After mixing the mixing the epoxy (resin + hardener) in accordance with the manufacturer’s recommendations, it’s time to apply the epoxy to the river table.
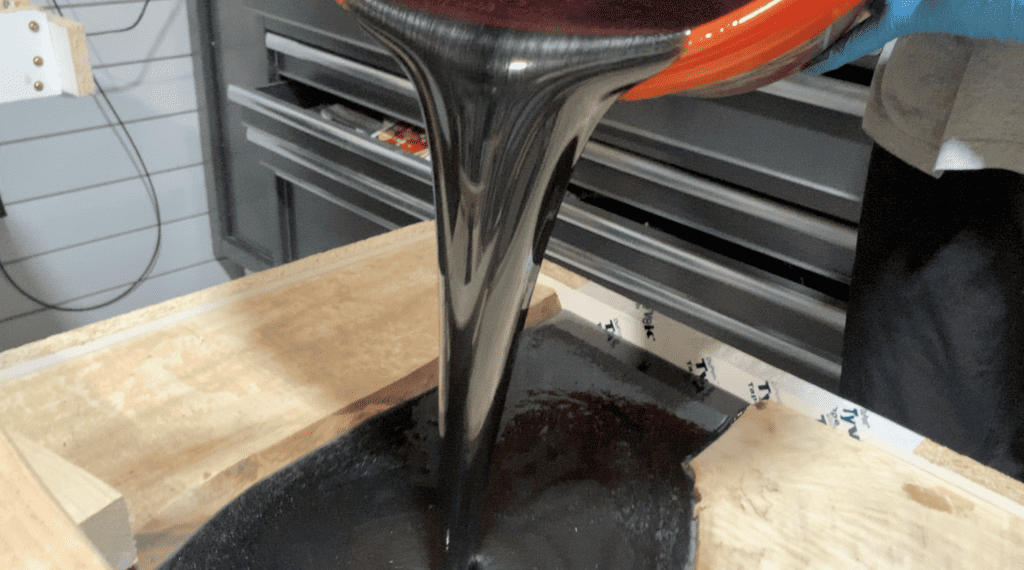
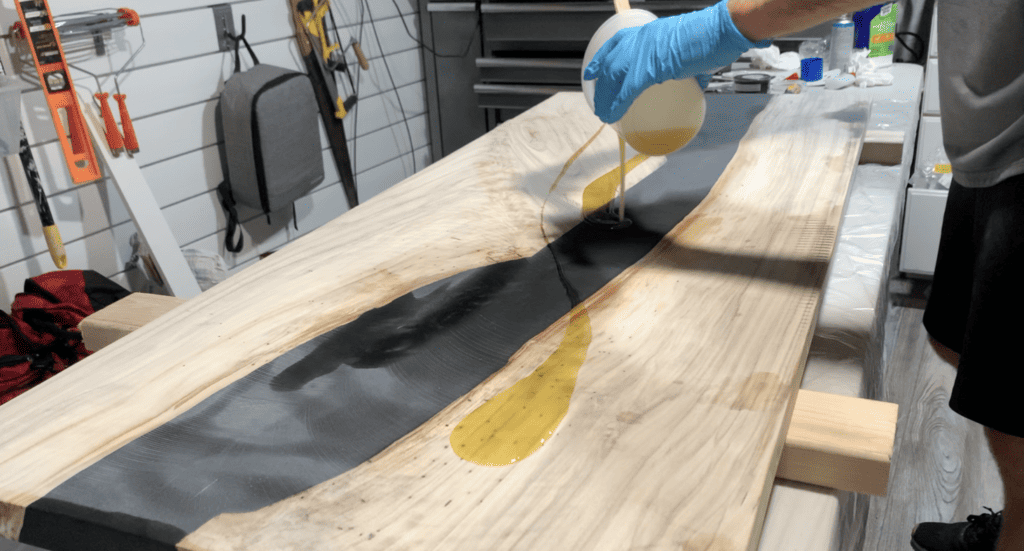
Apply the Epoxy to the Table
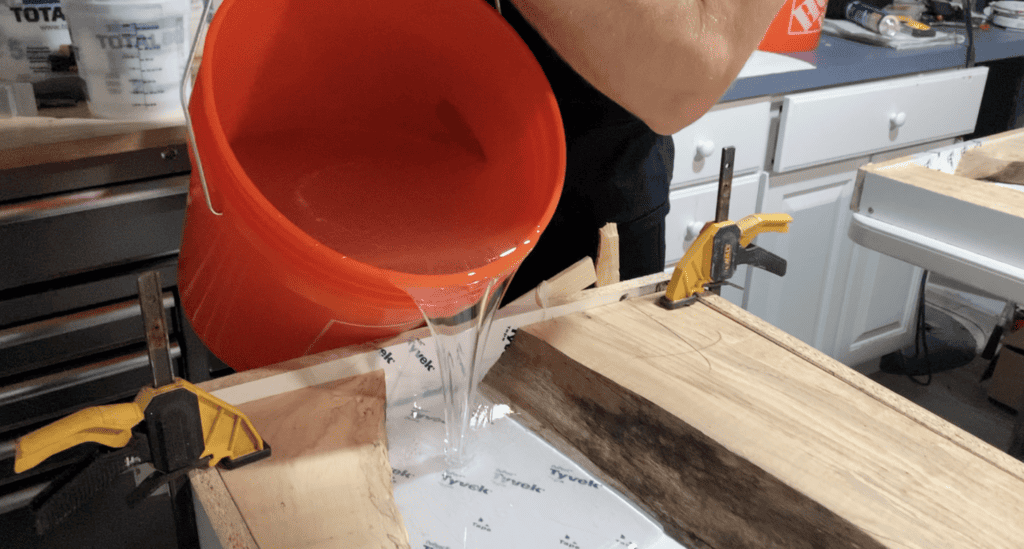
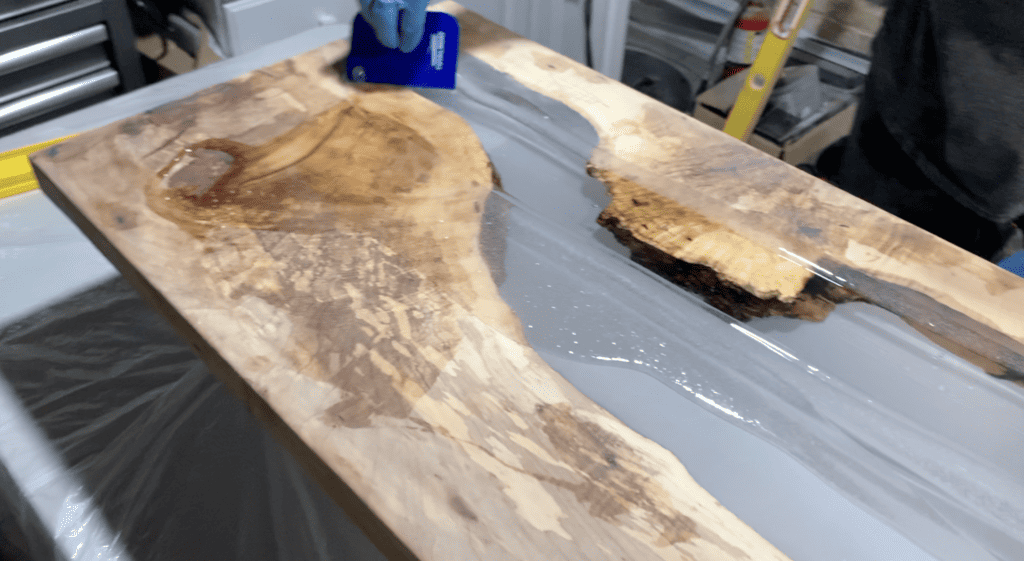
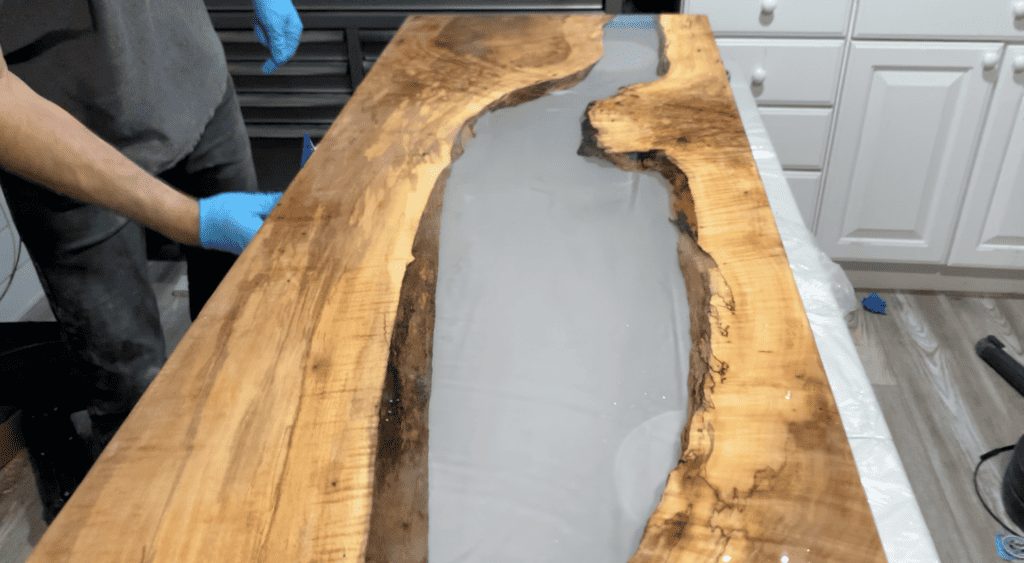
Slowly pour the epoxy into the center of the table and allow the epoxy to “self-level” across the entire area. Try to avoid any spillage or splashing of the epoxy since it is difficult to clean. Continue to pour the epoxy into the application area until the desired pour thickness is achieved. In my case, I poured 2” of epoxy depth since I was using an thick set epoxy that allowed me to do so.
Pro Tip: Be sure to use the appropriate PPE (mask, gloves, sacrificial clothing, etc.) when mixing and applying epoxy to the table.
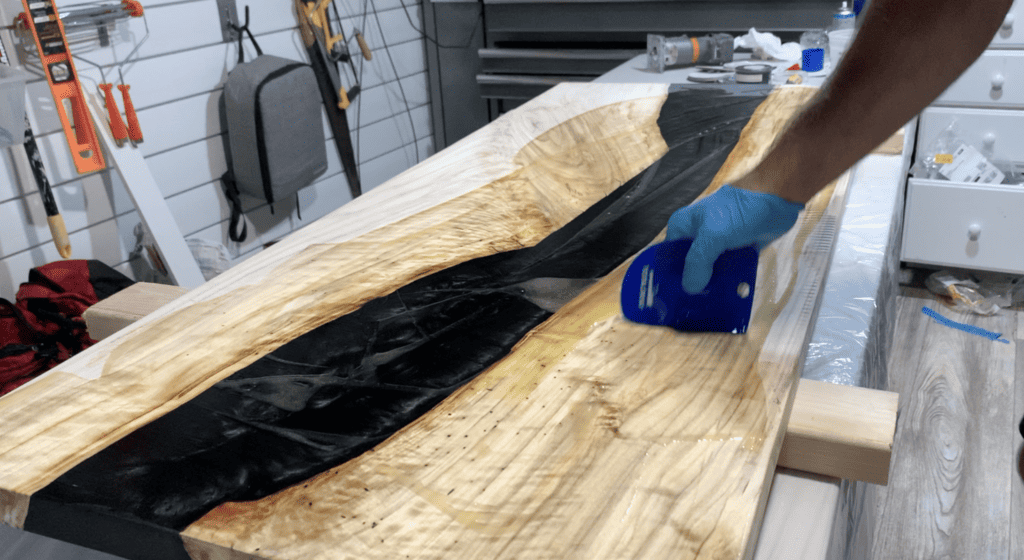
Remove Any Air Bubbles form the Epoxy
As you mix and pour epoxy, it is highly likely that some air bubbles will be entrained within the epoxy. Typically, these air bubbles will make their way to the surface of the epoxy and they can be removed by using a heat gun or torch.
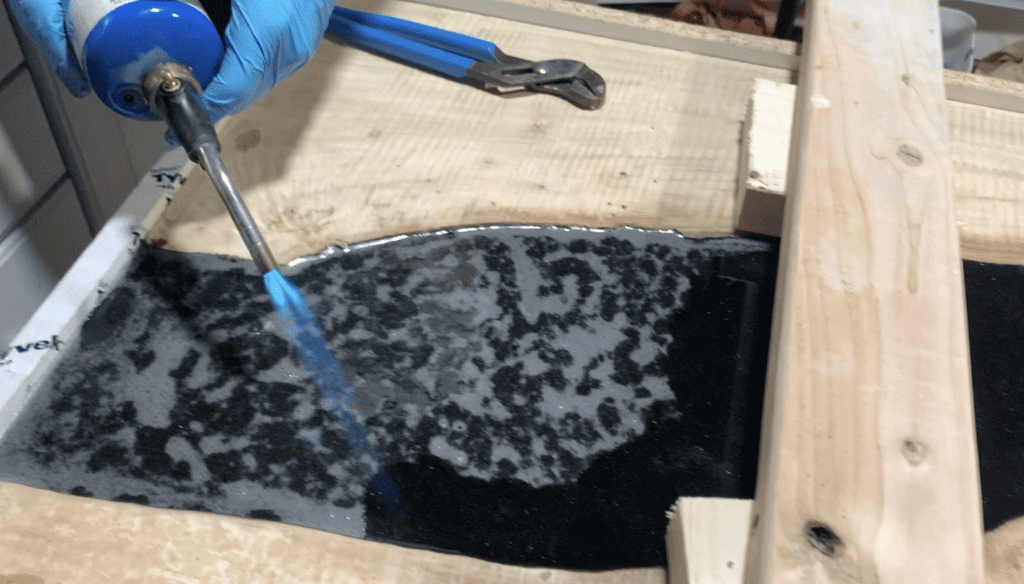
To remove air bubbles, use a heat gun or torch and bring the heat/flame within 6” of the epoxy surface. The heat will then cause the bubbles to pop and dissipate. Repeat this process for all of the air bubbles observed in the epoxy.
If you are pouring multiple layers, you will want to repeat this air bubble removal process after each pour. After removing the air bubbles from the epoxy, simply allow for the epoxy to cure.
Allow the Epoxy to Cure
After pouring the epoxy and removing the air bubbles, you will need to wait anywhere from 2 hours to 72 hours for the epoxy to fully cure. The total cure time will depend on the epoxy type, pour depth, and temperature of the room. Typically, thinner pours will cure faster than deeper pours.
For my epoxy table, I needed to wait 72 hours before the epoxy had cured enough to remove the it from the forms.
Remove the Epoxy Table From the Melamine Form
After giving the epoxy sufficient time to cure, it’s time to remove the table from the melamine form. To do this, remove any screws or nails that were used to hold the melamine form together. Next, use a hammer and prybar to gently separate the melamine form from the epoxy table. Sometimes the form will release from the epoxy rather easily and other times it can be very difficult to remove the form (if the epoxy bonded to the melamine).
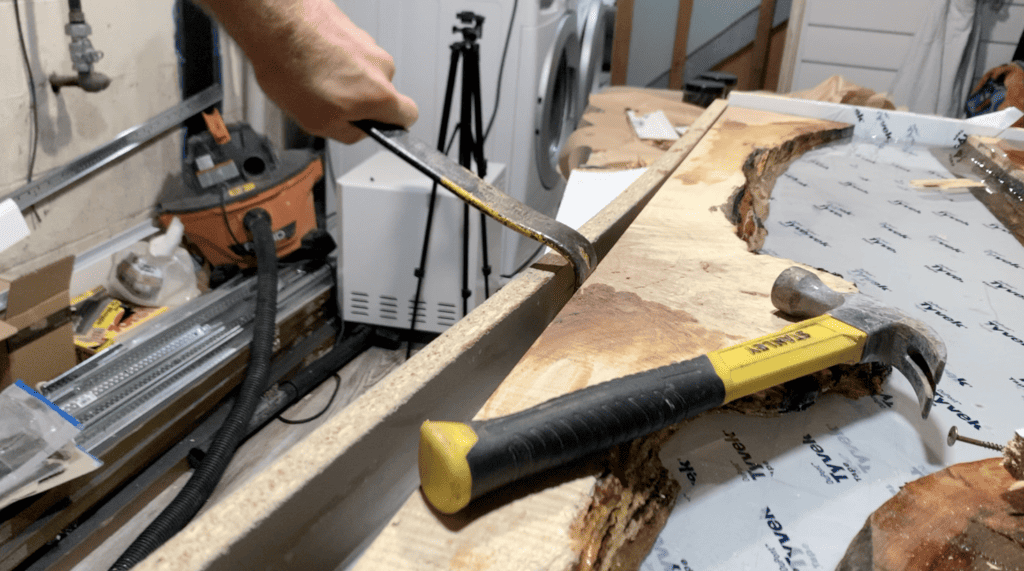
If you cause a little damage to the table during the removal of the melamine form (e.g. if some of the melamine delaminated and got stuck to the epoxy), it’s ok. Any imperfections will be cleaned up in the next step.
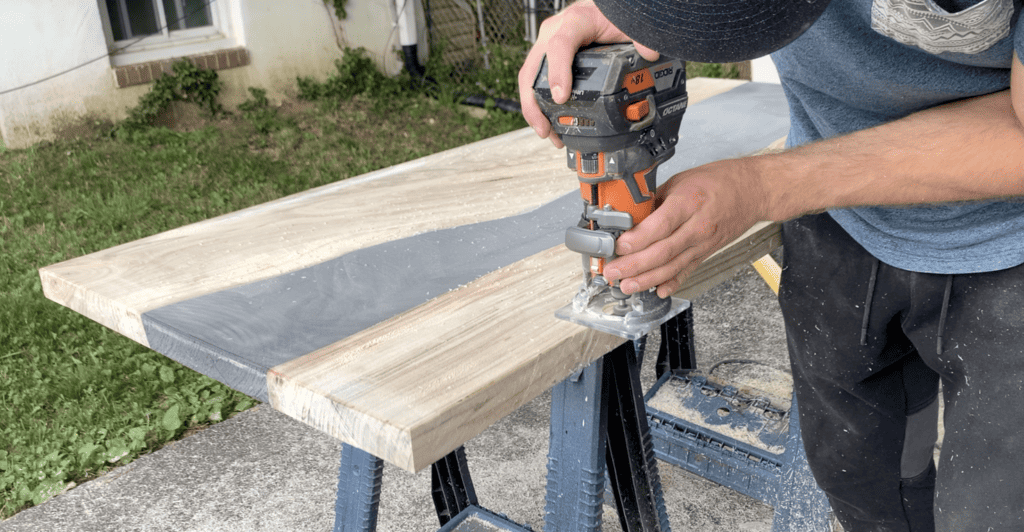
Plane, Route, and Sand the Epoxy Table as Desired.
After removing the epoxy table from the form, it is time to perform the final touch up work. Typically, you will want to run the table though a planer to ensure that the table is perfectly flat and to remove any imperfections from the surface of the table. I took my river table to a local lumber yard / mill house for them to plane down for a small cost. However, you can also use a router sled to plane down epoxy tables as well.
After planning the table flat, you may want to cut of a small sliver (1/2”) of the table on each side or as needed to ensure that the river table is perfectly square and uniform.
If desired, you can use a router with a round-over bit to give the edges of the table a rounded, smooth look.
Next, I recommend that you use an orbital sander to sand the surface of the table smooth. You will want to start with 100 grit and then move up gradually in the following progressions:
- 100 grit
- 120 grit
- 150 grit
- 180 grit
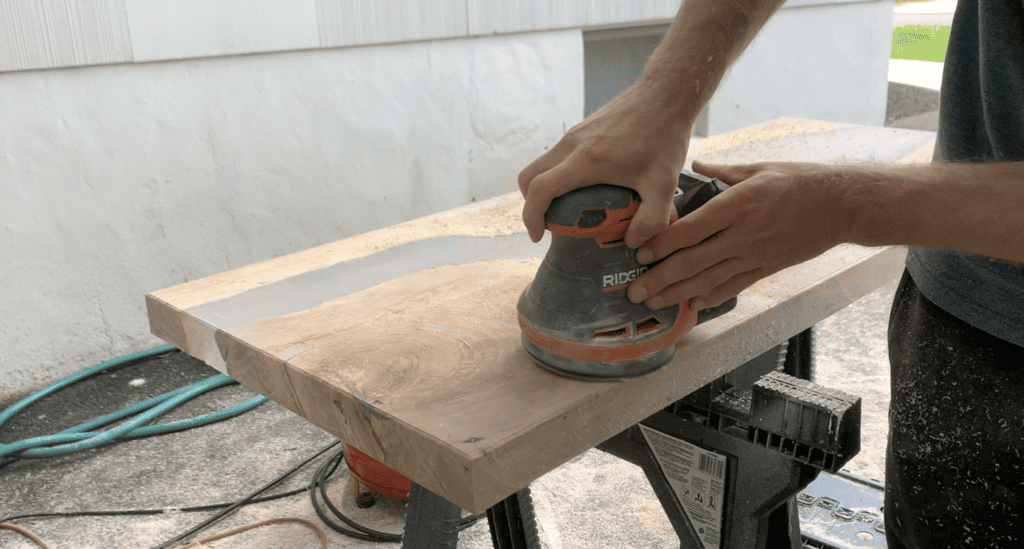
Be sure to sand the table completely smooth, removing all roughness, before moving on to the next grit. Once your epoxy table top is perfectly smooth, use compressed air to remove the majority of dust from the surface of the table.
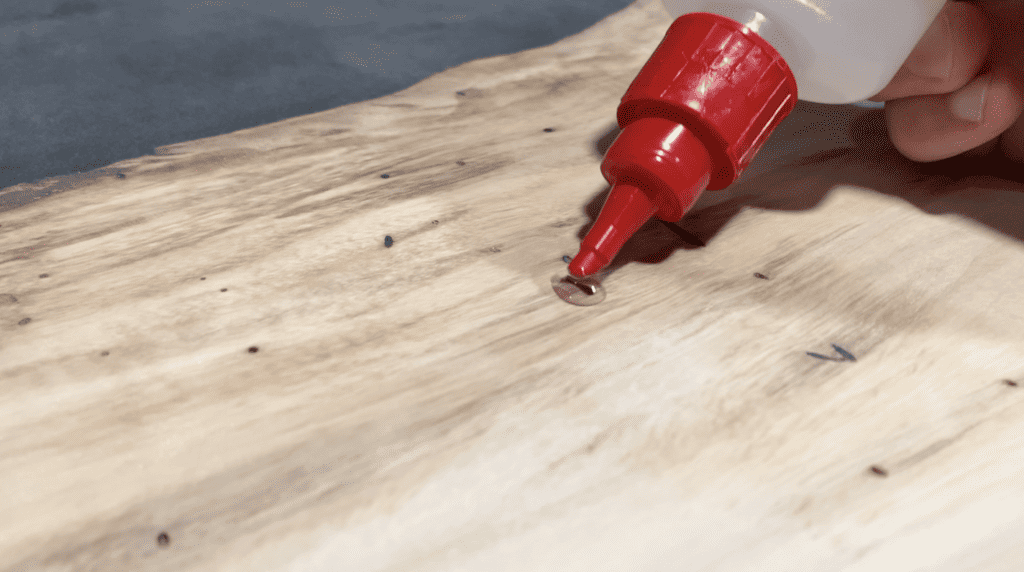
If you find any small holes in the table after the sanding process, you can use CA glue to fill the any small voids. CA glue dries in seconds and is much faster than using epoxy and waiting for it to cure.
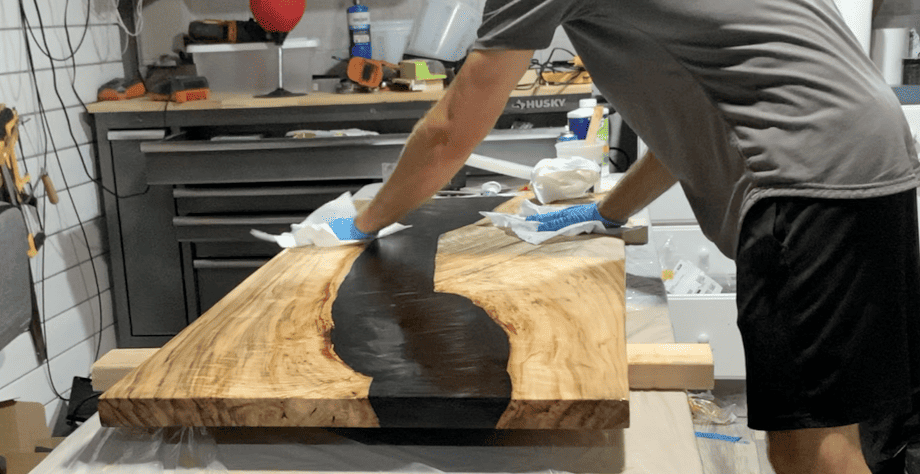
Next, use mineral spirits and a shop rag to remove any residual dust. Once all of the dust has been removed, you can begin the finishing process.
Finish the Surface of the Epoxy Table.
At this stage, the epoxy river table is nearly complete. However, you will almost always want to apply a protective finish coat to the surface of your table. A few of the most common epoxy table finishes are:
- Tabletop Epoxy
- Rubio Monocoat
- Wax/Oil/Shallac
For me personally, I like to apply a thin layer of tabletop epoxy to my epoxy tables since it provides the most protection. However, some people do not like this finish since it gives a “plastic” feel to the table. If you want to maintain the wood look and feel, a finish like Rubio Monocoat is your best bet. I recently finished epoxy tables with tabletop epoxy and Rubio Monocoat, so I will show you how to do both.
How to Apply Table Top Epoxy Finish
To apply a tabletop epoxy finish, start by ensuring that all of the dust is removed from the surface of the table. Next, mix up the tabletop epoxy in accordance with the manufacturer’s recommendations. For my project, I used Totalboat Tabletop Epoxy which is mixed in a 1:1 Resin/Hardener Ratio. To determine how much epoxy you will need to finish your table, you can use this calculator linked here. Typically, your tabletop epoxy will be roughly ¼” thick.
Mix the resin and hardener together using a mixing stick or a drill mixer in accordance with the manufacturer. Next, pour the epoxy over the surface of the table. Use an epoxy spreader to spread the epoxy uniformly over the entire surface of the table. After coating the entire top of the table, allow for a small amount to “flow” over the sides of the table and use the spreading tool to uniformly coat a thin layer of epoxy on the sides of the table.
PRO TIP: Some of the epoxy may drip down off the sides of the table. Therefore, It is recommended that you put plastic or another protective barrier down beneath the table.
Although the table top epoxy is “self-leveling”, you may want to consider using a foam brush to spread the epoxy around the sides of the table.
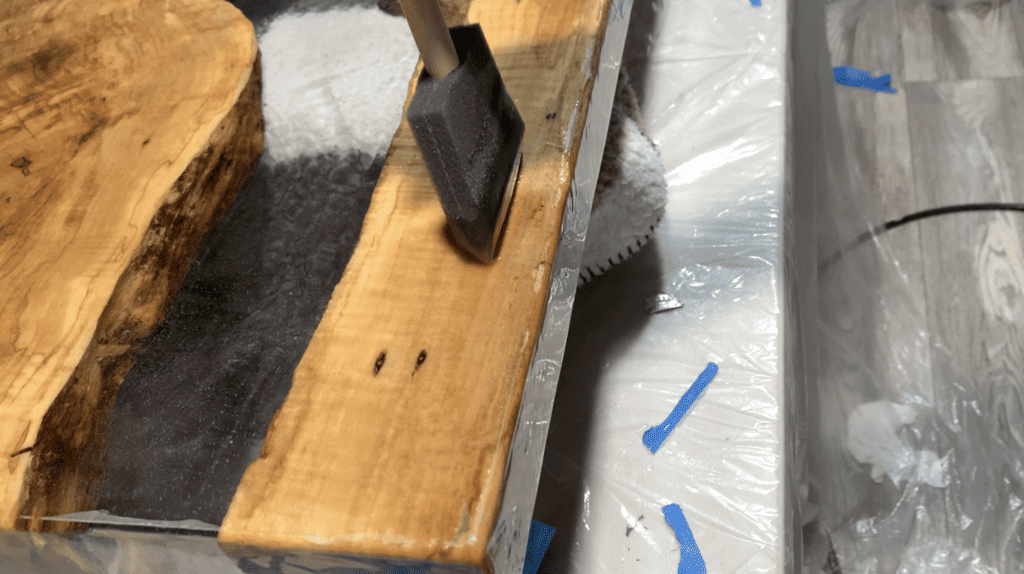
After applying tabletop epoxy to the top and sides of the table, air bubbles will typically form on the surface of the epoxy. Remove the air bubbles with a torch or heat gun, bringing the source of heat close to the bubbles. Keep a close eye on the tabletop epoxy for the first 15-30 minutes after applying it to the table so that you can remove any additional air bubbles that surface. Additionally, it is much easier to remove “epoxy drips” on the underside of the table before the epoxy hardens.
After letting the table top epoxy cure, you can apply additional layers of epoxy as desired. For my table, I applied two coats. You have two options for applying a second coat of epoxy:
- You can second coat of epoxy when the first coat is “tacky”, meaning that the epoxy is not fully cured. This will allow the second coat of epoxy to chemically bond to the first coat.
- You can allow the first coat of epoxy to fully cure and then you can rough up the surface of the epoxy to create a micro-abrasions that the new epoxy can mechanically bond to.
Either option is acceptable, but I typically let the first coat of epoxy cure and then sand it down before applying the second coat.
How to Apply Rubio Monocoat to An Epoxy River Table
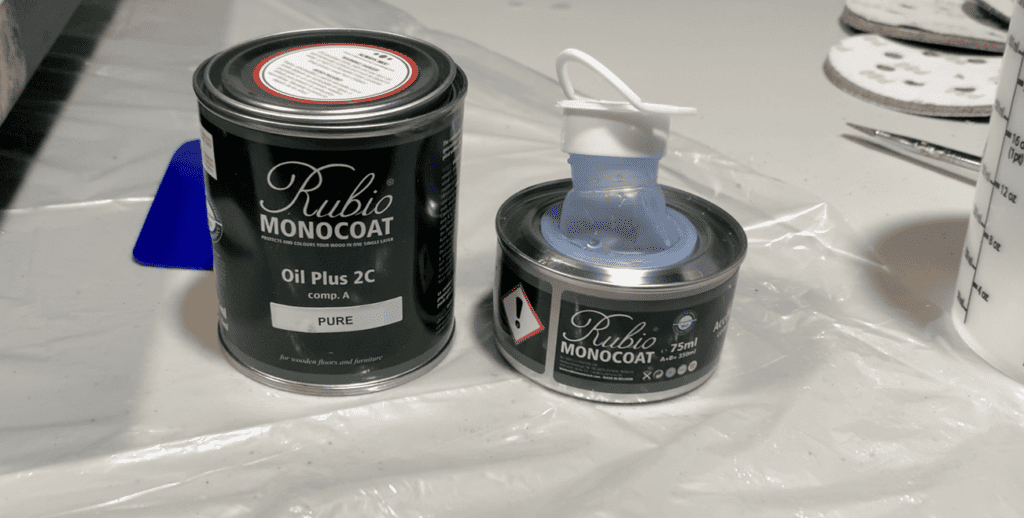
To apply Rubio Monocoat, start by ensuring that there is no dust on the table top. Next, I recommend that you start by finishing the bottom/underside of the table. Mix the wax with the accelerator in accordance with the manufacturer’s instructions and then apply the mixture to the table using a spreader tool.
After getting a thin layer of Rubio on the table, “buff” the finish into the table using a polishing pad. Next, remove any excess finish from the table using an emory cloth and then flip the table over and immediately begin finishing the top of the table.
PRO TIP: Ensure that you remove all of the excess finish from the table. The manufacturer notes that you can’t wipe off too much but you CAN leave too much finish on the table.
After applying Rubio Monocoat, you will typically want to give the finish 7 days to set-up for maximum protection.
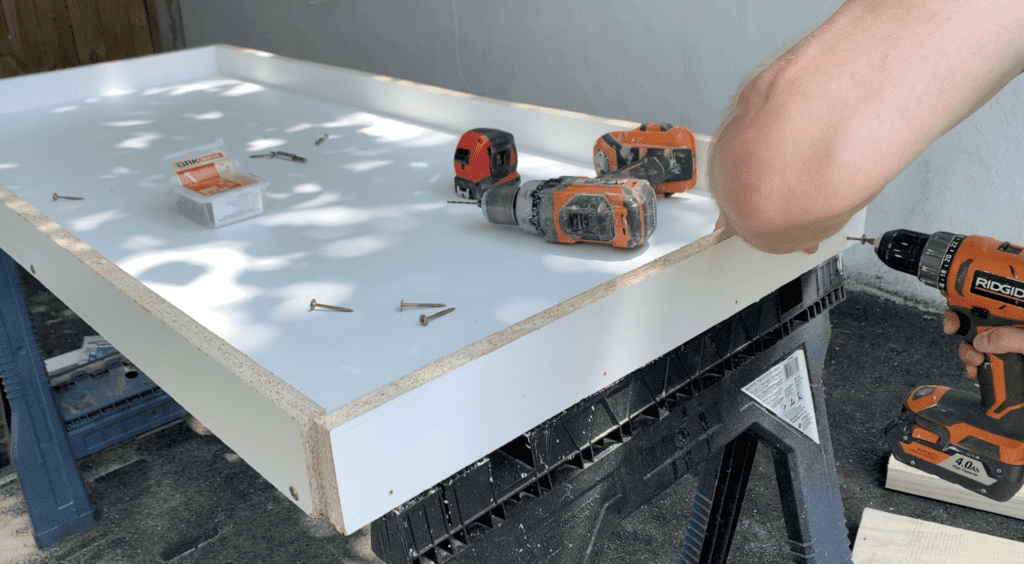
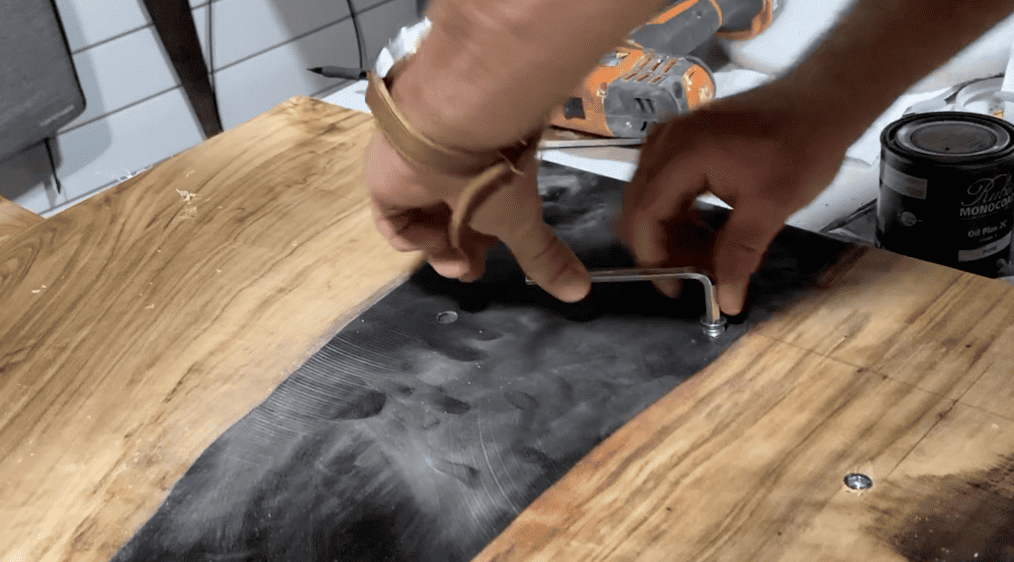
Attach the Legs to the Epoxy River Table
After finishing the surface of your epoxy table, the project is nearly complete. To finish the project, simply purchase or build a table base and mount the table on top. For my epoxy table, I purchased coffee table legs from amazon and simply attached them to the bottom or the table using threaded bolt inserts. I like to use threaded bolt inserts since they make it easier to remove the legs in the future (for transportation, etc.).
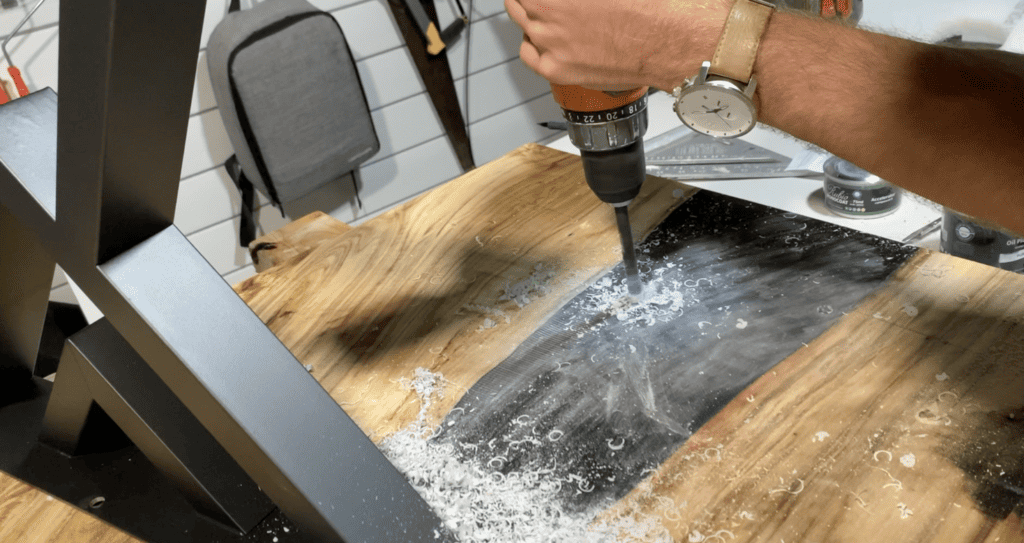
PRO TIP: Mark you drill bit with tape to ensure that you drill into the table at the required depth.
After drilling into the table, insert the threaded anchors using an Allen Wrench and then fasten the table legs to the table.
After attaching the legs to the epoxy table, you are ready to enjoy your newly created statement piece of furniture. Enjoy!

Your DIY Epoxy river table is now complete! If you are more of a visual leaner, you can watch my “How to Build an Epoxy River Table” video on YouTube which goes through every single step of the epoxy table building process.
Thanks so much for checking out ATImprovements! If you learned something from this project, you might also like these other DIY Projects:
- How to Build a Concrete Slab Shed Foundation: https://atimprovements.com/how-to-build-a-shed-base-concrete-slab-step-by-step-diy-guide/
- How to Frame a 10’x10′ Shed Base: https://atimprovements.com/how-to-build-a-shed-floor-base-diy-step-by-step-guide/
- How to Frame Shed Walls:https://atimprovements.com/how-to-frame-a-shed-how-to-frame-walls-for-a-10×10-modern-shed-step-by-step-with-pictures/
- How in Install a Shed Window: https://atimprovements.com/shed-window-installation-how-to-install-a-window-in-a-shed-diy/
- How to Install a Roll Up Door in a Shed or Garage:https://atimprovements.com/roll-up-door-installation/
- How to Build a Fence: How to Build a Fence (DIY Guide) – AT Improvements
- How to Build a Fence Gate: How to Build a Fence Gate (7 Steps with Pictures & Video) – AT Improvements
- How to Install a DIY deck Wire Railing: DIY Cable Railing – How to Install Cable Railing Step-by-Step – (atimprovements.com)
- How to Build a Concrete Paver Patio: DIY PAVER PATIO – Easy DIY Paver Patio Ideas – (atimprovements.com)
Thanks!
DISCLAIMER: This is a reference guide only. Consult local code requirements. Links included in this article might be affiliate links. If you purchase a product or service with the links that I provide, I may receive a small commission. There is no additional charge to you! Thank you for supporting ATimprovements so I can continue to provide you with free content each week!