
Because of the simplicity of the Schluter Kerdi Shower Kit, tiling shower walls has never been simpler. Although installing tile in your shower is typically best suited for professional tile settlers, this article will give you step-by-step instructions that will allow the average homeowner to successfully tackle the job.
To install tile on Kerdi shower walls, begin by applying thinset mortar to the walls using a trowel. Comb notches into the thinset and firmly embed your tiles into the thinset mortar. Use tile spacers and a laser level to ensure even spacing between tiles. Allow thinset mortar to dry, remove tile spacers, and apply grout to complete your shower wall tile installation.
This article will outline every single step of the Kerdi Shower Wall Tile installation process, step-by-step.
1. Complete all Tiling Prerequisite steps
Before tiling your shower walls, you need to ensure that all prerequisite steps have been completed. In other words, you need to ensure that your tile substrate has been properly prepared.
Typically, your shower wall tile substrate will consist of cement board backing with a waterproofing membrane. If you need guidance on the how to install cement board on your shower walls, check out my “How to install cement board on walls” article linked here or watch my Youtube Video below:
Once you have installed your cement board substrate, you need to determine what waterproofing system you will use for your shower. Because of the simplicity of the Schluter Kerdi Shower Kit, it is typically one of the most DIY-friendly waterproofing options.
For detailed instructions on how to install the Schluter Kerdi Shower Kit, I recommend that you read my article linked here or check out my Schluter Kerdi Shower Kit Youtube Video below:
Once you have your shower wall substrate and waterproofing system installed, you can begin the actual shower wall tile installation process.
2. Plan Out Your Tile Layout
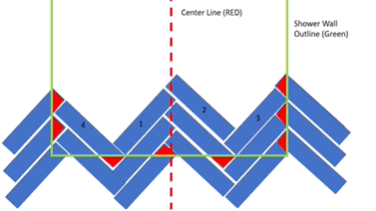
Because there are so many different tile patterns and tile sizes, there is no “best” way to plan out your tile layout. However, there are a few things you should keep in mind when establishing your tile layout:
- Determine the size of the tile spacers you will use and account for the spacing in your tile layout.
- Try and maximize the amount of full tiles in your layout. This will make the installation process simpler and reduce the amount of tile waste.
- Stagger your grout lines. Having grout lines that are tastefully staggered gives tile installations a more cohesive look.
- Avoid having small “slivers” of tiles on one side of the room and full tiles on the other. When measuring for your tiles (be sure to account for the tile spacers!) determine if you will be left with a small “sliver” of tile. If so, consider cutting the full tile on the other side so that there is a larger tile on the opposite wall.
- Take into account any shower valves, spouts, or niches that will be installed. It is sometimes desired to have these centered in the tile layout.
As stated above, there is really no “one size fits all” tile layout approach. However, by following the guidelines above and giving your layout a bit of forethought, you will set yourself up for more professional looking installation.
3. Apply Thinset Mortar to the Shower Walls
Once you have established your tile layout, it’s time to select your thinset mortar which will bond your tiles to the substrate.
The type of thinset mortar you select will depend on a variety of factors such as:
- Size of tile
- Type of tile
- Substrate Material
- Miscellaneous other factors
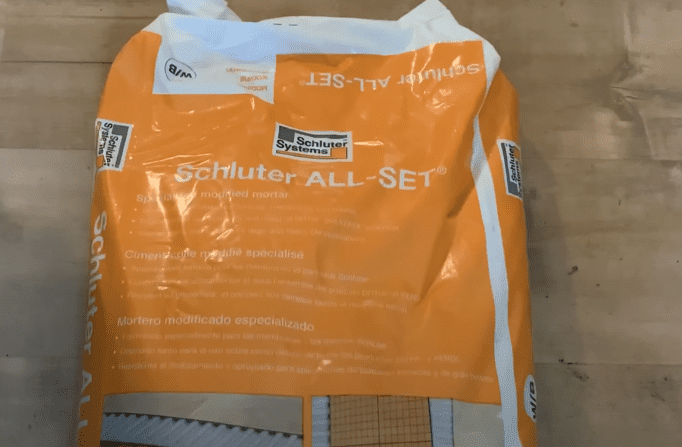
Be sure to check with the tile manufacturer to determine if there are any specific thinset mortar requirements. If you are applying tile on the Schluter Kerdi Shower Kit System walls, it is highly recommended that a Schluter Brand thinset mortar be used in order to maintain the Schluter Warranty. To maintain this Schluter Warranty it is recommended that you use one of the following Schluter Thinset Mortar types:
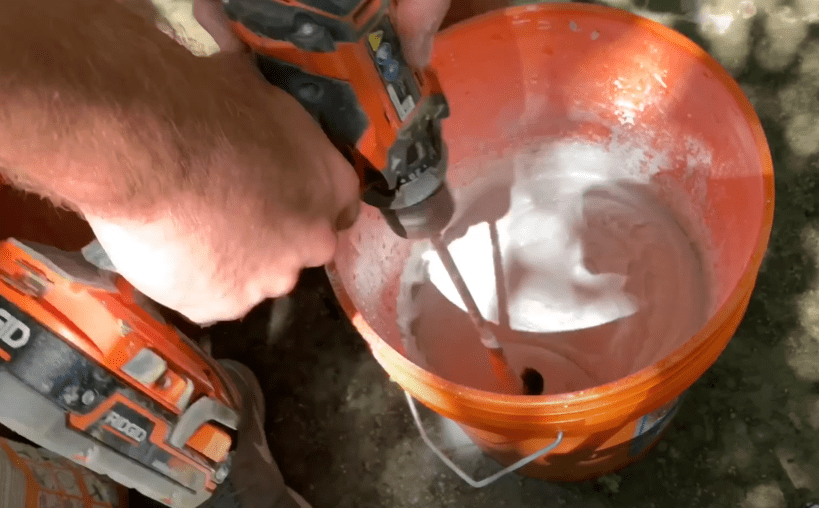
You also have the option to use any unmodified thinset mortar, but this will void the Schluter Warranty. After selecting your thinset mortar, mix it up according to the manufacturer’s instructions using a drill and a paddle mixer.
Once your thinset has been mixed up according to the manufacturer’s recommendations, apply thinset mortar to the walls using a trowel. The trowel size you use will depend on the tile type and tile size used for your application. Check with the tile manufacturer’s recommendations to select a trowel size appropriate for your specific installation. One of the most universal trowel sizes for the shower wall tile installation is a ¼ inch x 3/16″ V-notch trowel.
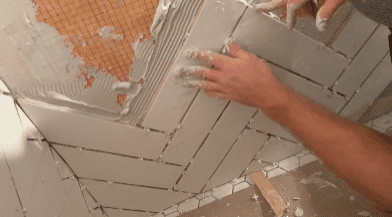
Apply thinset mortar to the walls using your trowel, beginning at the bottom of the wall. Apply the mortar using “directional troweling” meaning that all trowel lines run in the same direction. After applying Mortar to the first portion of your application area, you can being installing tiles on the shower walls.
4. Install Tiles on the Shower Walls
To install your first row of shower wall tiles, it is highly recommended that you use a laser level to establish a level line across for the bottom edge of the tiles. When establishing your level line, it is highly recommended that you leave a slight gap (1/8” – ¼”) on the bottom of your wall tiles to allow for expansion and contraction in the future. This expansion gap will then be filled with silicone as the final step in the tile application process. Typically, the size of this expansion gap will match the size of your tile spacers. As a result, you can simply place a tile spacer between the shower pan tiles and the wall tiles to achieve your expansion gap.
Pro tip: Use tile spacers and your laser level to establish an even starting line across the bottom of your shower walls. Ensure that the expansion gap is maintained across the entire length between the shower pan and shower wall.
At this stage, you can install your first row of shower wall tiles. Position the tiles in place along the laser level line and firmly embed the tiles into the thinset mortar. Install the tile spacers and then proceed to install the next tile in the row.
Continue to repeat this process until the entire first row of tiles is installed. Double check that your tiles are level and that the expansion gap is maintained before proceeding with the next row of tiles. Continue applying thinset mortar and installing tiles/spacers based on your tile layout established in step 2.
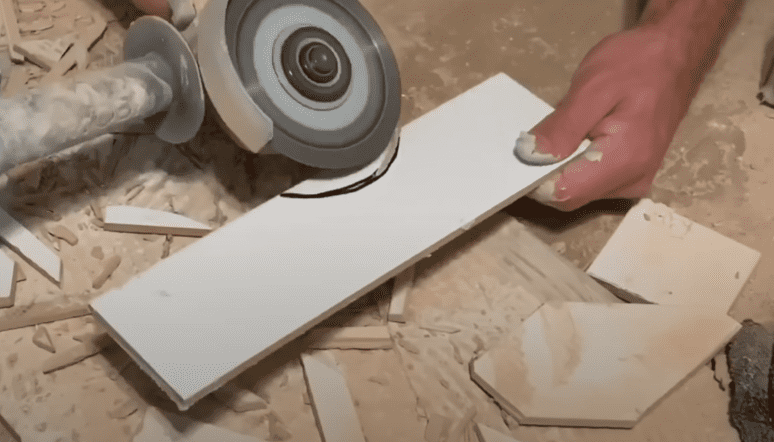
Work your way up the entire first shower wall until you get to the final row before the ceiling. Cut tiles as necessary, to leave a 1/8” gap between the shower walls and the ceiling to allow for expansion/contraction. This gap will be filled with silicone in the final step of the installation process.

Once the first shower wall has been completed, begin installing tile on the next wall following the same steps as described above.
- Establish laser level line along the bottom of the wall
- Utilize tile spacers as needed to establish expansion gap at the bottom of the
- Continue installing tiles row by row according to your tile layout.
In addition to the expansion/contraction gaps maintained at the top and bottom of the shower walls, it is also recommended that you leave a 1/8” gap at the intersection between walls. Again, this gap will be filled with silicone as the final step in the shower wall tile installation process. Basically, you want to maintain an expansion gap at each change of plane (floor to wall, ceiling to wall, and wall to wall).
Continue to install tile on your shower walls according to your tile layout until all tiles have been installed.
5. Allow Thinset Mortar to dry and Removal Tile Spacers
Once you have cleaned up excess thinset mortar from the face of your tiles and in between the grout lines, allow your shower wall tile installation to dry for roughly 24-48 hours. This will allow for adequate time for your thinset mortar to fully cure and harden.
Once the thinset mortar has fully cured remove your tile spacers from in between your tiles. Once all of the tile spacers have been removed, perform minor clean up work as needed to prepare for grout installation. This minor cleanup work may consist of the following:
- Scraping any dried thinset mortar from the face of your tiles (this is usually best accomplished with a 5 in 1 painter’s tool)
- Scraping any dried thinset that has hardened between the grout lines. This is usually best accomplished by using a grout scraping tool.
- Vacuuming any dust or debris that may have settled in between the tiles
- Running a sponge over the face of all of your tiles to remove any dust or impurities that may impact your grout installation
Once all of your grout preparation work has been completed, you can begin to install your grout.
6. Apply Grout to Tiles
Once you have given your shower wall tiles sufficient time for the thinset to dry (usually 24-48 hours) you can apply grout to your shower wall tile. Although there are many different types of grout, it is recommended that you use Epoxy grout for your shower wall tiles since epoxy grout is fully waterproof and stain-resistant.
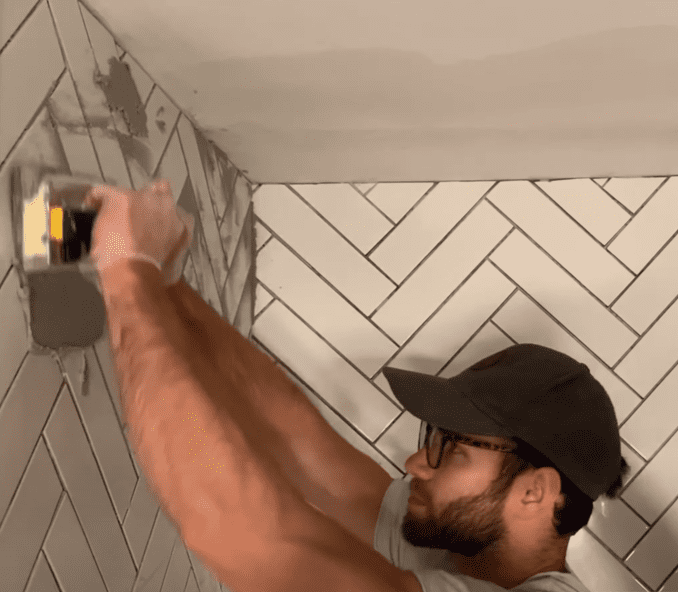
To apply epoxy grout to your shower walls, mix up the epoxy according to the manufacturer’s recommendations. Next, apply the epoxy grout to the shower walls using a grout float.
Force the grout into the grout lines by applying pressure with grout float. Once grout has been applied to all of the grout lines, remove the excess grout immediately.
Clean the face of the tiles using a wet sponge and grout haze remover and allow the grout to dry.
For detailed epoxy grout installation instructions, check out my “How to Install epoxy Grout” video below:
7. Apply Silicone to the Expansion Joints
Once you have installed your grout and cleaned up any excess, you can apply silicone to all of your expansion joints. Apply a high quality silicone to all expansions joints (floor to wall, ceiling to wall, and wall to wall). These flexible joints will flex with any movement and will not crack. For detailed instructions on how to apply silicone to your expansion joints, watch my Youtube Video below:
Once you have applied silicone to your expansion joints, your Kerdi shower wall tile installation is complete. Congratulations!
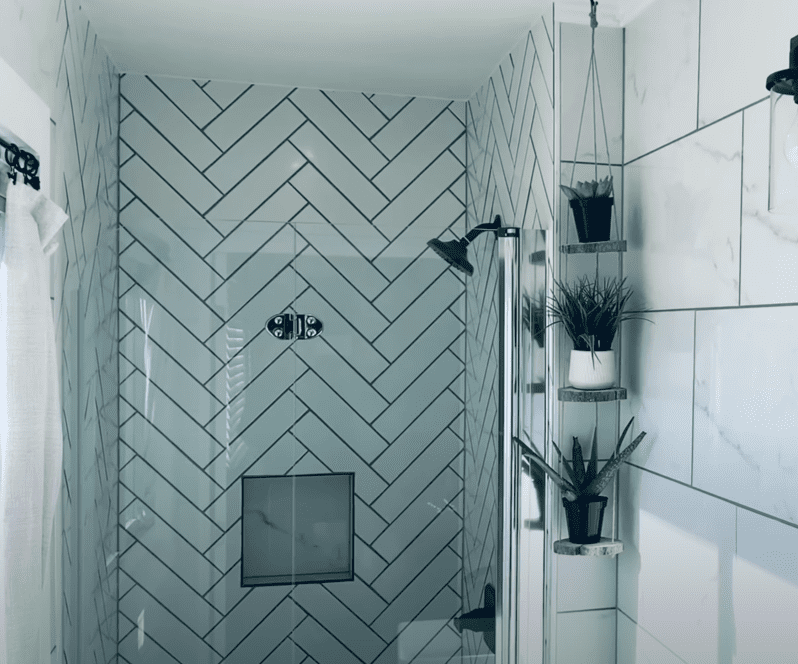
If you are more of a visual learner, check out my Herringbone wall tile installation video below:
Thanks so much for checking out ATImprovements! If you learned something from this project, you might also like these other DIY Projects:
How to Install Kerdi Shower Pan: How to Install Kerdi Shower Pan (Kerdi Shower Tray Installation) – AT Improvements
How to Install Kerdi Membrane: Kerdi Membrane Installation (Step-by-Step Installation Guide) – AT Improvements
How to Install a Kerdi Shower Curb: Kerdi Shower Curb Installation – AT Improvements
How to Install a Kerdi Shower Drain: Kerdi Shower Drain Installation – AT Improvements
How to Install Hexagon Floor Tiles: How to Install Hexagon Floor Tile – AT Improvements
Schluter Ditra VS Cement Board (Which is better?): Schluter Ditra VS Cement Board (Which is better?) – AT Improvements
To see the full bathroom transformation time lapse, click here!
Thanks!
DISCLAIMER: This is a reference guide only. Links included in this article might be affiliate links. If you purchase a product or service with the links that I provide I may receive a small commission. There is no additional charge to you! Thank you for supporting ATimprovements so I can continue to provide you with free content each week!