
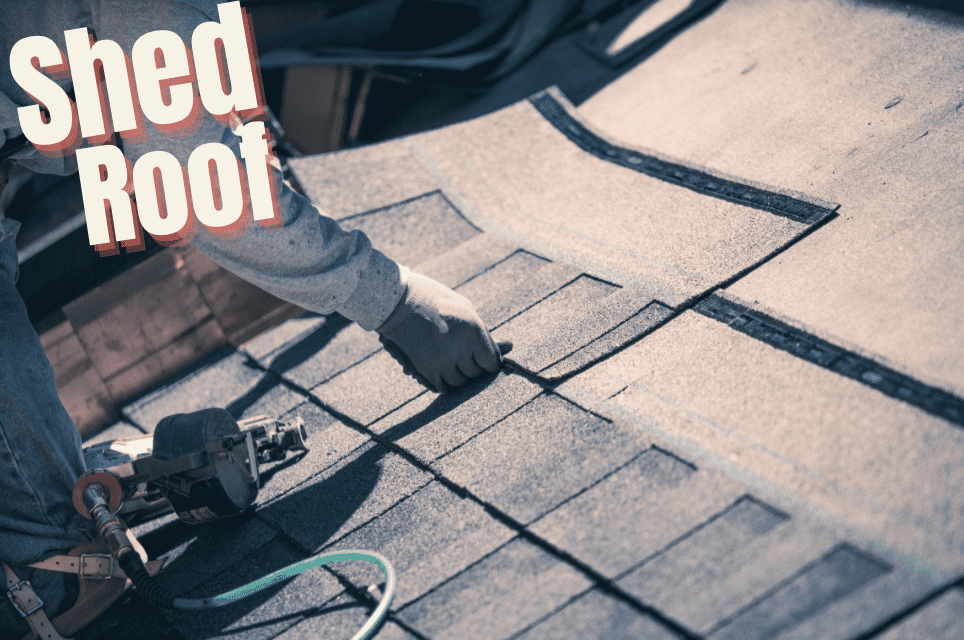
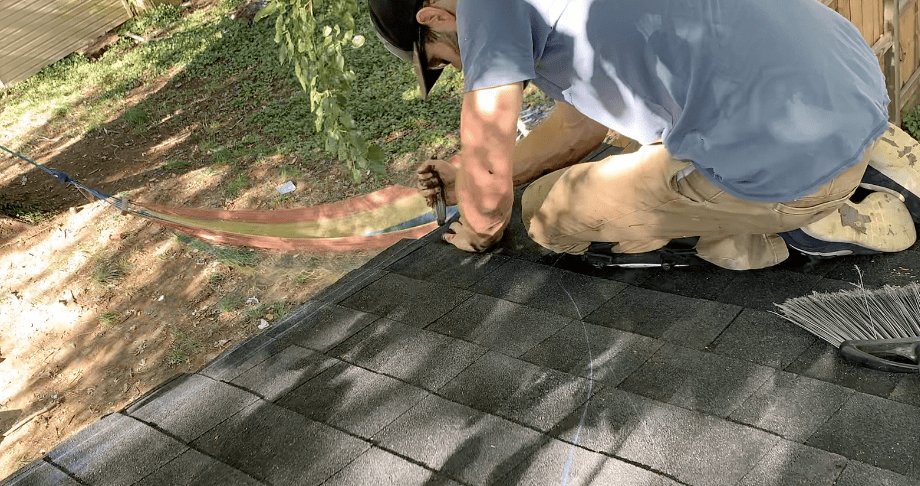
Installing shingles on a lean to shed roof is a relatively simple project that the average homeowner can tackle. Additionally, shingles are a very cost-effective shed roof option that be installed in a few hours.
To install asphalt shingles on a lean to shed roof, start by installing tar paper on the plywood shed roof decking. Next, install the drip edge along the perimeter of the shed roof. Install the drip edge below the tar paper on the Eave (bottom) side of the shed and above the tar paper on the Rake (side) of the shed. Next, Install the starter strip of shingles along the bottom of the shed roof. After Installing the starter strip, install the first row of shingles, attaching them to the plywood roof decking with a roofing nailer. Install 4 nails per shingle or 6 nails if you live in a high wind area. Continue to install each row of shingles until you reach the top of the of the shed roof. Install the final piece of ridge flashing over the shingles and front fascia board, attaching it in place with roofing nails and asphaltic coating.
This article will show you how to install an asphalt shingle roof on a lean to shed, step-by-step.
Tools and Materials Needed to Install Shingles on a Shed Roof

Although you can technically install shingles on a shed roof with a hammer and nails, there are a few tools that will make this project much simpler and less time consuming.
To successfully install asphalt shingles on a shed roof, I recommend the following tools and materials:
- Safety Equipment (Glasses, gloves, boots, etc.)
- Tape Measure
- Drill
- Air Compressor
- Roofing Nailer
- Roofing nails
- Asphalt Shingles
- Tar Paper
- Drip Edge
- Angle Flashing
- Asphaltic Coating
With all necessary tools and materials on hand, you can now begin installing the shingle roof on the Shed.
Understanding the “Anatomy” of a shed roof:
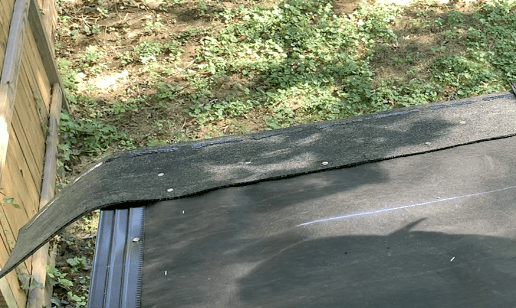
Before, proceeding with the shed roof shingle installation, let’s spend some time defining the “anatomy” of a shed roof. The sides of the the shed roof are knows as the “Rake”. The front of the shed is referred to as the “Ridge”. The back of the Shed is referred to as the “Eave”. Refer to the figure below for a visual representation of the Ridge, Rake, and Eave of the shed.
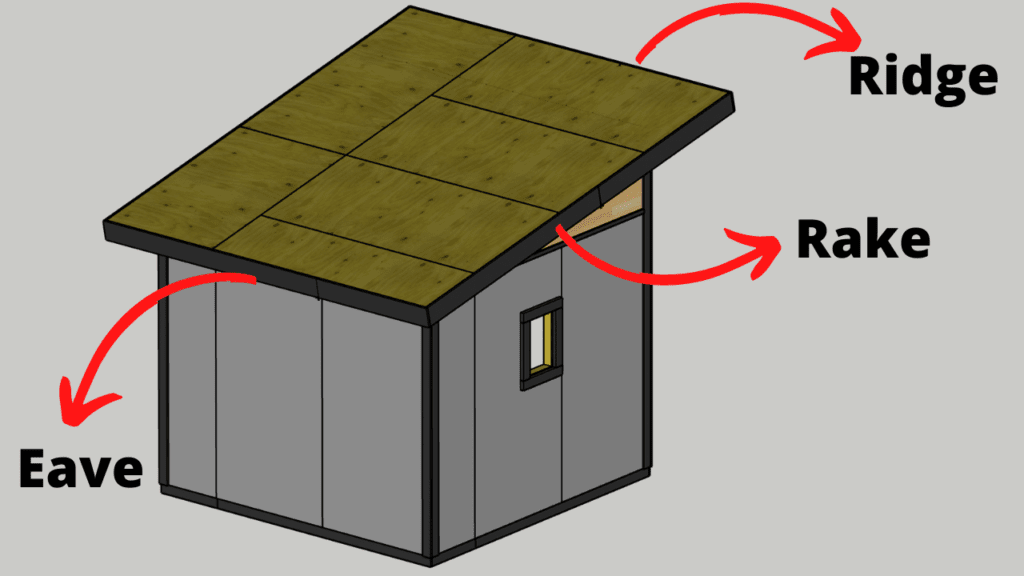
We will be referring to these terms a lot throughout this guide, so it is important to define them before proceeding.
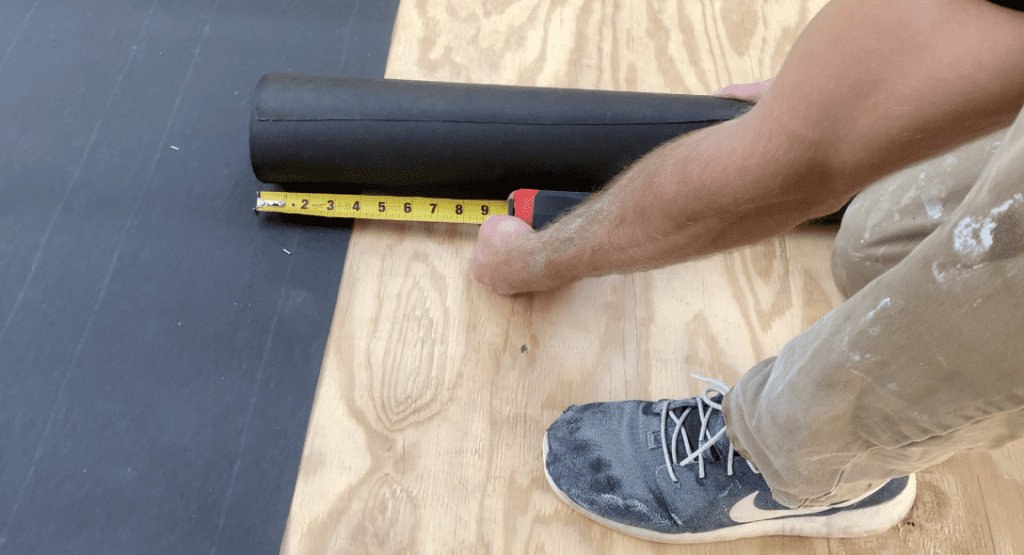
1. Determine the Number of Shingles You Will Need
The first step in any shed roofing project is determining the roof square footage. Measure the length and width of your shed roof and multiply them together to determine your total square footage.
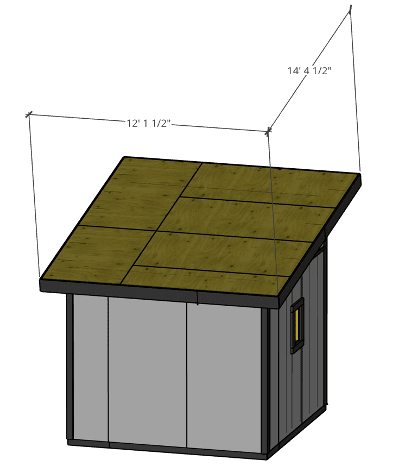
In my case, the length is 14’-4 ½” and the width is 12’ – 1 ½”. Multiplying them together, we get a total square footage of 175 SF.
Next, determine the coverage per bundle of shingles you plan to install. Typically, shingle bundles cover approximately 33.3SF per bundle. Therefore, divide you total square footage by the SF covered by bundle to determine the total amount of shingle bundles you will need. It this case, 175SF / 33.3 SF gives us 5.25 bundles. Therefore, I would need to order 6 bundles of shingles in order to cover the entire Shed Roof.
You will also need to account for the amount of “starter strip” you will need for your roof installation. To do this, measure the width of the shed. In our case, this is 12’-1 ½”. Typically, shingles are 39 3/8”, so we would need 4 shingles if we were going to make our own starter strips (don’t worry – this will be explained in more detail later).
Since we only need 5.25 bundles to cover our roof’s SF and we are ordering 6 bundles, we will have enough leftover shingles to make our own starter strips. Keep this in mind as you order your materials.
You also have the option to purchase pre-made started strips from your local home supply store (we will discuss this later).
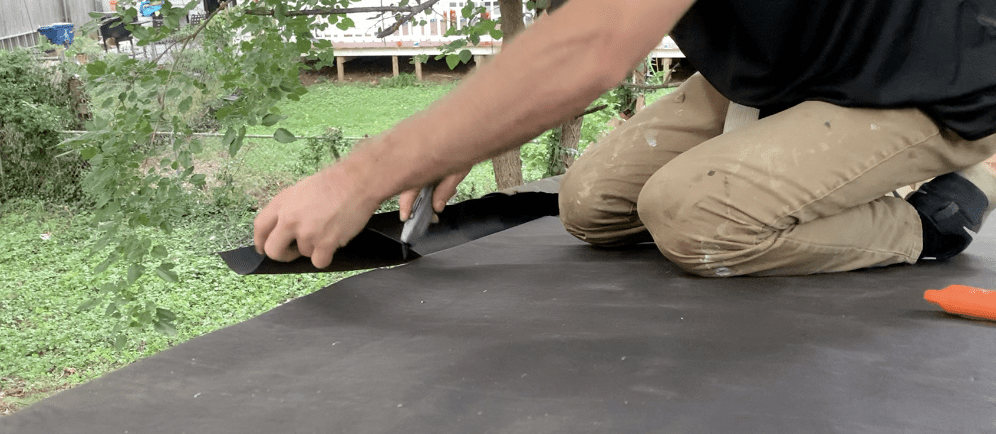
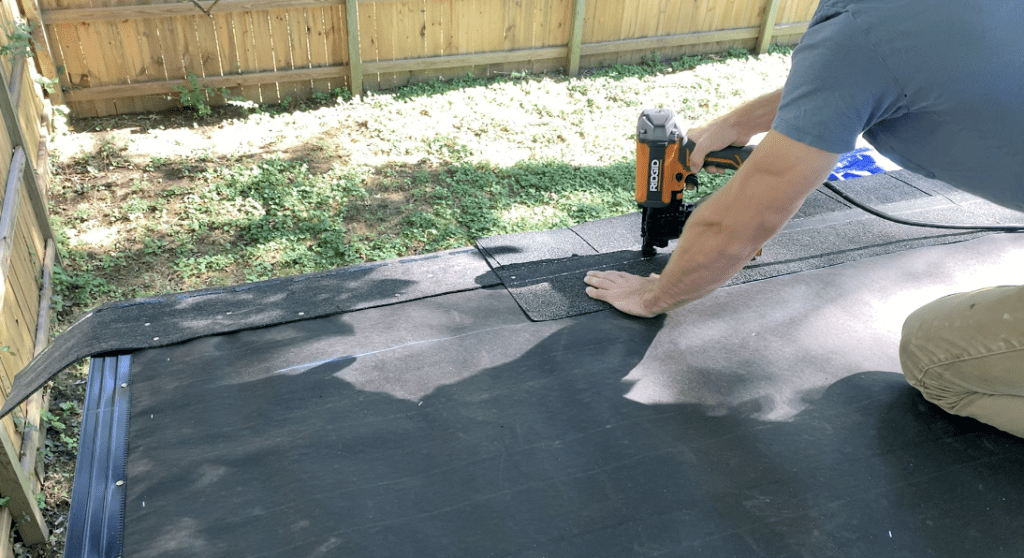
2. Install the Drip Edge on the Eave (Back) of the Shed Roof
The first step in the shed roof installation process is to install the drip edge on the “Eave” (back) of the Shed roof.
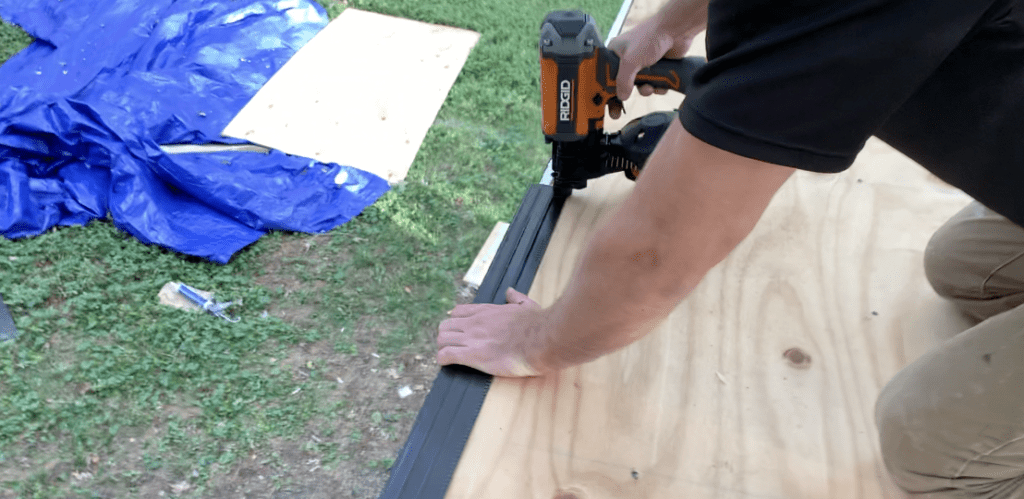
Drip Edges are typically made of non-corrosive metal and are nailed directly to the plywood roof sheathing. The purpose of the drip edge is to protect your shed roof fascia board by directing any water that drips off the roof away from the fascia board.
In the event that your drip edge does not span the entire width of your shed eave, overlap the second piece of drip endge over the first drip edge by a minimum of 4”.
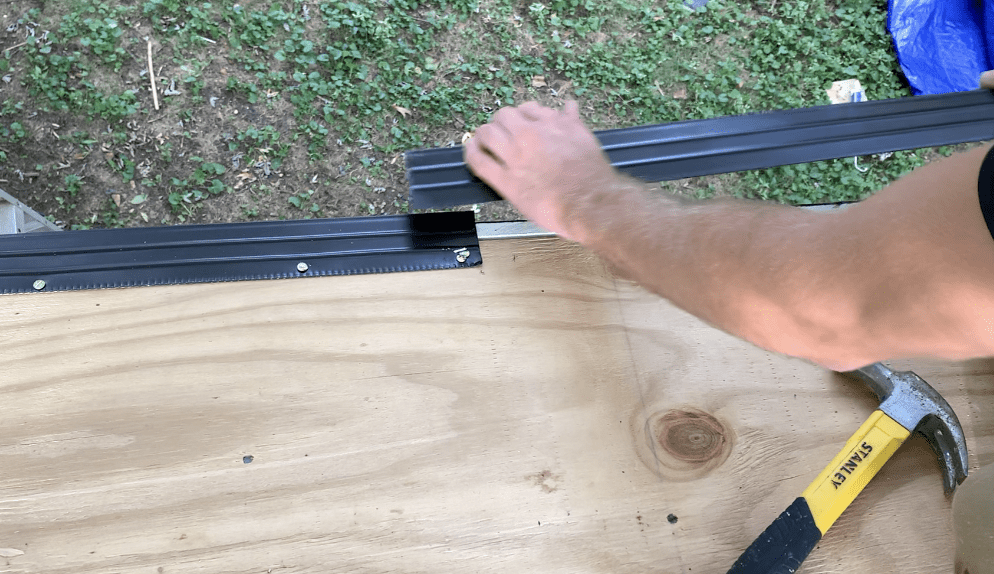
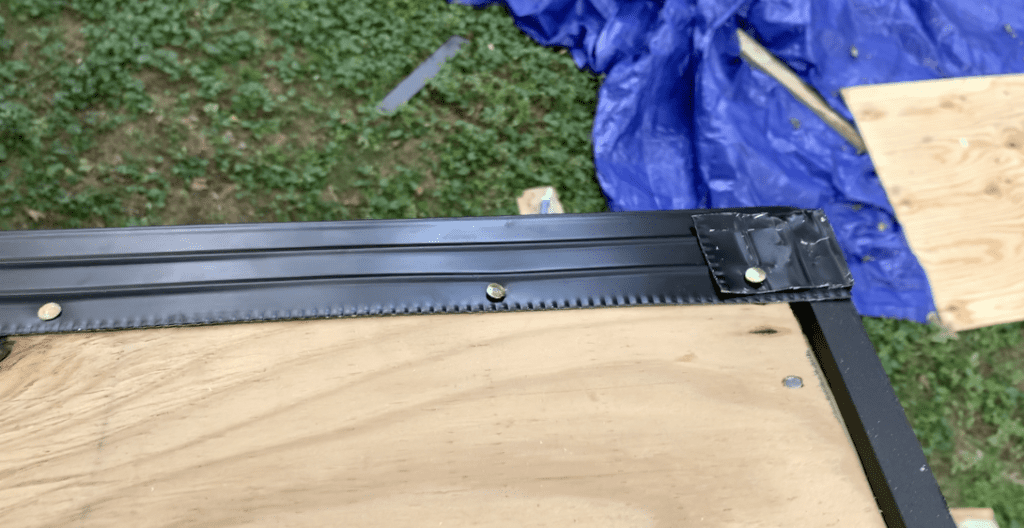
At the corners of Eave/Rake intersection, it is sometimes recommended to bend the drip edge at a 90” degree angle so that you have a surface you can mount your rake edge drip edge upon.
To create this 90″ angle, cut the top of the drip edge with tin snips and bend the drip edge 90 degrees with pliers.
It is recommended that you install a nail at the corner of the drip edge – as shown below:
After installing the drip edge on the Eave of the shed roof, you can begin installing your tar paper.
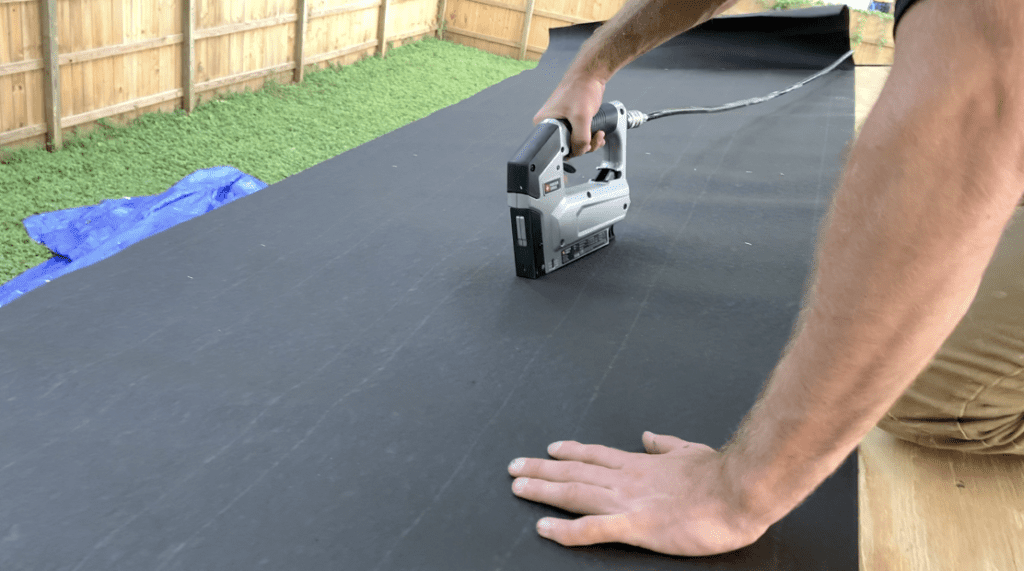
3. Install Tar Paper
Tar paper is a thin layer of waterproof material that serves as waterproof barrier between the plywood roof decking (below) and the shingles (above).
To install tar paper, start at the bottom of the shed roof (eave side) and place the tar paper such that there is a 1/8” overhang (1/4” max) past the previously installed drip edge on the eave of the shed roof.
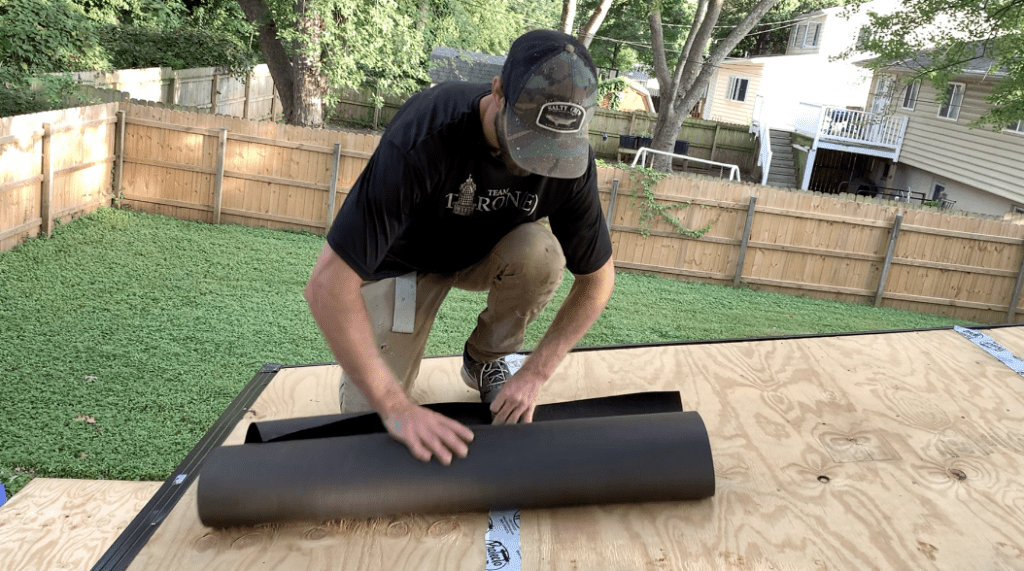
PRO TIP – Leave a few inches of tar paper overhanging the rake edges of the shed roof. You can trim off any excess later with a utility knife.
Install the first row of tar paper within the tolerances listed above and attach the tar paper to the plywood decking below with staples or nails.
Install the next row of tar paper on top of the previously installed row – allowing for a 4-6” overlap.
This tar paper overlap will ensure that any moistures contacts the tar paper will be able to freely drain towards the bottom.
Repeat this tar paper installation process up the entire length of the roof.
Once you reach the top of the roof, trim the tar paper so that it is flush front fascia board at the ridge of the shed roof.
At this point, go back and trim any overhanging tar paper on the rake edges of the roof. Trim the tar paper on the rake edge of the roof so that it is flush with the fascia board.
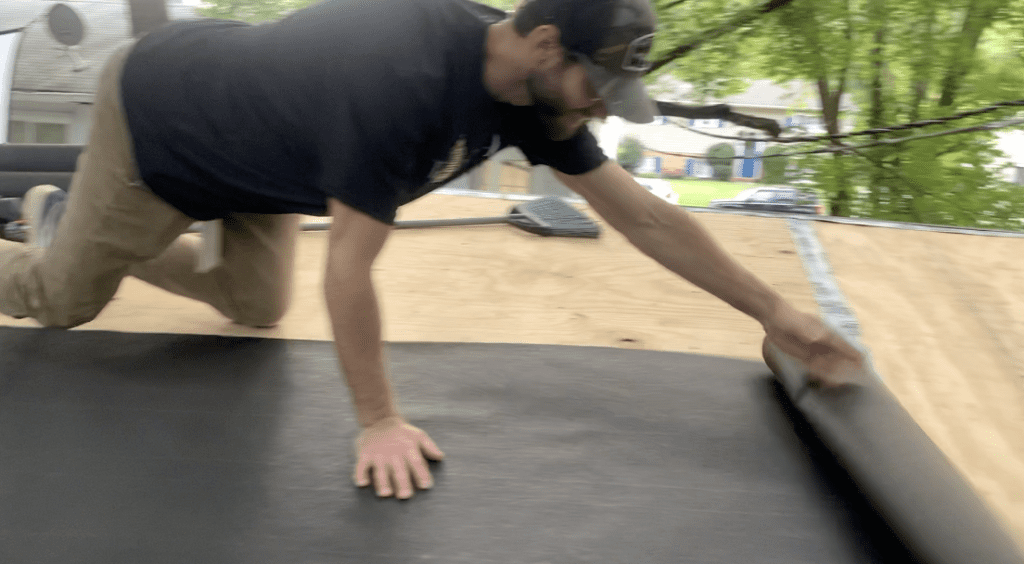
After installing the tar paper over the entire shed roof plywood decking, you can begin to install the drip edge on the rake edges of the shed.
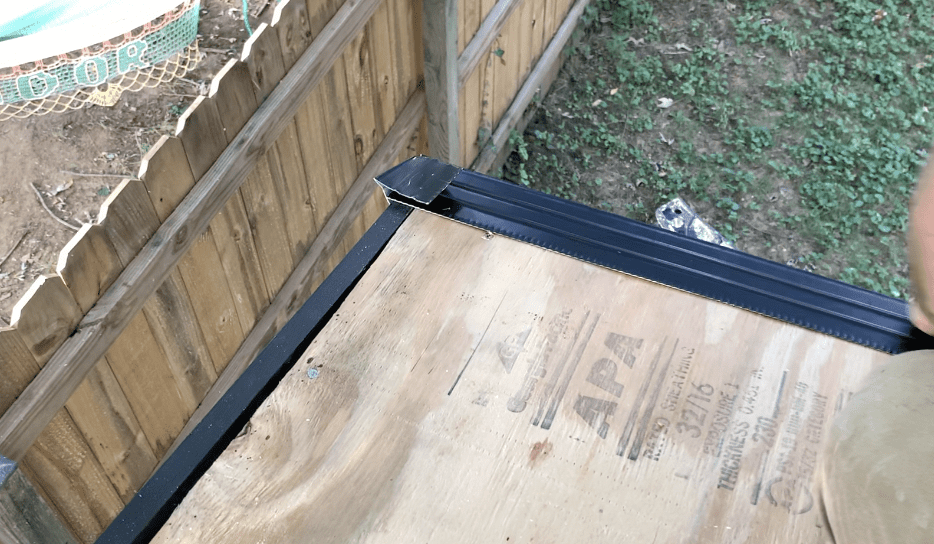
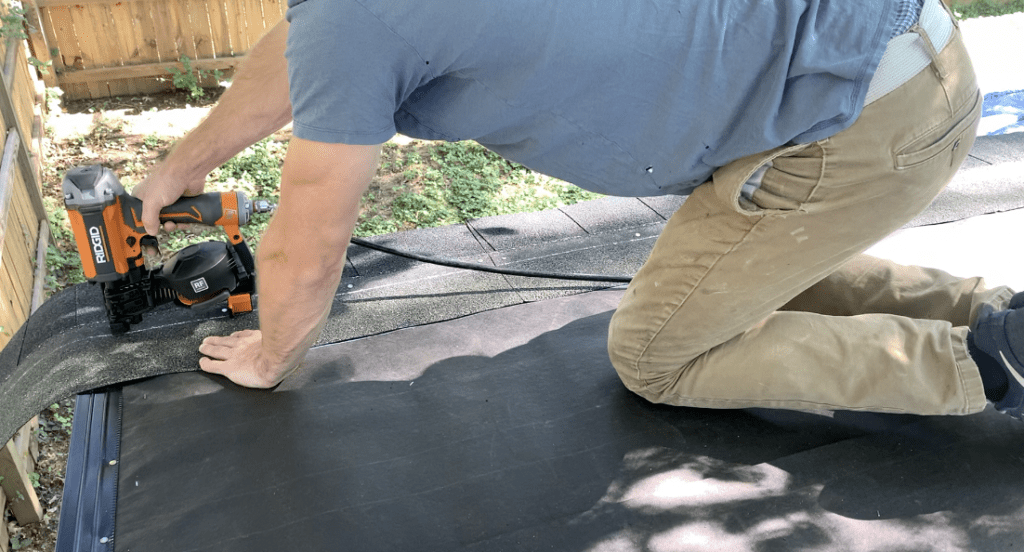
4. Install Drip Edge on the Rake Sides of the Shed
After installing all of the tar paper, Install the drip edge on the rake edges of the roof.
Remember – The drip edge is installed ON TOP of the tar paper on the rake edges and UNDERNEATH the tar paper on the eave edge.
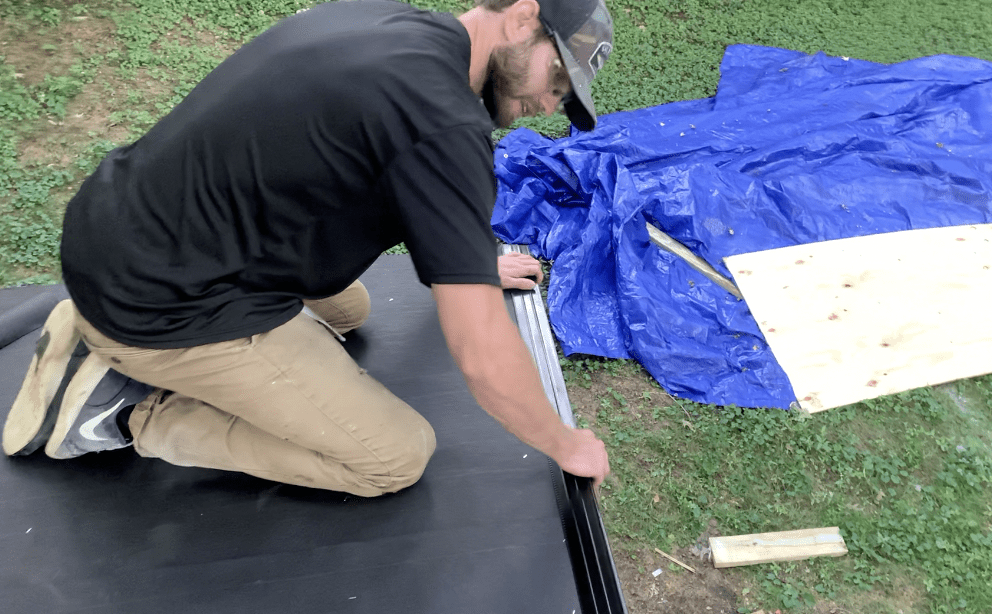
Similarly to the eave edge, install the drip edge on the rake edge of the shed roof – securing it to the tar paper and sheathing with roofing nails.

Again, if your shed side requires more than one piece of drip edge, overlap the bottom piece by the top piece of drip edge by a minimum of 4” to allow for correct drainage.
Overlap the drip edge of the rake with the angled piece of drip edge from the eave side that was cut at an angle.
Trim or position the drip edge as needed to that it is flush with the front fascia board at the ridge of the shed roof.
Once the drip edge has been installed at the eave and rake edges, you can install your starter strip of shingles.
5. Installing the Shingle Roof Starter Strip
Before you can begin installing the first course of asphalt shingles, you must install a starter strip (also called a starter row) on the Eave edge of the shed roof.
PRO TIP – In high wind areas it is sometimes advisable to install a starter strip on the Rake edges of the shed as well. You also have the option to secure the rake side shingles to the underlayment using asphaltic plastic cement. This will be discussed later in the article.
The starter strip (or starter row) is absolutely necessary for all shingle applications since it facilitates the roof’s water-shedding function by covering the joints left by the first row of shingles.
As mentioned previously, you can purchase pre-made starter strips or you can create your own starter strips using shingles.
Since a shed typically only requires a few linear feet of starter strip to cover the eave edge, it is often more economical to make your own starter strip using full shingles.
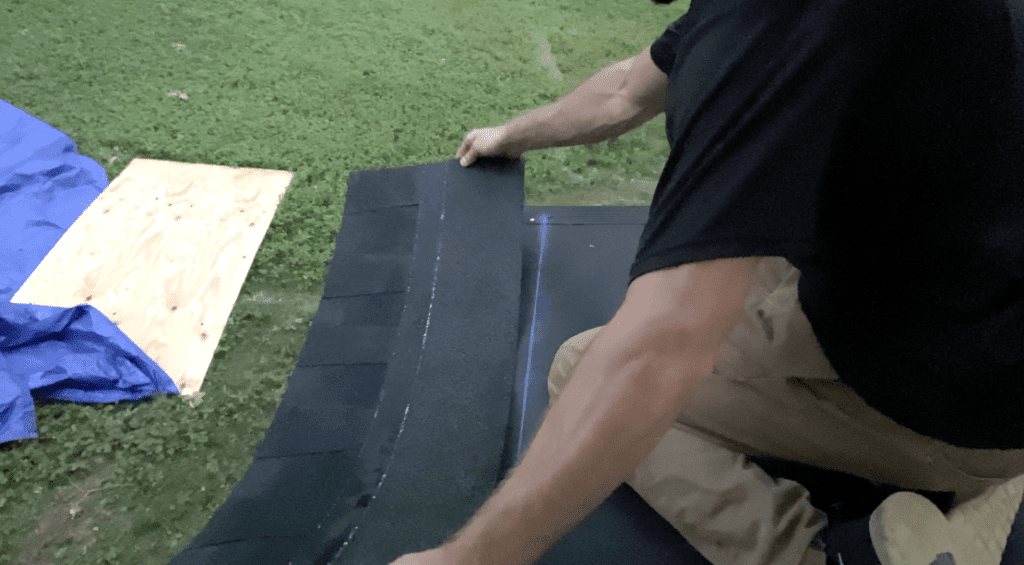
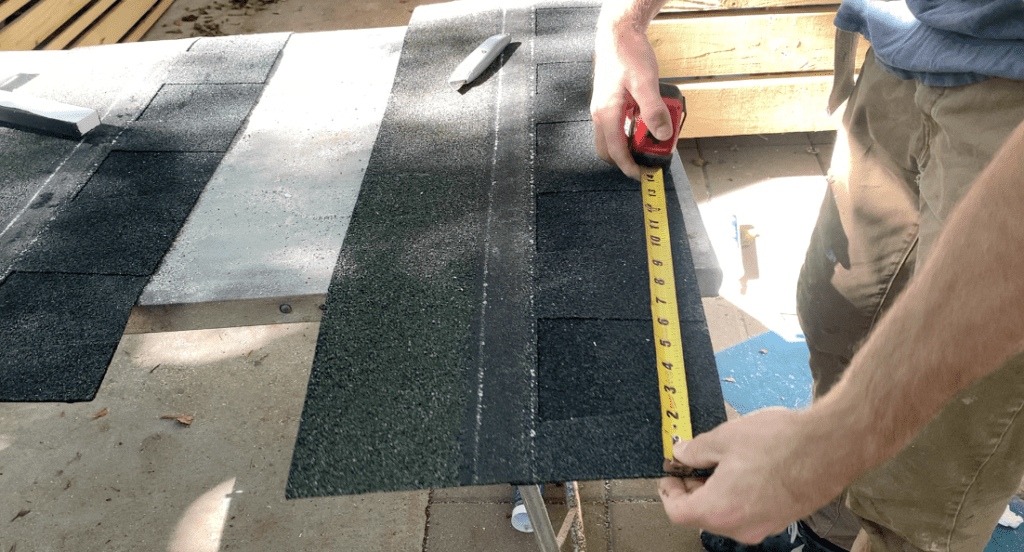
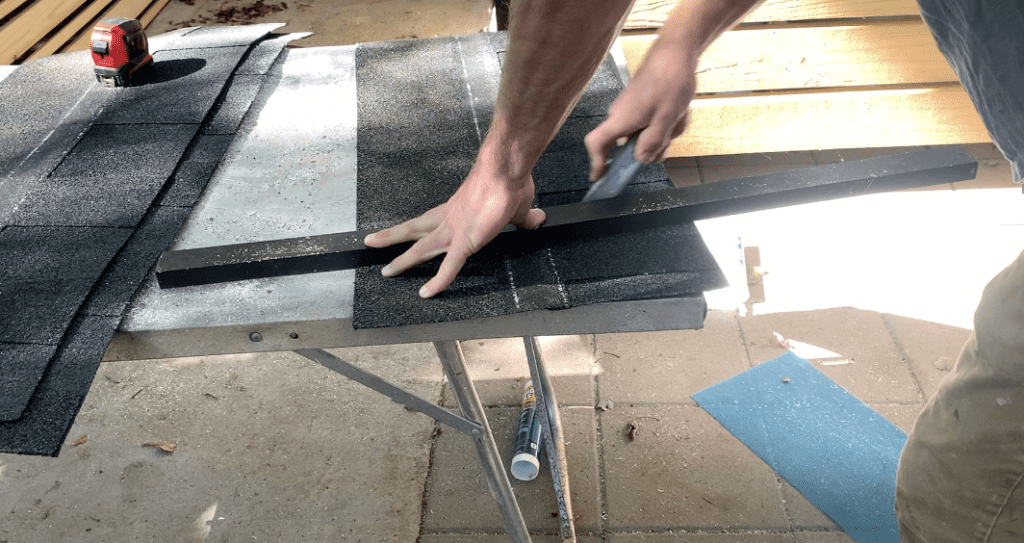
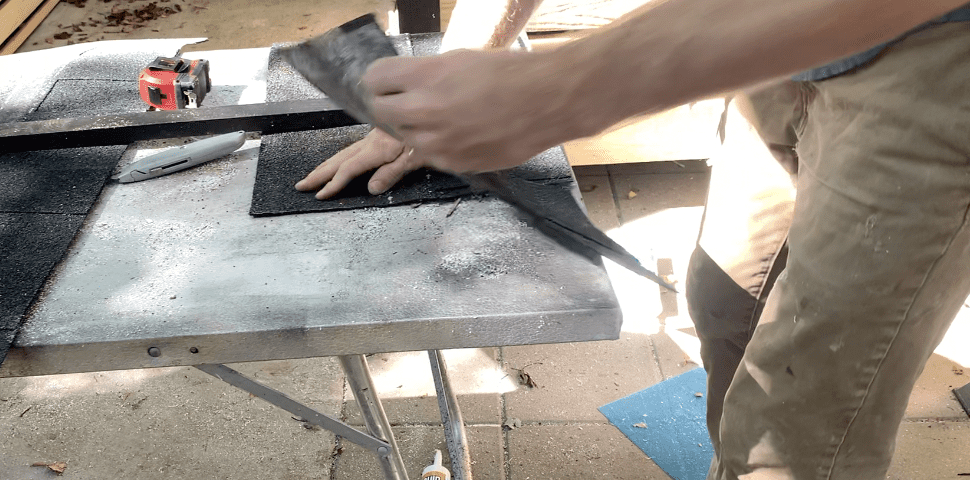
To create your own shed roof starter strip, cut the shingle in half (length wise) using a utility knife. It is often helpful to flip the shingle upside down and use a utility knife and a straight edge to accomplish this.
Repeat this process for as many starter strips you need to cover the eave edge of your shed. After cutting all of your starter strips, you can begin the installation.
For the first starter strip, trim off approximately 4” from the length prior to installing. This will ensure that the joint from the full shingle installed on top of the starter strip (next step) will be 4″ away from the starter strip joint.

Place the starter strip so that it overlaps the eave and rake drip edges by approximately ¼” – ½”.
Next, secure the first starter strip segment in place by nailing it through the tar paper and plywood roof decking approximately 2.5” above the (bottom) of the starter strip. Ensure that the adhesive on the starter strip is oriented towards the bottom of the shed – as shown. This will adhere the shingles installed on top of the starter strip to the starter strip.
Continue installing the starter strip along the eave edge of the shed roof, butting each adjacent starter strip up flush to the adjacent starter strip and nailing them into place.
Continue positioning and nailing the starter strip in place along the eave edge of the shed until the entire eave is covered. It is acceptable to leave the starter strip overhanging the rake side of the shed. This will be trimmed off in later steps.
After the starter strip has been fully installed along the eave edge of the shed roof, you can begin installing the first row of shingles.
6. Installing Shingles on the Shed Roof
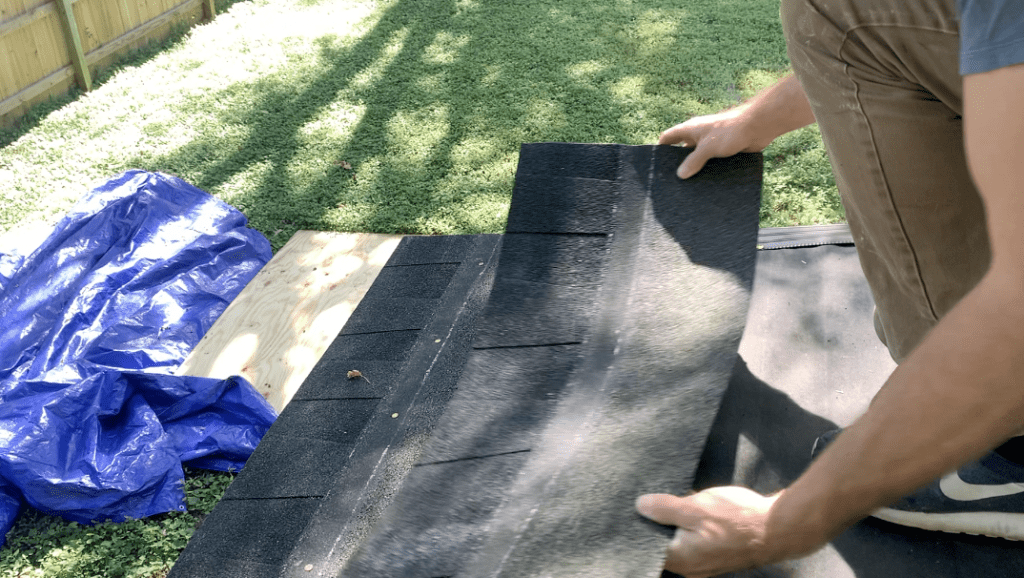
Install the First Course (Row) of Asphalt Shingles on the Shed Roof
Since the first starter strip was cut 4” short, we can use a full shingle when starting the first course of shingles.
Place your first full shingle in place such that it overhangs the drip edge by approximately ½” – ¾” on both the eave and rake edges of the shed.
PRO TIP – It is often advisable that you overhang your shingles approximately ¼” further than your starter strip. Therefore, if you installed your starter strip with a ½” overhang over the drip edge, it is recommended that you install your shingles with a ¾” overhang over the drip edge (which is the same as a ¼” overlap over the starter strip).
After determining your overhang, it is often helpful to establish is “shingle start line” using a chalk line.
To establish a shingle start line, take the shingle width (in this example case, the shingles are 13 ¼’ inch wide) and subtract your desired shingle overlap past the starter strip (in our case, ¼”) – which gives us a 13”. Take this measurement from the starter strip and mark the location on the tar paper on both ends of the shed roof.
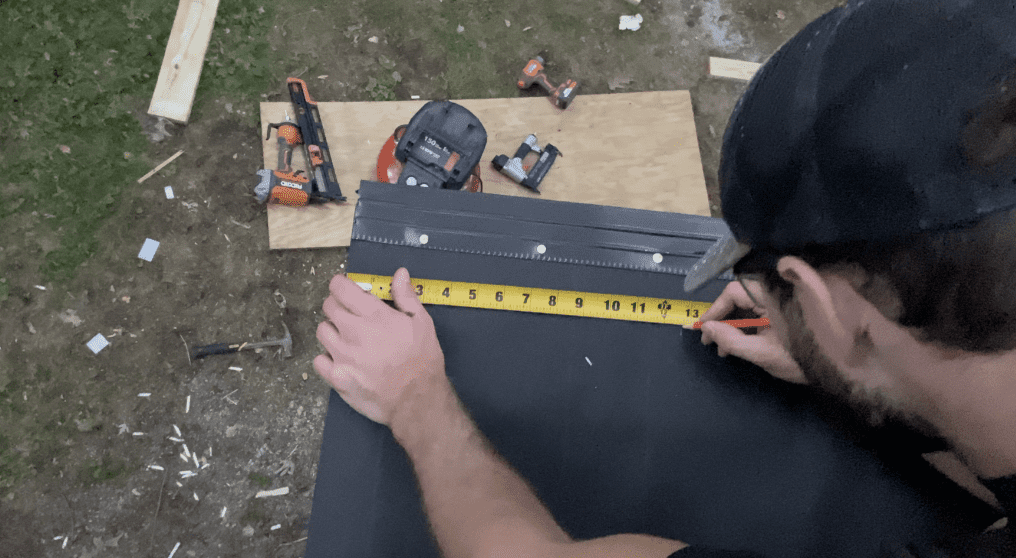
After marking both ends of the shed, use a chalk line to establish a mark. This mark will indicate the back line for the first course of shingles.
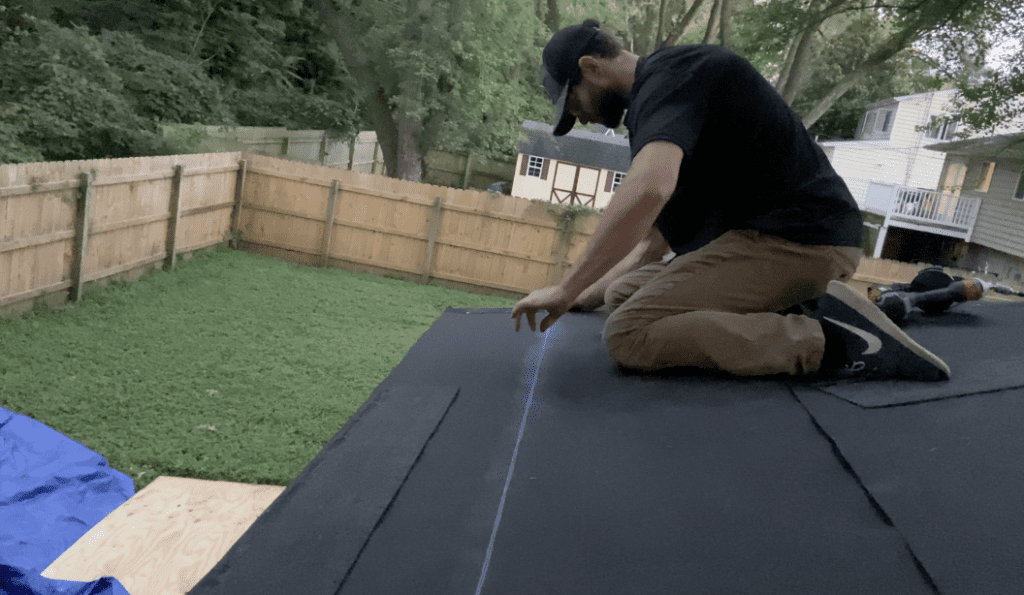
Now, when you line up the back of the first course of shingles with the chaulk line, you will have a ¼” overhang over the starter strip and a perfectly straight line of shingles to begin your second course.
Install the first shingle so that it overlaps the drip edge/starter strip on the rake and eave edges based on your slected overhang and so that the back of the shingle is even with the chaulk line.
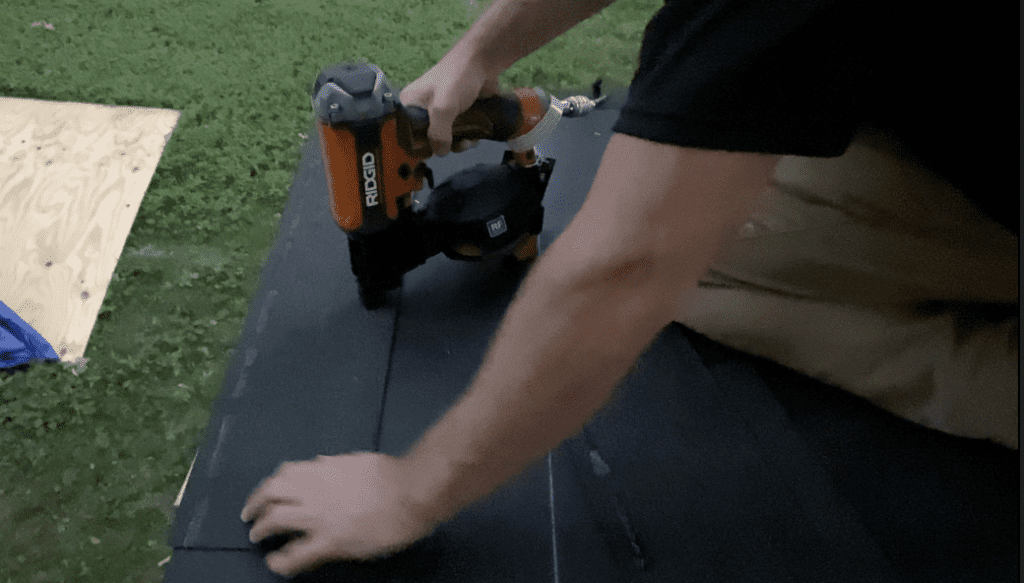
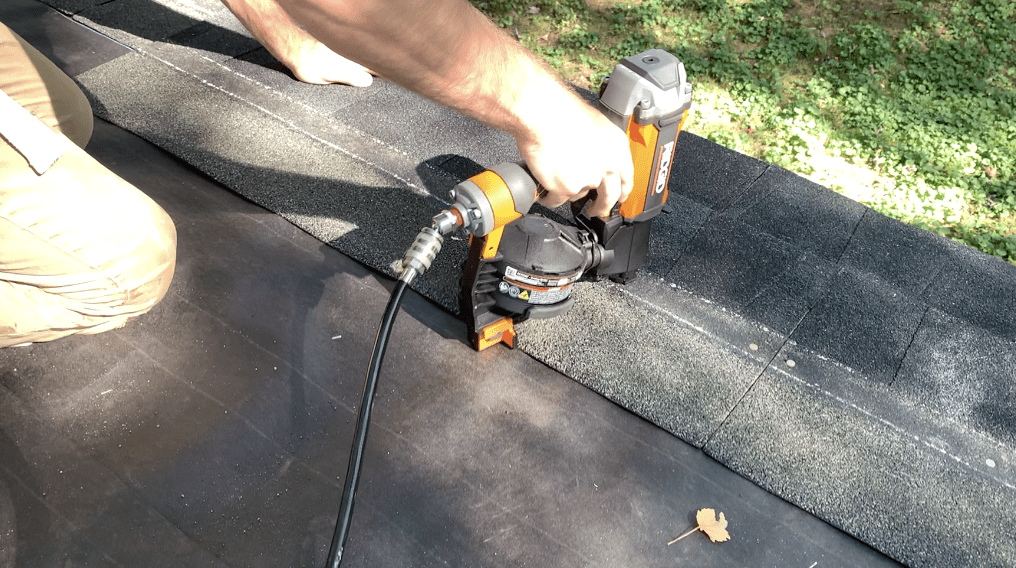
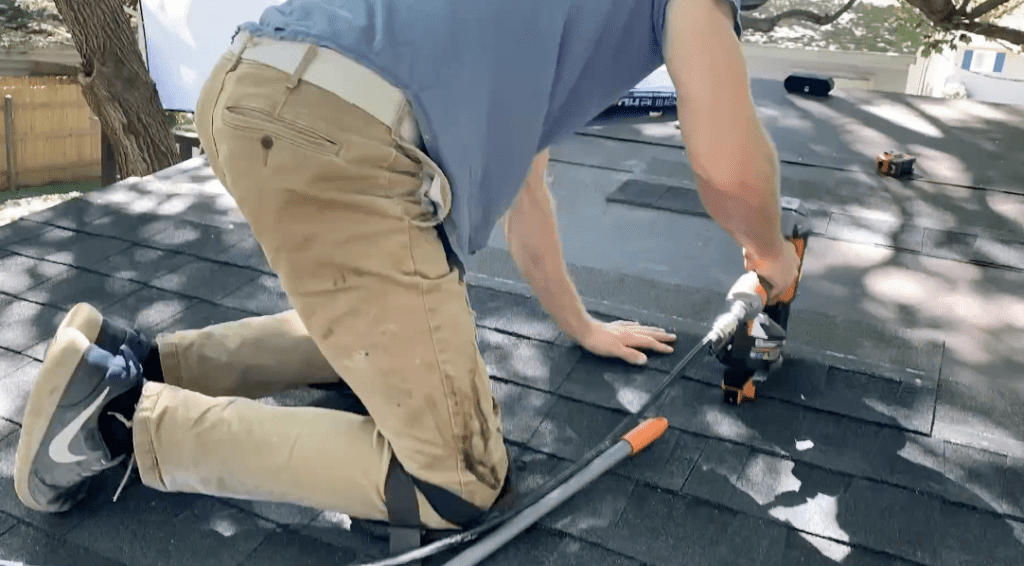
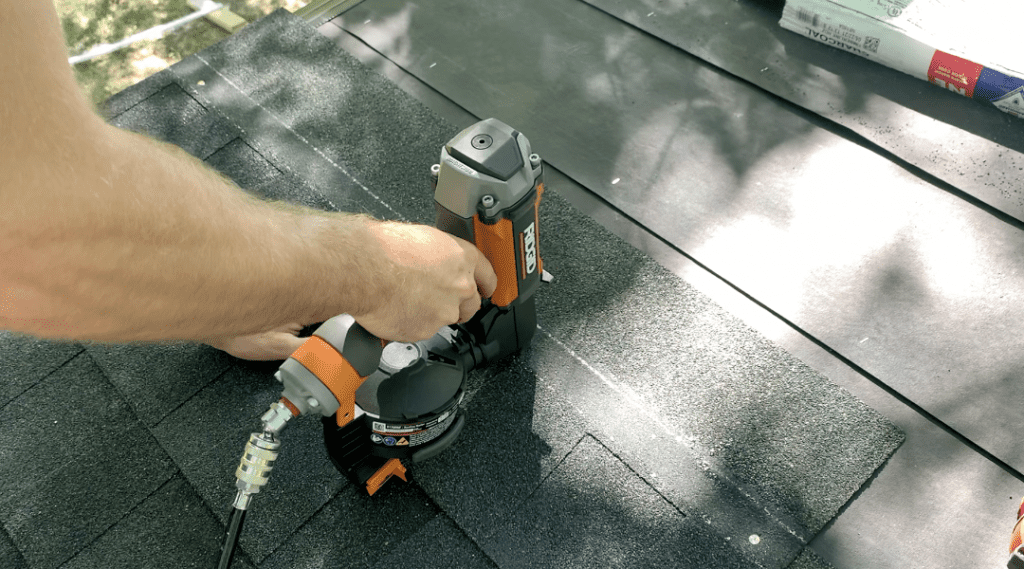
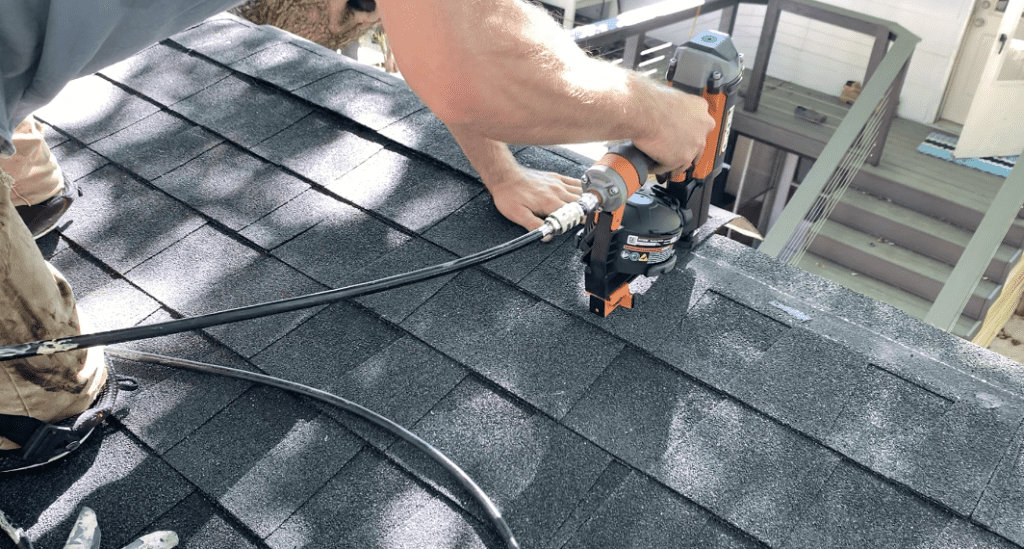
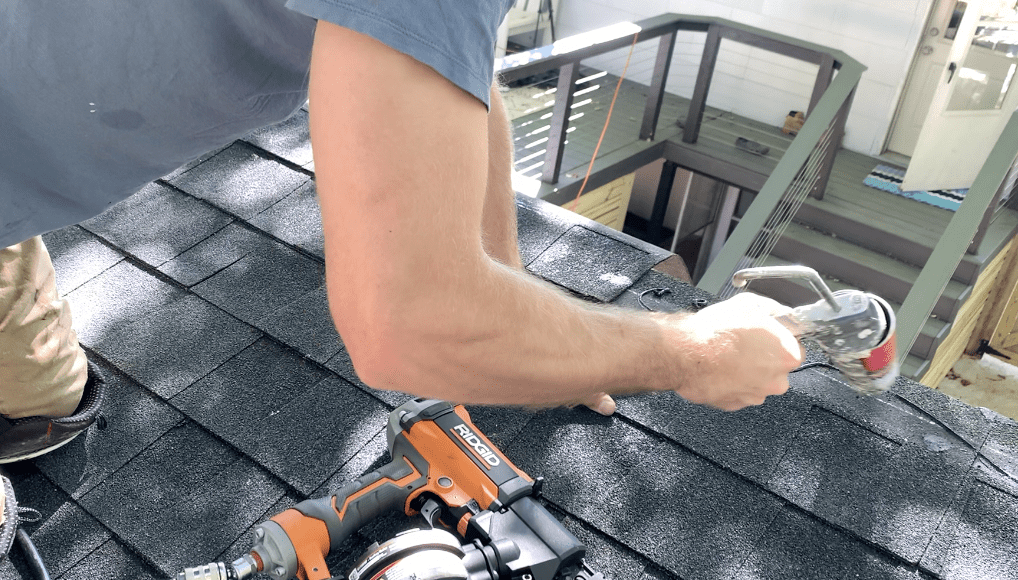
After positioning the first shingle in place, fasten it to the roof sheathing using 4 evenly spaced roofing nails. If you live in a high wind area, 6 roofing nails per shingle is recommended. Many shingles have a “target nail zone” marked on each shingle. Ensure that your nails are installed in this area. Refer to the Shingle Nailing Guide below:

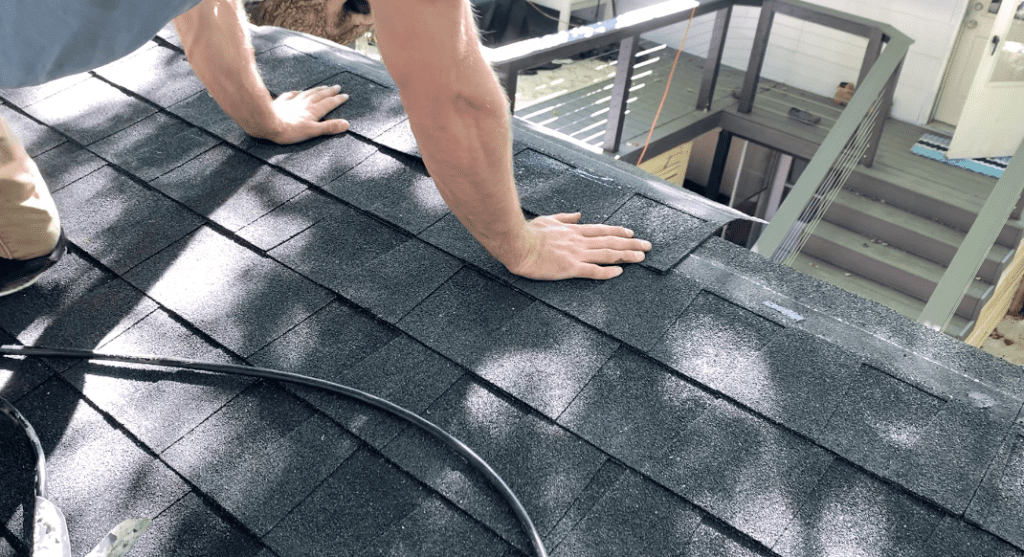
After securing the first shingle, install the next full shingle such that it is butted up flush against the first shingle.
Double check that the overlap is correct on the eave edge and that the top of the shingle is flush with the chaulk line. Once the orientation is confirmed, secure the shingle to the roof using roofing nails. Repeat this process for the remainder of the first course.
When you get to the last shingle in the first course, simply install it in place as you did for the other shingles. Any excess that hangs over the rake edge of the roof will be trimmed off later.
Installing the Second Course (Row) of Shingles
Since we installed a full shingle for the first course, trim off 6” (from the long side) for the first shingle to be used to start the second course.
Next, place the shingle so that it overlaps the rake (as necessary) and so that the bottom is flush with the tops of the wide cut-outs. See below:
This will typically result in 5 5/8” of shingle exposure (of the first row of shingles).
After positioning the shingle appropriately (e.g. maintaining the rake overlap and ensuring that the bottom of the shingle is lined up with the previous row), nail the first shingle in the second course in place.
Repeat this process for all of the remaining shingles in the second course. Leave an overhang over the rake edge (if applicable).
Installing the Third Course of Shingles
Installing the third couse is the exact same as the second course. The only difference is that you should trim 11” off of the first shingle (instead of the 6” that was cut off previously).
Installing the Fourth Course of Shed Shingles
Trim 17’ off the first shingle and install the row of shingles as was done for the other shingle courses.
Install the Remaining Courses of Shingles
After installing the fourth course of shingles, use a full shingle and repeat the process as was done for the first course of shingles.
Repeat these steps as needed until you get to the final row of shingles at the ridge of the shed roof.
Installing the Final Row of Shingles
Installing the final row of shingles is typically the most difficult step in a lean-to style shed roof shingle installation. To complete the final row, continue to install your shingles by lining up the bottom of the shingle until is flush with the tops of the wide cut-outs on the shingle below. The last shingle will likely overhang the shed ridge in an awkward manner – but this is ok.
Install the the final shingles so that the bottom is lined up correctly and then nail the top part of the shingle to the shed’s plywood decking approximately 1” from the front of the shed ridge fascia board.
Install four nails (or 6 for high wind areas) per shingle all the way across the row.
Although these nails will be covered by the ridge flashing that will be installed as part of the final step, it is often good practice to cover the nail heads with roofing mastic.
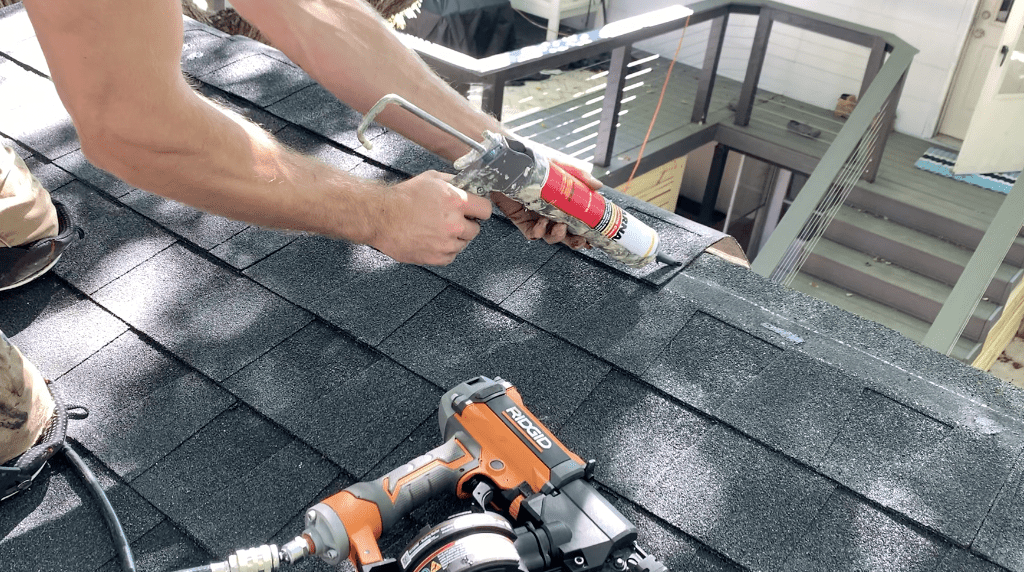
Additionally, consider applying roofing mastic beneath the final row of shingles to help aid in adhesion to the layer below – as shown:
After installing the last row of shingles on the ridge of the shed roof, trim off all of the excess shingle with a utility knife such that the shingles are flush with the shed’s front fascia board.
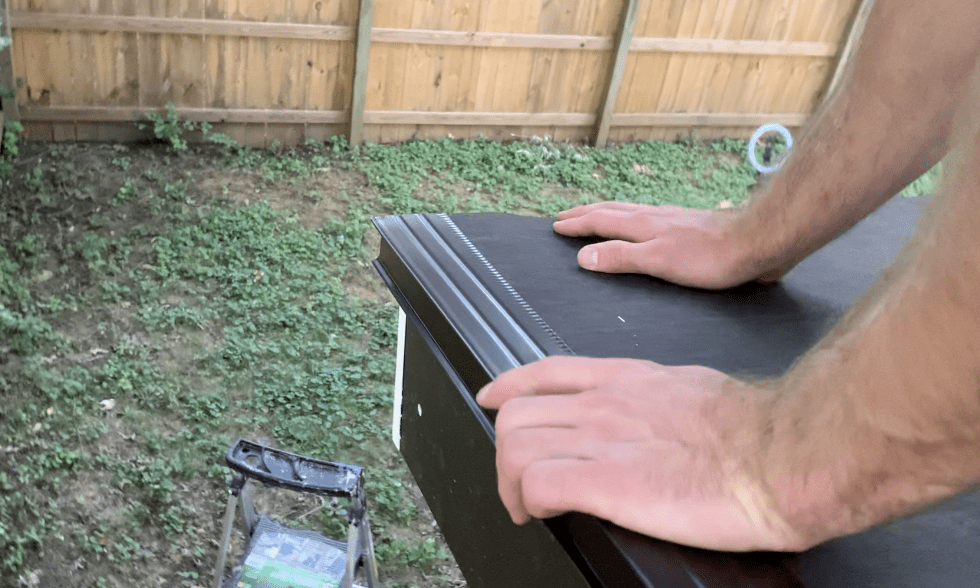
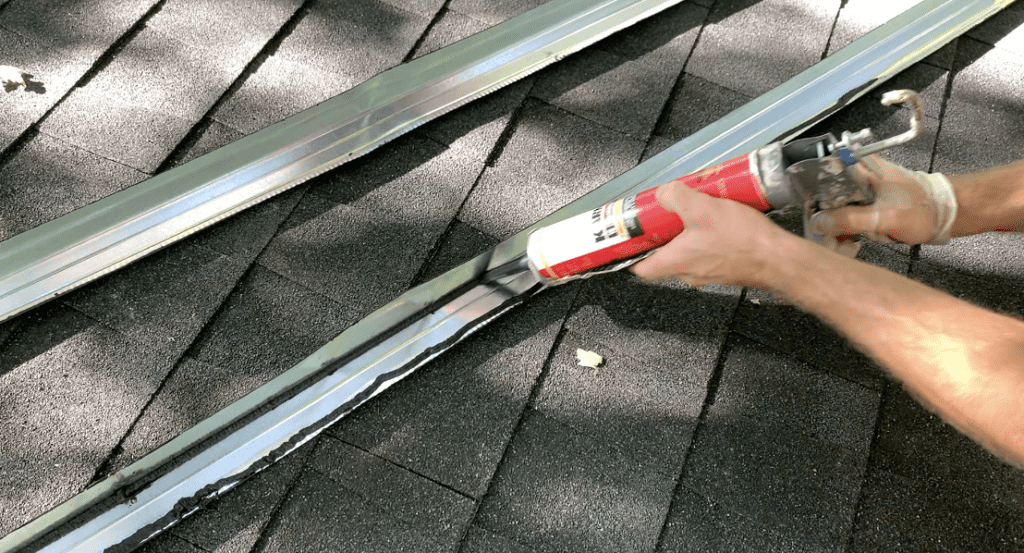
Once you have trimmed off the excess shingle on the front of the shed, you can install your angled ridge flashing on the ridge of the shed roof.
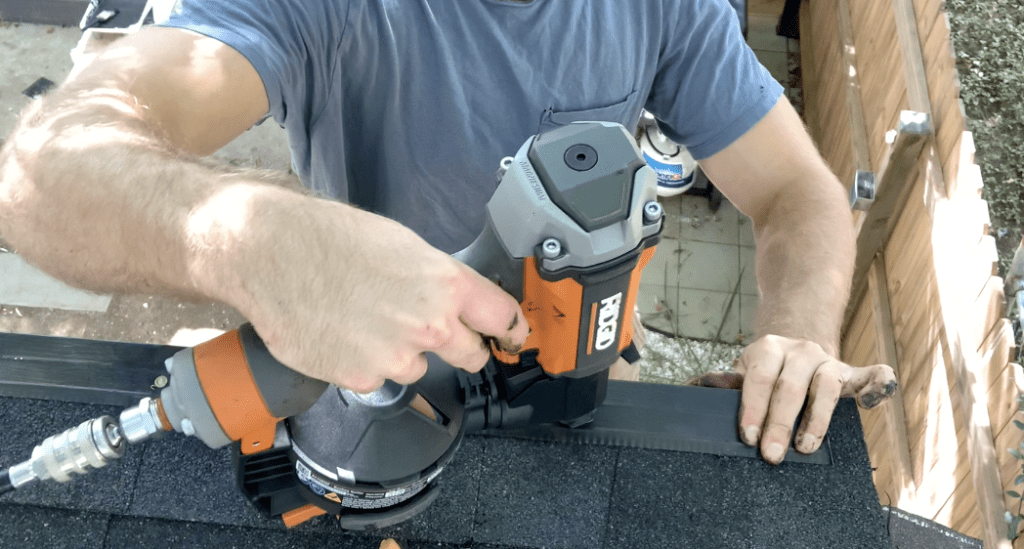
7. Install the Ridge Flashing
After trimming the last row of shingles flush to the front fascia board of the shed, install a piece of 90 degree angled ridge flashing over the ridge of the shed roof. This flashing will overlap the fascia board (vertically) and the previously installed shingles (horizontally).
To install this angled ridge flashing, start by applying two beads of roofing mastic on both sides of the angled ridge flashing – as shown.
Next, position the flashing in place so that it accomplishes the following:
- Ridge flashing should extend further than the rake side drip edge by approximately ¼”.
- Ridge flashing should cover the previously installed nails in the shingles (that are exposed).
- Ridge flashing should prevent any water from getting underneath the shingles at the top of the shed.
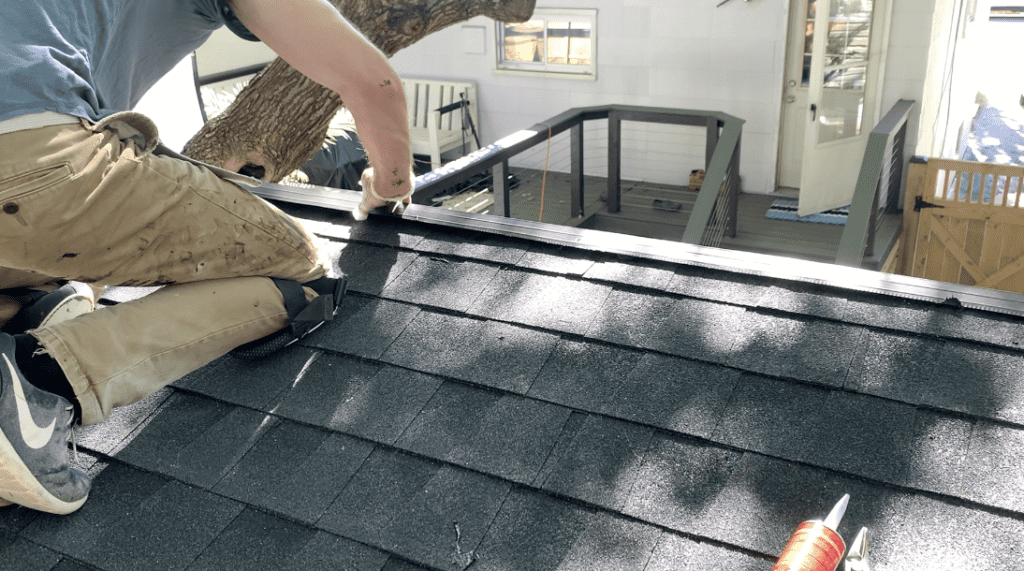
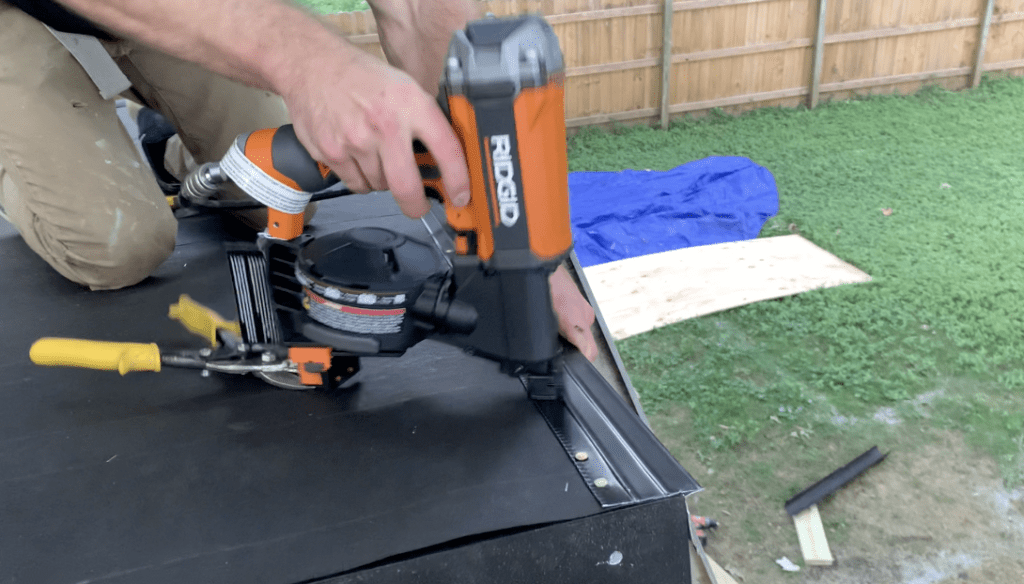
Once the ridge angle flashing is positioned appropriately, tack it in place with roofing nails every 12″.
If your shed roof width requires more than one piece of ridge flashing, ensure that a 6” overlap is used to prevent water from infiltrating between the flashing intersection. It is also recommended that you apply roofing mastic at the ridge flashing intersection – as shown below.

Use roofing mastic to cover all exposed nail heads and to further waterproof the intersections between any two adjacent pieces of flashing.
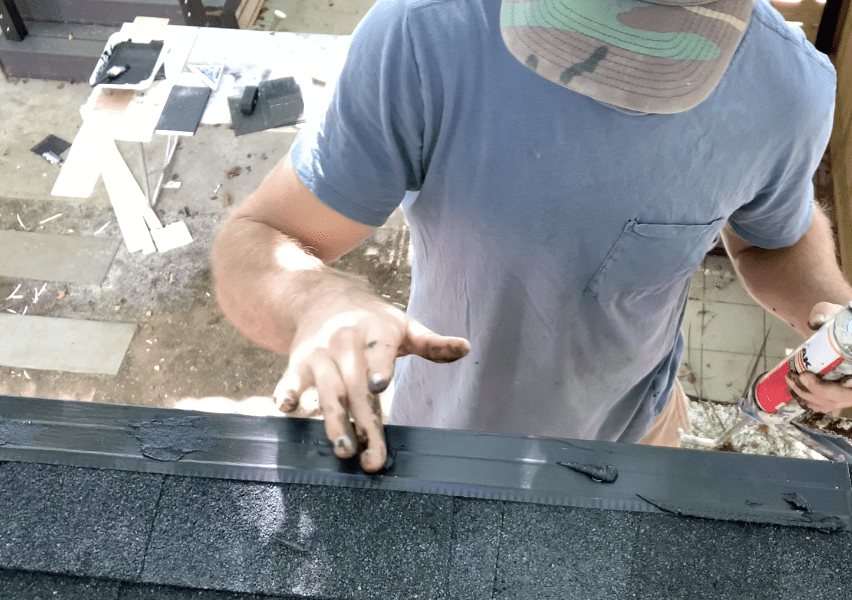
Finally, trim the ridge flashing as needed to leave a 1/4″ overhang over the rake side drip edge.
At this stage, your shed roof asphalt shingle installation is nearly complete.
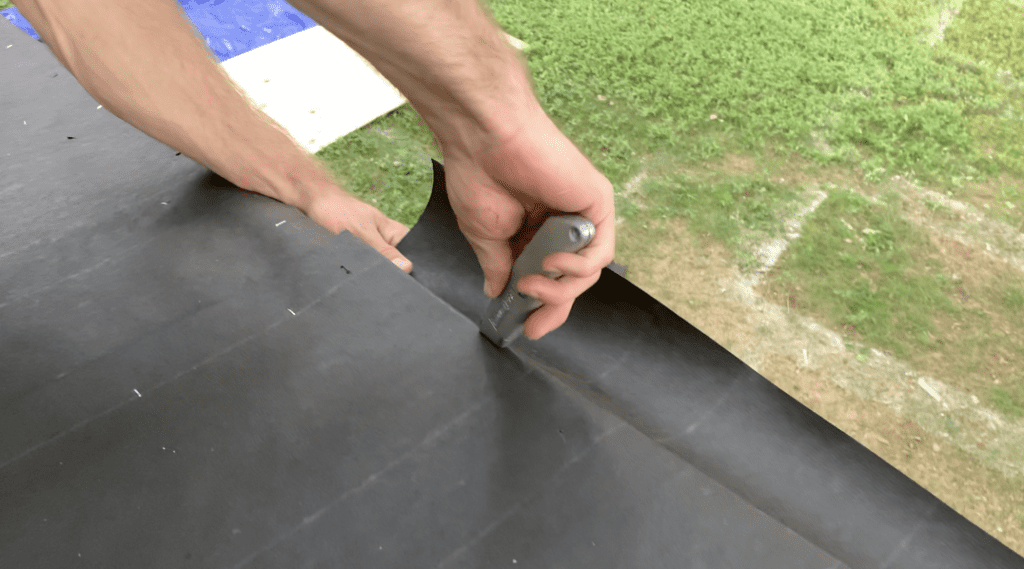
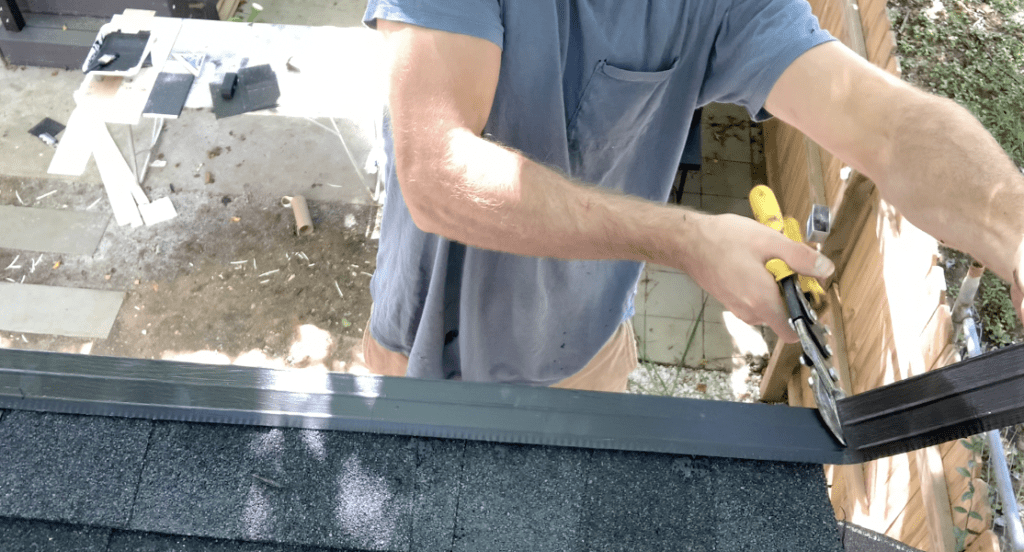
8. Trim Off Any Overhanging Shingles on the Rake Sides of the Shed
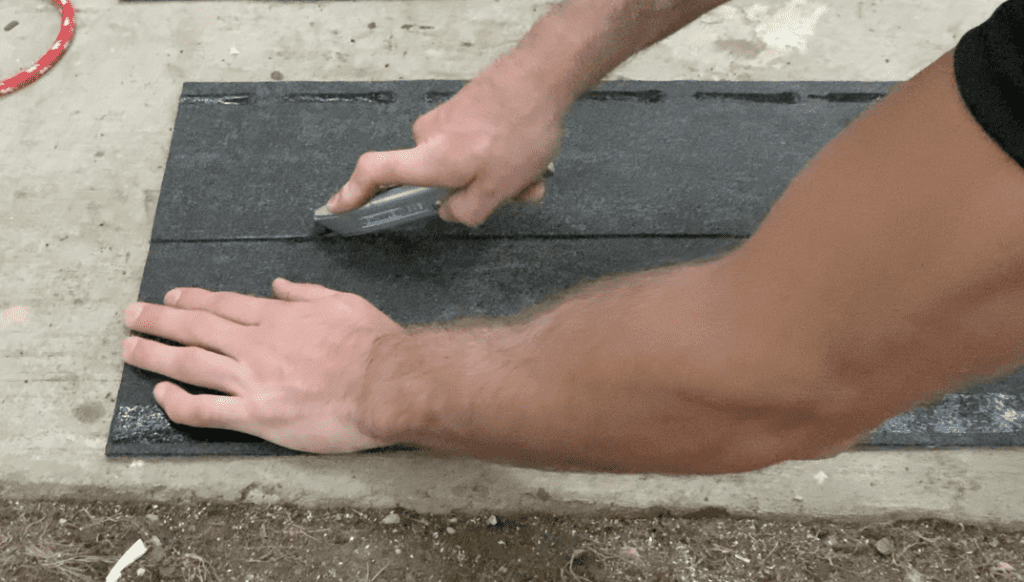
At this stage, cut off any excess shingle that overlaps the rake sides of the shed. To do this, snap a chalk line along the top of the shingles by marking the desired overlap over the rake edge (likely between ¼” and ¾” passed the drip edge). Mark both the eave (bottom) of the shed roof and the ridge (top) of the shed roof and snap the chalk line.
Use a utility knife to cut off any of the excess shingle along the chalk line.
There is a specific type of “hooked” utility knife that makes cutting off the excess shingle a breeze.
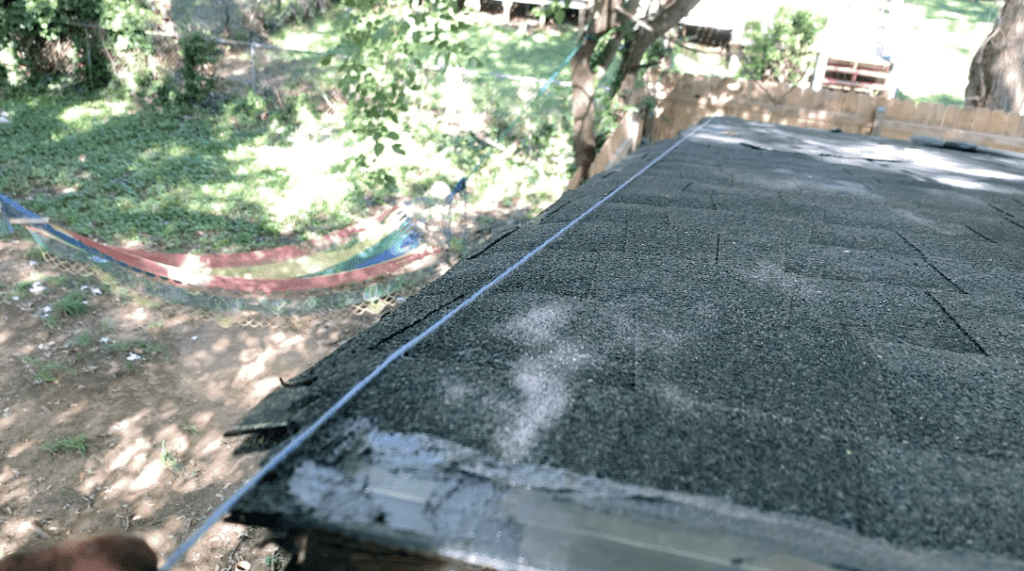
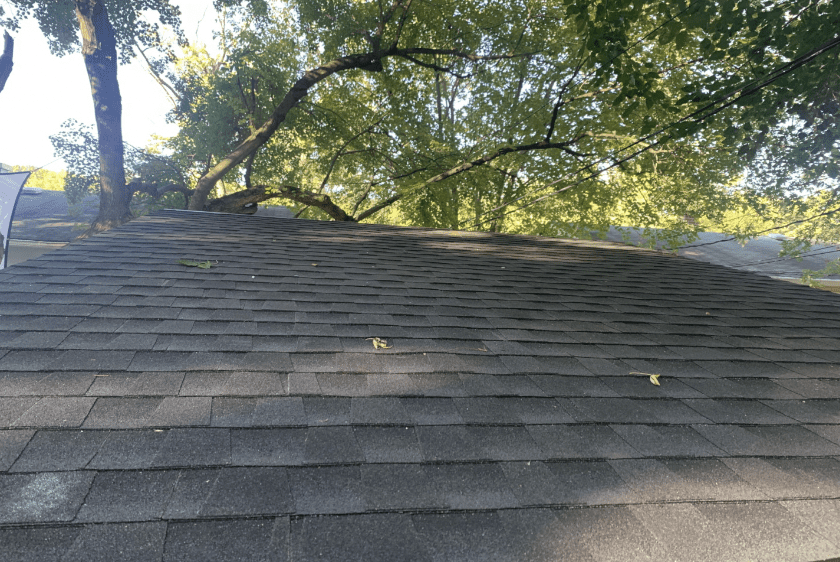
At this point, your asphalt shingle shed roof installation is complete!
PRO TIP – Keep an eye on the shed during the next rain event to ensure that there are no leaks. If a leak is observed, apply roofing mastic to the problem area (once the shingles have dried).
This lean to Shed Roof Asphalt Shingle Installation was part of the 10’x10′ Modern Shed Build Project you see below:
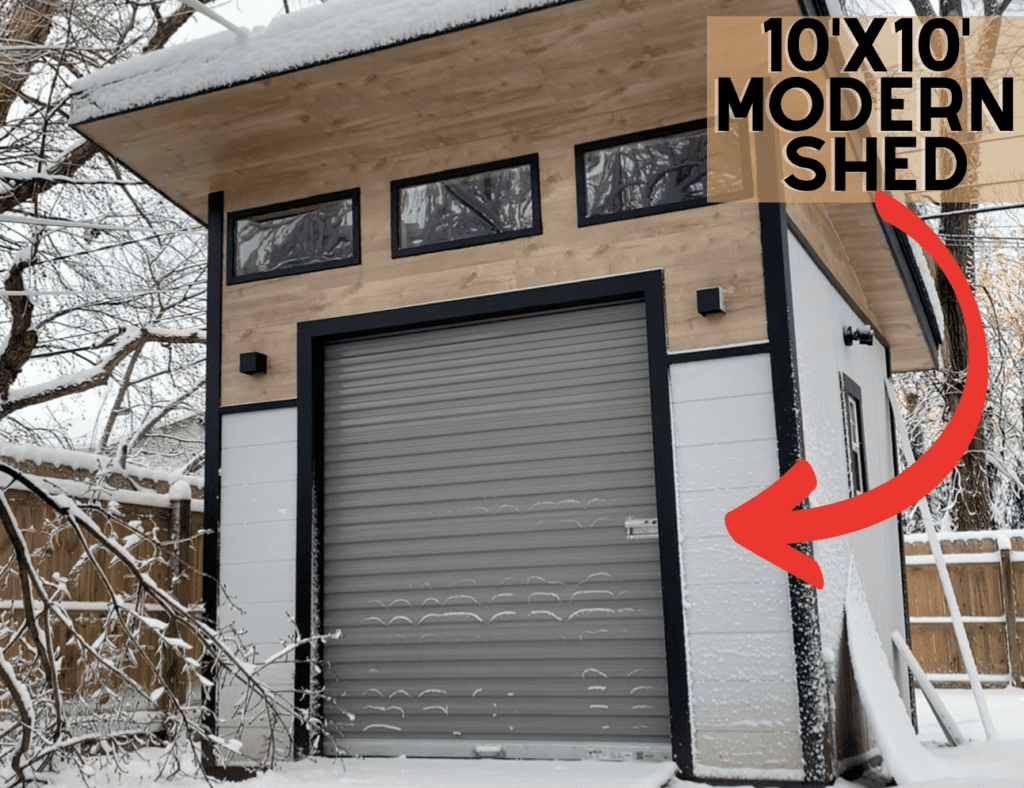
For more information on how to Build a 10’x10 Modern Shed from start to finish, check out ATimprovements.com or watch my step-by-step tutorial videos on Youtube.
Thanks!
Thanks so much for checking out ATImprovements! If you learned something from this project, you might also like these other DIY Projects:
- How to Build a Concrete Slab Shed Foundation: https://atimprovements.com/how-to-build-a-shed-base-concrete-slab-step-by-step-diy-guide/
- How to Frame a 10’x10′ Shed Base: https://atimprovements.com/how-to-build-a-shed-floor-base-diy-step-by-step-guide/
- How to Frame Shed Walls:https://atimprovements.com/how-to-frame-a-shed-how-to-frame-walls-for-a-10×10-modern-shed-step-by-step-with-pictures/
- How in Install a Shed Window: https://atimprovements.com/shed-window-installation-how-to-install-a-window-in-a-shed-diy/
- How to Install a Roll Up Door in a Shed or Garage: https://atimprovements.com/roll-up-door-installation/
- How to frame a lean to shed roof: https://atimprovements.com/lean-to-shed-roof/
- How to Build a Shed Ramp: https://atimprovements.com/shed-ramp-building-guide/
- How to Build a Fence: How to Build a Fence (DIY Guide) – AT Improvements
- How to Build a Fence Gate: How to Build a Fence Gate (7 Steps with Pictures & Video) – AT Improvements
- How to Install a DIY deck Wire Railing: DIY Cable Railing – How to Install Cable Railing Step-by-Step – (atimprovements.com)
- How to Build a Concrete Paver Patio: DIY PAVER PATIO – Easy DIY Paver Patio Ideas – (atimprovements.com)
Thanks!
DISCLAIMER: This is a reference guide only. Consult local code requirements. Links included in this article might be affiliate links. If you purchase a product or service with the links that I provide, I may receive a small commission. There is no additional charge to you! Thank you for supporting ATimprovements so I can continue to provide you with free content each week!